Staying safe in Corona virus time: read the guest blog post by Phillip Klebba here.
During social isolation we have more time to devote to meal preparation, things that take hours to materialize at the table don’t need to be reserved to the weekend. But I always welcome simple things with a smile. The first one comes from Nadiya’s show Time to Eat, which I binge watched from first to last episode, enjoying every second of it. The second would be breakfast for most people, but my first meal of the day is lunch, so that’s when I’ve been enjoying it (often). Lastly, the third is a tribute to a UK ingredient that can be not only hard to find, but quite pricey for us Americans, clotted cream. I finally made it from scratch, and if you are into that sort of ingredient, I have one word for you: WOW.
INCREDIBLY SIMPLE #1
TORTILLA EGG ROLLS
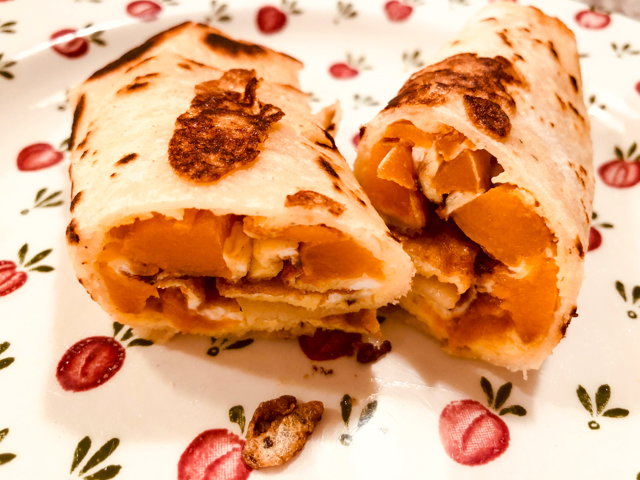
TORTILLA EGG ROLLS
(adapted from Nadiya’s Time to Eat)
for one person….
1 egg
salt, pepper, spices to taste
1 tortilla (I used corn, she used flour)
olive oil
goodies to taste (I used leftover roasted butternut squash)
Crack the egg into a bowl, season with salt pepper and any spices you feel like. Whisk well. Put a small frying pan over a medium heat, and drizzle in two teaspoons of oil. Pour the egg mixture into the hot oil, making sure it is hot enough to sear it quickly.
Scatter your goodies over the egg, put the tortilla on top, pressing it gently with a spatula to glue nicely to the egg mixture underneath it. Cook for 30 seconds, then flip it all gently and cook on the other side (tortilla down) for another 30 seconds.
Take the pan off the heat and put the tortilla/egg on a plate. Roll the whole thing when it is cool enough to touch, slice and….
ENJOY!
to print the recipe, click here

Corn tortillas are a little harder to roll, but I prefer them because they are lighter and in my opinion more flavorful. I sometimes warm it up for a couple of seconds in the microwave before adding on top of the egg to make it slightly more pliable, but it’s not mandatory. Nothing wrong keeping it simple… You can add mushrooms, olives, peppers, sliced leftover meat, and make them a little bigger by using a larger flour tortilla. The method is simple and so easy to adapt to your needs, I hope you’ll give it a try.
INCREDIBLY SIMPLE #2
Orange – Yogurt – Tahini Bowl

Cut orange in segments. I used blood oranges for this version, but any juicy orange will work. Place fruit in a serving bowl. Top with a nice dollop of yogurt, drizzle tahini all over it. A touch of maple syrup, and your favorite granola. Close your eyes as you eat it. It is dreamy. I called it lunch many times in the recent past. Tahini and yogurt. Who could tell? I used bananas instead of oranges and also a mixture of oranges and strawberries. Everything works. Refreshing, light but satisfying because tahini packs quite a bit of energy.
INCREDIBLY SIMPLE #3
CLOTTED CREAM
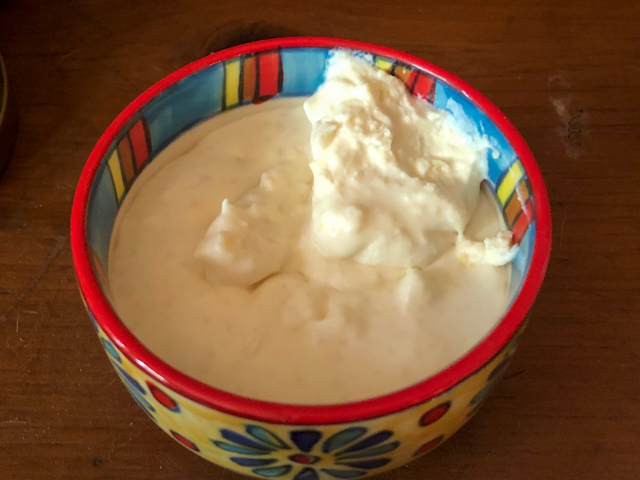
Hardest part of this “recipe?” Finding non-ultra-pasteurized heavy cream. I was lucky to find ONE little container at the grocery store and jumped on it with so much enthusiasm I almost lost my mask. Once you find that, follow this super simple procedure: pour it in a baking dish so that the level is not higher than 1 inch. Place carefully inside a low oven (mine was set at 170 F and I confirmed with oven thermometer to be pretty stable). Leave it there for 12 hours. Come back to this view….
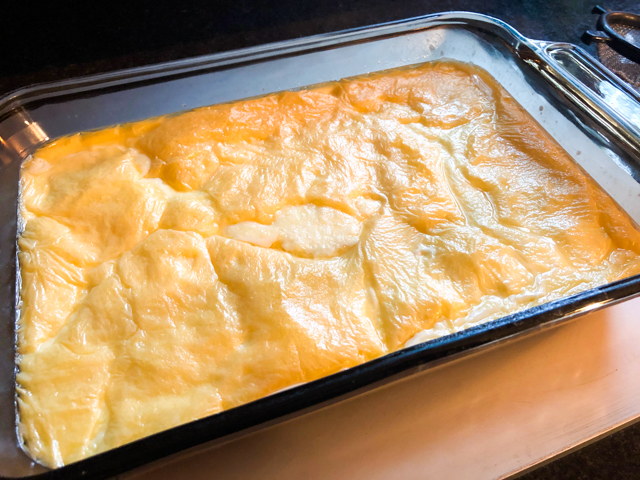
Let it come to room temperature, and place it in the fridge for 12 to 24 hours. Carefully scoop out the clotted cream and transfer to a container for storage. If you like it softer, add a bit of the liquid left underneath. That liquid, by the way, will work as milk in any type of baking, or as a nice addition to your coffee or tea.
Clotted cream is pure culinary gold, and so easy to make, essentially no hands-on work. Perfect over scones, pancakes, waffles. You will find plenty of ways to enjoy it, I’m sure. Even as a simple spread over bread or crackers. With a touch of jam if you are so inclined.

I heard that clotted cream can also be prepared in a crock pot. I intend to try that next time I score some of the appropriate heavy cream. The preparation sous-vide is also available in many sites in the internet, but I found the method a bit too convoluted and potentially messy. This was super easy and I highly recommend you give it a try.
ONE YEAR AGO: Ispahan Macarons
TWO YEAR AGO: Smokin’ Hot Meatloaf and Homemade Ketchup
THREE YEARS AGO: Banana Bread with Espresso Glaze
FOUR YEARS AGO: Slow-Cooker Carnitas & Paleo Planet Cookbook Review
FIVE YEARS AGO: The Making of a Nobel Reception
SIX YEARS AGO: Fennel Soup with Almonds and Mint
SEVEN YEARS AGO: Green Curry Pork Tenderloin
EIGHT YEARS AGO: Farfalle with Zucchini and Ricotta
NINE YEARS AGO: Slow-baked Salmon with Lemon and Thyme
TEN YEARS AGO: Hoisin Explosion Chicken