Super simple preparation, the air-fryer shines to produce moist and tender chicken in less than 30 minutes (not counting marinating time, of course). You can add different spices, just keep the basic oil, lemon and yogurt base.
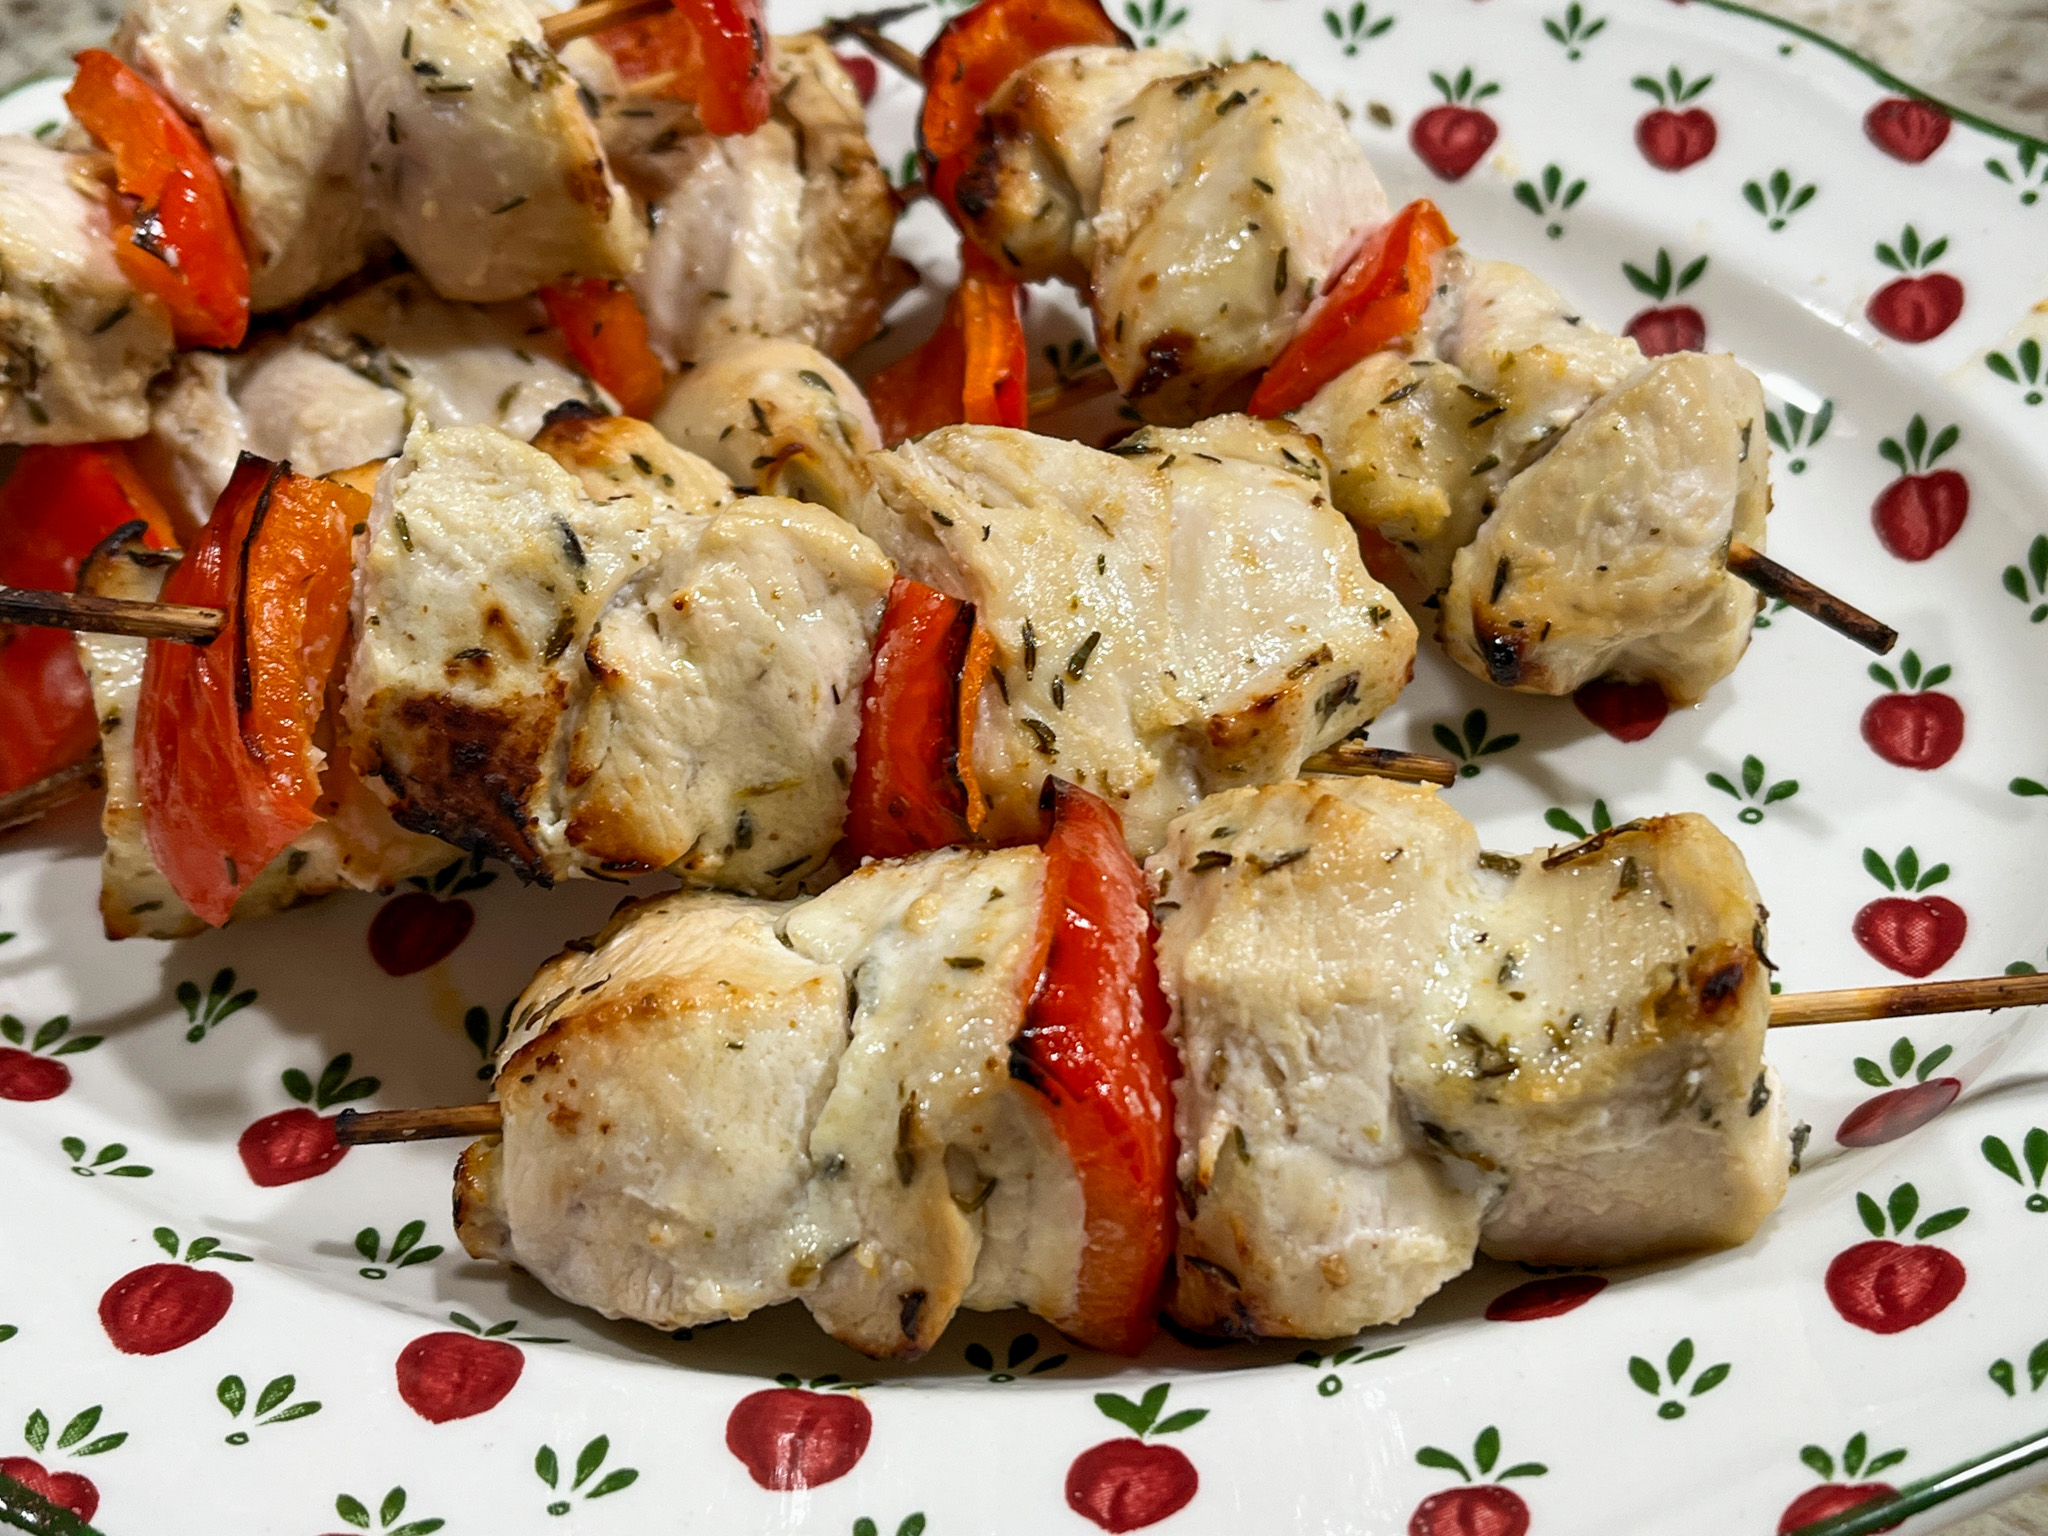
AIR-FRYER CHICKEN SKEWERS
(from The Bewitching Kitchen)
3 boneless chicken breasts, cut in 1 inch pieces
1/4 cup olive oil
1/4 cup lemon juice
1/2 cup yogurt, low-fat or full fat
1 Tablespoon apple cider vinegar
1 Tablespoon agave nectar
1 teaspoon Herbes de Provence
1/2 tsp black pepper
salt to taste
1 red bell pepper, cut in squares
olive oil spray
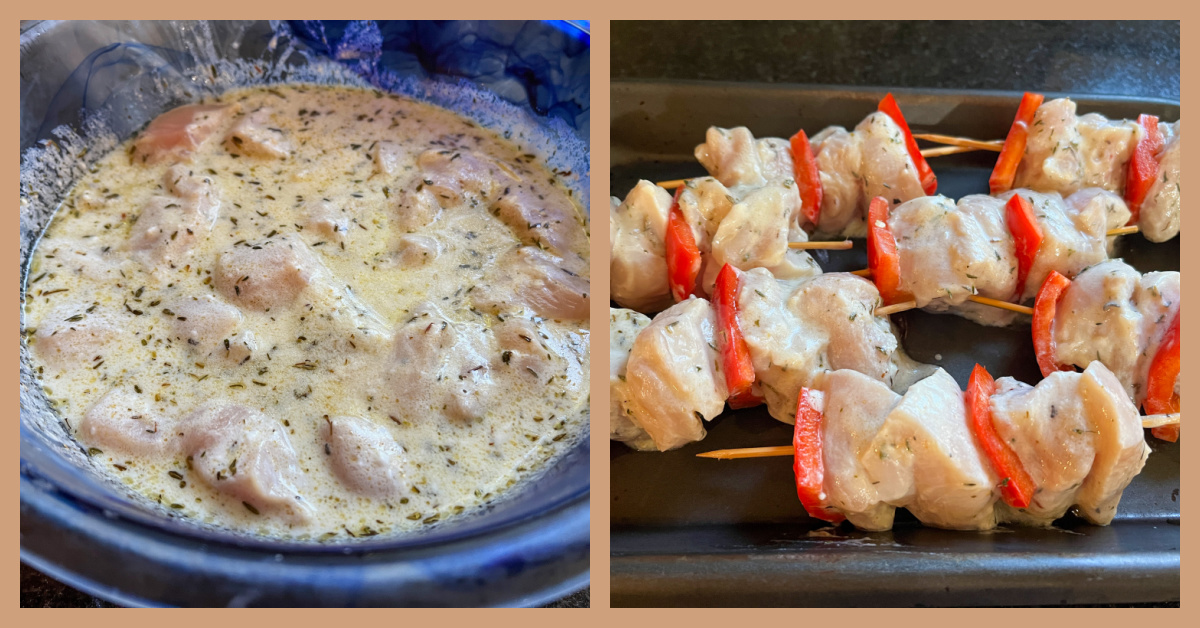
Make the marinade by whisking vigorously the olive oil, lemon juice, vinegar, yogurt, and agave nectar. Add the Herbes de Provence, pepper and salt, mix well.
Place the pieces of chicken in a bowl and add the marinade. Cover and refrigerate for a minimum of 30 minutes to 4 hours.
Soak wooden skewers in water while you marinate de meat. Make sure to you skewers that fit inside your air-fryer, or cut them in the appropriate length. Remove chicken from the marinade. Thread pieces of chicken and a couple of red bell pepper pieces in each skewer.
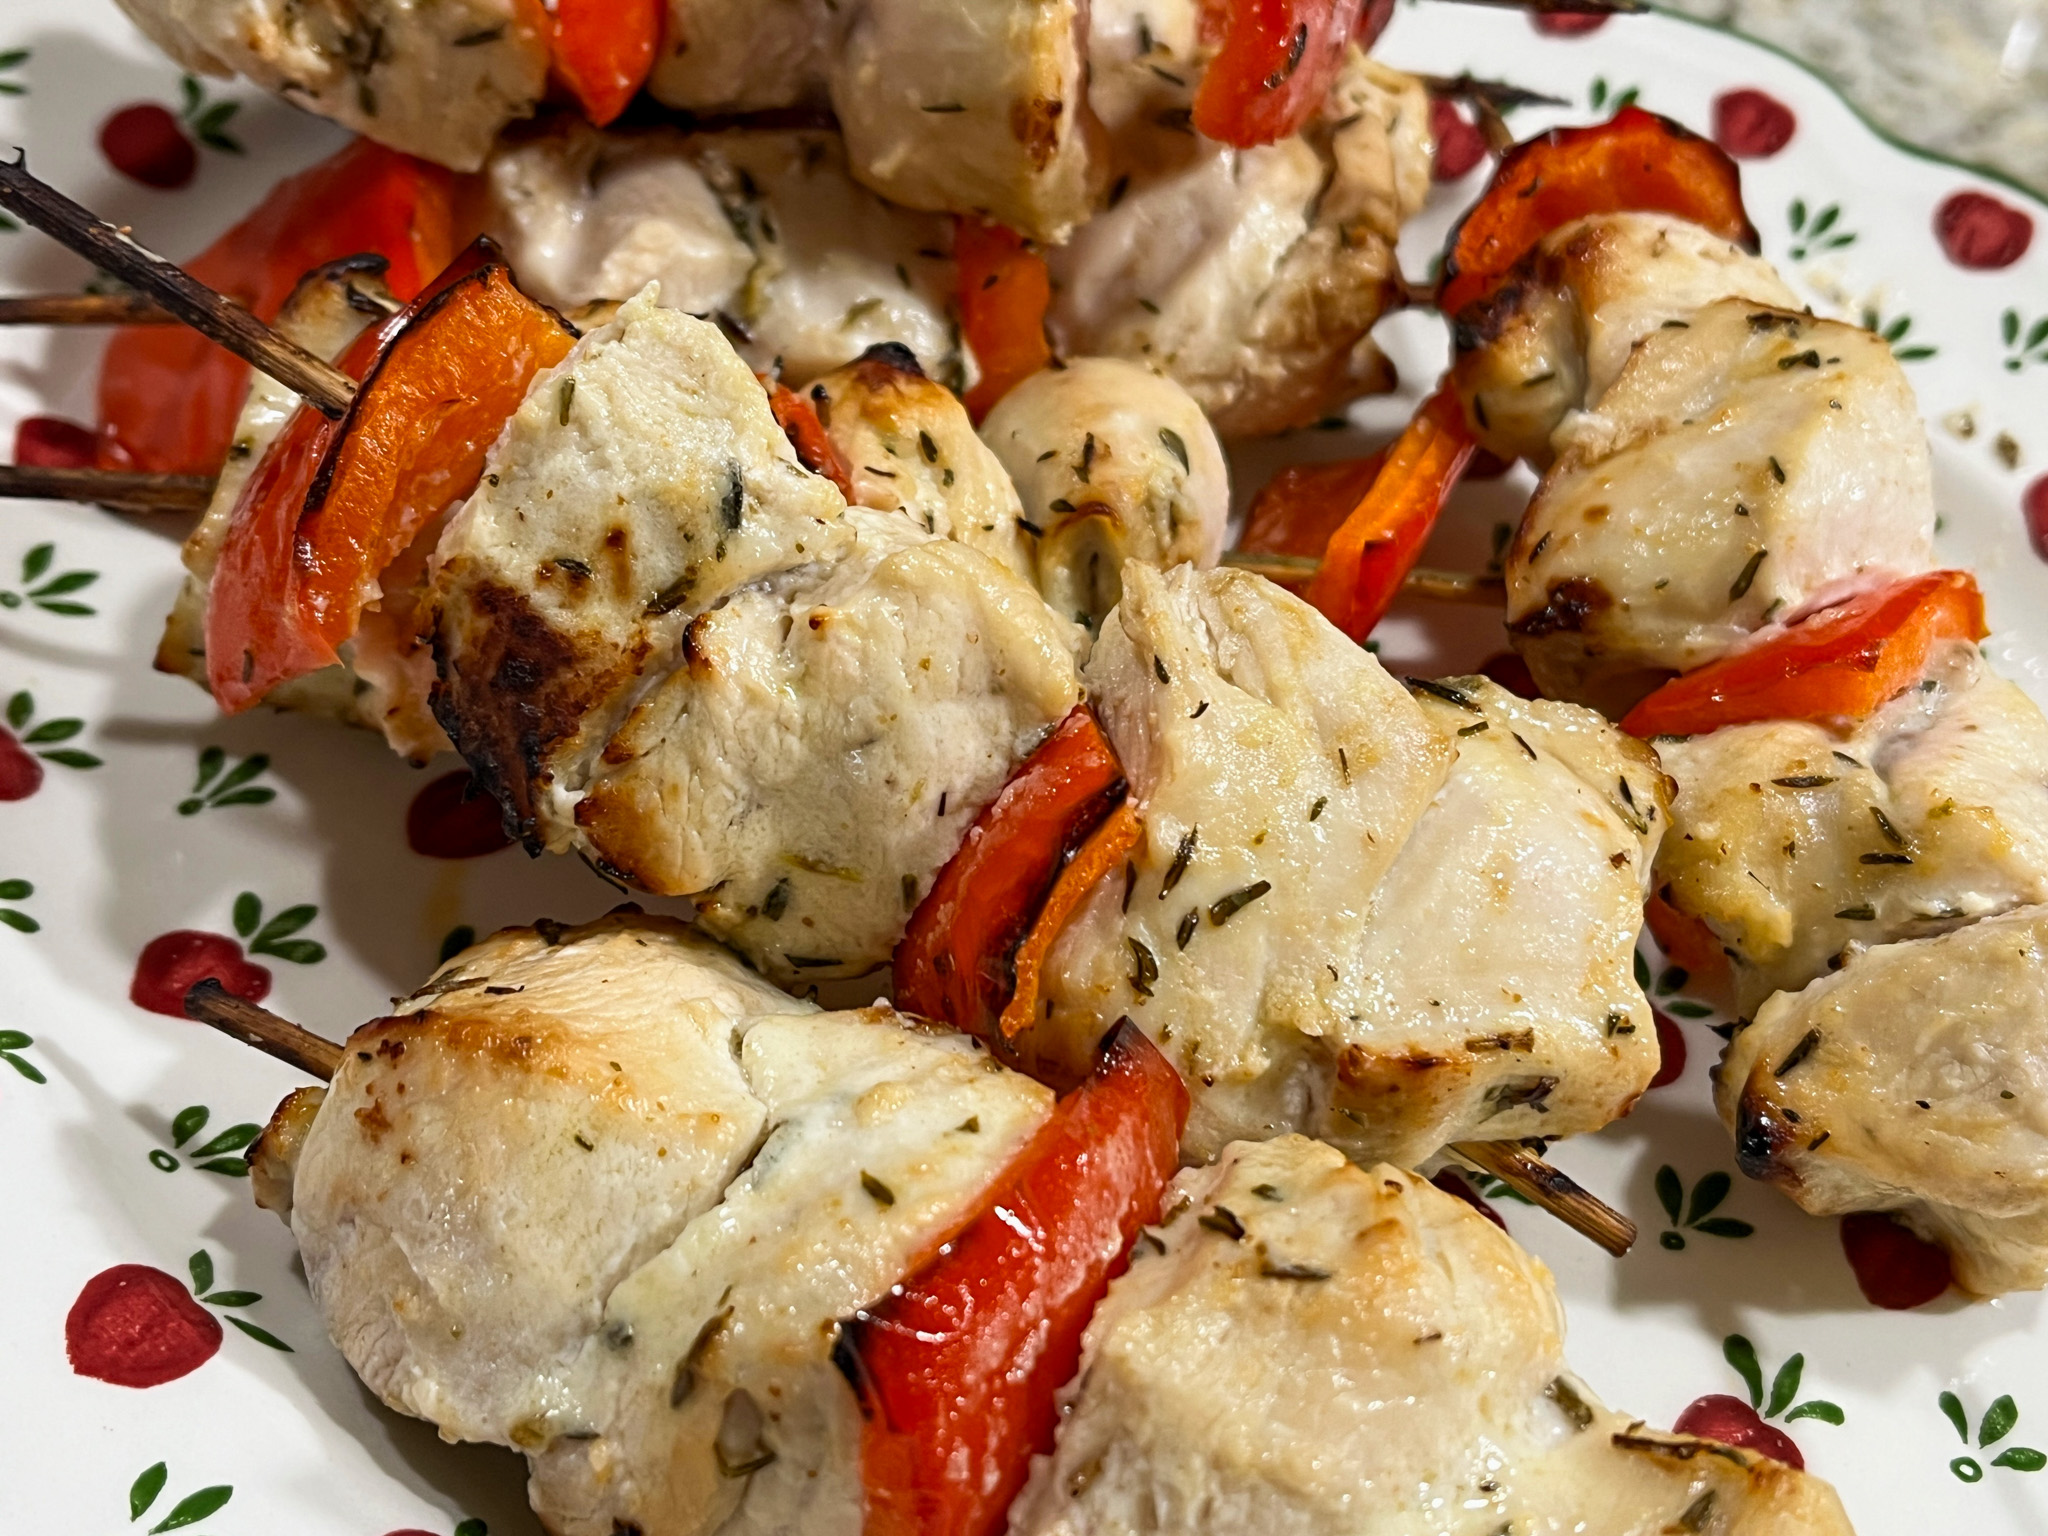
Turn fryer to 400F or as high as it will go. Spray the basket with olive oil, place the skewers inside, spray some more olive oil over them. Cook for 12 to 15 minutes. Remove them to a baking dish and cover with foil for 5 minutes. Uncover and serve.
ENJOY!
to print the recipe, click here
Comments: Another one for our rotation. Our fryer held 7 skewers with no issues, but smaller fryers might force you to cook in batches, so keep that in mind. If onions are not a problem for you, thread some together with the red bell pepper for even more flavor. You can also take this preparation heavily into Middle Eastern territory by incorporating cinnamon, turmeric, allspice, whatever you feel like.
We enjoyed ours with simple white rice and broccoli.
A perfect meal for a Wednesday evening!
ONE YEAR AGO: Almond-Cranberry Sandwich Cookies
TWO YEARS AGO: Brazilian Candy, Surpresa de Uva
THREE YEARS AGO: Red Quinoa “Tabbouleh”
FOUR YEARS AGO: Cucumber Salad with Yogurt-Harissa Dressing
FIVE YEARS AGO: Sundried Tomato and Feta Cheese Torte
SIX YEARS AGO: Hickory-Smoked Beef Tenderloin
SEVEN YEAR AGO: Spaghetti Squash, Revisited
EIGHT YEARS AGO: Stir-fried Chicken and Cabbage in Spicy Almond Sauce
NINE YEARS AGO: Fifteen Years!
TEN YEARS AGO: Light Brioche Burger Buns
ELEVEN YEARS AGO: Sourdough Blues
TWELVE YEARS AGO: Headed to Hawaii
THIRTEEN YEARS AGO: A yummy Brazilian cake: Bolo de Fuba’
FOURTEEN YEARS AGO: Hidden Treasure
FIFTEEN YEARS AGO: Avocado Three Ways