MOONCAKES FOR MID-AUTUMN FESTIVAL

Happy Mid-Autumn Festival, for those who celebrate! Every year, around July, I promise myself I will try to bake mooncakes. And every year I find excuses not to do it, because it seems so intimidating! Finally, I decided to woman-up, and go for it. I used the recipe from a great cookbook, Mooncakes and Milk Bread, by Kristina Cho. The copyrighted recipe is available online (click here), in case you don’t have the cookbook. I will share my experiences as a mooncake-virgin.

To make mooncakes, you will need molds (either plastic or wood will work). I used molds similar to these. You will also need Lyle’s Golden Syrup and a special type of water that can be made from baking soda, but I decided to get the commercially available (click here). You will only use 1 tsp of alkaline water per batch of dough. Molds come in two common sizes, 50g and 100g. I used the larger ones, make sure to adjust the amount of dough + filling to the size of mold you have.

The dough is surprisingly easy to work with, due to the high fat content. It stretches easily and I had no issues forming the balls with the filling inside. I used 48 g dough per ball, and about 35g filling of two kinds, the pistachio-honey described in the original link, and my second batch was simpler, just almond paste (8 oz) with 1/4 cup mini chocolate chips.
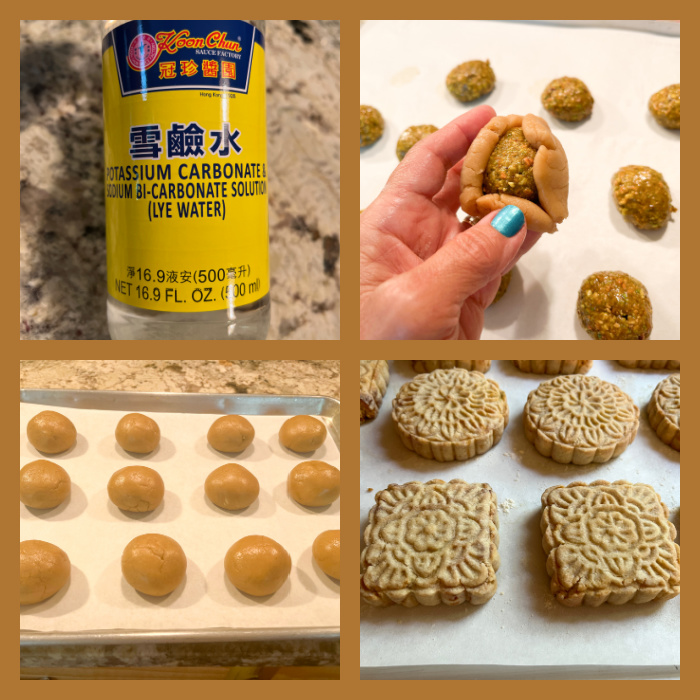
My problems started during baking. For many of the mooncakes, the pattern was almost fully lost during the second stage of baking. Maybe I used too much egg wash, or maybe some other tweaking in my technique was needed. At any rate, you can see in the picture below that my first batch was not as good as the second.
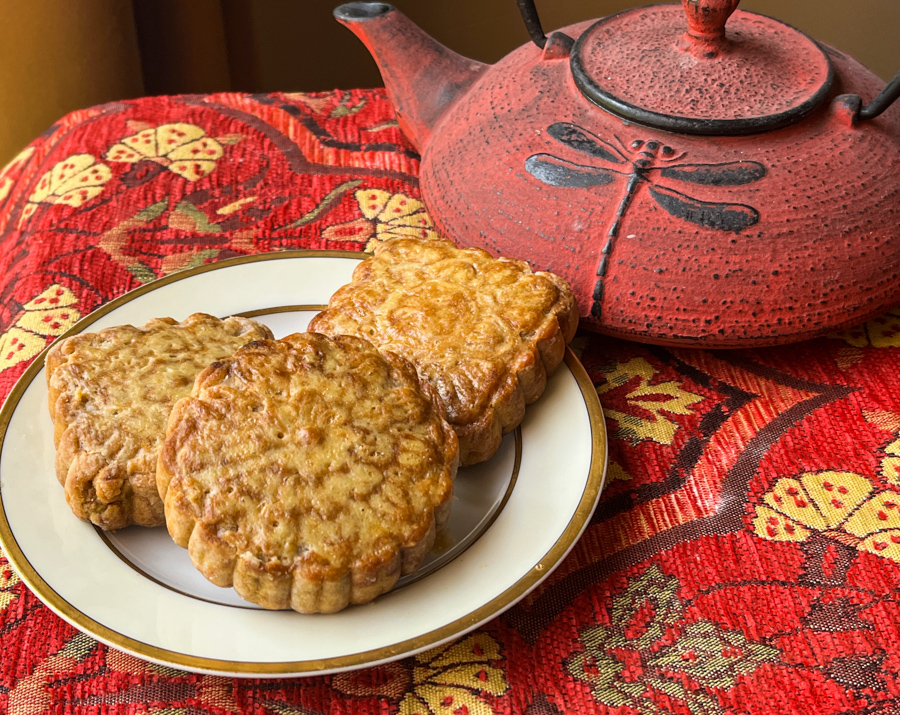
I suppose that making mooncakes is a bit like baking macarons, you’ll get better the more you make them. At any rate, I will definitely be using my molds with other types of cookie dough, as long as they don’t spread too much and have a higher chance of retaining the beautiful designs. Stay tuned… And if you celebrate…

HAPPY MID-AUTUMN FESTIVAL!

ONE YEAR AGO: Almond-Raspberry Triangles and a Special Cookbook Review

TWO YEARS AGO: Sweet and Spicy Roasted Cauliflower

THREE YEARS AGO: Roasted Cauliflower Salad over Hummus

FOUR YEARS AGO: Queen of Sheba

FIVE YEAR AGO: Brunch Burger

SIX YEARS AGO: Mango Salsa with Verjus

SEVEN YEARS AGO: Raspberry Bittersweet Chocolate Chunk Brownies

EIGHT YEARS AGO: Scary Good Pork Burgers

NINE YEARS AGO: Review of exercise program Focus25

TEN YEARS AGO: Celebrate Wednesday with a Thai Seafood Curry

ELEVEN YEARS AGO:  Post-workout Breakfast

TWELVE YEARS AGO: Semolina Barbecue Buns

THIRTEEN YEARS AGO: Lavash Crackers
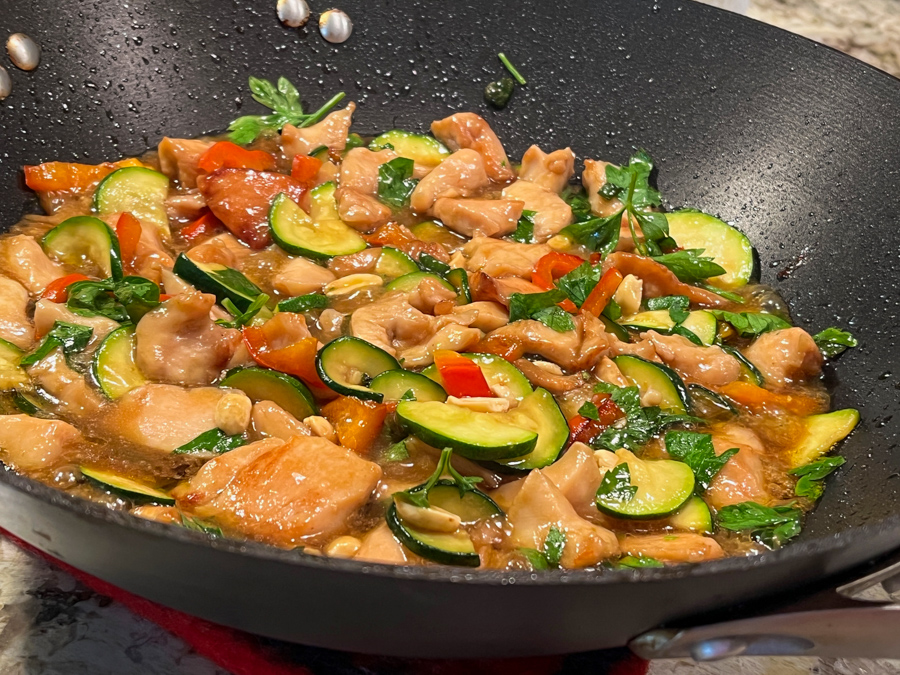
CHICKEN & ZUCCHINI STIR-FRY

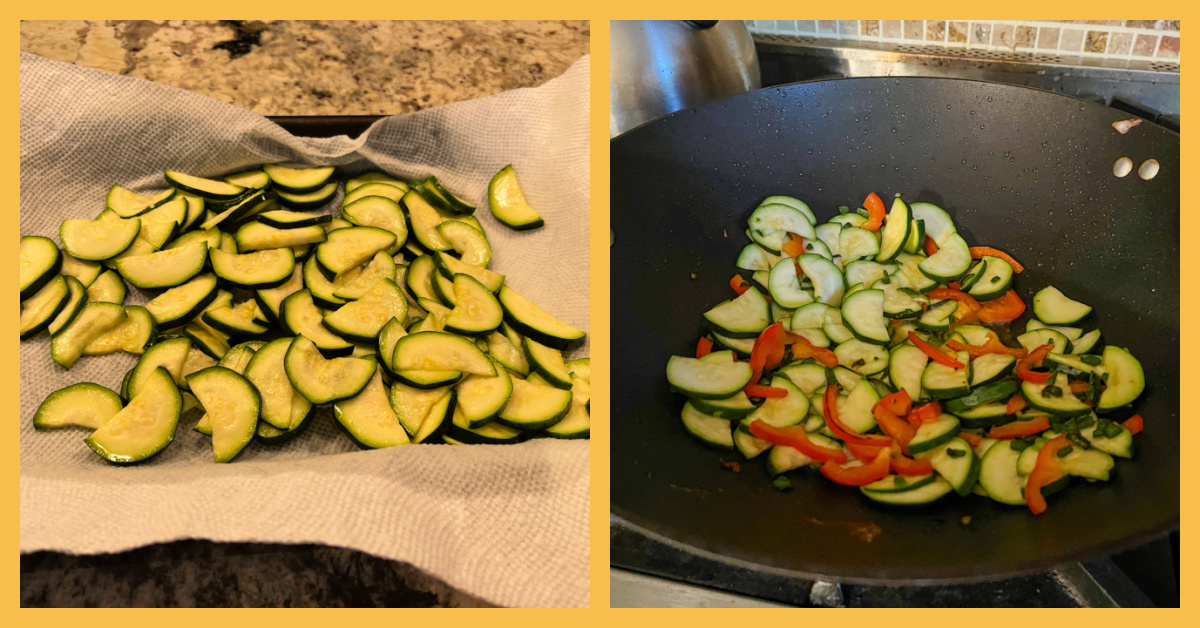
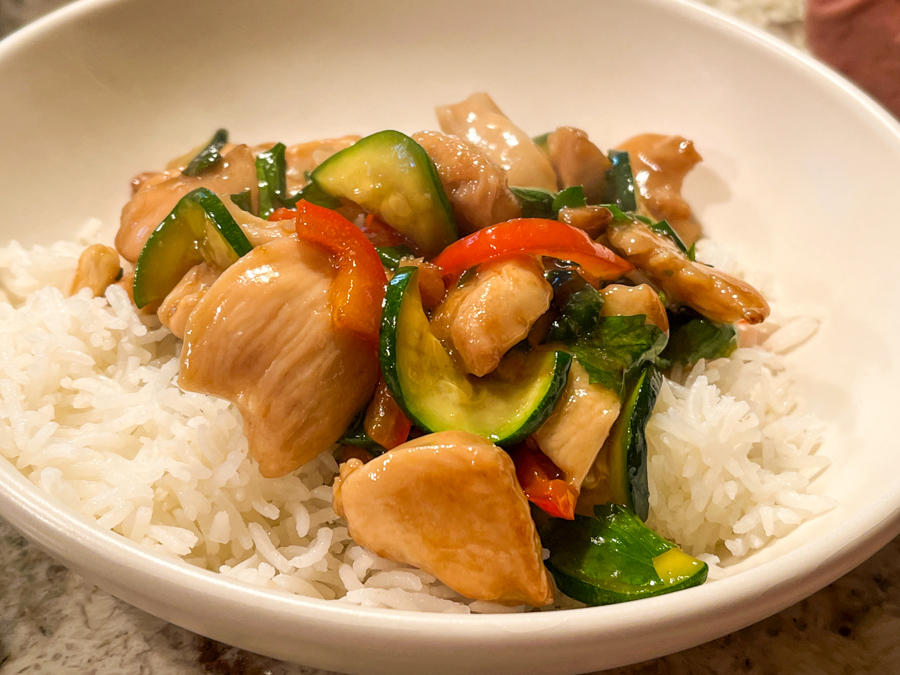
Zucchini is a delicious vegetable but pretty tricky to stir-fry, as it can go mushy super quickly. Today I share a recipe that deals with this problem and results in a nice one-pot meal, flavorful and easy to put together. Just keep in mind you’ll need 30 minutes to draw the juices out of the zucchini slices, which is about the same time the chicken will need to marinate. Perfect timing!

ORIENTAL-STYLE CHICKEN AND ZUCCHINI STIR-FRY
(from the Bewitching Kitchen)

3 medium zucchini, thinly sliced
2 teaspoons salt
3 boneless, skinless chicken breasts, cut in 1/2 inch pieces

to marinate the meat:
2 tablespoons soy sauce
2 tablespoons dry sherry
2 teaspoons baking soda
1 teaspoon cornstarch

for stir-fry:
2 tablespoons peanut oil
1 bell pepper, sliced thin
1/2 Serrano pepper, finely minced
1/2 cup water
1 tablespoon hoisin sauce
1 tablespoon soy sauce
1 tsp sesame oil
2 tsp cornstarch
salt to taste
roasted peanuts, about 1/3 cup
fresh cilantro leaves to serve

Prepare the zucchini by adding it to a large bowl and sprinkling the salt all over. Leave it at room temperature for 30 minutes. Rinse briefly to remove the salt, dry the slices over paper towel. They are now ready to use.

Marinate the chicken by mixing sherry, soy sauce, cornstarch and baking soda in a small bowl, and adding to the meat. Leave it for 30 minutes at room temperature.

Make the finishing sauce by mixing water, hoisin, soy, sesame oil and cornstarch. Reserve.

Heat the oil on a wok, add the chicken pieces and fry until golden brown on all sides. Remove to a bowl, add more oil if needed, sauté the bell pepper and Serrano pepper for a couple of minutes, seasoning lightly with salt. Increase the heat to high, add the zucchini slices, move them around for 10 seconds or so, add the chicken back, stir fry everything together for a minute. Add the finishing sauce, and heat it all together until it thickens slightly. Add peanuts, cilantro, and serve over steamed white rice.

ENJOY!

to print the recipe, click here

Comments: I really like the fact that marinating the meat and prepping the zucchini takes the same amount of time. Once that is out of the way, dinner will be ready in minutes, and all textures will be perfect. The zucchini cooks so quickly that you can also add it together with the finishing sauce and just heat it for a few minutes until it all thickens, making it even simpler. If you like more heat, add Sriracha or any other type of chili oil. Of course, for most people garlic and onion sauté with the bell peppers will be great too. As I always say, your kitchen, your rules… But definitely give this a try, you will not look at zucchini stir-fry the same way…

ONE YEAR AGO: The Never Again Folder

TWO YEARS AGO: Chai-Butterfly Macarons

THREE YEARS AGO: Roasted Cauliflower Salad over Hummus

FOUR YEARS AGO: Sous-vide Egg Bites

FIVE YEARS AGO: Paul Hollywood, The Weekend Baker

SIX YEARS AGO: Texas Sheet Cake

SEVEN YEARS AGO: In My Kitchen, September 2015

EIGHT YEARS AGO: Sour Cherry Sorbet: A Labor of Love

NINE YEARS AGO: In My Kitchen – September 2013

TEN YEARS AGO: Raspberry Sorbet at Summer’s End

ELEVEN YEARS AGO: When three is better than two  (four years with Buck!)

TWELVE YEARS AGO: Grating Tomatoes (and loving it!)

THIRTEEN YEARS AGO: A Peachy Salad for a Sunny Day

MEET THE PRINCE!

We are thrilled to introduce you to our new family member, Prince Freckles. Prince was born on June 12th, and joined our home 24 hours ago. Having a puppy is like falling in love with a special someone. Everything makes you smile, fills your heart with joy, and you cannot quite understand how you’ve lived your life without that being as part of it. We are absolutely smitten by this bundle of energy. His heart-shaped nose, his delicate black spots very similar to those of our dear BogeyQT. In less than 24 hours he learned to go down the two steps from kitchen to TV room, which scared him beyond belief at first. He almost did a full body flip the first time, and how we wish we had captured it on video! The images are already so many, as I type this post they fly through my mind and I cannot stop smiling. We needed him. And he is here. Welcome to the Bewitching Kitchen, Little Prince!

INCREDIBLY SIMPLE: KOREAN CHICKEN THIGHS

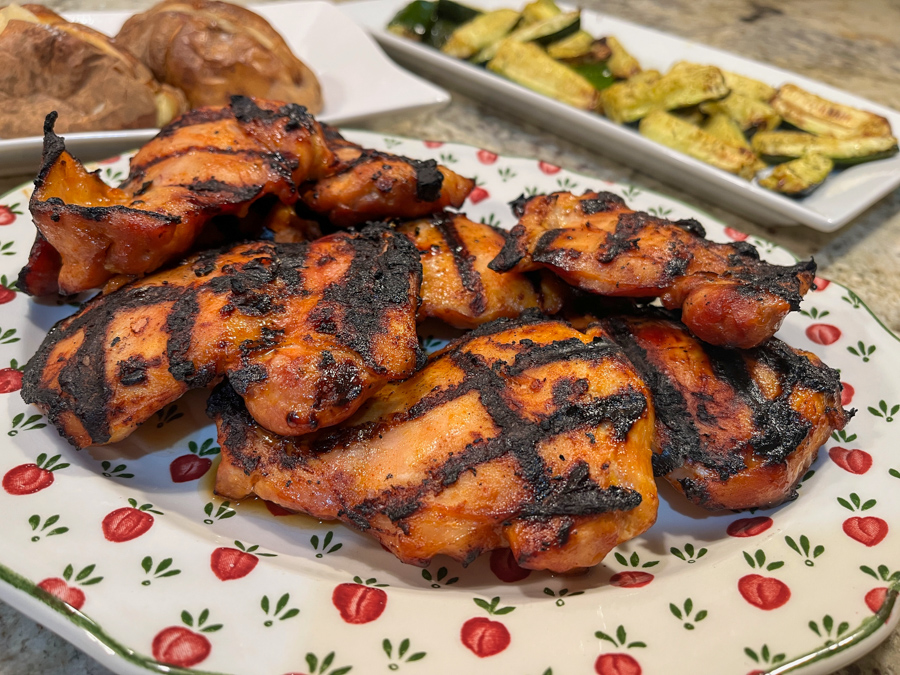
Mix a few ingredients, marinate the chicken. Grill. Done. It will go into our rotation, which tells you how much we loved it. Spicy to the right level. Sweet to the right level. Tender and moist.

KOREAN CHICKEN THIGHS
(from the Bewitching Kitchen)

8 boneless, skinless chicken thighs
3 tablespoons Gochujang sauce
3 tablespoons soy sauce
2 tablespoons honey
2 tsp toasted sesame oil
1/2 tsp salt plus more to taste

Mix all ingredients for the marinade, whisking them well. Add the pieces of chicken and move them around to coat each piece with the marinade. Leave it in the fridge from 2 hours to overnight.

Sprinkle a little more salt on the pieces of meat and grill until done, about 7 minutes per side, depending on how hot your grill gets.

ENJOY!

to print the recipe, click here

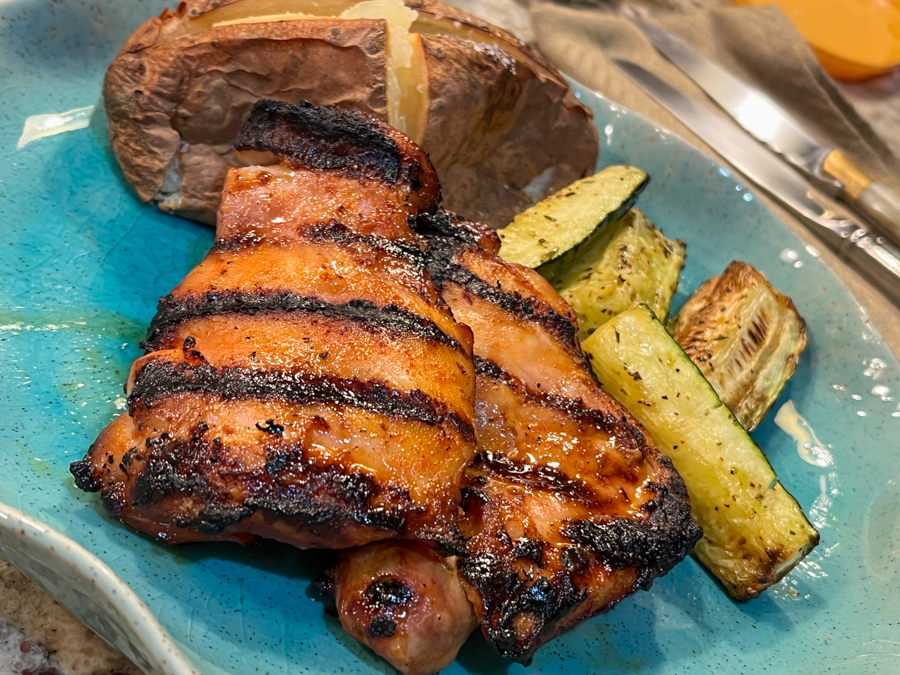
Comments: Two of my best buddies are Gochujang and Sriracha. I like to drizzle Sriracha over turkey burgers or other things ready to eat, but Gochujang I prefer to cook with. I find it a bit too strong on its own. In this marinade it is the dominant flavor, but unless you really dislike spicy food, it is not overpowering. I was quite amazed by how tasty leftovers turned out even when tortured fora couple of minutes in the microwave. We had them with air-fried zucchini (which I did not do a good job, over-crowded the basket and they turned out mushy), and British-style roasted potatoes (Sally pats herself on the back, they were perfect).

ONE YEAR AGO: Zucchini with Quick-Pickled Vegetables and Peanut Sauce

TWO YEARS AGO: Nha Benta (Brazilian candy)

THREE YEARS AGO: The Best, The Very Best Hummus

FOUR YEARS AGO: Chicken Katsu

FIVE YEARS AGO: Whole-Lemon Marinade: Long Overdue

SIX YEARS AGO: Tomato and Cucumber Salad with Almond Vinaigrette

SEVEN YEARS AGO: Eggplant Tomato Stacks

EIGHT YEARS AGO: The Couscous that Wasn’t

NINE YEARS AGO: Apple-Cinnamon Bread

TEN YEARS AGO: Blueberry Galette

ELEVEN YEARS AGO: In My Kitchen, August 2011

TWELVE YEARS AGO: Journey to a New Home

THIRTEEN YEARS AGO: Friday Night Dinner

BANANA BREAD FROM THE EXPERTS

This is a recipe from America’s Test Kitchen, the folks who test every single variable in a recipe multiple times until they come up with perfection. With the best. Or, as they called this one, The Ultimate Banana Bread. They’ve been known to go after food bloggers who either share their recipes without permission, or tweak their versions. I find the tweaking part a bit funny. Taste is so subjective that adjusting any recipe to suit the palate is what any cook should be doing…

THE ULTIMATE BANANA BREAD

The recipe is available online, so you can get it with a jump here. I actually did not see that review until after making the recipe, but I read it smiling all the way through… It turns out that I removed all the fuss and no major harm was done.

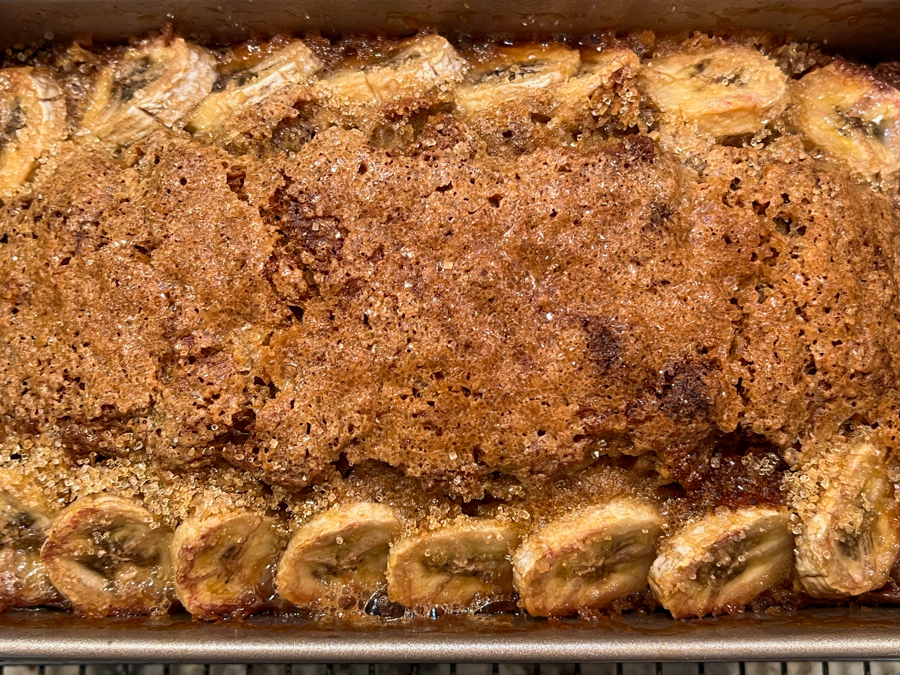
As the folks at thekitchn mentioned, the addition of turbinado sugar on top is brilliant. I actually added it in two installments, first right before placing in the oven…

And the second time another sprinkle just over the bananas when the bread had been baking for 40 minutes. I baked for a total of 55 minutes, in a 9 x 5 inch pan. The other tweaking I did was using frozen bananas without worrying about draining excess liquid. I also measured the amount of mashed bananas that went into the bread, as the fruit varies so much in size: 600g of banana pulp. One single fresh banana was used for the slices on top. Doing that, the recipe is really super simple, two bowls, one for dry ingredients, one for wet. Done.

Keep in mind that going at the sugary crust to peel it off and eat it is considered a faux-pas. Stealing extra slices of banana and running away? Equally distasteful. What you should do is make this recipe, available online in the link I provided or in this cookbook. Tweaking is optional. Your kitchen, your rules!

ONE YEAR AGO: Shrimp Stir-Fry with Snow Peas and Cashews

TWO YEARS AGO: Pickled-Roasted Chickpeas with Cashew Cream

THREE YEARS AGO: Twice-Baked Goat Cheese Souffle

FOUR YEARS AGO: A Star from England in the Bewitching Kitchen

FIVE YEARS AGO: Hommage to the Sun

SIX YEARS AGO:The Fabulous Three
.
SEVEN YEARS AGO: Turkey-Chorizo Burger with Green Chile Dressing
.
EIGHT YEARS AGO:Taco Salad
.
NINE YEARS AGO: Semolina Sourdough Boule
.
TEN YEARS AGO:Forgive me, for I have sinned
.

ELEVEN YEARS AGOCracked Wheat Sandwich Bread
.
TWELVE YEARS AGO:  Au Revoir, my Bewitching Kitchen
.
THIRTEEN YEARS AGO:French Bread