CHEESY LOW-CARB ZUCCHINI TARTS

After a week of fun and over-indulging a bit in Colorado, it was time to get back into a more attentive approach to cooking for a few days. For my body, nothing works better than controlling carbs. I respond quite well to it, and don’t find it that hard to do. Whenever I feel like reducing carbs, I think of Kalyn’s blog, her site is a great source of wonderful recipes. I had this one saved in my Pinterest board for a while, and  even got the exact same pan she used. It was too cute to resist. And I must tell you, it works great, very sturdy, I can see it will be around my kitchen for many many years, and maybe it will find its way into Greenlee’s home one day. If you don’t know, Greenlee is my 2 and a half-year old grand-daughter. Yeap, that’s how sturdy this pan seems. But back to the recipe. If you like omelettes and frittatas, this one is for you. And, of course, you don’t need to splurge and get the pan, use a large muffin tin, or you might even pour it into a pie dish, I suspect you can fill two regular size pans, although not too deeply. You might have to adjust the baking time a little. It is easy to judge when it’s done – just a little jiggly in the center, and getting a nice golden brown look on the surface.

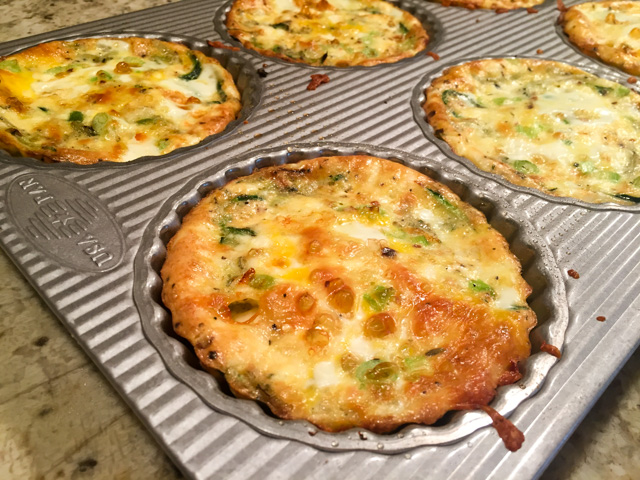
CRUSTLESS LOW-CARB ZUCCHINI TARTS
(slightly modified from Kalyn’s Kitchen)

4 oz. feta cheese, crumbled and softened
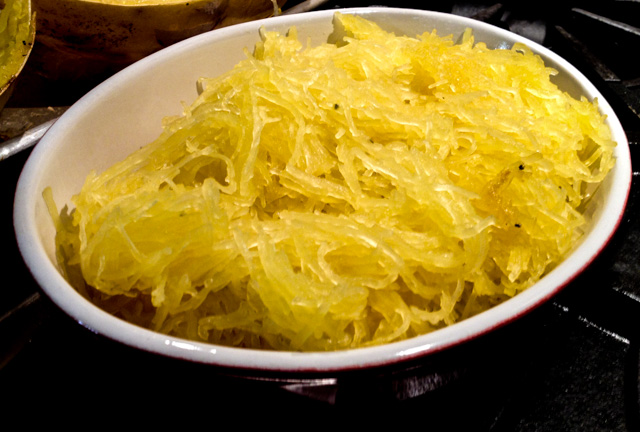
3 small zucchini, julienned or cut with spiral cutter
1 tablespoon olive oil
1/2 tsp. Herbes de Provence
1/4 teaspoon Aleppo pepper (or red pepper flakes)
salt and fresh-ground black pepper to taste
1/4 cup coconut milk (or heavy cream)
8 eggs, well beaten
6 T coarsely grated sharp white cheddar
1/4 cup sliced green onions, plus more for garnish if desired

Heat the oven to 375F/190C. Crumble 4 oz. of feta cheese into a large glass measuring cup or a bowl and let it come to room temperature.  Heat olive oil in a non-stick frying pan, add the zucchini, sprinkle with Herbes de Provence, Aleppo pepper, a little salt and black pepper to taste.  Cook the zucchini a few minutes over medium-high heat, just until it’s barely starting to soften.

Spray the tart pan with olive oil  and divide the cooked zucchini among the tart wells. Top with a generous tablespoon of coarsely grated sharp cheddar and a pinch of green onions. Then use a fork to stir the now-softened goat cheese and add the coconut milk (or heavy cream) and whisk well.  Beat eggs in another bowl and add to the goat cheese/milk mixture a little at a time, stirring until fully blended.

Fill each tart well with the feta-cheese and egg mixture, being careful not to fill too full.  Bake about 30 minutes, or until tarts are firm and lightly browned. Serve hot.

ENJOY!

to print the recipe, click here

Comments: I am quite fond of frittatas and omelettes, but sometimes they can taste too eggy. I know, what kind of a statement is that?  But, there is such a thing as “too eggy,” at least for my taste buds. I find that using coconut milk mellows down quite nicely that flavor, making it more subtle, and the texture quite creamy. Heavy whipping cream does a similar job, but in my personal experience, coconut milk is the winner. The recipe makes six tarts, which means after Phil and I enjoyed two on a Sunday lunch, I still had four left. I kept them in the fridge for four days, wrapped individually in Saran wrap, and they were still excellent on the last day, warmed up for 60 seconds – exactly – in the microwave. I bet they freeze well too.

It is so nice to be able to have lunch at home, these tarts go well with just about anything.  Kalyn conceived them as breakfast items, but since I don’t normally have breakfast, they turn into a perfect lunch item.  Of course, the possibilities are endless as far as what other goodies to add… sun-dried tomatoes, Kalamata olives, maybe some prosciutto or diced ham. Just add whatever you like to the sautéed zucchini and proceed with the recipe.

Kalyn, thanks so much for your constant inspiration, and for “twisting my arm” (virtually at least) to get this great tart pan. Very nice addition to the Bewitching Kitchen

ONE YEAR AGO: Blogging Hiatus

TWO YEARS AGO: Apricots, Three Ways

THREE YEARS AGO: Up Close and Personal with Kale

FOUR YEARS AGOBlack Berry Cherry Sorbet

FIVE YEARS AGO: Asparagus Pesto

SIX YEARS AGO: Chocolate and Chestnut Terrine

SEVEN YEARS AGO: Under the spell of lemongrass

EIGHT YEARS AGO: Greens + Grapefruit + Shrimp = Great Salad!

SaveSave

SaveSave

Save

Save

SaveSave

SaveSave

SaveSave

SaveSave

SaveSave

SaveSave

SaveSave

SaveSave

COFFEE MACARONS DRESSED UP TO PARTY

As I debate with myself the feasibility of changing my blog name to The Bewitching Macaron, I am here to share one more take on the French delicacies I am so in love with. Once again I used my basic recipe that works quite well, with a minor change. I dried the almond flour-powdered sugar mixture for a couple of days before using. That was a tip I found somewhere and decided to try. The filling is a slight modification from Nadiya, a contestant from the Great British Baking Show. Excellent, I highly recommend you give it a try if you are a coffee lover. If you are not a coffee lover, there is always the opportunity to become one. I am showing you the path of caffeine enlightenment. Grab my hand and walk with me…

COFFEE MACARONS
(adapted from a basic recipe from Craftsy)

Yield: About 72 shells; 36 assembled macarons

for the shells:
198 g powdered sugar
113 g almond meal
1/2 teaspoon instant coffee
113 g egg whites (I aged mine for three days)
1 g or a pinch of cream of tartar
100 g granulated sugar
Brown Gel color from AmeriColor
2 drops vanilla extract
for the filling:
100g dark chocolate (70% cocoa)
2 egg yolks
50g dark brown sugar
3 tablespoons water
1 ½ teaspoons fine instant espresso powder
150g unsalted butter, softened
to decorate:
gold sprinkles (optional)

Line 2 or 3 heavy baking sheets with parchment paper or Silpat mats. Layer the powdered sugar, almond meal and instant coffee in a food processor or mini processor. Pulse until the mixture looks like fine meal, about 15 seconds. Pass through a sieve and transfer to a small bowl. Set aside.

Place the egg whites and pinch of cream of tartar in the bowl of a stand mixer fitted with the whisk attachment. Make sure that the bowl and the whisk are impeccably clean. Starting on medium speed, whip the whites with the cream of tartar until they look like light foam. The whites should not appear liquid. The foam will be light and should not have any structure.

Slowly rain in the granulated sugar, trying to aim the stream between the whisk and the side of the bowl. Turn the speed up to medium-high. Continue to whip the meringue until it is soft and shiny. It should look like marshmallow creme. Add the gel color and the vanilla. Staying at medium-high speed, whip the egg whites until the mixture begins to dull and the lines of the whisk are visible on the surface of the meringue. Check the peak. It should be firm. Transfer the whites to a medium bowl.

Fold in the almond meal mixture in three increments. Paint the mixture halfway up the side of the bowl, using the flat side of a spatula. Scrape the mixture down to the center of the bowl. Repeat two or three times, then check to see if the mixture slides slowly down the side of the bowl. Put the mixture in a piping bag fitted with one of the tips listed above. Pipe on the prepared baking sheets.

Slam each sheet hard four to six times on the counter. Then fist bump each end of the sheet’s underside twice. Let the unbaked macarons dry until they look dull but not overly dry. Drying time depends on humidity. Ina dry climate, the macarons can dry in 15 to 20 minutes; in a humid climate, it can take 35 to 40 minutes. When the skin forms, top with gold sprinkles, if you so desire.

While the macarons are drying, heat the oven to 330 F (170 C/gas mark 3). Bake one sheet at a time on the middle rack. Check in 11 minutes. If the tops slide, then bake for 2 to 3 more minutes. The macarons should release without sticking. Check one or two. If they stick, put them back in the oven for 1 to 2 more minutes. Let the macaroons cool for 10 minutes before removing from the pan.

Make the filling:  Melt the chocolate in the microwave and leave to cool. Place the egg yolks in a heatproof bowl, and set aside. Put the sugar, water and espresso powder in a small pan, and heat gently until the sugar dissolves. Add the mixture to the egg yolks, whisking constantly.  Set the mixture over a pan of simmering water and continue to whisk gently until the mixture thickens. That should happen in less than 5 minutes, make sure the water is just at a gentle boil. Take the mixture off the heat and continue to whisk. Gradually add the butter, and keep whisking. Fold in the melted chocolate then set the mixture aside to firm up. Do not refrigerate, just keep it at room temperature until it is firm enough to pipe.

Assemble the macarons: find two macarons similar in size and add a good amount of filling to the bottom of one of them. Place the other on top and squeeze gently to take the filling all the way to the edge.  Store in the fridge for 24 hours for perfect texture.

ENJOY!

to print the recipe, click here

Comments: I wish I could say to you that this was a perfect batch, but it was not. Half of my macarons were “hollows”, which in macaron lingo means they have big air pockets inside, sometimes separating the cookie in two layers, making it impossible to use them.  I guess they could make nice crumbs over ice cream, or a layer for a trifle type dessert, but that’s about it. I don’t think drying the almond flour mixture for a couple of days explains the outcome, though. Macarons are finicky creatures and two batches made exactly the same way a few days apart might behave in completely different ways. Just a little too stiff the meringue, or too much energy in folding the batter, oven too hot, not enough drying time to form the skin.. and you can go from perfect macarons to a full-blown disaster. No feet, cracked, lumpy, hollows, the list of boo-boos can be intimidating. Still, even if I am not quite sure why I had problems this time, half of them were perfect, and I had enough to share with our group in a lab meeting. Not enough to share with the department, which is usually my goal. Oh, well. There is always next time. In fact,  I’ve got not one but two more macaron recipes to share. Told ya. Obsession. Although I prefer the word passion.

The taste was spot on, though. Just that small amount of instant coffee in the shells gave them a subtle coffee flavor, then the filling… oh, the filling… superb! I can see that used to frost cupcakes… maybe not appropriate to offer to that hyper-active 6 year-old… Made me think of this sign we saw hanging in a coffee shop in Frisco, CO.

😉

Pinning is sharing, sharing is loving!


ONE YEAR AGO: Blogging Hiatus

TWO YEARS AGO: Tomato Tatin

THREE YEARS AGO: Headed to Colorado!   

FOUR YEARS AGO: Farofa Brasileira

FIVE  YEARS AGO: Thai-Inspired Pork Tenderloin

SIX YEARS AGO: A yummy Brazilian cake: Bolo de Fuba’

SEVEN YEARS AGO:  Summer’s Tomatoes

EIGHT YEARS AGO: Leaving on a jet plane… 

SaveSave

SaveSave

BEEF GOULASH, SLOW-COOKER VERSION

I realize it’s not the time for goulash, at least not where we live. But, having just spent a week in Colorado. I also realize this classic Hungarian dish could come in quite handy mid-August.  Highs of low 60’s in the middle of the day, cooling down to 40-something in the evening? That’s goulash-friendly all the way. Come to think of it, using the crock pot in the summer is a pretty nice way to approach cooking. And yes, I’ve been known to enjoy a hearty beef stew in Kansas at the height of the summer and not even feel awkward about it. It is not a common meal for us during this season, but when I get that craving for comfort food, I listen to my body and go for it.


CROCK POT BEEF GOULASH
(inspired by America’s Test Kitchen)

2 medium shallots, minced
1/8 cup sweet paprika
¼ cup tomato paste
3 tablespoons vegetable oil
2 garlic cloves, minced (optional)
1 teaspoon caraway seeds
2 cups chicken broth
⅓ cup soy sauce
1 tablespoon Minute tapioca
2 bay leaves
1 piece of boneless beef chuck (4 to 5 pounds),  cut into 1½-inch chunks
Salt and pepper
⅓ cup sour cream
2 tablespoons minced fresh parsley

Season the pieces of beef with salt and pepper and reserve.

In a small skillet, heat the oil, saute the shallots until translucent, add the paprika, tomato paste, garlic, and caraway seeds. Stir until fragrant, transfer the mixture to the slow-cooker. Add the chicken stock, soy sauce, tapioca, and bay leaves. Place the seasoned beef  over the sauce, mix it to coat the pieces.

 Cover and cook until beef is tender, 9 to 11 hours on low. Discard bay leaves. In a bowl, combine 1 cup hot stew liquid with sour cream, then stir the mixture into stew. Adjust seasoning with salt and pepper. Serve with fresh parsley sprinkled on top. 

ENJOY!

to print the recipe, click here

Comments: If you happen to own this product reviewed a while ago by Mimi, definitely put it to use in this recipe. I have used it in the past, but ran out of it and completely forgot to re-order, Not the type of ingredient easy to find where we live.  As to the recipe, do not get pre-cut stew beef. It is simply not the same as getting a beautiful, marbled piece of chuck roast and cutting it yourself. Especially using the crock pot for so many hours, it makes a difference in the texture of the meat.  The packages sold at the grocery store are usually cut too small and often go through some process to tenderize them. No bueno.

I have a confession to make. After enjoying goulash as it was meant to be enjoyed, over a hot, delicious bowl of buttered noodles, I’ve been known to push the boundaries of fusion cuisine. Leftover goulash going on a date with a corn tortilla might sound a bit odd, but… I find it truly delicious. And if you crumble feta cheese on top, you won’t be hurting my feelings… I might do the same later…

ONE YEAR AGO: Post-workout Chia Yogurt Bliss

TWO YEARS AGO: Tomato Tatin

THREE YEARS AGO: Best Thing I Ever Made: Chocolate Chip Cookies

FOUR YEARS AGO: Farofa Brasileira

FIVE YEARS AGO: Thai-Inspired Pork Tenderloin

SIX YEARS AGO: A yummy Brazilian cake: Bolo de Fuba’

SEVEN YEARS AGO:  Summer’s Tomatoes

EIGHT YEARS AGO: Leaving on a jet plane… 


SaveSave

SaveSave

SaveSave

SaveSave

SaveSave

SaveSave

SaveSave

SaveSave

SaveSave

SaveSave

SaveSave

SaveSave

SPAGHETTI SQUASH, REVISITED

In more than 8 years of blogging, I never re-posted an article. That changes today, for good reason. Lita Watson, who blogs at Quick Easy Cook, wrote me a nice message because she read an old post of mine and thought I would be interested in her extensive research about spaghetti squash, from methods of cooking, to nutritional characteristics, including ten great recipes using it. I am quite fond of this type of squash because it is so light and when you need to counteract excesses – like what I’m going through right now during our vacation week in Colorado – it is a nice alternative to pasta. I can see myself grabbing a couple of squashes at the grocery store next week (wink, wink).

So, without further ado, here is a link to Lita’s post.

And a flash-back to my own article, in case you missed it.

I considered calling this post Life-Changing Spaghetti Squash, but then decided it would be a bit much, after all many people don’t even care for it and rather have their lives unchanged, leaving the spaghetti squash behind at the grocery store.  However, if you are like me and happen to love the process of making the strands magically appear at the tines of the fork, then enjoy them with a little browned butter, or a hearty Bolognese sauce… you should consider this method.  You’ll need a pressure cooker with a steamer insert, and 8 minutes of your busy day.  Eight short minutes and you will be rewarded with the best ever spaghetti squash, the strands will have such great texture that you will not use another method ever again.

Instead of a regular recipe, I will walk you through the process, which starts exactly the same way as any other method… Cut the spaghetti squash in half and remove the seeds (I like to cut them crosswise but you can definitely do it lengthwise).

squash cut

Now, set up your pressure cooker with 1/2 cup water inside, and a steamer….

steamer

Place the spaghetti squash halves inside the steamer, it doesn’t matter if they don’t fit standing up, any placement will work fine….

pressurecooker

Close the pressure cooker, once it reaches proper pressure cook for exactly 8 minutes.  Open the pan right away by equalizing the pressure running the pan under cold water in the sink…. Marvel at the look of the strands, ready to be forked out without a single hard, uncooked spot….

8 minutes

Now, all you have to do is remove the strands to a serving platter, and enjoy the best, most perfect spaghetti squash ever, in record time!

Spaghetti Squash22

Comments: I eat a lot of spaghetti squash and have tried many methods to cook it. Most people like to roast it, but I intensely dislike doing so. More often than not I end up with chunks of the squash that never get tender enough to pull into strands, and then it’s a major pain, sticking it back in the oven or calling it a day and accepting the idea that some of it will be lost. One day I read about microwaving it, and it is an improvement in terms of time and convenience. You can cut it in half, remove the seeds, and microwave it for about 15 minutes.   It cooks a lot more evenly, but the texture suffers a little.  With the pressure cooker, all problems are solved: in 8 minutes you get spaghetti squash that will give you nice strands all the way through the skin. And the texture? Unbeatable!  I know not many people have a pressure cooker, but if you are a spaghetti squash fan, it’s almost worth getting one just for preparing it. Not to mention black beans, artichokes, brown rice….

😉

ONE YEAR AGO: Stir-fried Chicken and Cabbage in Spicy Almond Sauce

TWO YEARS AGO: Fifteen Years!

THREE YEARS AGO: Light Brioche Burger Buns

FOUR YEARS AGO: Sourdough Blues

FIVE  YEARS AGO: Headed to Hawaii

SIX YEARS AGO: A yummy Brazilian cake: Bolo de Fuba’

SEVEN YEARS AGO:  Hidden Treasure

EIGHT YEARS AGO: Avocado Three Ways


SaveSaveSaveSave

SaveSaveSaveSave

SaveSave

SaveSaveSaveSave

SaveSave

SaveSave

FIRST MONDAY FAVORITE: JULY 2017

Here we are in August, and it’s time to share my favorite post of last month…

I must pick In My Kitchen, since I love writing those…

For the full link to the post, click here


Thank you Sid, for organizing the First Monday Favorite!

If you are a food blogger and would like to participate, drop Sid a line.

To see the contributions from my virtual friends, click on the link below

(comments are shutdown for this post)

https://static.inlinkz.com/cs2.js

SaveSave

SaveSave