
I invite you to visit the Home Bakers Collective blog, to read my review about a great online resource for bakers of all levels. Hope to see you there!

I invite you to visit the Home Bakers Collective blog, to read my review about a great online resource for bakers of all levels. Hope to see you there!
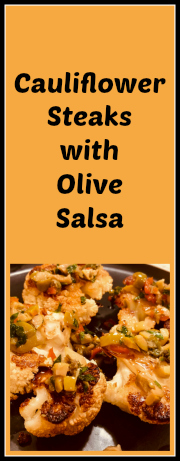
Nothing irritates a true vegetarian more than giving names like “steak” to a veggie dish to make it more appealing. My apologies, I have no intention of ruffling feathers, it’s just not as sexy to call it “Cauliflower Slices.” I’ve made a version of it in the past, but this one is so much better that it almost makes me want to go back and delete that post. This is cauliflower steak done to perfection, and I thank my friend Eha for introducing it to me. It will go in our regular rotation. For sure.
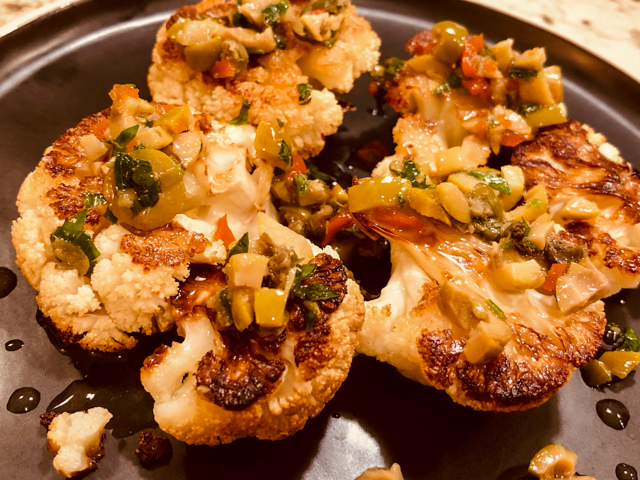
CAULIFLOWER STEAKS WITH OLIVE AND CAPER SALSA
(adapted from Cook Republic)
for the cauliflower:
1 head of cauliflower
3 tablespoons olive oil
for the salsa:
60g pitted green olives
2 tablespoons baby capers, drained
1/2 teaspoon red chilli flakes
chopped fresh parsley to taste
20ml extra virgin olive oil
juice of half a lemon
salt and pepper to taste
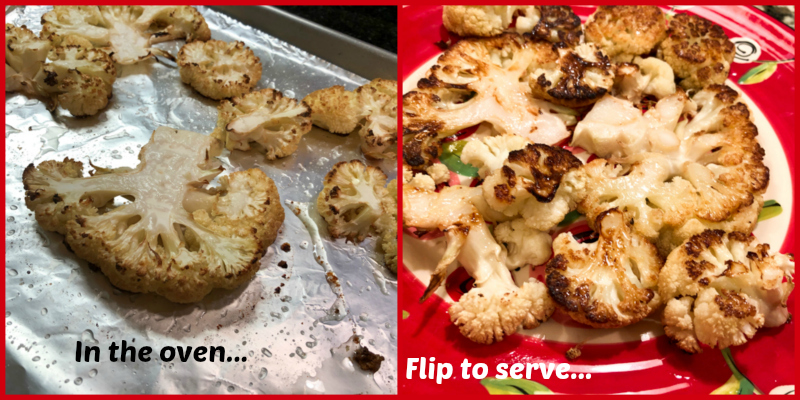
Heat oven to 325FC. Cover a baking dish with aluminum foil and drizzle with one tablespoon of olive oil. Place the cauliflower on a chopping board, resting on the stalk. Holding the head gently, slice the cauliflower into 5-6 thick slices (each about 1 inch wide).
Place the cauliflower slices on the prepared baking sheet. Drizzle the top with remaining olive oil.
Roast for 30 minutes. Increase oven temperature to 425F. Roast for a further 15-20 minutes at this higher temperature till the cauliflower is starting to char and brown nicely. Remove from the oven and set aside.
Place all ingredients for the salsa in a small bowl. Whisk very well. Spoon prepared salsa over the cauliflower steaks. Sprinkle with a pinch of sea salt flakes, freshly ground black pepper and chopped parsley.
ENJOY!
to print the recipe, click here
Comments: My only modification to the recipe was to reduce the amount of olive oil in the salsa and add lemon juice. For my taste, the olives add enough luscious fat, and the salsa tasted lighter and “brighter” with less oil and some extra acidity. Go with what rocks your own boat. Your kitchen, your rules.

What is wonderful about this recipe is the method to roast it. Lower temperature first, don’t mess with it, allow it to cook at a slow pace. Then increase the temperature and take it as far as you like. The salsa, cold and tangy, on top of that perfectly cooked slice of cauliflower? Perfection on a plate. I urge you to give this a try.
Eha, thanks so much for introducing me to this recipe in particular,
and to Cook Republic. I am following…
ONE YEAR AGO: Twice-Cooked Eggplant
TWO YEARS AGO: Turkey Burger, Japanese-Style
THREE YEARS AGO: Pumpkin Macarons
FOUR YEARS AGO: Slow-Cooked Whole Chicken
FIVE YEARS AGO: Chocolate Zucchini Cake with Chocolate Frosting
SIX YEARS AGO: Pecan-Crusted Chicken with Honey-Mustard Dressing
SEVEN YEARS AGO: Bewitching Kitchen on Fire!
EIGHT YEARS AGO: Cashew Chicken Lettuce Wraps
NINE YEARS AGO: Chiarello’s Chicken Cacciatore
TEN YEARS AGO: Donna Hay’s Thai-Inspired Dinner
ELEVEN YEARS AGO: Panettone
A special man was born. A lot of him lives in me. And in every member of our family.

Dad with my sister Norma, 50 years ago.

(comments are shutdown for this post)
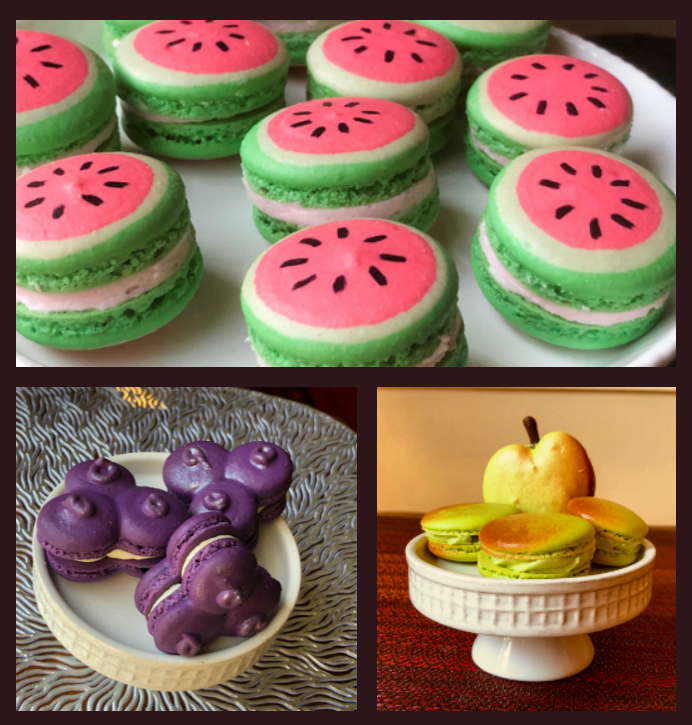
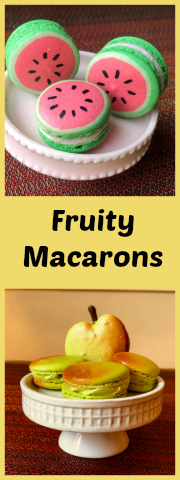
Three fruits, three macarons… Watermelons, Blueberries and Apples, each using a slightly different technique for piping the shells. For the watermelon version, I share two styles for the shells, with the same buttercream filling.
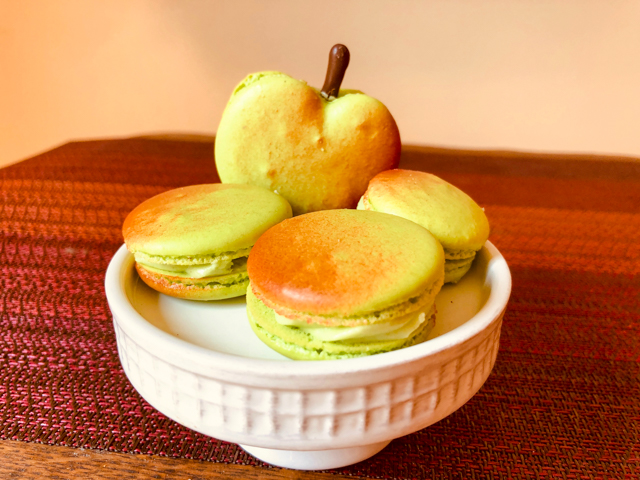 APPLE CIDER MACARONS
(inspired by Broma Bakery)
for shells:
3 egg whites (check the weight, mine were 103g)
same amount of granulated sugar (103g)
same amount of fine almond flour (103g)
same amount of powdered sugar (103g)
1/4 tsp vanilla paste
pinch of cream of tartar
food gel color, yellow and green (8:1)
for filling:
113g unsalted butter (softened)
360g powdered sugar (about 3 cups)
4 tablespoons apple cider
pinch of salt
for decoration:
brown Candy Melts
air-brush color, red and orange
Mix 3 tablespoons of granulated sugar with the egg whites and cream of tartar in the bowl of a KitchenAid type mixer. Place over simmering water and whisk for about 2 minutes until sugar is dissolved (temperature should be around 150F).
Place bowl in the KitchenAid and whisk in medium-speed, slowly adding the rest of the granulated sugar. Whisk for about 4 minutes, until thick peaks form. Add vanilla and food coloring (I added yellow and green).
Mix the almond flour with the powdered sugar, pass in the food processor together for about 10 pulses, then sift the mixture. Add it to the meringue and proceed with the macaronage until you can form a figure 8 with the batter flowing down from a spatula. Place in a large piping bag fitted with a round tip.
Pipe shells in shape of an apple, let it dry until a skin forms. Bake at 300F for about 12 minutes, until the top does not move when you gently try to twist it around. Color half of the shell with airbrush, I used a mixture of red and orange colors, eye-balling to get the tone I wanted.
Make the stems by piping Candy Melts on parchment paper. Make more stems than you’ll need, as they might break.
Make the filling by creaming the butter for a couple of minutes, then adding the powdered sugar, cider and salt. Adjust consistency with milk if needed, or more powdered sugar.
Fill shells, match them, and add the stems. Let the macarons mature overnight in the fridge before serving.
ENJOY!
to print the recipe, click here
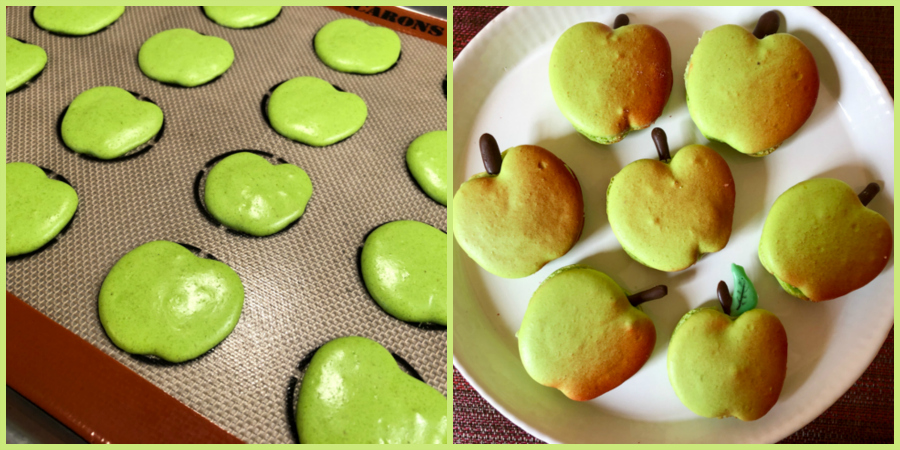
Comments: The macaron recipe is the one I’ve been playing with recently, from Broma Bakery. I just adapted it to make it in proportion to the weight of a given number of egg whites, because it simplifies everything quite a bit. I love how these turned out, air-brushing really adds a lot to the shells, but if you don’t have it, they will be fine without it. You can also make the macarons round and add just the stem, or maybe the stem and a little leaf, also piped with Candy Melts, dyed green.
Next time you want to make macarons, think about the size of the batch you need.
A small batch? Grab two egg whites, weigh them and add the other ingredients, all with the exact same amount by weight.
A regular batch (enough for about 24-30 macs?) Grab three egg whites.
A big batch? Four egg whites. That would probably be my limit, macaronage on a bigger batch might be tricky.
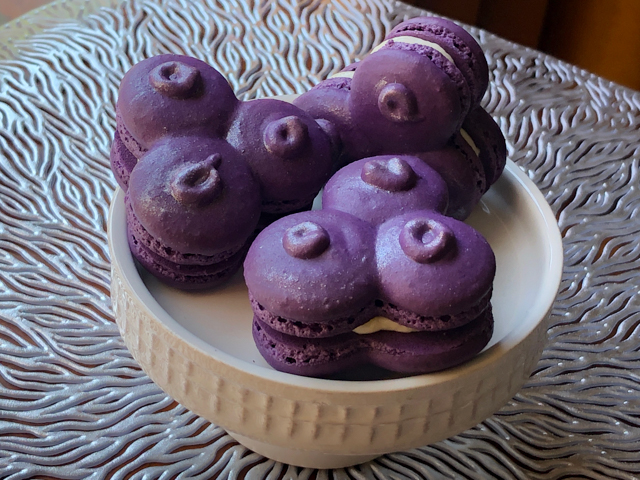
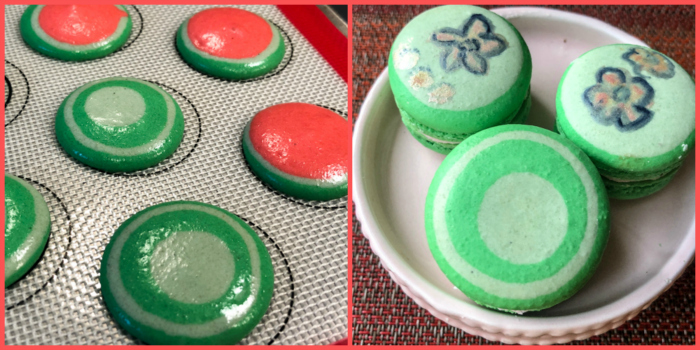
BLUEBERRY CLUSTER MACARONS
(inspired by Veronika Gowan)
Macarons made with this recipe, using gel food dye purple, from Artisan Accents)
Macaronage kept a bit thicker than normal, so that shells can be piped without losing their individual circles. Most of the batter was placed in a bag with a regular icing tip for macarons (80-100mm), and a very small amount was placed in a bag without any tip, with a small opening cut with scissors. That was used to pipe the little round stem spots.
When you pipe the cluster, make sure each “blueberry” is kept small, so that the final macaron is not huge.
for the filling:
1/4 cup blueberry jam (store-bought or homemade)
113g butter, softened
240g powdered sugar
lest of 1 lemon
lemon juice to taste
pinch of salt
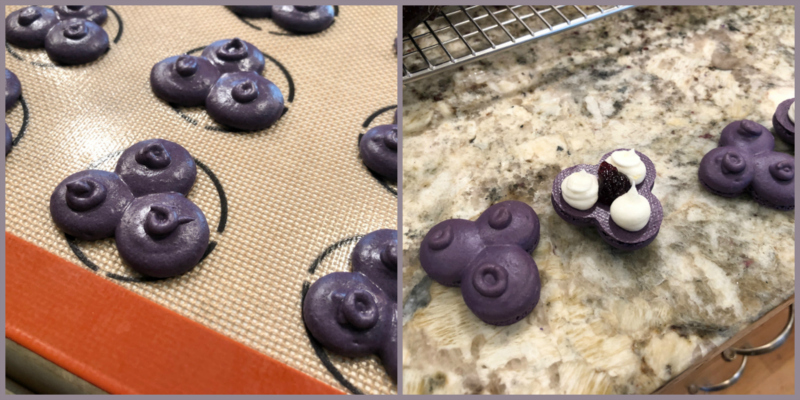
Pipe the cluster of three small berries. Tap the tray to release air bubbles, but be gentle, you don’t want the circles to join too much. Let the batter sit for 5 minutes, then pipe the round stem centers. Let the shells dry until a skin forms, then bake as normally (300F for about 12 minutes).
Make the lemon buttercream by whisking the softened butter for a couple of minutes in a KitchenAid type mixer. Add the lemon zest and whisk another 30 seconds, then the powdered sugar in a few batches in very low speed. Slowly increase the speed once the sugar is starting to get incorporated, add the lemon juice, salt, and whisk at high speed for a couple of minutes. Adjust consistency with more lemon juice or powdered sugar, as needed.
Fill the shells with a dollop of jam in the center and lemon buttercream around, as shown in the picture below. Let the macarons mature in the fridge overnight before enjoying.
Comments: Veronika Gowan makes incredible macarons, perfect examples of fruits and even vegetables (she recently made unique and exquisite chanterelle macarons). I need to practice my piping skills for very delicate features, but in the case of blueberry clusters, next time I will add the stem decoration by painting. I think they will be more delicate and maybe more realistic that way. You can click on her instagram feed to see many of her amazing productions.

WATERMELON MACARONS, TWO WAYS
(piping inspired by Pies and Tacos)
for shells:
same recipe as Apple Cider macarons above, separated in three batches: green, light green (or left un-dyed), and watermelon (pink and red 2:1)
for filling:
200g powdered sugar
60g unsalted butter softened
1/2 tsp Amoretti watermelon emulsion (adjust to taste)
milk or heavy cream to adjust consistency of buttercream
pinch of salt
to decorate:
edible food marker, black
You will pipe the shells in three concentric colors, starting with the dark green, then light (or un-dyed), then watermelon After that you tap the tray to release bubbles as normally, just don’t be too harsh.

Once baked, you can fill them and do the final decoration with a black marker. You might have leftover batter of one or two colors (I had both green colors leftover). In this case, use them as the back of your macaron, or come up with a totally different design. Go with the flow, dance to the Macaron Music…
To make the watermelon buttercream, follow the general method of the lemon buttercream above, but use watermelon flavor added to the butter after it is creamed. Then proceed with the powdered sugar addition and milk or cream, if needed.
Alternative design for watermelon macarons
You can simplify things and pipe shells of two different colors, matching one green and one watermelon-color. I air-brushed some pink luster on the shell, but that is just a bit of icing on the cake… 😉
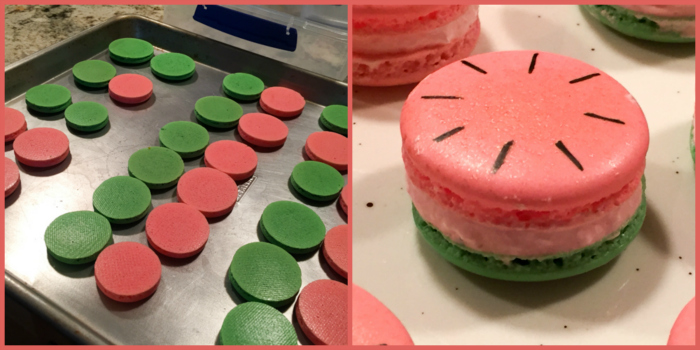
After filling the macarons with watermelon buttercream, make little seed markings with black food marker, and as always, let the macarons sit in the fridge overnight for proper maturation of the shells.
I hope you enjoyed these variations on my favorite cookie. I have been practicing with different shapes, and results are not always that great, but I still have fun trying…
ONE YEAR AGO: Halloween Entremet Cake
TWO YEAR AGO: Pork with Prunes, Olives and Capers
THREE YEARS AGO: Kansas Corn Chowder
FOUR YEARS AGO: Impossibly Cute Bacon and Egg Cups
FIVE YEARS AGO: Pulling Under Pressure
SIX YEARS AGO: Cooking Sous-vide: Two takes on Chicken Thighs
SEVEN YEARS AGO: Miso Soup: A Japanese Classic
EIGHT YEARS AGO: On my desk
NINE YEARS AGO: A must-make veggie puree
TEN YEARS AGO: Vegetarian Lasagna
ELEVEN YEARS AGO: Brazilian Pão de Queijo
INCREDIBLY SIMPLE #1
EGGS WITH ZA’ATAR AND LEMON

This very simple “recipe” is from a wonderful cookbook called “Falastin.” Gently boil as many eggs as you want, but just for 6 minutes. The idea is to get the yolk still pretty creamy. Now in a small bowl, whisk olive oil, lemon juice, and za’tar. Peel the eggs, and chop them coarsely, drizzle your little sauce and sprinkle salt on top. Amounts are totally flexible, I usually go with 2 eggs, 1 tablespoon olive oil and then improvise. I don’t know how many times I’ve called this lunch, with Ak-Mak crackers or a slice of sourdough bread. So good!
INCREDIBLY SIMPLE #2
SMOKY CHICKPEAS

Inspiration for this recipe came from Steeped: Recipes Infused with Tea (I adore it). You will need some smoked tea (Lapsang Souchong), but it is totally worth it to get some and keep in your pantry, even if you don’t enjoy it as a regular tea. I use it in chocolate ganache and quite often in cooking. It gives the food a very nice, subtle smoky flavor.

Slice open one bag of smoked tea, mix its contents with some cumin, smoked paprika, and salt. Open a can of chickpeas, drain and rinse well. Add into a bowl, drizzle some grape seed oil all over it, add the dry spice mixture and mix. Spread on a baking sheet lined with aluminum foil, and roast in a 400F oven for 25 minutes until golden brown. Once again, amounts can be totally eye-balled, no need for precision here. Relax and have fun with it.
INCREDIBLY SIMPLE #3
AROMATIC BASMATI RICE
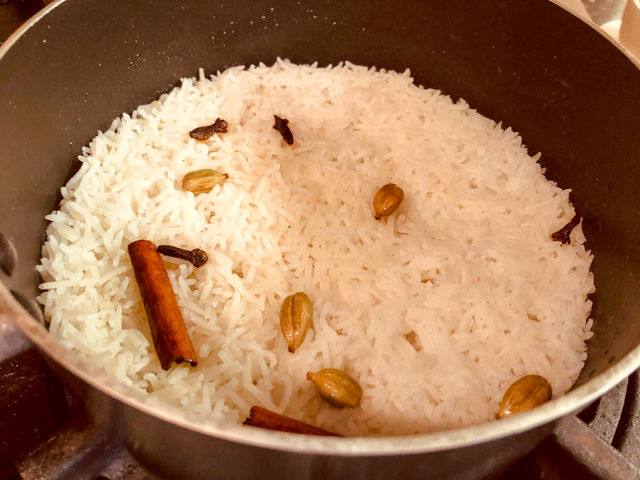
I found this gem of a recipe at Spice House website and made it four times in a row. That tells you how much we enjoyed it. It just turns a regular batch of rice into something special. I made some adjustments to their recipe as I felt that the rice was turning out a bit too underdone for our taste.
AROMATIC BASMATI RICE
(adapted from Spice House)
1 cup Basmati rice, rinsed
1 Tablespoon grape seed oil (or another mild-flavored oil)
5 whole cardamom pods
2-3 whole cloves
1 cinnamon stick
salt to taste
2 cups cold water
Add oil to a non-stick saucepan and place the pan over medium heat. When the oil is hot, add the cardamon (you can lightly crush them if you want more flavor), cloves and cinnamon stick to saute briefly. When fragrant, add rice and salt. Saute a minute or so to coat the grains of rice with the flavored oil. Add water, but don’t put the lid on yet.
Once the water boils, turn the heat down and simmer uncovered for 7 minutes. Cover the pan, and let it cook on very gently heat for 7 more minutes. Turn the heat off and let the rice sit in the pan for 10 minutes before removing the spices and fluffing the rice for serving.
ENJOY!
to print the recipe, click here

.
INCREDIBLY SIMPLE #4
BAKED SALMON WITH SOY-GINGER GLAZE

BAKED SALMON WITH SOY-GINGER GLAZE
(inspired by At Home with Natalie)
3 salmon filets
1/4 cup soy sauce
1/4 cup mirin (sweet rice wine)
1 Tablespoon brown sugar
1 Tablespoon freshly grated ginger
1 tsp sesame oil (do not add more, it is powerful stuff)
salt to taste
sesame seeds to sprinkle on top
Place the salmon filets (skin side down) over a baking sheet covered with aluminum foil leave at room temperature while you heat the oven to 350F and reduce the sauce for glazing.
Mix the soy sauce and mirin in a small non-stick saucepan, add the ginger, brown sugar and sesame oil. Simmer gently for a few minutes, until it starts to get a little thicker. Brush the top of the filets with some of the glaze, season very lightly with salt, and place in the oven for 20 minutes. Reserve the rest of the glaze.
Remove the pan from the oven, brush with more glaze and sprinkle sesame seeds. Return to the oven, and cook until done to your liking. Serve immediately.
ENJOY!
to print the recipe, click here

We eat salmon every week, but usually the husband is the seafood cook in our house. I rarely venture into his department, but was tempted to try this very simple preparation. I know I’ll be making it regularly, the only key thing is to get the fish cooked to the exact point you want (which is easier to do with sous-vide, but sometimes it’s nice to simplify things further). Probe the filet with a paring knife, and remove from the oven when it reaches your personal Nirvana level.

ONE YEAR AGO: Halloween Entremet Cake
TWO YEAR AGO: Pork with Prunes, Olives and Capers
THREE YEARS AGO: Kansas Corn Chowder
FOUR YEARS AGO: Impossibly Cute Bacon and Egg Cups
FIVE YEARS AGO: Pulling Under Pressure
SIX YEARS AGO: Cooking Sous-vide: Two takes on Chicken Thighs
SEVEN YEARS AGO: Miso Soup: A Japanese Classic
EIGHT YEARS AGO: On my desk
NINE YEARS AGO: A must-make veggie puree
TEN YEARS AGO: Vegetarian Lasagna
ELEVEN YEARS AGO: Brazilian Pão de Queijo
