SPAGHETTI SQUASH PERFECTION

I considered calling this post Life-Changing Spaghetti Squash, but then decided it would be a bit much, after all many people don’t even care for it and rather have their lives unchanged, leaving the spaghetti squash behind at the grocery store.  However, if you are like me and happen to love the process of making the strands magically appear at the tines of the fork, then enjoy them with a little browned butter, or a hearty Bolognese sauce… you should consider this method.  You’ll need a pressure cooker with a steamer insert, and 8 minutes of your busy day.  Eight short minutes and you will be rewarded with the best ever spaghetti squash, the strands will have such great texture that you will not use another method ever ever again.

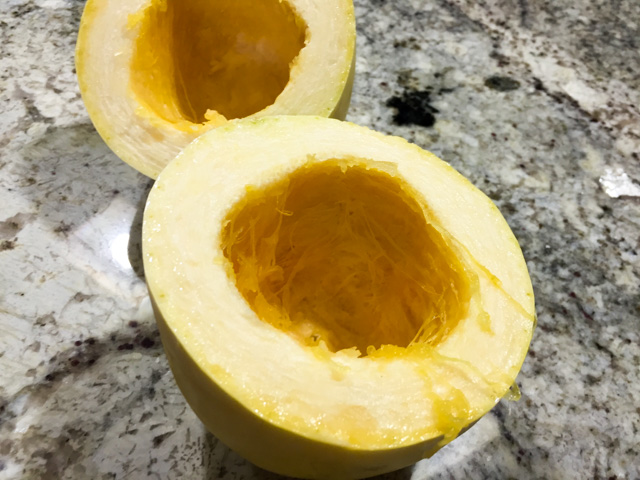
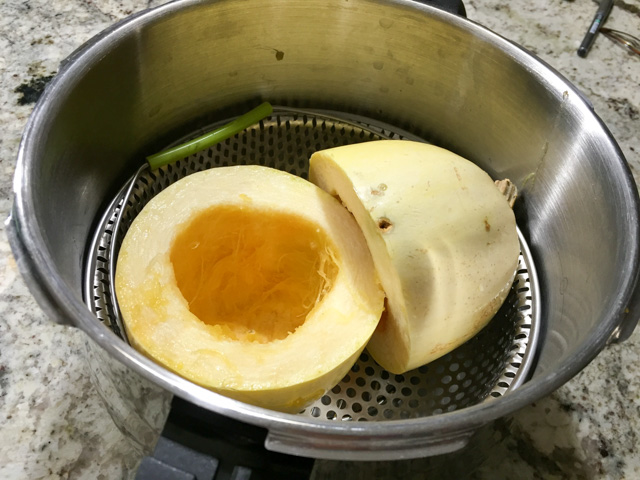
Instead of a regular recipe, I will walk you through the process, which starts exactly the same way as any other method… Cut the spaghetti squash in half and remove the seeds (I like to cut them crosswise but you can definitely do it lengthwise).

squash cut

Now, set up your pressure cooker with 1/2 cup water inside, and a steamer….

steamer

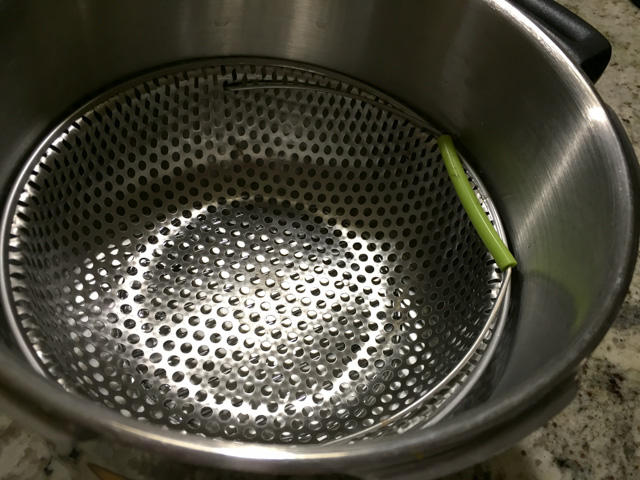
Place the spaghetti squash halves inside the steamer, it doesn’t matter if they don’t fit standing up, any placement will work fine….

pressurecooker

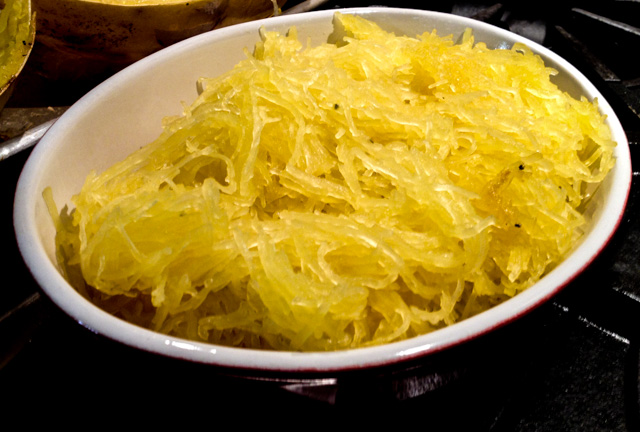
Close the pressure cooker, once it reaches proper pressure cook for exactly 8 minutes.  Open the pan right away by equalizing the pressure running the pan under cold water in the sink…. Marvel at the look of the strands, ready to be forked out without a single hard, uncooked spot….

8 minutes

Now, all you have to do is remove the strands to a serving platter, and enjoy the best, most perfect spaghetti squash ever, in record time!

Spaghetti Squash22

Comments: I eat a lot of spaghetti squash and have tried many methods to cook it. Most people like to roast it, but I intensely dislike doing so. More often than not I end up with chunks of the squash that never get tender enough to pull into strands, and then it’s a major pain, sticking it back in the oven or calling it a day and accepting the idea that some of it will be lost. One day I read about microwaving it, and it is an improvement in terms of time and convenience. You can cut it in half, remove the seeds, and microwave it for about 15 minutes.   It cooks a lot more evenly, but the texture suffers a little.  With the pressure cooker, all problems are solved: in 8 minutes you get spaghetti squash that will give you nice strands all the way through the skin. And the texture? Unbeatable!  I know not many people have a pressure cooker, but if you are a spaghetti squash fan, it’s almost worth getting one just for preparing it. Not to mention black beans, artichokes, brown rice….

😉

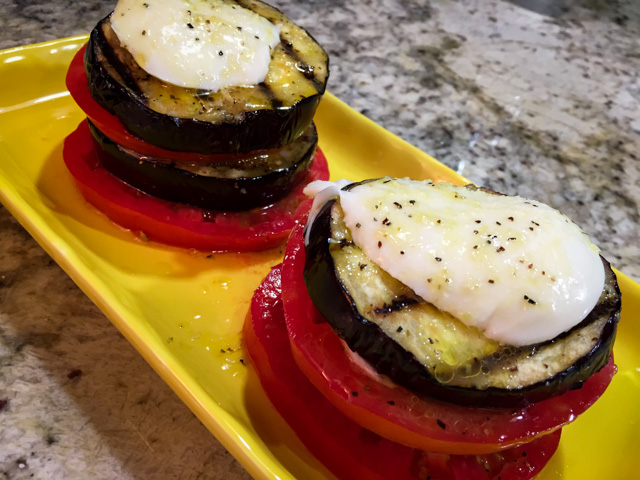
ONE YEAR AGO: Skinny Eggplant Parmigiana

TWO YEARS AGO: Supernova Meets Wok

THREE YEARS AGO500 Posts and The Best Thing I ever made

FOUR YEARS AGO: Back in Los Angeles

FIVE YEARS AGO: White House Macaroni and Cheese

SIX YEARS AGO: Korean-Style Pork with Asian Slaw

PIMP YOUR VEG, A GUEST POST!

Today I have a very exciting post to share!  Do you know the blog Foodbod hosted by Elaine? Great site for vegetarian recipes with an upscale gourmet flair. I’ve been following her blog for a while, and I can tell you that pretty much everything she blogs about makes me dream about being a guest in her dining room. She lives far away from me, we have half a continent and a huge ocean separating us, but the fun thing of the food blog world is that we can have virtual events that join us. Recently Elaine started a series on her blog entitled “Pimp your veg.” Her goal is to come up with ways to make veggie dishes more interesting and fun, and she does that like nobody’s business! I was thrilled when she invited me to contribute with a post for this series using the spiralizer, which is one of my favorite gadgets these days.  So, if you’d like to see what I came up to pimp my veggies, stop by Foodbod, and…. ENJOY!

This is the spiralizer I love…. Paderno, 4 blades

Cucumber Carrot Salad2

Elaine, I had a lot of fun composing the post for your blog!
Thank you so much for the invitation….


EGGPLANT TOMATO STACKS

This is pretty much a non-recipe, but a few details made this preparation so delicious, I must share. First of all, you’ll need to use the best juicy large tomatoes you can find. We got heirloom tomatoes that turned out perfect. Slice them thick, no skinny slices. Same goes for the eggplant slices, and once you grill them, 2 minutes per side and you are done. This will preserve some of the eggplant texture, it won’t go all mushy on you.  I often make the mistake of over-grilling eggplant. It gets bitter and limp. No bueno city.

Eggplant Stacks

EGGPLANT TOMATO STACKS
(from the Bewitching Kitchen)

1/4 cup olive oil
juice of half a lemon
Herbes de Provence to taste
salt and pepper to taste
2 big Heirloom tomatoes
1 medium eggplant
4 slices of mozzarella cheese

Make the dressing by mixing the olive oil, lemon juice, herbs, salt and pepper. Whisk well to emulsify.

Cut the eggplant in thick slices and brush each side with some of the dressing.  Reserve.  Slice the tomatoes, place over a platter and brush each slice very slightly with the dressing.  Reserve.

Grill the eggplant two minutes per side on a very hot grill. While hot from the grill, assemble the stacks, starting with a thick tomato slice, then a slice of hot eggplant on top. Add a slice of mozzarella, continue stacking the veggies. Top with a thin mozzarella slice, and drizzle any dressing leftover on top.  Add a tad more salt and serve.

ENJOY!

to print the non-recipe, click here

Comments: Sometimes simplicity is all you need in life. I didn’t anticipate making a post about this dish, but considering how much we both loved it, I had to share.  Resist the idea of melting the mozzarella on top by running the dish under a broiler or something.  It’s all a play with contrasting temperature and texture. The tomato will be just barely warm from cozying up with the grilled eggplant, and that will intensify its taste in a delightful way. I said it once, but will say it again, do not grill the eggplant to death. Assemble the stacks, bring them to the table, and pair them with any main dish you feel like it. I suppose two of these stacks could work well as a light meal. If you have some bread with it, even better. Some leaves of fresh basil in between the layers would be a nice touch, which unfortunately I thought about only a couple of hours later.  Such is life…

I hope you’ll give this a try before summer is over…  (typing this last phrase just about sent me into a crying fit. I am such a sensitive creature…)

ONE YEAR AGO: The Couscous that Wasn’t

TWO YEARS AGO: Apple-Cinnamon Bread

THREE YEARS AGO: Blueberry Galette

FOUR YEARS AGO: In My Kitchen, August 2011

FIVE YEARS AGO: Journey to a New Home

SIX YEARS AGO: Friday Night Dinner

ROASTED RED PEPPER-WALNUT DIP WITH POMEGRANATE

Are you familiar with Muhammara, a flavorful Middle Eastern red pepper dip? This concoction is similar but not quite the same. The addition of dates gives it a sweeter note, and the use of pomegranate juice is also a departure from the classic.  I made it for a dinner party we hosted not too long ago, and served it with Ka’kat bread. Perfect partner for the dip.  The recipe comes from Martha Stewart, and contrary to my expectations, there were problems. In fact, it was almost a disaster, but my beloved husband saved the show and thanks to his advice, the dip did not metamorphose into soup. And guess what? This is Paleo-friendly, so if you are into it, feel free to dig in!

Red Pepper Walnut Dip

ROASTED RED PEPPER-WALNUT DIP WITH POMEGRANATE
(from Martha Stewart)

4 pitted dates
3 chopped roasted red peppers
1/2 cup pomegranate juice (use less: see my comments)
1/2 cup toasted walnuts
1/2 teaspoon red-pepper flakes
2 tablespoons extra-virgin olive oil
Coarse salt and freshly ground pepper
Pomegranate seeds (optional)

Soak dates in hot water until softened, about 10 minutes; drain. Pulse dates, red peppers, pomegranate juice, walnuts, and red-pepper flakes in food processor until smooth. With machine running, slowly add olive oil until thoroughly combined. Season with salt and pepper.

Dip can be stored in refrigerator in an airtight container up to 3 days.

Garnish with pomegranate seeds, if so desired.

ENJOY!

to print the recipe, click here

composite2

Comments: Don’t let my almost disaster stop you from making this dip, it was delicious!  However, I even left feedback on Martha Stewart’s website stating that there are problems with the recipe as published. No way 1/2 cup of pomegranate juice will work. I actually roasted more bell peppers than the recipe called for, and it was still pretty much a soup once I was done processing it.

In complete despair, I told Phil that we would have to settle for store-bought hummus for our dinner party because the dip was ruined, but he did not even blink: put it in a sieve to drain, it will be alright.  He is simply the most optimistic human being ever, nothing brings him down.  Take golf, for instance. He faces each shot, no matter how tough, with full composure. Moi? I start shaking uncontrollably when my golf ball goes into a bunker (the golf balls I play with have a mind of their own, did you know that?).  In part because I know how many strokes it will take me to get said ball out of there. But, let’s get back to cooking, a nicer subject.

Following the advice of the resident scratch golfer, I placed the dip inside a small colander lined with a coffee filter, and within 30 minutes it had reached a perfect dip consistency.  Tragedy averted! I struck gold in March 07th, 2000.

😉

ONE YEAR AGO: Lemon-Pistachio Loaf

TWO YEARS AGO: Roast Beef French Dip Sandwich with Green Pea Pesto

THREE YEARS AGO: Asparagus Pesto

FOUR YEARS AGO: Chocolate and Chestnut Terrine

FIVE YEARS AGO: Under the spell of lemongrass

SIX YEARS AGO: Greens + Grapefruit + Shrimp = Great Salad!

YELLOW SQUASH SOUP

I generally dislike negativism, although admittedly I am not a very optimistic person.  I try to hide it well, though, and keep my assessment of everything that will might go wrong to myself. HOWEVER, the weather lately has pushed me to a dangerous edge, so I shall pout, whine, complain and be generally unpleasant to fellow human beings.  We have rain, then thunderstorms, then more rain. When there’s no rain, we have cloudy skies.  The temperature rarely reaches 75 F, but when that happens I am expected to be cheerful, walk around smiling. Not happening.  Given the bizarre meteorological situation I’m stuck with, I am blogging on soup. Soup. Hot and soothing. In May. I know, pitiful.

Yellow Squash Soup11
YELLOW SQUASH SOUP WITH TARRAGON AND LEMON
(slightly modified from Fer’s site Chucrute com Salsicha)

2 large yellow squash, cut in chunks
1 shallot, minced
1 tablespoon olive oil
1 tablespoon butter
1 tablespoon fresh tarragon leaves, minced
salt and pepper to taste
3 cups chicken or vegetable stock
juice of 1/2 lemon
1/4 cup heavy cream
dash of nutmeg
fresh chives for decoration

Heat the olive oil and butter in a pan, add the shallots and saute until translucent. Add the pieces of squash and cook for 7 to 10 minutes in medium heat.  Season lightly with salt and pepper.  Add the tarragon, chicken stock, and lemon juice.  Mix well, cover the pan and simmer for 10 to 15 minutes.  Off the heat, add the heavy cream and nutmeg, transfer the mixture to a blender and process until smooth.  Alternatively, you can reserve some of the pieces of squash to add later, for texture.

Serve right away with chives (or fresh tarragon) on top.

ENJOY!

to print the recipe, click here

Comments: For those who don’t know, Fer is a Brazilian food blogger who’s been living in the US probably as long or even longer than me. She was also my number one inspiration to start the Bewitching Kitchen, so it feels special to blog about a recipe from her site… Fer shared a post about this soup not too long ago, but my intention was to make it in the fall, when the weather would be more appropriate for it.  However,  the universe conspired against me.  We are at the end of the month of May.  I’ve been unable to wear shorts or flip-flops. End of May.  I had to bring a jacket from storage on more than one occasion. I wore boots three times this month. So there you have it, Yellow Squash Soup for lunch.  At least I can testify that it’s delicious!  This soup will be a regular appearance at our kitchen, and in my next time – when October comes – I intend to use coconut milk instead of heavy cream, just because I think it will be awesome that way too.  If you are faced with adverse meteorological conditions, make this soup, it is bright yellow like the sun that should be shinning outside.

cartoon-calvin-grumpy

Note added after publication…. because I have great friends, I share with you a better cartoon sent to me by the one and only Gary…  yeap, that summarizes it all much better

unnamed-23

ONE YEAR AGO: Grilled Chicken with Tamarind and Coconut Glaze

TWO YEARS AGO: Chicken-Apricot Skewers

THREE YEARS AGO:  Asparagus Quiche

FOUR YEARS AGO: Two-stage Pea and Prosciutto Risotto

FIVE YEARS AGO: Mellow Bakers: Corn Bread