This is a recipe I used to make all the time and for some odd reason disappeared from our menu. The other day I was searching the blog for ideas, and fell on this post from twelve years ago! I made it twice, two in a row, and tweaked it slightly. This is a lower-carb version, and if you skip the breadcrumbs on the topping it can also be gluten-free.
LOW-CARB TORTA DI ZUCCHINI
(from the Bewitching Kitchen)
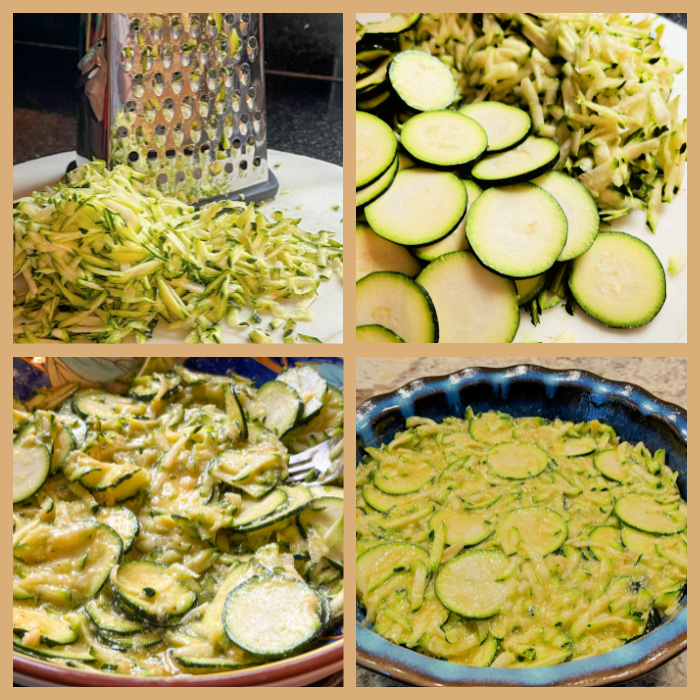
4 zucchini, 2 grated, 2 thinly sliced
4 eggs
zest of 1 lemon
1/2 tsp Herbes de Provence
1/2 tsp salt or to taste
black pepper, to taste
1/4 cup almond flour plus more to sprinkle on plate
1/4 cup finely grated Parmigiano cheese
topping: 1/4 cup breadcrumbs + 1/8 cup Parmigiano cheese
drizzle of olive oil
Grease a pyrex pie dish with butter. Sprinkle some bread crumbs or almond flour to coat.
Mix the beaten eggs with the lemon zest, herbs, Parmigiano cheese, 1/4 cup of almond flour, salt and pepper. In another bowl, place the grated and sliced zucchini. Shake the dish carefully to distribute the slices more or less evenly. Add the egg mixture to it, mix gently, and pour into the prepared pie dish. Sprinkle the remaining mixture of bread crumbs (or you can use almond flour) and cheese on top, forming a very light coating. You may not need to use it all. Drizzle a bit of olive oil.
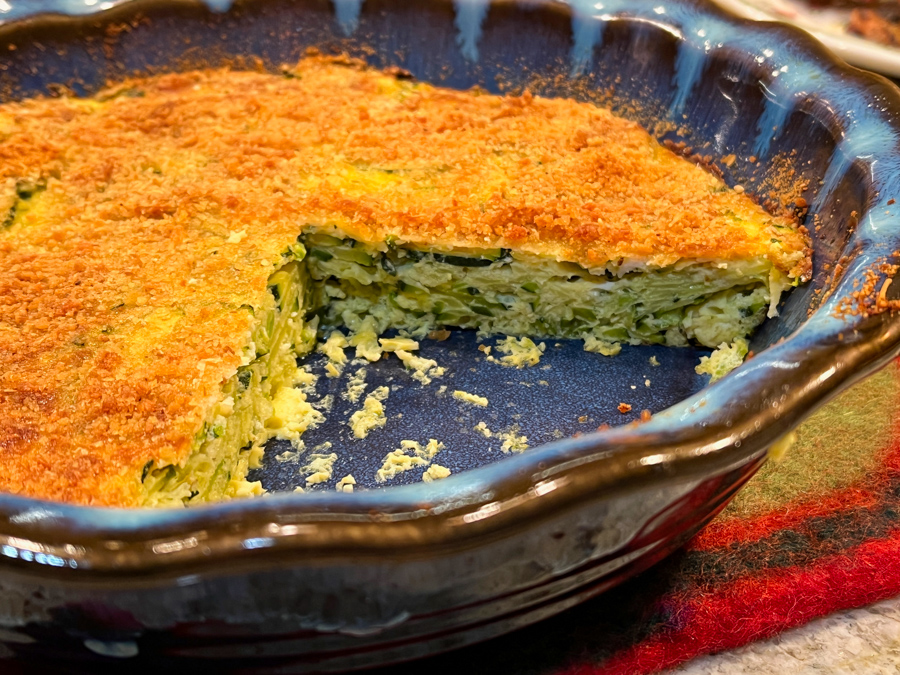
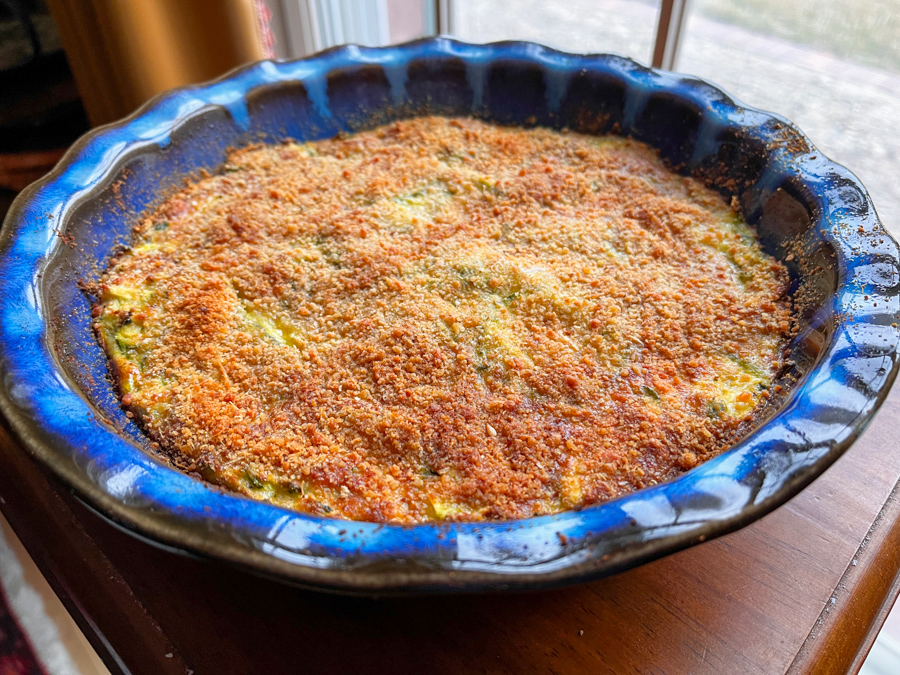
Bake in a 375F until set and golden on top, 25 to 30 minutes. Allow it to cool for at least 15 minutes before serving. Serve warm or at room temperature.
ENJOY!
to print the recipe, click here
Comments: This is the type of recipe that makes the cook a bit nervous. As you put it together, it seems impossible to work. But trust me, it does. Normally recipes using zucchini tell you to squeeze the liquid, but this one does not. The mixture of grated zucchini with the slices is what makes the whole texture perfect. Think about a baked frittata, but without that intense eggy flavor that some people object to. I used almond flour in place of bread crumbs in the body of the recipe, but added some bread crumbs to the topping. You can just use almond flour instead for an even lower in carb concoction.
It is very important to let the torta rest for at least 15 minutes before slicing. I actually like to leave it for about half an hour and enjoy it barely warm. That’s when everything sets nicely. I don’t know why this delicious side dish left our rotation, but it is so simple and so tasty, I felt it was worth re-blogging, with the minor modifications I introduced in this version. I hope you give it a try… Next on my plans? To make a mixture of carrots and zucchini. Stay tuned!


ONE YEAR AGO: Woodland Creatures Cookies
TWO YEARS AGO: Incredibly Simple… Crunchy Asparagus
THREE YEARS AGO: A Sourdough Quartet
FOUR YEARS AGO: When bad things happen to good people
FIVE YEARS AGO: Sweet Potato “Hummus”
SIX YEARS AGO: Cauliflower Crust Pizza
SEVEN YEARS AGO: Silky Rutabaga Puree
EIGHT YEARS AGO: Bon Bon Chicken: Light and Spectacular
NINE YEARS AGO: Red Wine Sourdough Bread with Cranberries
TEN YEARS AGO: Award-Winning Sourdough Baguettes
ELEVEN YEARS AGO: Country Rye (Tartine)
TWELVE YEARS AGO: Penne a la Vechia Bettola