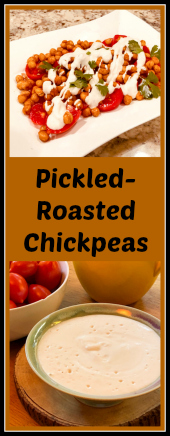
PICKLED-ROASTED CHICKPEAS WITH CASHEW CREAM

I share with you today another slightly unusual side dish, or main dish if you add to it a nice helping of couscous. It starts with chickpeas simmered in white vinegar, then roasted with smoked paprika. After pairing them with juicy tomatoes, the whole thing was dressed with the number one choice for vegans when they crave sauces like bechamel: cashew cream.  It has the advantage of being very low in saturated fat, so those who are watching their intake of all things butter and cheese, can indulge without worries.

PICKLED-ROASTED CHICKPEAS WITH CASHEW CREAM
(from the Bewitching Kitchen)

1 (15-ounce) can chickpeas, drained and rinsed
2 cups white vinegar
drizzle of olive oil
1/2 tsp salt or to taste
1/2 tsp smoked paprika or to taste
fresh tomatoes, cut into slices or small pieces
cilantro leaves (optional)

for the cashew cream:
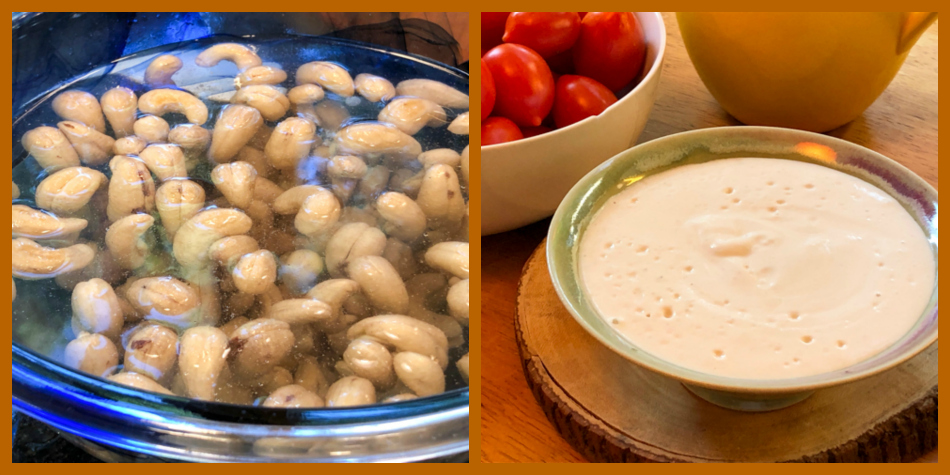
1 cup cashews, soaked for 4 hours to overnight in a large volume of cold water
2 tablespoons lemon juice
salt to taste
1 cup water

Heat oven to 420F.

Bring the vinegar with a pinch of salt to a boil in a sauce pan. Immediately add the chickpeas, boil for 30 seconds, close the pan and remove from heat. Leave the chickpeas in the hot vinegar for 20 minutes. Drain.

Place the drained chickpeas in a roasting pan covered with aluminum foil. Drizzle the olive oil, season with salt and smoked paprika, rubbing them gently to coat well. Roast for about 25 minutes, until dark golden.  Remove them to a paper towel lined plate to cool.

Make the cashew cream. Place the drained cashews with lemon juice and salt into a Vitamix type blender, blend until almost smooth (it won’t turn completely smooth until you add water). Add the water slowly with the motor running. Add as much water as you like to achieve a smooth, creamy consistency.

Assemble the dish: place tomatoes on a serving platter, season lightly with salt, pepper, and a drizzle of olive oil. Spoon the roasted, cold chickpeas on top, and drizzle with the cashew cream. Decorate with cilantro leaves if desired.

ENJOY!

to print the recipe, click here
Comments: If you love pickled things, you will enjoy this take on chickpeas. If you are not too fond of the sharp taste of vinegar, simply skip that step and roast the chickpeas without simmering first. They will still be delicious, and complement the tomatoes well.

The cashew cream. This is a simpler version of one I made a few years ago.  I actually made a double batch and enjoyed it over smoked chicken fajitas, drizzled over roasted butternut squash, and replacing cheese on eggplant Parmigiana. The secret is to soak the cashews for several hours. You can speed up the process by using boiling water and letting them sit for 30 minutes or so, but I find that the taste is brighter and the texture better if you take the longer route. Next on my list is to use cashews as a base for “buttercream” in macaron filling. Perhaps with matcha flavor. Stay tuned.
ONE YEAR AGO: Twice-Baked Goat Cheese Souffle

TWO YEARS AGO: A Star from England in the Bewitching Kitchen

THREE YEARS AGO: Hommage to the Sun


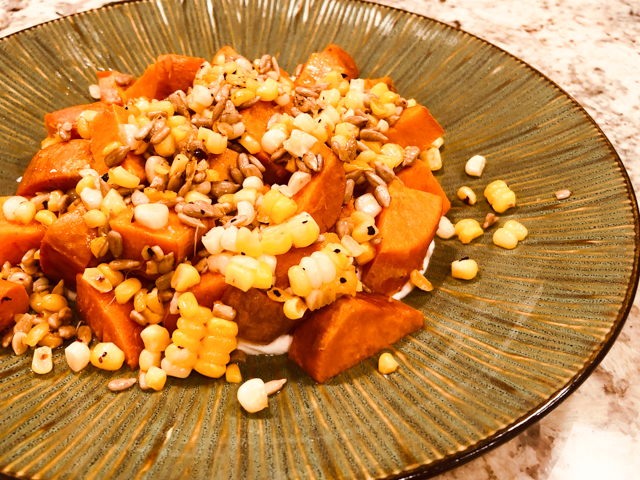
ROASTED SWEET POTATO WITH CORN AND SUNFLOWER SEEDS

A few things make this recipe a bit unusual. First, the sweet potato is roasted at a low temperature, 300F. Second, it is served either barely warm or at room temperature over fridge-cold lemony yogurt. And finally, it gets crowned with a hot and spicy mixture of sauteed sunflower seeds and corn. I know it all sounds a bit crazy, but when the husband praised this side dish more than he did the bison chili that went with it, I knew I had hit gold.

ROASTED SWEET POTATO WITH CORN AND SUNFLOWER SEEDS
(adapted from Start Simple)

3 medium sweet potatoes
olive oil and salt to season potatoes
1/2 cup yogurt
1 tablespoon lemon juice
1 tsp harissa paste
Urfa pepper (or another ground chile pepper you like)
salt to taste
2 tablespoons grape seed oil
kernels of 1 ear of corn (raw or cooked)
1/4 cup sunflowers seeds, raw
drizzle of toasted sesame oil

Turn the oven to 300F. Rub the sweet potatoes with a little olive oil, season with salt. Roast for 60 to 75 minutes, until soft (it depends on the size of the potatoes). Let the potatoes cool to room temperature, the flesh will sink and the skin will peel off super easily.  Cube the flesh in the size you like. Reserve.

Mix the yogurt with lemon juice and harissa, season lightly with salt. Place in the dish you will use to serve the potatoes.  Add the cubed potatoes on top. Just before your meal, add grape seed oil to a non-stick skillet, when it gets nice and hot add the corn kernels, season with Urfa pepper and salt. Sautee until fragrant, add the sunflower seeds and cook until they start to get golden.  Immediately add the hot mixture over the sweet potatoes, and take to the table.

ENJOY!

to print the recipe, click here

Comments: There are two ways to make sweet potatoes truly special, sous-vide and low-temperature roasting. The latter is the easiest, and if you’ve never tried them prepared this way, you are in for a treat. It is really a lot better than the more common method of blasting it at higher temperatures, either whole or cut in pieces. Roasted, they can sit in the fridge waiting for you, perfect texture, to be used in all sorts of preparations.

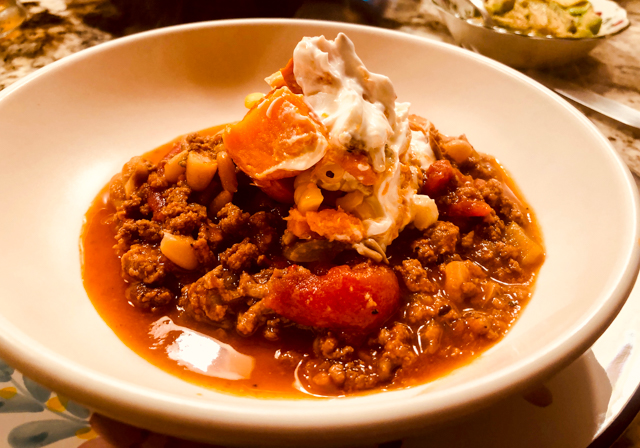
We enjoyed it over bison chili (made with this recipe, but using ground bison instead of ground turkey). The yogurt tames that heat from the chili, acts as a refreshing breeze on a warm summer night. A delicious dinner, that will be on our menu for sure in the near future.  The husband already requested it…

ONE YEAR AGO: Five-Stranded Braided Bread

TWO YEARS AGO: Ptichye Moloko, a Russian Dessert

THREE YEARS AGO: Cheesy Low-Carb Zucchini Tarts

FOUR YEARS AGO: Blogging Hiatus

FIVE YEARS AGO: Apricots, Three Ways

SIX YEARS AGO: Up Close and Personal with Kale

SEVEN YEARS AGO: Black Berry Cherry Sorbet

EIGHT YEARS AGO: Asparagus Pesto

NINE YEARS AGO: Chocolate and Chestnut Terrine

TEN YEARS AGO: Under the spell of lemongrass

ELEVEN YEARS AGO: Greens + Grapefruit + Shrimp = Great Salad!


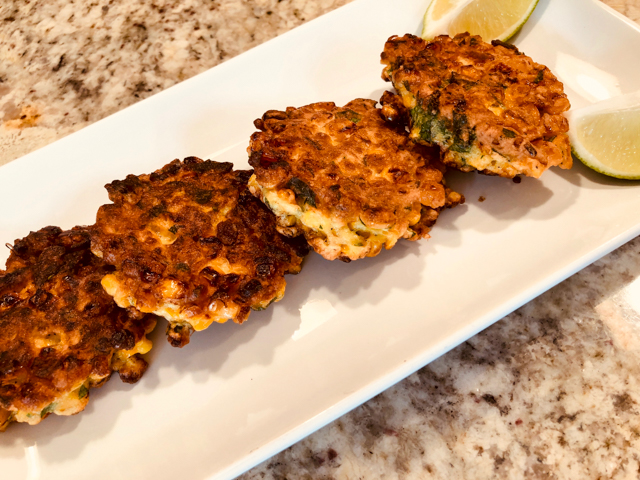
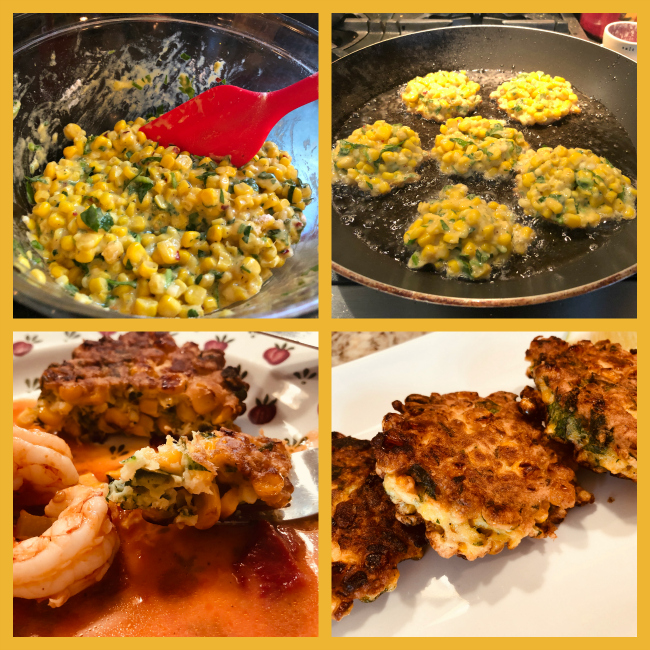
CORN FRITTERS

I have deep aversion for frying things, and since getting the air-fryer I almost never do it on top of the stove. This recipe appealed to me, and I could not quite see it working in the air-fryer, so I took a deep breath and embraced the job.  Absolutely worth it. And since it is shallow frying, it was not that bad at all.  It all starts with a can of corn. Yes, corn from a can. Trust me, it works beautifully…

CORN FRITTERS
(adapted from Tin Can Magic)

1 can (340g) corn in water, drained
about 1/4 cup parsley leaves, minced
zest of 1 lemon
3 tablespoons all-purpose flour
2 eggs
½ teaspoon salt
grapeseed oil for shallow frying

Stir together the corn, minced parsley, flour, eggs, zest and salt in a large mixing bowl. Reserve.

Heat a wide, non-stick frying pan over high heat, then pour in enough oil to coat the pan. When the oil is almost starting to smoke,  spoon the corn mixture into the pan, leaving enough space between the portions. You will have enough for about 8 fritters, so eye-ball the amounts.

Allow the fritters to cook on one side for 3–4 minutes, then carefully flip and fry for another 4 minutes. Transfer the fritters to a plate lined with paper towels, and keep warm in a low oven as you fry the second batch.

ENJOY!

to print the recipe, click here

Comments: This is one of those recipes that I thought could have a high chance of failure. Most batters for fritters get some type of leavening agent for extra lift, this one did not. I was pleasantly surprised by the resulting texture. My only advice is to leave it alone as you pour the portions on the hot oil. You need that beautiful brown crust to form, that will set the cake and allow the interior to get all creamy. Could you use fresh corn? I am sure you could, but the beauty of this recipe is the simplicity. Plus, using canned corn makes this simple recipe easy to make the whole year.  We had it with shrimp in a spice tomato-based broth. A very tasty dinner.

ONE YEAR AGO: Minnie Macarons

TWO YEARS AGO: Air-Fried Mexican Meatloaf

THREE YEARS AGO: Mimi’s Sticky Chicken, a Call from my Past

FOUR YEARS AGO: Perfect Soy-Grilled Steak

FIVE YEARS AGO: The Devil’s Bread

SIX YEARS AGO: Heart of Palm Salad Skewers

SEVEN YEARS AGO: Potluck Frittata and Lavoisier

EIGHT YEARS AGO: Home-made Corn Tortillas

NINE YEARS AGO: Whole-Wheat Spaghetti with Peanut Sauce

TEN YEARS AGO: Brigadeiros: A Brazilian Party!

ELEVEN YEARS AGO: Lemony Asparagus


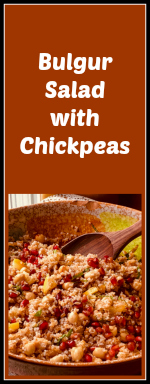
BULGUR AND CHICKPEA SALAD WITH POMEGRANATE SEEDS

I’ve been on a bulgur kick lately. It is such a nice grain, cooks in less than 10 minutes and you can enjoy it warm or cold. In the version I share today, it showed up as salad, with a very simple lemony dressing with fresh mint from our own garden. Disclaimer: I take zero credit for any fruits, legumes or herbs grown in our backyard. The husband is the gardener in charge, and for that I am forever grateful. I am a certified mint-killer.

BULGUR AND CHICKPEA SALAD WITH POMEGRANATE SEEDS
(from the Bewitching Kitchen)

1 cup bulgur
1/2 tsp salt
1 can chickpeas, drained and rinsed
1/4 tsp paprika
2 Tablespoons olive oil
juice of 1 lemon
fresh mint leaves
fresh pomegranate seeds
1/2 preserved lemon, cut in small pieces (optional)
salt and pepper for final seasoning

Cook the bulgur in a large volume of salted water for 8 to 10 minutes. Drain and rinse briefly with cold water. Reserve.

Place the drained chickpeas in a microwave-safe bowl, sprinkle some paprika and microwave for 15 seconds or so. Let them cool briefly.  Add the chickpeas to the bulgur in a serving bowl. Add mint leaves to taste, drizzle olive oil and lemon juice, mix everything well. Finally add pieces of preserved lemons (if using) and pomegranate seeds. Adjust seasoning, and serve.

ENJOY!

to print the recipe, click here

Comments: The little step of microwaving the chickpeas for just a few seconds with a touch of spice is absolutely worth it. I read about it a long time ago and now I just incorporate in every recipe that calls for canned chickpeas. It brightens up the flavor, and since it is such a short “cooking” time, it does not affect the texture. It exorcises  that “tinned” feel out of them.

I added preserved lemons because I made some from scratch back in April and this salad was a perfect opportunity to bring them to play. You can omit or add orange segments together with the pomegranate seeds. Leftovers keep quite well, in fact I think the salad was better at lunch next day. I added a squeeze of fresh lemon juice, and a touch of additional salt. This will be in our regular rotation, I am sure.

ONE YEAR AGO: Purple Star Macarons

TWO YEAR AGO: Smoked Salmon, Fait Maison

THREE YEARS AGO: Kouign-Amann, Fighting Fire with Fire

FOUR YEARS AGO: In My Kitchen, Yin and Yang

FIVE YEARS AGO: Chocolate Toffee Banana Bread

SIX YEARS AGO: In My Kitchen, June 2014

SEVEN YEARS AGO:  Strawberry Frozen Yogurt

EIGHT YEARS AGO: Baked Coconut and “The Brazilian Kitchen”

NINE YEARS AGO: Honey-Glazed Chicken Legs

TEN YEARS AGO: French-Style Rolls


CAULIFLOWER FOR COMPANY? YES, PLEASE!

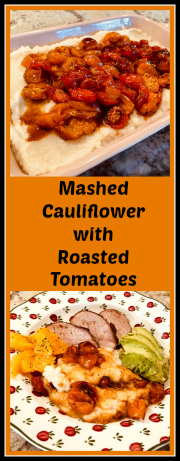
Let’s imagine for a moment that dinner parties are still “a thing.”  Those days feel like a lifetime away, but I know they will come back at some point. When? I have no idea. But when they do, allow me to offer a recipe for mashed cauliflower as your side dish. I promise you, this one will please every single one of your guests, even those who twist the nose at anything low-carb. The secret is topping the mash with roasted grape tomatoes (you can use yellow or a mixture).  It turns into a luscious, satisfying, flavorful side dish that will go well with pretty much any protein you are featuring as the star of your show.

MASHED CAULIFLOWER WITH ROASTED GRAPE TOMATOES
(from the Bewitching Kitchen)

1 large head of cauliflower
squirt of lemon juice
salt to taste
1/3 cup yogurt (low-fat is ok)
drizzle of olive oil
1 Tablespoon nutritional yeast (or grated parmigiano-reggiano to taste)
smoked paprika to taste
grape tomatoes (yellow or red)
1 Tablespoon olive oil
drizzle of balsamic vinegar
salt and pepper

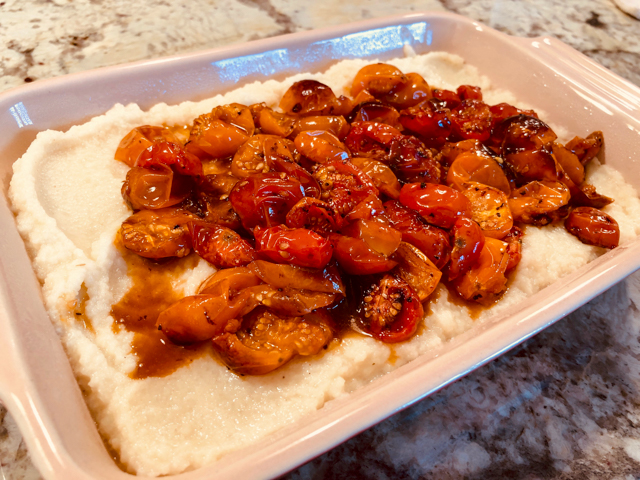
Start by roasting the tomatoes. Place them as a single layer on a baking dish covered with aluminum foil. Drizzle the olive oil, balsamic vinegar, and season with salt and pepper. Roast at 400 F until they start to get golden brown and release some juices. Reserve.

Cut the cauliflower in florets and cook in slightly salted boiling water with a bit of lemon juice until fork-tender.  Add to a food processor (ok if a bit of water goes with it), and add the yogurt, nutritional yeast, olive oil, and spices. Process until smooth, taste and adjust seasoning, or even a bit more lemon juice if you like. Transfer to a baking dish. Top with the roasted tomatoes, but don’t add too much of the tomato liquid, just a little bit.

Place in the 400 F oven for about 10 minutes to warm everything together. If the mashed cauliflower is looking more on the dry side, you can warm up covered with foil. If it seems a bit loose, warm it with no foil on top.

Serve right away with the main dish of your choice.

ENJOY!

to print the recipe, click here

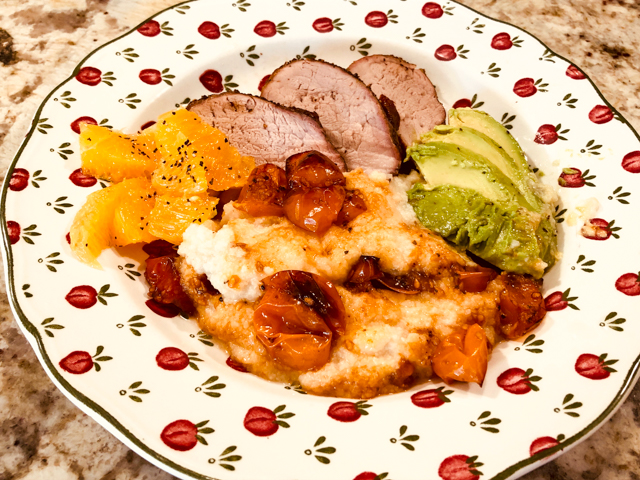
Comments: This was one delicious meal! The pork tenderloin is very similar to the one I shared recently, made in our smoker, with a bit less pepper. A little avocado and orange on the side, and we were ready to dig in. Felt like a dinner party…

ONE YEAR AGO: Coconut and Lime Macarons

TWO YEAR AGO: Flank Steak Carnitas

THREE YEARS AGO: Sesame and Poppy Seed Sourdough

FOUR YEARS AGO: Pecan-Crusted Chicken from Southern at Heart

FIVE YEARS AGO: Lamb Shanks en Papillote with Cauliflower-Celeriac Purée

SIX YEARS AGO: Chestnut Brownies and a Blog Award!

SEVEN YEARS AGO: Quinoa with Cider-Glazed Carrots

EIGHT YEARS AGO: Celebrate Wednesday: Heirloom Tomatoes Steal the Show

NINE YEARS AGO: Pain de Provence

TEN YEARS AGO: Golspie Loaf, from the Scottish Highlands