MIMI’S STICKY CHICKEN, A CALL FROM MY PAST

Paleo-friendly, low-carb & delicious!

Many years ago I used to visit a cooking forum that is long gone. One recipe was a big hit with many of the members: Mimi’s Sticky Chicken. I admit the name is not very sexy, but once you’d read the many stellar reviews, you’d be inclined to disregard the sticky issue and give it a try. Over the years, that exact recipe has been published in websites everywhere, credit not always given to the author. So, without further ado, here you have the original link. I tried to find out Mimi’s whereabouts, but my search skills returned nothing.  As you can see in the link, she created this recipe in the early 80’s, and asked for full credit whenever someone talked about it. It’s only fair.  I used to make it quite often when I was dating Phil and during the early years of our marriage, as the kids absolutely loved it. For some reason, I forgot all about it. It’s been definitely more than a decade since I last had it on our table. But to compensate, I made it twice in the last month. HA!

MIMI’S STICKY CHICKEN
(modified from the original version found here)

2 teaspoons salt
1 teaspoon paprika
1/2 teaspoon cayenne pepper
1/2 teaspoon onion powder
1/2 teaspoon thyme
1/2 teaspoon black pepper
1/4 teaspoon garlic powder
1 whole roasting chicken, about 3 pounds
1 shallot, cut in half
1 lemon, cut in quarters

Combine all spices  in a small bowl. Dry chicken very well, rub the spice mixture over skin and sprinkle a little inside the cavity.  Place in a bag or in a bowl, covered with plastic wrap, and refrigerate overnight.

Heat the oven to 250F. It is not a typo. It is a very low oven.  When ready to roast, stuff the cavity of the chicken with the shallots and lemon. Place it breast side down in a roasting pan (I like to use a small rack to keep it elevated, spraying the rack with olive oil to prevent the skin from sticking to it).

Cook for about 5 hours, or until the internal temperature reaches 155 F. Baste occasionally after the first two hours, with the liquid that starts to accumulate in the roasting pan.

If you like to crisp up the skin, carve the chicken in pieces and place under the broiler briefly. It will falling apart, so handle it gently.

ENJOY!

to print the recipe, click here
Comments: Amazing how something we loved so much could end up neglected for years. Two things I’d like to bring up: first, if you don’t have time to refrigerate the bird overnight with the spice mixture, don’t worry, just go ahead with it right away. Second, if you are not around to baste the chicken, it won’t be a serious drawback. When ready to serve, baste a little with the roasting liquid, and go for that brief encounter with the broiler. On your first time making this recipe,  it would be nice to check the temperature and see if after 4 hours the meat is already approaching 155F. If it is, don’t leave it all the way to the five-hour mark. Once you get to know how your oven behaves, you can trust the timing a bit more. Make sure to always roast a chicken of similar size.

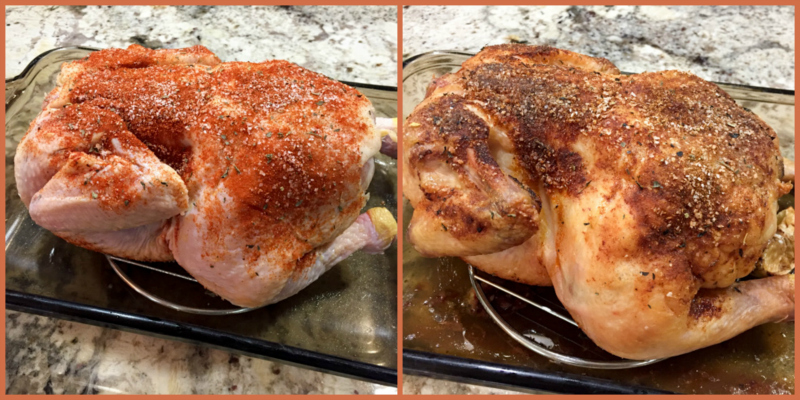
As I mentioned before, once the meat is cooked, it will be falling apart. Note in the picture below how the bone broke through the skin.


I also like to squeeze the roasted lemon all over the chicken right before serving, and sometimes will grab a fresh one to make sure to get that extra bite of acidity that goes so well with it.
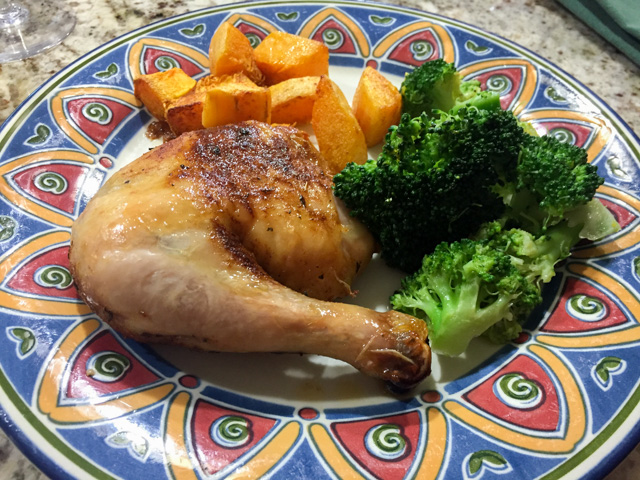

Dinner is served: Mimi’s Sticky Chicken,
Pan-Steamed Broccoli, and Roasted Butternut Squash… 


Add to FacebookAdd to DiggAdd to Del.icio.usAdd to StumbleuponAdd to RedditAdd to BlinklistAdd to TwitterAdd to TechnoratiAdd to Yahoo BuzzAdd to Newsvine

ONE YEAR AGO: Perfect Soy-Grilled Steak

TWO YEARS AGO: The Devil’s Bread

THREE YEARS AGO: Heart of Palm Salad Skewers

FOUR YEARS AGO: Potluck Frittata and Lavoisier

FIVE YEARS AGO: Home-made Corn Tortillas

SIX YEARS AGO: Whole-Wheat Spaghetti with Peanut Sauce

SEVEN YEARS AGO: Brigadeiros: A Brazilian Party!

EIGHT YEARS AGO: Lemony Asparagus


HONEY GLAZED SRIRACHA MEATBALLS

This one is for all the Sriracha lovers out there. Of all the hot sauces, Sriracha is my favorite because it’s not just about heat, there’s a lot of complex flavor packed in too. I always have a bottle in the fridge, and will squirt a little bit over turkey burgers, regular burgers, sweet potato fries, meatballs. Not too much, just that little touch that shakes the senses up. When I saw this recipe a while ago on Eat Yourself Skinny, I tried it almost immediately, with a few changes to suit my preferences. Phil is not as wild about Sriracha as I am, so I did the honorable thing to do, and wolfed them down by myself for lunch. No, not in a single day. I am crazy for Sriracha but portion control comes first…

HONEY GLAZED SRIRACHA MEATBALLS
(adapted from Eat Yourself Skinny)

for the meatballs:
2 lb. ground chicken (or turkey)
1/4 cup almond flour
1 egg
1 tsp. salt
½ tsp. black pepper
a squirt of lemon juice

for the sauce:
¼ cup Sriracha
3 Tbsp soy sauce
3 Tbsp rice vinegar
3 Tbsp honey
1 Tbsp grated fresh ginger
½ tsp. toasted sesame oil
minced chives for decoration (optional)

Heat oven to 375 degrees F.

In a large bowl, mix together ground chicken, almond flour, egg, salt and pepper until well combined. Shape mixture into  balls and place spaced apart on a baking sheet lightly sprayed with cooking spray or covered with parchment paper.

Bake meatballs for 20 to 25 minutes, or until browned and cooked through.

While the meatballs are baking, combine all the ingredients for the sauce in a small saucepan and bring to a boil over medium heat, whisking continuously. Reduce heat and simmer for 5 minutes, then toss with the meatballs.

Sprinkle with minced chives, if so desired.

ENJOY!

to print the recipe, click here

Comments: These turned out hot enough for me, but you can always add some cayenne pepper or increase the amount of Sriracha if feeling particularly brave.  I love adding a dollop of yogurt (seasoned with salt and za’tar) to these meatballs, because I find the contrast of peppery heat with cold, creamy yogurt very pleasing. The best advice to making good meatballs is to avoid handling the mixture too much, the looser the better. And don’t cook them to death. Dried meatballs are simply no bueno.  I never fry them anymore, prefer to cook them in the oven, but for this recipe I made the sauce in a skillet and simply added the cooked meatballs to the sauce for a nice glaze. Winner, my friends, winner!

Pinning is sharing, sharing is caring! 

Add to FacebookAdd to DiggAdd to Del.icio.usAdd to StumbleuponAdd to RedditAdd to BlinklistAdd to TwitterAdd to TechnoratiAdd to Yahoo BuzzAdd to Newsvine

ONE YEAR AGO: Slow-cooker Braised Lamb Shanks

TWO YEARS AGO: How about some coffee with your steak?

THREE YEARS AGO: Celebrate Wednesday with a Spiral Kick

FOUR YEARS AGO: Carrot Flan with Greens and Lemon Vinaigrette

FIVE YEARS AGO: Granola Bars

SIX YEARS AGO:  Awesome Broccolini

SEVEN YEARS AGO:  A Twist on Pesto

EIGHT YEARS AGO: Ciabatta: Judging a bread by its holes

SaveSave

SaveSave

SaveSave

SaveSave

SaveSave

SaveSave

SaveSave

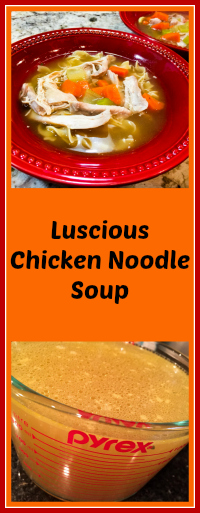
LUSCIOUS CHICKEN NOODLE SOUP

Perhaps you would think that the time for blogging about soup is pretty much over. But two facts conspired to bring it to our table. First, Phil got a little cold, and second, the weather turned pretty nasty. Forecast for Saturday and Sunday: chilly and full-time rain. Great combination for a rotten weekend. I will disclose to you that we do resort to Campbell’s canned soup sometimes. Yes, it’s not that great, but whenever we feel like we might be getting a bit sick, we buy a couple of cans and call them dinner. I squirt a little lemon juice over my bowl, freshly ground black pepper, and it does a reasonably ok job. But, this time I decided to take this classic soup medicine into my own hands. I would start by making my own chicken broth and use that to cook chicken thighs until  fork-tender. I won’t be humble. This was one spectacular chicken noodle soup. Even if for my bowl I used zoodles instead.

CHICKEN NOODLE SOUP
(from the Bewitching Kitchen)

A pressure cooker is preferred, but not mandatory

for the chicken stock:
2 pounds of chicken wings
2 carrots, cut in chunks
1 celery rib, cub in chunks
1/2 large onion
10 whole peppercorns
1 piece of ginger, about 1/2 inch
1 piece of kombu, about 3 inches long
1 bay leaf
7 cups of water

for the soup:
6 chicken thighs, skinless, with bone-in
4 medium carrots, diced
2 ribs celery, diced
chicken broth, as much as needed
salt and pepper to taste
fresh lemon juice to taste
cooked noodles or zoodles

Start by making the chicken broth. Mix all ingredients in a large stockpot or pressure cooker. If using a pressure cooker, cook for 40 minutes under pressure, release steam, open the pan, strain the stock. If using a regular pan, simmer for at least one hour, preferable an hour and a half.

Return about 2 cups of broth and 1 cup of water to the pressure cooker, add the chicken pieces seasoned with salt and pepper. Cook under pressure for 20 minutes. Alternatively, simmer in a regular pan until the meat is very tender. Remove the pieces of chicken to a bowl, allow it to cool until you can handle it.

As the chicken cools, return the pressure cooker to the stove, add the carrots, celery, cook under pressure for 5 minutes, or in a regular pan until the veggies are tender. The base of the soup is now ready.  Shred the chicken with a fork or your fingers. Reserve.

When it’s time to enjoy the soup, cook some noodles (or zoodles) in boiling salted water.  Re-warm the soup by mixing the soup base, the reserved chicken meat, and any reserved stock until the consistency is the way you like. Squirt fresh lemon juice, adjust seasoning if needed with salt and pepper. Place some cooked noodles in your serving bowl, ladle the soup over, and…

ENJOY!

to print the recipe, click here

Comments: I got the inspiration for this soup from a couple of sources. For instance, the use of kombu in the chicken stock came from the book The Longevity Kitchen. It is an interesting ingredient, one that I advise you to use just like you would fish sauce. Don’t sniff it. Big turn off. But it does a great job, not only nutritionally speaking, but in terms of flavor. The stock made with chicken wings has been my method of choice for years now, after a basic recipe found in one of my favorite cookbooks  Simple to Spectacular. I pumped it up by using the pressure cooker, and it does a great job extracting all flavors and goodies from the wings. In the composite photo you can see the color of the stock (upper left), no photoshopping was involved.

You will notice that I used the pressure cooker three times in a row, but you can do it all in a regular pan. Make sure to allow the wings to simmer for one full hour at least, and the chicken thighs until very tender. I’ve seen recipes recommending a 10 minute simmer, and I have no idea what those people are talking about. You would have to pretty much wrestle the meat off the bone with such a quick cooking.

All in all, this was so good that I had to blog right away. Contrary to what normally happens, you are reading on Wednesday a recipe we enjoyed only three days earlier. Also contrary to my principles, with this post I line two articles in a row involving chicken. Oh, well. That shows you how much I enjoyed this recipe, I simply could not wait to share.  I hope you’ll give it a try if you are headed to winter where you live, or if someone is feeling lousy with a cold. Heck, try it if you simply love chicken noodle soup. No other reason needed!

Add to FacebookAdd to DiggAdd to Del.icio.usAdd to StumbleuponAdd to RedditAdd to BlinklistAdd to TwitterAdd to TechnoratiAdd to Yahoo BuzzAdd to Newsvine

ONE YEAR AGO: Orange Mini-Cakes and a Bonus Recipe

TWO YEARS AGO: In My Kitchen, May 2015

THREE YEARS AGO: Chestnut Brownies and a Blog Award!

FOUR YEARS AGO: Quinoa with Cider-Glazed Carrots

FIVE YEARS AGO: Celebrate Wednesday: Heirloom Tomatoes Steal the Show

SIX YEARS AGO: Pain de Provence

SEVEN YEARS AGO: Golspie Loaf, from the Scottish Highlands


NIGELLA LAWSON IN THE BEWITCHING KITCHEN

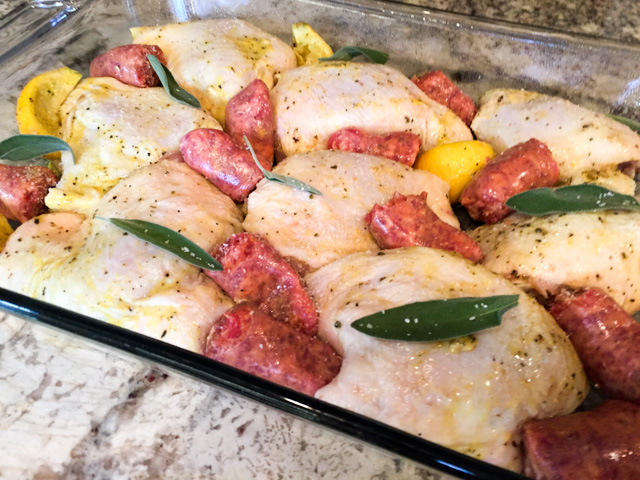
Did I get your attention? Well, unfortunately she was not here in person. I would love to have her over for dinner, but this time it was just virtually through one of her tasty recipes.  Nigella is clearly a person who is happy in her own skin,  someone who enjoys life to the fullest. Watching her cooking shows brings me that “I’ll have what she’s having” feeling… And, to make things even better, her recipes are never too fussy.  I have several of her cookbooks, but for some reason forgot all about them for a long time. The other day, talking to my friend Denise, she reminded me of one of Nigella’s recipes, a favorite of hers. A chicken and sausage one pan kind of deal. I immediately remembered making it years ago, before my blogging life started. Got this absurd craving for it, made it next day (!!!), fell in love with it all over again.  Sent a picture to Denise, and that’s when we realized we were talking about two different recipes.  Obviously, I now have another one to try. They both join poultry with sausage, but one takes Italian sausage, the other chorizo. One has potatoes, the other doesn’t. And a few more departures on the overall flavor. Anyway, I sense a Nigella-phase in our kitchen.  Yeah, I must have what she’s having…

ROAST CHICKEN THIGHS WITH SAGE AND SAUSAGE
(modified from Nigella Lawson)

1 medium shallot
1/3 cup olive oil
2 teaspoons English mustard
1 tablespoon dried sage
Freshly ground black pepper
1 tablespoon Worcestershire sauce
2 lemons
8 chicken thighs, bone and skin in
6 Italian sausages
salt to taste
2 tablespoons fresh sage leaves

Peel and cut the shallot into four pieces, and put into a freezer bag with the oil, mustard, dried sage, a good grinding of pepper, and Worcestershire sauce. Cut lemons in half, squeeze juice into bag, and then cut the halves into eighths and add them. Squeeze everything around to mix, then add the chicken pieces. Leave to marinade in the refrigerator for a few hours (overnight is perfect).

Heat oven to 325 degrees F. Allow the chicken to come to room temperature in its marinade. Arrange the chicken pieces in a roasting tin skin side up with the marinade, including all the bits and pieces, and tuck the sausages around them. Season with salt. Sprinkle the fresh sage leaves over the chicken and sausages and then put the pan into the oven, covered with aluminum foil for  to cook for 1 hour. Remove the foil, increase heat to 425 F and keep roasting until the skin turns golden brown and starts to crisp up.

ENJOY!

to print the recipe, click here

Comments: This is such an easy recipe to put together! It is originally from her cookbook Feast, but she featured the recipe in one of her shows back in the good old times of FoodTV Network. I modified it quite a bit not so much in terms of ingredients, but cooking method, because as I’ve mentioned a few times in the past, I think nothing beats the texture of chicken that starts cooking low and slow. For weeknights this would be a bit tricky, this is the type of cooking I reserve for weekends.

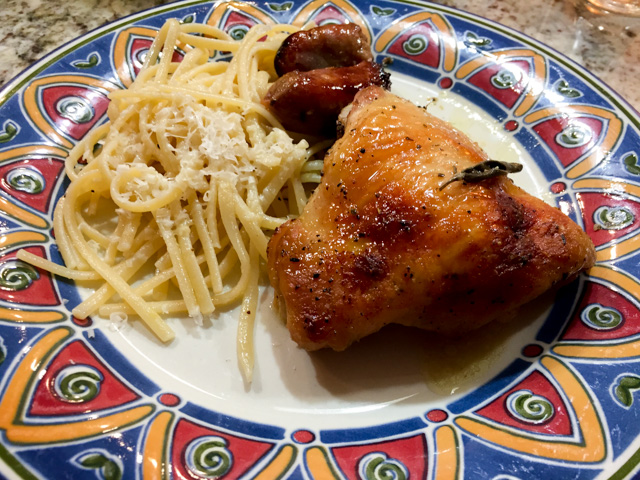
Phil loved this so much that he started getting nervous about the possibility of not enjoying it again for another 8 years. He kept dropping hints:  ” I would not mind having this chicken every couple of weeks… Actually, you “could” make it weekly, you know?”  So there you have it, it’s really a wonderful way to enjoy chicken, with the spicy tasty bits of sausage, and the flavors of sage and lemon. A keeper.

Dinner is served!
A little pasta with olive oil and grated cheese was all we needed…

Add to FacebookAdd to DiggAdd to Del.icio.usAdd to StumbleuponAdd to RedditAdd to BlinklistAdd to TwitterAdd to TechnoratiAdd to Yahoo BuzzAdd to Newsvine

ONE YEAR AGO: Walnut-Raisin Bran Muffins

TWO YEARS AGO: Gingersnaps with White Chocolate Chips

THREE YEARS AGO: Turkey Chili with Almond Butter

FOUR YEARS AGO: Secret Recipe Club: Leek and Cheese Tart

FIVE YEARS AGO: Secret Recipe Club; Triple Chocolate Brownies

SIX YEARS AGO: Shaved Asparagus Salad

SEVEN YEARS AGO: Indonesian Ginger Chicken

Save

Save

Save

Save

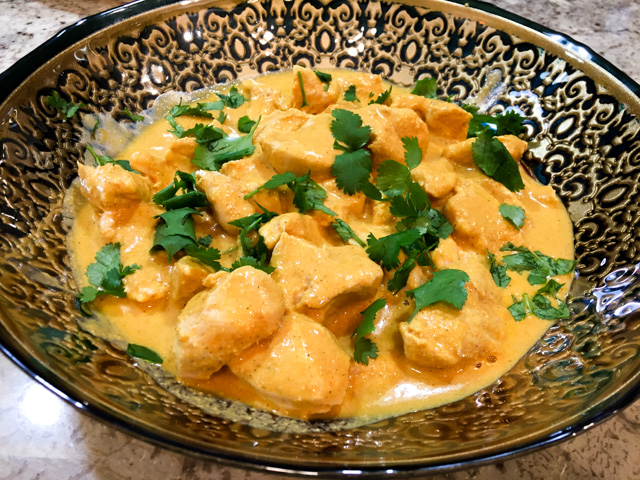
CHICKEN KORMA-ISH

Chicken Korma is a classic Indian recipe, but due to the considerable amount of liberties I took with this classic, I must be upfront about it in the title, to avoid the Food Police coming after me.  For starters, I cooked it sous-vide. I know, what was I thinking?  But I tell you, the perfect texture is worth it. Perhaps you are familiar with the concept of velveting meat before stir-frying? It is widely used in Chinese cooking and does wonders for chicken breast, pork tenderloin, or shrimp, typical types of protein that will often dry up when submitted to the intense heat of the wok. Chicken Korma is not a stir-fry, but the improvement in texture offered by the gentle cooking in the water-bath made me think of velveting. To add insult to injury, I omitted several spices that make Korma a Korma. There you go. Rebel. My middle name. Inspiration came from this recipe at Anova Culinary, a great source for sous-vide cooking.

chicken-korma

SOUS-VIDE CHICKEN KORMA
(inspired by Anova Culinary)

2 tablespoons canola oil
1 shallot, cut into small dice
2 tablespoons tomato paste
1 tablespoon kosher salt
1 tablespoon minced fresh ginger
1 tablespoon garam masala
1 tablespoon Madras curry powder
1 teaspoon ground cinnamon
1 teaspoon ground turmeric
1 teaspoon freshly ground black pepper
1/3 cup heavy cream
1/3 cup Greek yogurt
1/3 cup cashews
2 tablespoons lemon juice
1 tablespoon honey
1 1/2 pounds boneless skinless chicken breasts, cut into 1/2-inch pieces
Fresh cilantro, for serving

Set the sous-vide to 150°F (65°C).

Heat the oil in a large non-stick skillet over medium heat. When the oil is shimmering, add the shallot and cook, stirring frequently, until softened and lightly browned, about 5 minutes. Add the tomato paste, salt, ginger, garam masala, curry powder, cinnamon, turmeric and pepper. Continue to cook, stirring constantly, until aromatic, about 2 minutes. Remove from the heat and let cool for 5 minutes.

Transfer the mixture to a food processor or blender. Add the cream, yogurt, cashews, lemon juice, and honey. Process until smooth, about 1 minute. Combine the pureed sauce with the chicken in a large zipper lock bag. Seal the bag using the water immersion technique and place in the water bath. Set the timer for 2 hours to 3 hours.

When the timer goes off, remove the bag from the water bath. Transfer the entire contents of the bag to a serving bowl and garnish with cilantro.

ENJOY!

to print the recipe, click here

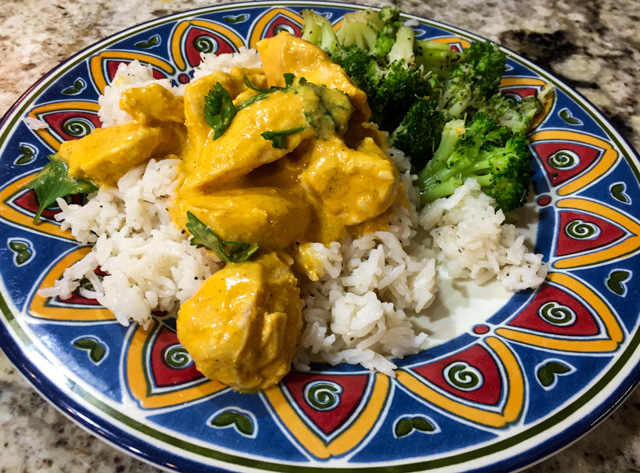
served

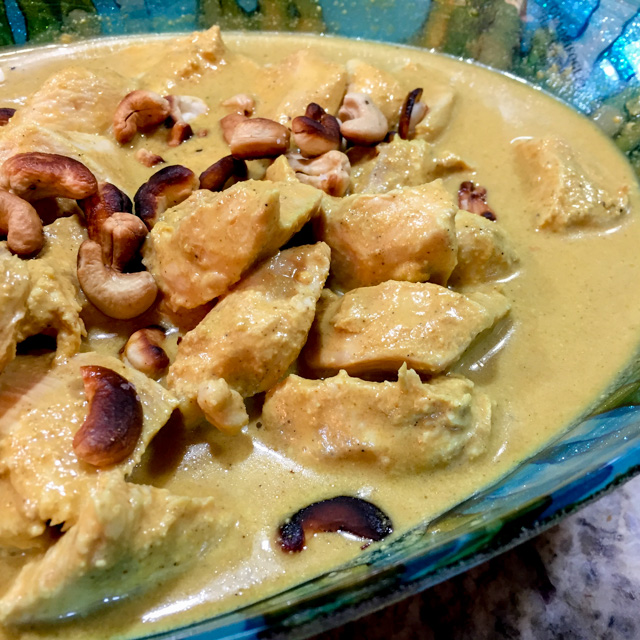
Comments: We adored this recipe. Period. If you look at the original, you’ll notice I substantially reduced the amount of heavy cream. It was plenty rich this way already, and it had enough sauce in the bag to form a luscious sauce. Of course, if you prefer the extra richness given by more cream, go for it.  I also used fewer spices.  On my second time around, instead of cilantro I sautéed a few cashews until golden brown and sprinkled all over when bringing it to the table. Phil liked the second version even better, I cannot decide.  One thing is certain; this will go in our regular rotation of recipes. If you don’t have sous-vide, simply use a regular pan, saute the chicken pieces (you could velvet them before for better texture), then add the ingredients for the sauce and simmer very gently until cooked through.  Yogurt has a tendency to separate, something that might be a bit more likely cooking on the stove top. Indeed, that is another benefit of sous-vide, with such a gentle heat, the yogurt mellows down gently, without putting up a fight and curdling right in front of your eyes…

secondSecond time around… double cashews, ground in the sauce,
and sautéed for serving…


chicken-korma-from-bewitching-kitchen

Add to FacebookAdd to DiggAdd to Del.icio.usAdd to StumbleuponAdd to RedditAdd to BlinklistAdd to TwitterAdd to TechnoratiAdd to Yahoo BuzzAdd to Newsvine

ONE YEAR AGO: Sunday Gravy with Braciole

TWO YEARS AGO: In My Kitchen, February 2015

THREE YEARS AGO: Avocado and Orange Salad with Charred Jalapeno Dressing

FOUR YEARS AGO: Green Olive, Walnuts and Pomegranate Salad

FIVE YEARS AGO: Romanian Flatbreads

SIX YEARS AGO: Ziti with Artichokes and Meyer Lemon Sauce

SEVEN YEARS AGO: Blasted Broccoli, Stove-top version