TUSCAN GRILLED CHICKEN AND SAUSAGE SKEWERS

Talk about being slow to blog about stuff.  This recipe was made last August, so it will appeal a lot more now to the lucky folks who live in places such as Australia, New Zealand, Brazil, Argentina, are enjoying the best time of their lives, aka SUMMER!  I was slow to blog, but even slower to give it a try, as the recipe is from Fine Cooking, year 2006.  Eight years and a few months ago.

You will need to prepare in advance a delicious rosemary-infused olive oil, and there will be leftovers. I confess that this was probably the reason why I dragged my foot for so long before making this recipe. I am not big on preparing infused oils and sauces and dressings that can be used later. They sit in the fridge making me feel guilty as the days go by and their expiration date approaches.  Still this rosemary concoction would be great in a simple spaghetti aglio & olio or drizzled over your favorite pizza topping.  Very flavorful stuff, the smell as it simmers will make you wanna dance. Not a dancer? It will make you wanna sing. Not a singer either? I will settle for a smile. Make it a big one, though.
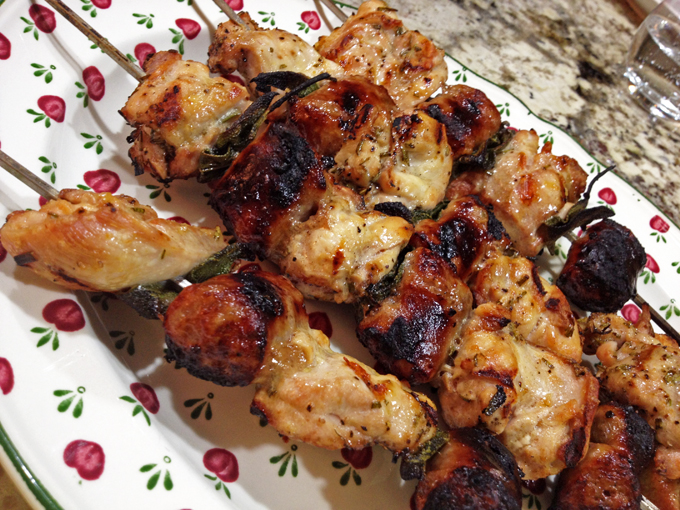
Tuscan Chicken Sausage Skewers

TUSCAN GRILLED CHICKEN AND SAUSAGE SKEWERS
(from Fine Cooking magazine, issue #80)

2-1/2 lb. boneless, skinless chicken thighs, trimmed of excess fat and cut in half
1/2 cup plus 2 Tbs. Rosemary-Garlic Oil (recipe follows)
1 tsp. chopped fresh rosemary
Kosher salt and freshly ground black pepper
1-1/2 lb. sweet Italian sausage links, cut into 2-inch pieces
24 large fresh sage leaves

Up to a day ahead and at least a couple of hours before serving, toss the chicken in a medium bowl with 2 Tbs. of the infused oil, the fresh rosemary, 1 tsp. kosher salt, and 1/2 tsp. pepper.

Heat a grill to medium heat. Divide the remaining 1/2 cup oil into two small bowls (one for grilling and one for serving, if desired). Alternately thread three pieces of sausage, three pieces of chicken, and four sage leaves onto each of six 12-inch metal skewers.

Grill the skewers, covered, until one side is browned and has good grill marks, about 4 min. Brush with some of the rosemary-garlic oil, flip, and cook the other side until it, too, has good grill marks, about 4 min. Brush with more oil and flip again. Continue cooking, flipping, and brushing with oil until the sausage and chicken are both cooked through, about 10 min. more.

Let cool for a couple of minutes and then arrange on a platter, and serve with additional oil, if so desired.

ENJOY!

to print the recipe, click here

RosemaryOil
ROSEMARY-GARLIC OIL
(slightly modified from Fine Cooking magazine, issue #80)

1-1/2 cups extra-virgin olive oil
2 cloves garlic, smashed and peeled
3 sprigs fresh rosemary

Heat the olive oil and garlic in a small saucepan over medium heat, stirring occasionally, until the garlic starts to bubble steadily, 3 to 4 min. Add the rosemary, remove from the heat, and let cool to room temperature. Transfer to a clean glass jar or other storage container, cover, and refrigerate. Use within five days.

ENJOY!

to print the infused oil recipe, click here
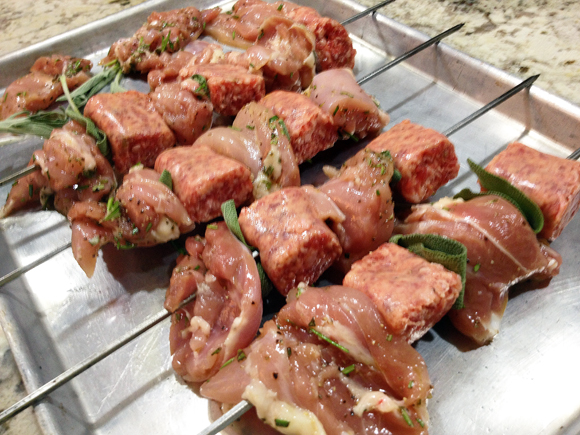
skewers

Comments:  This was a pretty nice recipe! I did not baste the skewers often while grilling, only once, but that did not hurt them a bit. Vegetarians forgive me, but the mixture of chicken with sausage is a winner, and the sage leaves add a lot of flavor and visual appeal.  If you want to add veggies to the skewers, I think eggplant cubes could work well, they would stand to the cooking and be done more or less at the same time as the meat. Of course, onion would be another great option. Something to consider when summer is finally back bringing with it my beloved flip-flops, shorts, and t-shirts. By now I am even looking forward to golf…   😉

Note added after publication: I was kindly reminded by my readers in Florida that they are currently all happy under a 70 F sunny weather.  It is a bit like sticking the knife and twisting, so yes, go ahead Floridians, and make this recipe.  Think about me as you do it, and send me some of your warm weather ASAP.

ONE YEAR AGO: Celebrate Wednesday with Pork Tenderloin & Apples

TWO YEARS AGO: Salmon Wellington

THREE YEARS AGO: The Green Chip Alternative

FOUR YEARS AGO: Weekend Pita Project

FIVE YEARS AGO: Let it snow, let it snow, eggs in snow


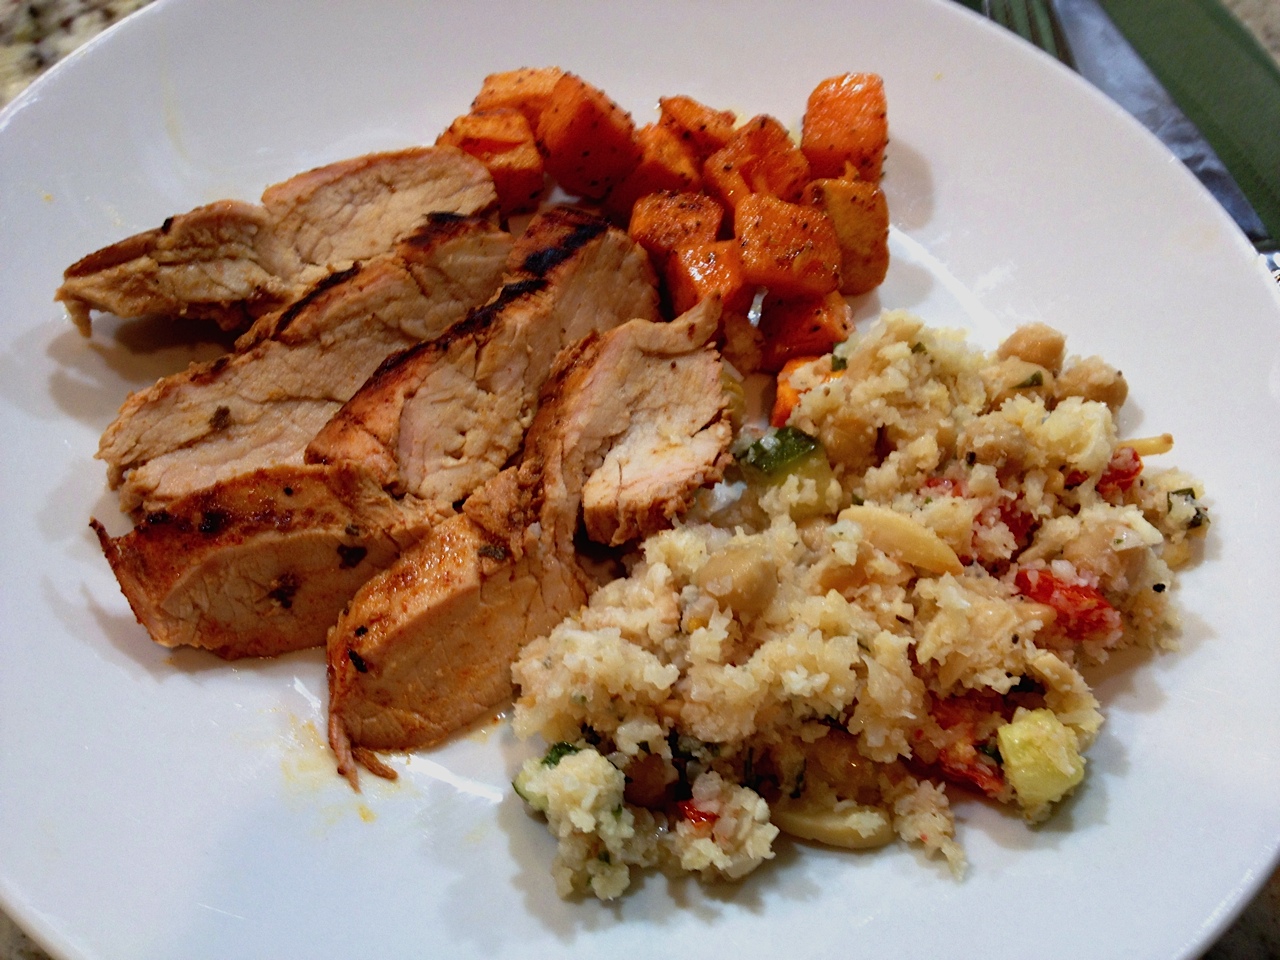
PORK TENDERLOIN ADOBADO

One of the cuts of meat that is always present in our weekly rotation is pork tenderloin, because it cooks fast and goes well with many types of seasonings. For that reason, I am always searching for new ways to prepare it. I found this recipe through a Google search, decided to give it a try without any  intention of blogging about it. Sometimes it’s nice to simply cook and eat dinner like normal people do. You know, without the need to scream at your partner “DO NOT DARE TOUCHING IT, I HAVE TO TAKE A PICTURE!”. It does get old after a while. So, I sliced the meat, served it, and Phil, very surprised asked me “You won’t be blogging about this?”.  No, I’ll let this one slide by.  Then, he took a first bite, and told me “Sally, this has got to be in the blog, it’s very good!”.   I had to agree, it turned out super tasty, and deserves to be shared with my readers. A picture was quickly snapped,  and we moved on with our dinner.

PorkAdobado

PORK ADOBADO
(adapted from Elly Says Opa)

1 Tbsp. grape seed oil
1 clove garlic, minced
1/3 cup ancho chile powder
2 Tbsp. cider vinegar
1 tsp. dried oregano, preferably Mexican
1/2 tsp. sugar
3/4 tsp. salt
3/4 cup water
1 pork tenderloin, around 1.25 lb, butterflied

In a small saucepan, heat the oil over medium heat. Add the garlic and saute until fragrant and golden, about 1 minute. Stir in the chile powder, vinegar, oregano, sugar, salt, and water. Simmer over medium-low heat, stirring occasionally, for 5-10 minutes until flavors are combined. Let cool to room temperature (or, if making ahead, refrigerate). Set aside about 1/4 of the marinade.

Place the remaining marinade and the pork tenderloin in a shallow bowl or resealable bag, making sure to coat the pork with the marinade. Marinate for several hours or overnight.

Sprinkle a little extra salt on the tenderloin. Grill to your desired degree of doneness, brushing with the reserved marinade half way through cooking. Allow to rest for 5-10 minutes before slicing.

ENJOY!

to print the recipe, click here

Comments: If you want to learn more about the concept of “carne adobada” in Mexican cooking, Wikipedia is waiting for you with a click here. This preparation ends up with a subtle heat, and the acidity of the vinegar brightens up the flavors. Very nice take on pork tenderloin, which should work equally well on boneless chicken breasts. You can cook the pork on a cast iron pan and finish it in the oven, or use any type of preparation you are comfortable with.  I always butterfly it to speed up cooking, but the original recipe did not call for it.

As I mentioned many times, we grill 12 months of the year. Phil grew up in Michigan and a little snow (less than 3 feet, that is) doesn’t scare him.  Me?  I inform that we will be grilling, which means “Darling, you light the grill, monitor the cooking, and bring it all back to the warmth of our home once it’s done”.  Sometimes I amaze myself at my efficiency.

unnamed

ONE YEAR AGO: Braised Fennel with Saffron and Tomato

TWO YEARS AGO: Revenge of the Two Derelicts

THREE YEARS AGO: Plum-Glazed Duck Breasts

FOUR YEARS AGO: Peppery Cashew Crunch

FIVE YEARS AGO: Baked Shrimp and Feta Pasta


SCARY GOOD PORK BURGERS

Don’t forget to enter my million page views giveaway!

Time is running out, so click here to participate…

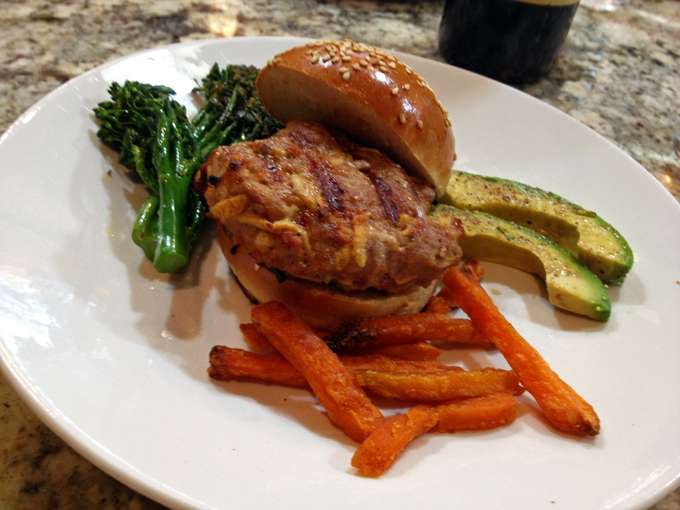
A few weeks ago I shared with you a recipe for light brioche burger buns, and promised a future blog on a pork burger that was a perfect match for those buns. The inspiration for this recipe was a show by Giada de Laurentiis on FoodTV, but I made enough modifications to call it my own. Pork and green apples make a nice pas de deux, and to give the patties a little more spice I added a small amount of chorizo, an ingredient I’ve been using a lot lately. It packs so much flavor, but its heat is not overpowering, especially if you use it sparingly. These burgers were scary good. Scary in the sense that they almost gave me a heart attack. Read on, my friends. This post proves what I suspected for a long time. In a previous life, I was a merciless serial killer.

PorkBurgers

PORK BURGERS WITH APPLES AND CHORIZO
(from the Bewitching Kitchen)

2 pounds ground pork
1/2 link (about 1.5 oz) fresh pork chorizo (Mexican type)
1 Granny Smith apple, peeled, cored and shredded
1 clove garlic, finely minced
1/2 inch piece of ginger, grated
1 tsp dried thyme
salt and pepper to taste

Mix all the ingredients in a large bowl.  Do not pack the mixture too tightly.

Form into 6 medium-size patties. The mixture will be soft.   Place the patties over parchment paper and refrigerate until it’s time to grill them.

Grill them about 5 minutes per side on grates lightly coated with oil.   If you want to add a slice of cheese, do so on the final couple of minutes of grilling, or as soon as you remove them from the grill, keeping them tented with foil. Serve with tomatoes, lettuce, or any other topping you like.

ENJOY!

to print the recipe, click here

Comments:  I prepared these burgers at the end of an intense working day. I was doing experiments that require very precise timing, and once started, cannot be paused until the very end. Every reagent has to be in its spot, ready to be quickly grabbed and used. Once the prep work is all done, I take a deep breath, start the chronometer, and hope for the best.  It’s hard to have a totally flawless experiment, but that day the stars were perfectly aligned, and flawless it was. I drove home feeling on top of the world, ready to stretch the super-accurate timing to dinner preparation. Phil had to stay for another hour working in his office, so my plan was to welcome his arrival home with a nicely set dinner table, juicy pork burgers all ready.

patties

I made the patties, refrigerated them, worked on a couple of side dishes, and walked outside to light the grill.  Under one of those gorgeous Kansas sunsets,  I opened the knob of the gas tank, and lifted the lid of the grill to turn the flames on. The last thought that popped in my mind was “life is good”. And then, it quickly wasn’t anymore. Life had just gifted me a gargantuan mouse prancing over the grates. He froze when he saw me, and just as I let out a screech with the potential to wake up newborn babies in Tokyo, the creature jumped off passing one inch from my left arm, landed on the ground and disappeared into some bushes. Deja vu all over again. The worthless quadrupeds that I feed on a daily basis  went hiding inside their dog house.  Apparently they do not handle well hysterical screaming. I know, inconceivable. That marked the end of a perfectly timed meal. Instead of juicy burgers, Phil encountered a distraught wife who refused to step outside into the backyard to finish the dinner.

mouse1

Due to the profound psychological trauma this situation caused me, I was unable to use the grill for a couple of weeks. Now I go through a process of kicking the door that encloses the gas tank a couple of times, then banging on the grill lid four or five more times before opening it. I am sure the neighbors worry about my mental state in case they catch a glimpse of my routine. Granted, a foreigner can get away with a lot. For all they know, that might be a common pre-grilling performance back in Brazil.   That’s my story, and I’m sticking to it.

Back to food. These burgers were pretty tasty. I made them a second time recently and grated the apples a little finer, not sure which version I liked best, though.  There’s some visual appeal to the bigger shreds of apple peeking at the surface to say hello.  No matter how you decide to treat the fruit, the combination of pork, green apple, chorizo, a touch of ginger was spot on.  No need to use egg as a binder if you refrigerate the patties and handle them gently.  If you are feeling tropical enough, do the Brazilian thing, and release your frustrations on the lid of the grill before you light it.  One never knows….   😉

ONE YEAR AGO: Review of exercise program Focus25

TWO YEARS AGO: Celebrate Wednesday with a Thai Seafood Curry

THREE YEARS AGO:  Post-workout Breakfast

FOUR YEARS AGO: Semolina Barbecue Buns

FIVE YEARS AGO: Lavash Crackers

SOUS-VIDE PORK CHOPS WITH ROASTED POBLANO BUTTER

Cooking certain cuts of pork in the Bewitching Kitchen can be a bit tricky. No matter how many chefs, cooks and food bloggers recommend cooking pork medium or even medium-rare claiming that it’s safe and tastes better, we prefer our pork to be fully cooked, approaching well-done.  Sorry, folks, it’s a matter of taste… At that point, the less marbled pieces will end up dry.  So, I pretty much abandoned center-cut pork loin chops in favor of other cuts. Pork tenderloin is my number one choice, and for braises and low-roasting I go with pork shoulder.   Let’s bring sous-vide to the scene.  Now I can cook the meat to the point we enjoy it, ending with a piece of meat that is both tender and juicy.  This recipe, by the way, was the one that really sold the sous-vide concept to Phil.  He was amazed by how perfectly cooked these turned out!

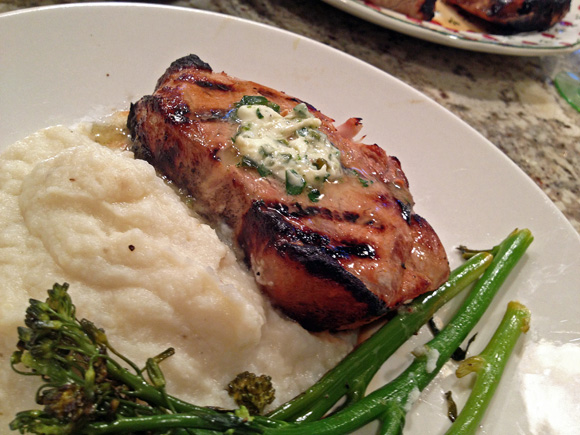
Pork sous vide


PORK LOIN CHOPS WITH ROASTED POBLANO BUTTER
(from the Bewitching Kitchen)

for the compound butter:
2 sticks of butter at room temperature
1 small poblano chili, roasted and peeled, seeds removed
1 Tbsp minced cilantro
zest of 1/2 lime
1/2 teaspoon salt
black pepper to taste

for the brine:
2 cups water
2 Tbs salt
1 Tbs sugar

for the meat:
4 center cut pork chops, boneless
1 tablespoon butter (probably a bit less)
grated ginger to taste
2 Tablespoons soy sauce
2 Tablespoons honey
1 teaspoon mustard
1 teaspoon lime juice

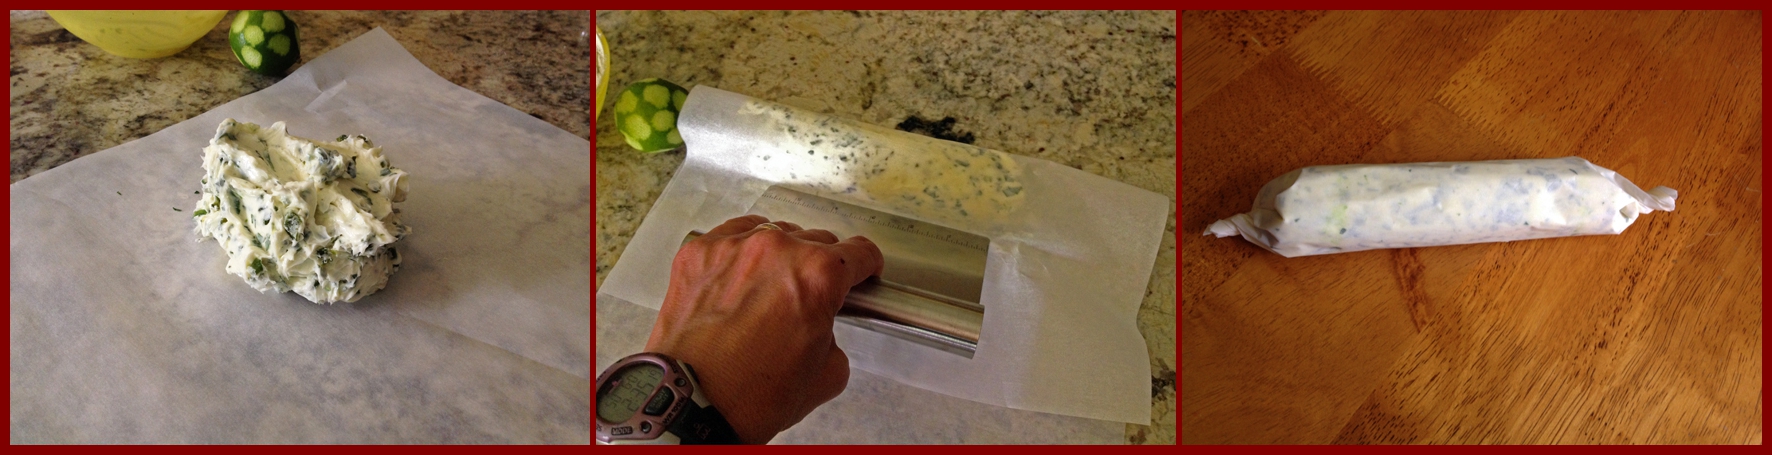
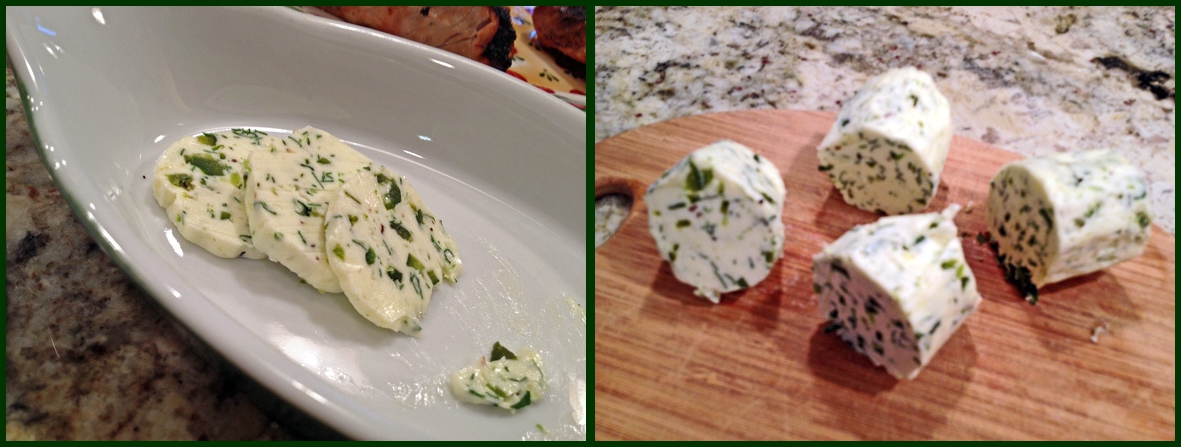
Make the compound butter earlier in the day or several days before. Mix all ingredients well, form the butter into a log shape over parchment paper, rolling it tightly.  Place the roll in the fridge for several hours, cut in slices when ready to use.  Freeze leftover slices in a plastic bag.

Make a brine by dissolving the salt and sugar in 2 cups of cold water.  Place the pork chops in the brine, refrigerate for a couple of hours.  Remove the meat from the brine, rinse briefly and pat dry.  Add a little bit of butter and grated ginger on top of each piece of pork, and place two chops inside each sealable bag.

Seal the bags and place in a sous-vide bath set for 140F for 6 hours.

When the time is almost up, mix the soy sauce, honey, mustard and lime juice in a small bowl.  Remove the meat from the bag, brush the pieces with this mixture and grill very quickly on a hot grill just to char the surface, a couple of minutes per side.

Serve with a piece of compound butter on top.

ENJOY!

to print the recipe, click here

composite

If you’ve never made compound butter, that’s a nice cooking project for a Saturday afternoon. You can flavor it with many different fresh herbs, the traditional kind uses minced parsley.  I went with a lot of roasted poblano, a small amount of cilantro and some lime zest. Using a bench scraper helps a lot to get the butter shaped as a nice roll, but next time I will add a layer of plastic wrap underneath the paper. The butter must be very cold when you serve it, so that it slices easily. It is hard to make compound butter using less than 2 sticks, so you will have plenty of slices to save in the freezer for later. Just remove what you will use a few minutes before dinner time.

composite
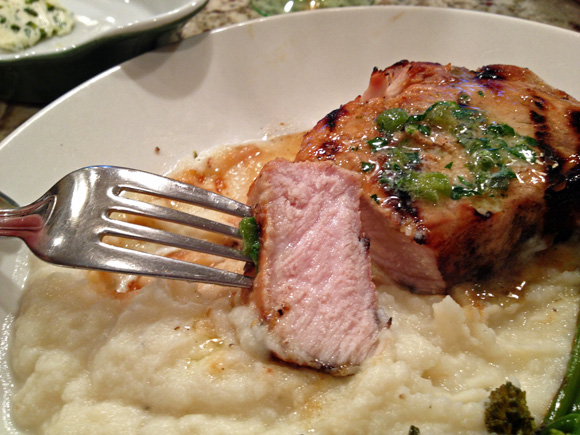
We both really loved this meal. Take a look at how juicy the slice of pork turned out! We served it with mashed cauliflower and sautéed broccolini.  A perfect way to end a Sunday!

Sliced

If you do not have a sous-vide, the exact same recipe can be made on the grill, simply brine it before, brush with the soy mixture (add the ginger to the rest of the ingredients) and grill, preferably with indirect heat to prevent the surface from burning too fast. If you are anti-butter, I feel a bit sorry for you, but the sous-vide pork will be ok on its own.    😉

ONE YEAR AGO: Roasted Strawberry Buttermilk Sherbet

TWO YEARS AGO: Amazing Ribs for the 4th of July!

THREE YEARS AGO: Baby Back Ribs on the 4th of July

FOUR YEARS AGO: Blueberry Muffins

FIVE YEARS AGO: A Pie for your 4th of July

COOKING SOUS-VIDE: SWEET AND SPICY ASIAN PORK LOIN

I am so excited to publish this post!  My first experiment with the Anova sous-vide gadget, actually if I must be completely honest, it was the second experiment, the first shall remain unblogged.  It involved soft-boiled eggs, and a garbage disposal. Pretty sad combination.  But, I did not let that bring me down, next day I rolled up my sleeves, and went to work on a recipe for pork loin that I found on SVKitchen: Sous-vide Recipes and Techniques for the Home Cook.

served

SWEET AND SPICY ASIAN PORK LOIN
(slightly modified from this recipe)

3 pounds boneless pork loin (not pork tenderloin), trimmed of excess fat, cut into 2-inch pieces
2 stalks lemongrass, 3 outer layers and top third removed and discarded, thinly sliced
½ cup soy sauce
⅔ cup packed brown sugar
1 tablespoon Sriracha sauce
2 tablespoons minced fresh ginger
2 teaspoons Chinese five-spice powder
1 teaspoon kosher salt
1 teaspoon freshly ground black pepper
2 scallions, sliced on a diagonal, for garnish

Heat the water bath to 132°F (56°C).

In a bowl large enough to accommodate the pork, combine the lemongrass, soy sauce, brown sugar, chili-garlic sauce, ginger, five-spice, salt, and pepper. Add the pork and toss everything together to coat evenly. Divide the pork between two large zip lock food bags and seal using the water displacement method.

Cook for 6 hours.

Carefully open the food bags and serve the pork over cooked rice garnished with the sliced scallions.

ENJOY!

to print the recipe, click here

Composite1
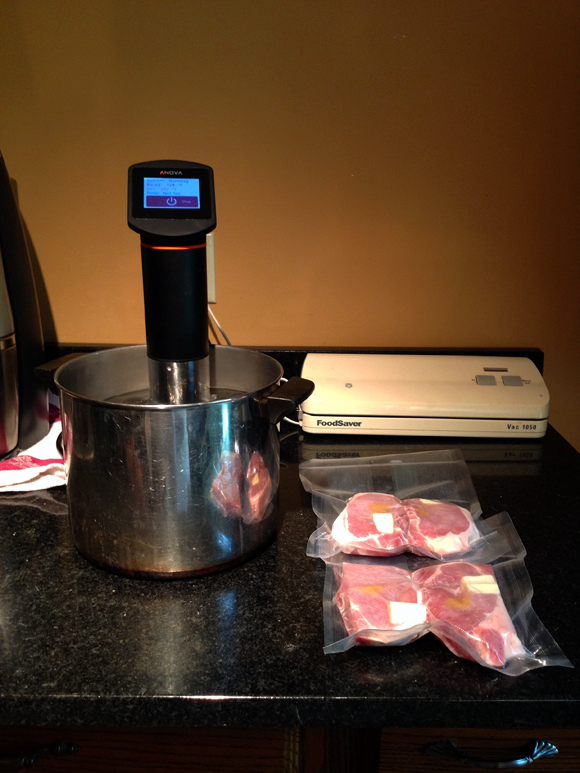
In this photo, you see the Anova gadget attached to the large pan, and the water heating nicely to the correct temperature.  After mixing the pieces of meat with the marinade, two large Ziplock bags are sealed using the water displacement method.  I lowered the bag in a bowl of warm water (that makes the plastic more pliable and facilitates removing all air bubbles). The last photo shows the two bags sealed and ready to dive into the water-bath.  Easy as pie!

composite2
I set the timer for 6 hours, but due to important commitments such as helping Phil mow the front lawn & folding laundry, time was extended to 6 hours and 45 minutes. I hoped it would not be a problem. It wasn’t. In fact, it confirmed one of the advantages of sous–vide cooking: once the temperature is reached and properly equilibrated through the meat, you can take your time. Within limits, of course, there will be a change in texture if you push it too far. But this too far becomes a matter of hours, not minutes. Sweet!

Pork Sous-vide

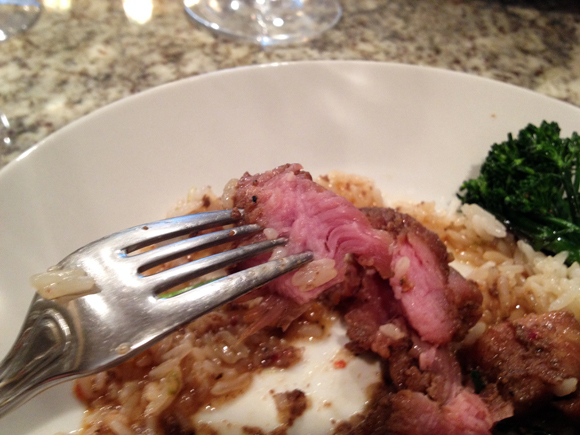
Here is a close up of the meat as you bite into it… moist and tender all the way through!

Meat
Final comments:
 SVKitchen is a fantastic source of recipes and tips for sous-vide cooking, I have several recipes already bookmarked. The site is not getting updates anymore which is kind of sad, but you can still find a ton of stuff and they are also very helpful by email.

One of the things I learned right away from sous-vide cooking is: take notes.  Small variations in temperature will change the result of a recipe, and some can be pretty tricky to nail. Soft-boiled eggs are one classic example. Apparently, once you hit the jackpot with the method that pleases you, it will be quite reproducible.  I am not there yet, but slowly improving.  A very informative and fun article dealing exclusively with soft-boiled eggs can be found here.

Another important point in sous-vide is that for the most part the food will not look appetizing once it’s cooked.  The sous-vide obviously doesn’t brown the food and doesn’t reduce a liquid.  Normally you will need to do a final stove-top, oven, or grill step to bring the dish to completion.  Still, the idea that you can prepare your food in advance and wrap it up in minutes at dinner is quite attractive for those who work full days.  But more important than that is the ability to have perfectly cooked seafood, poultry to work with. Goodbye, tough scallops & shrimp… goodbye dried up chicken breasts & pork loin…

So far, I am really having fun with this new toy.  It is compact, can be stored away in a shelf when not in use, and I found an even better spot to put it in action: the countertop in our laundry room, adjacent to the kitchen.  There Anova enjoys the company of the vacuum sealer,  and on the left of the picture we have a sink, so it’s all quite functional.

AnovaSetting

I hope you enjoyed this first post on sous-vide, stay tuned for new adventures on Anova Land…  

ONE YEAR AGO:  Farewell to a Bewitching Kitchen

TWO YEARS AGO: In My Kitchen. June 2012

THREE YEARS AGO: Goodbye L.A.

FOUR YEARS AGO: 7-6-5 Pork Tenderloin