PULLING UNDER PRESSURE

Are you afraid of the pressure cooker? Are you so terrified that you don’t even own one and the thought of that thing in your kitchen gives you nightmares? I am here to help you out. As 99.99% of Brazilians, I grew up used to its noise a couple of times per week, making sure we never ran out of black beans, a staple in any Brazilian kitchen. Looking back, I am forced to admit that my Mom’s pressure cooker was scary. That thing had zero safety features and relied on the experience (and perhaps a little luck) of the user not to blow up. A wimpy-looking closing mechanism, a gasket that would definitely be worn out in a few months, and a tiny valve that danced the dance of the steam on top, but seemed ready to fly off any second. Basically, Mom’s pressure cooker was like a bomb in waiting. But, apart from one incident in which black beans tainted the kitchen’s ceiling, nothing serious ever happened.  Having said all that, today’s pressure cookers have absolutely nothing to do with the ones from my past. They have safety mechanisms in place that prevent building excessive pressure, and the lid simply will not open unless the pressure in versus out is equalized.  I don’t even hesitate to grab mine whenever I want to make black beans, but truth is, they are incredibly useful to cook many types of food, from soups to sauces, from meat to grains, veggies, and even desserts! But, let’s start with a favorite recipe of mine, Pulled Pork. An American classic made in a classic Brazilian cooking vessel, the one and only pressure cooker!
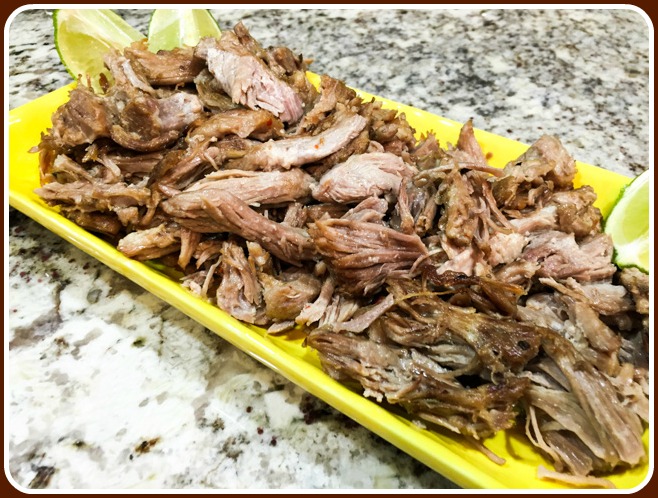
Pressure Cooker Pulled Pork22

PRESSURE COOKER PULLED PORK
(from The Bewitching Kitchen)

5 pounds boneless pork shoulder cut into large chunks
water
2 bay leaves
2 teaspoons ground cumin
1 tablespoon dried Mexican oregano
1/2 teaspoon Aleppo pepper flakes
1 tablespoon salt
1/4 cup apple cider

Place the chunks of meat in the pressure cooker, add water to just barely cover them, then add the bay leaves, and all other ingredients. Mix gently to dissolve the salt and incorporate the apple cider.

Close the pressure cooker and turn the heat on high until it builds pressure, then lower the heat and cook it for 45 minutes.  When the time is up, turn the heat off and allow the pressure cooker to come down naturally, it should take about 15 minutes, maybe a little less.

Open the pan once the pressure is equalized, and transfer the meat carefully to a baking dish. It will be very tender. You can save the cooking liquid, put it in the fridge to make it easier to remove the layer of fat that will form, using it as a base for sauce.

Shred the meat with two forks, discarding any fatty pieces or gristle. You can use the meat right away or save it for several days in the fridge.  When ready to use, you can saute it in olive or coconut oil to crisp up the edges, or warm it up gently in a pan and then spread the pulled meat on a layer and run it under the broiler (my favorite method).   Serve with tortillas, or over steamed rice and black beans, incorporate in sauces, improvise a Tex-Mex lasagna with it…  and…

ENJOY!

to print the recipe, click here

compositepulled

A word about pressure levels:  these days you can find regular pressure cookers and also electric ones. Many models will have two levels of pressure, the lowest around 6 psi (pounds per square inch), the highest from 13 to 15 psi. My pressure cooker delivers a single, powerful level of pressure of 15 psi. If yours doesn’t reach this level simply cook the meat 5 minutes longer. I have no experience with electric pressure cookers, but from what I see around they require longer times in general, perhaps 30% or even longer cooking times.  Use the specifications provided in the instruction booklet you have somewhere, or let google do the research for you…

Pulled pork is definitely one of our favorite meals, I’ve made it many, many times, as Phil’s kids also used to love it. My default recipe is in the blog and it is fantastic. However, I must say this one pleased me even more!  Something about the moisture retained by the meat cooked under pressure, and the way the seasoning is more uniformly present instead of concentrated on the charred surface made this dish a complete winner in my book…  The meat won’t look gorgeous as it comes out of the pressure cooker, so don’t be discouraged when you open the pan. Trust me on this. Get the meat out very gently, pull it and try a little piece… even without browning on a pan or under a broiler you will be amazed by how wonderful it is.

I like to serve mine over Romaine lettuce leaves, a bit of guacamole, shredded Queso fresco…

servedSally


But, of course, you can opt for a more authentic presentation that will include corn tortillas, and a serving of refried beans on the side…  It’s all good!
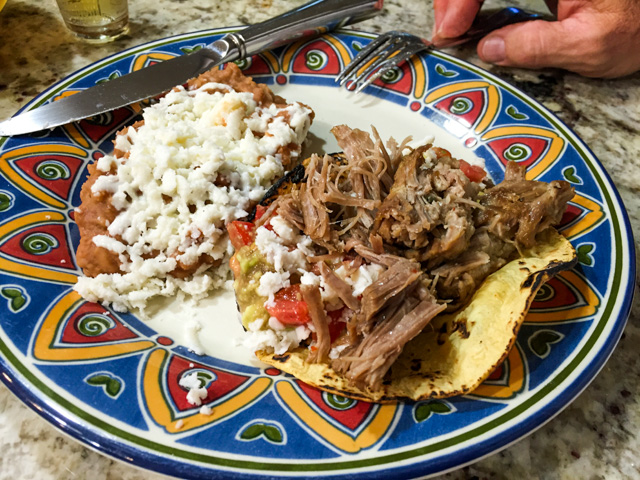
servedPEK


And you know what I love the most? Leftovers for lunch, so easy to put together… a quick saute of the meat, some tomatillo salsa, half an avocado, Queso fresco for good measure, and a nice sprinkle of the world’s best hot sauce, Sriracha!  Tell me, isn’t this a great lunch?

leftovers

I hope I convinced you to lose your fear of pressure cooking.  Pork shoulder is very forgiving and probably one of the best types of meat to inaugurate your pressure cooking adventures.  Second best type? My vote goes for chicken thighs.  Stay tuned, I’ve got a nice curry coming up sometime soon. Well, you know… soon enough.

😉

before I leave you, a little picture of me and Mom, who doesn’t cook anymore, but I am sure remembers fondly the days in which she prepared the best black beans in the known universe for her family! As this post is published, I’ll be almost leaving Brazil to fly back home…

IMG_1537

ONE YEAR AGO: Cooking Sous-vide: Two takes on Chicken Thighs

TWO YEARS AGO: Miso Soup: A Japanese Classic

THREE YEARS AGO: On my desk

FOUR YEARS AGO: A must-make veggie puree

FIVE YEARS AGO: Vegetarian Lasagna

SIX YEARS AGO:  Brazilian Pão de Queijo
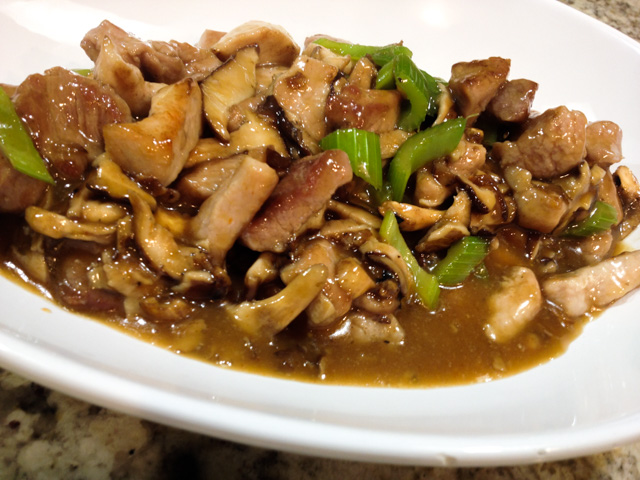
SICHUAN PORK STIR FRY IN GARLIC SAUCE

My love affair with America’s Test Kitchen only grows stronger and stronger… I’ve been making a lot of their recipes without a single disappointment (insert discreet knock on wood).  Pork stir-fry can be pretty tricky to prepare. More often than not the meat either turns out too dry or too greasy, and the flavors fail to mingle well.  Cook’s Illustrated to the rescue.  They tackle the many issues with this preparation by using boneless country-style pork ribs, and soaking the pieces of meat in a solution of baking soda. Baking soda acts by raising the pH (decreasing acidity), therefore affecting the charges present in protein molecules, which in turn changes the way the molecules interact with each other. With a raise in pH, the protein strands unfold and relax, in other words, the meat becomes considerably more tender. If you take the process too far, either by using a huge amount of baking soda or by allowing the meat to sit for too long in its presence, you’ll end up with mushy meat.  But when performed correctly it results in meat with fantastic texture. ATK also incorporated a coating with cornstarch before stir-frying, which helps retain moisture as the meat cooks. Genius, right? As to the sauce that finalizes the dish, they use ketchup and fish sauce to up the level of glutamates, giving it a boost in flavor.

Seems simple and straightforward enough. In fact, the dish comes together quite quickly once you do the initial prep of the meat, so have all your ingredients ready, and get busy… Dinner will be served in no time!

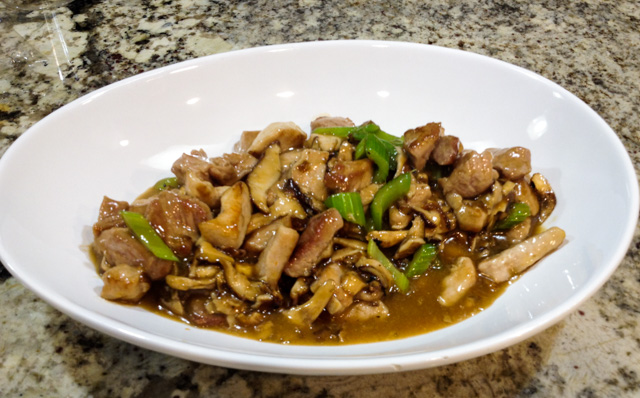
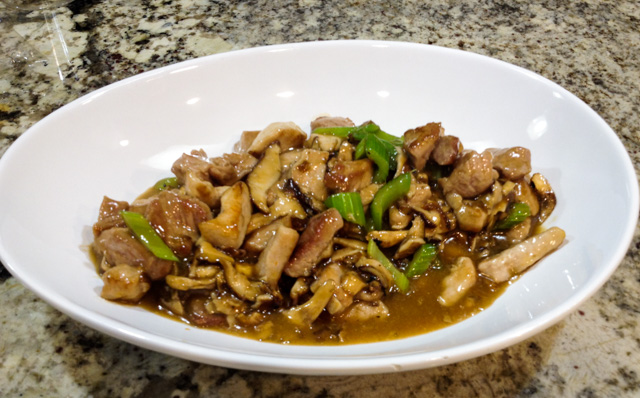
Pork Stir Fry ATK

SICHUAN PORK IN GARLIC SAUCE

(reprinted with permission from America’s Test Kitchen via Cook’s Illustrated)

for the sauce:
1/2 cup low-sodium chicken broth
2 tablespoons sugar
2 tablespoons soy sauce 
4 teaspoons Chinese black vinegar
1 tablespoon toasted sesame oil
1 tablespoon Chinese rice wine or dry sherry
2 teaspoons ketchup
2 teaspoons fish sauce
2 teaspoons cornstarch

for the meat:
12 ounces boneless country-style pork ribs, trimmed
1 teaspoon baking soda
1/2 cup cold water
2 teaspoons Chinese rice wine or dry sherry
2 teaspoons cornstarch

for the stir-fry:
4 garlic cloves, minced
2 scallions, white parts minced, green parts sliced thin
2 tablespoons Asian broad-bean chili paste
4 tablespoons vegetable oil
6 ounces shiitake mushrooms, stemmed and sliced thin
2 celery ribs, cut on bias into 1/4-inch slices

For the sauce: Whisk all ingredients together in bowl; set aside.

For the pork: Cut pork into 2-inch lengths, then cut each length into 1/4-inch match sticks. Combine pork with baking soda and water in bowl. Let sit at room temperature for 15 minutes. Rinse pork in cold water. Drain well and pat dry with paper towels. Whisk rice wine and cornstarch in bowl. Add pork and toss to coat.

For the stir-fry: combine garlic, scallion whites, and chili paste in bowl. Heat 1 tablespoon oil in 12-inch nonstick skillet over high heat until just smoking. Add mushrooms and cook, stirring frequently, until tender, 2 to 4 minutes. Add celery and continue to cook until celery is crisp-tender, 2 to 4 minutes. Transfer vegetables to separate bowl.

Add remaining 3 tablespoons oil to now-empty skillet and place over medium-low heat. Add garlic-scallion mixture and cook, stirring frequently, until fragrant, about 30 seconds. Transfer 1 tablespoon garlic-scallion oil to small bowl and set aside. Add pork to skillet and cook, stirring frequently, until no longer pink, 3 to 5 minutes. Whisk sauce mixture to recombine and add to skillet. Increase heat to high and cook, stirring constantly, until sauce is thickened and pork is cooked through, 1 to 2 minutes. Return vegetables to skillet and toss to combine. Transfer to serving platter, sprinkle with scallion greens and reserved garlic-scallion oil, and serve.
.
ENJOY!
.

to print the recipe, click here
 .

Comments: In the past, I’ve attempted a few recipes using boneless country-style pork ribs and was quite disappointed by how they turned out, particularly in texture. I had pretty much given up on them. When I noticed they used this cut for the stir-fry, I was intrigued. Could they possibly make it work? Never doubt ATK, my friends. They do their home work, or… should I say their kitchen work, testing every variable imaginable.

When Phil and I sat down to enjoy this stir-fry, we both had the same thought: this feels like a meal served at an upscale Chinese restaurant. Let’s be frank, Chinese restaurants can be a gastronomic disaster, every dish presented with the exact same gloppy, overly sweet soy-based sauce.  But when you find a place that offers truly authentic recipes, it’s an amazing experience! I had fantastic Chinese meals in São Paulo’s huge Chinatown during my college years. I can picture this recipe served in such a setting, or better yet,  in the comfort of our bewitching kitchen.

Sichuan Pork Stir Fry
I hope you give this recipe a try, don’t be intimidated by the number of ingredients or steps in preparing it.  As I mentioned, once the meat is out of its baking soda spa, the whole meal will be ready in lightning speed.  Nothing better to crown a busy working day…
😉
 .

FIVE YEARS AGO:
 Popeye-Pleasing Salad
.
SIX YEARS AGO: Summer’s Finale

BABY BACK RIBS WITH TOMATILLO GLAZE

Ribs are one of Phil’s favorite meals, and my default recipe has been on the blog for quite some time.  This version is different because instead of the regular barbecue sauce it calls for a tomatillo glaze. Much lighter in terms of sugar content, but very flavorful.  I actually made the exact recipe from Mary Sue Milliken a couple of years ago, but this time I tweaked it and to our taste it was close to perfection.  If you always make ribs with the red, sticky barbecue sauce, try this version for a totally different take. The tomatillos give them a brighter flavor, so get those napkins ready, and dig in!

RibsServed3_opt-2

BABY BACK RIBS WITH TOMATILLO GLAZE
(inspired by Mary Sue Milliken’s recipe)

for the dry rub:
2 racks of baby back ribs
2 1/2 tablespoons kosher salt
1 tablespoon dry mustard
1 tablespoon paprika
1/2 teaspoon cayenne pepper
1/2 teaspoon freshly ground black pepper
1 large lemon, sliced
1 large lime, sliced

for the tomatillo glaze:
1 shallot, diced
3 tablespoons olive oil
10 tomatillos, husked, washed and roughly chopped
1 Serrano chile, sliced
1 large bunch fresh cilantro, roughly chopped
2 to 3 tablespoons maple syrup
Salt and freshly ground black pepper

Heat oven to 325°. Combine first 5 ingredients in a small bowl. Place each rack of ribs on a double layer of foil; sprinkle rub all over ribs. Wrap racks individually and divide between 2 baking sheets.

Bake ribs until very tender but not falling apart, about 3 hours. Carefully unwrap ribs; pour any juices from foil into a 4-cup heatproof measuring cup; reserve juices. Let ribs cool completely.

Meanwhile, make the tomatillo glaze: In a large saucepan over medium-high heat, saute the shallot in the olive oil until golden. Add the tomatillos and Serrano chile and cook, stirring frequently, until the mixture thickens, 30 to 45 minutes. Add the reserved rib pan juices (discard the top layer of fat) and cilantro and cook an additional 10 minutes. Puree in a blender and add the maple syrup. Cook over low heat for 10 minutes, stirring constantly and being careful not to burn. Adjust seasoning with salt and pepper.

Turn the oven heat up to 450 degrees F, or heat the grill. If finishing the ribs in the oven, brush generously with the glaze and bake another 10 minutes per side, basting with the glaze every 2 to 3 minutes. To grill, generously glaze the ribs and grill 5 minutes per side, frequently brushing with additional glaze. Cut the ribs apart and serve hot with extra glaze on the side.

ENJOY!

to print the recipe, click here

dry rub

 Ready to go into the oven, low and slow does it!

tomatillo glaze

Comments: My default recipe is similar in the overall method of cooking the ribs covered, low and slow, then adding a glaze and blasting it in a very hot oven or grill.  But usually I skip any dry rubs and simply season the ribs with salt, pepper, lemon slices on top.  I decided to change gears this time and after searching cookbooks and websites for the ultimate dry rub, I came up with this one. Not overly spicy, but if you like more heat pump up the cayenne and that should do it.

The tomatillo glaze makes the ribs shine! The recipe makes more than you’ll need for brushing during the final phase of cooking, so warm some up and enjoy with your meal.  Leftovers would pair well with a pork tenderloin or grilled boneless chicken breasts.

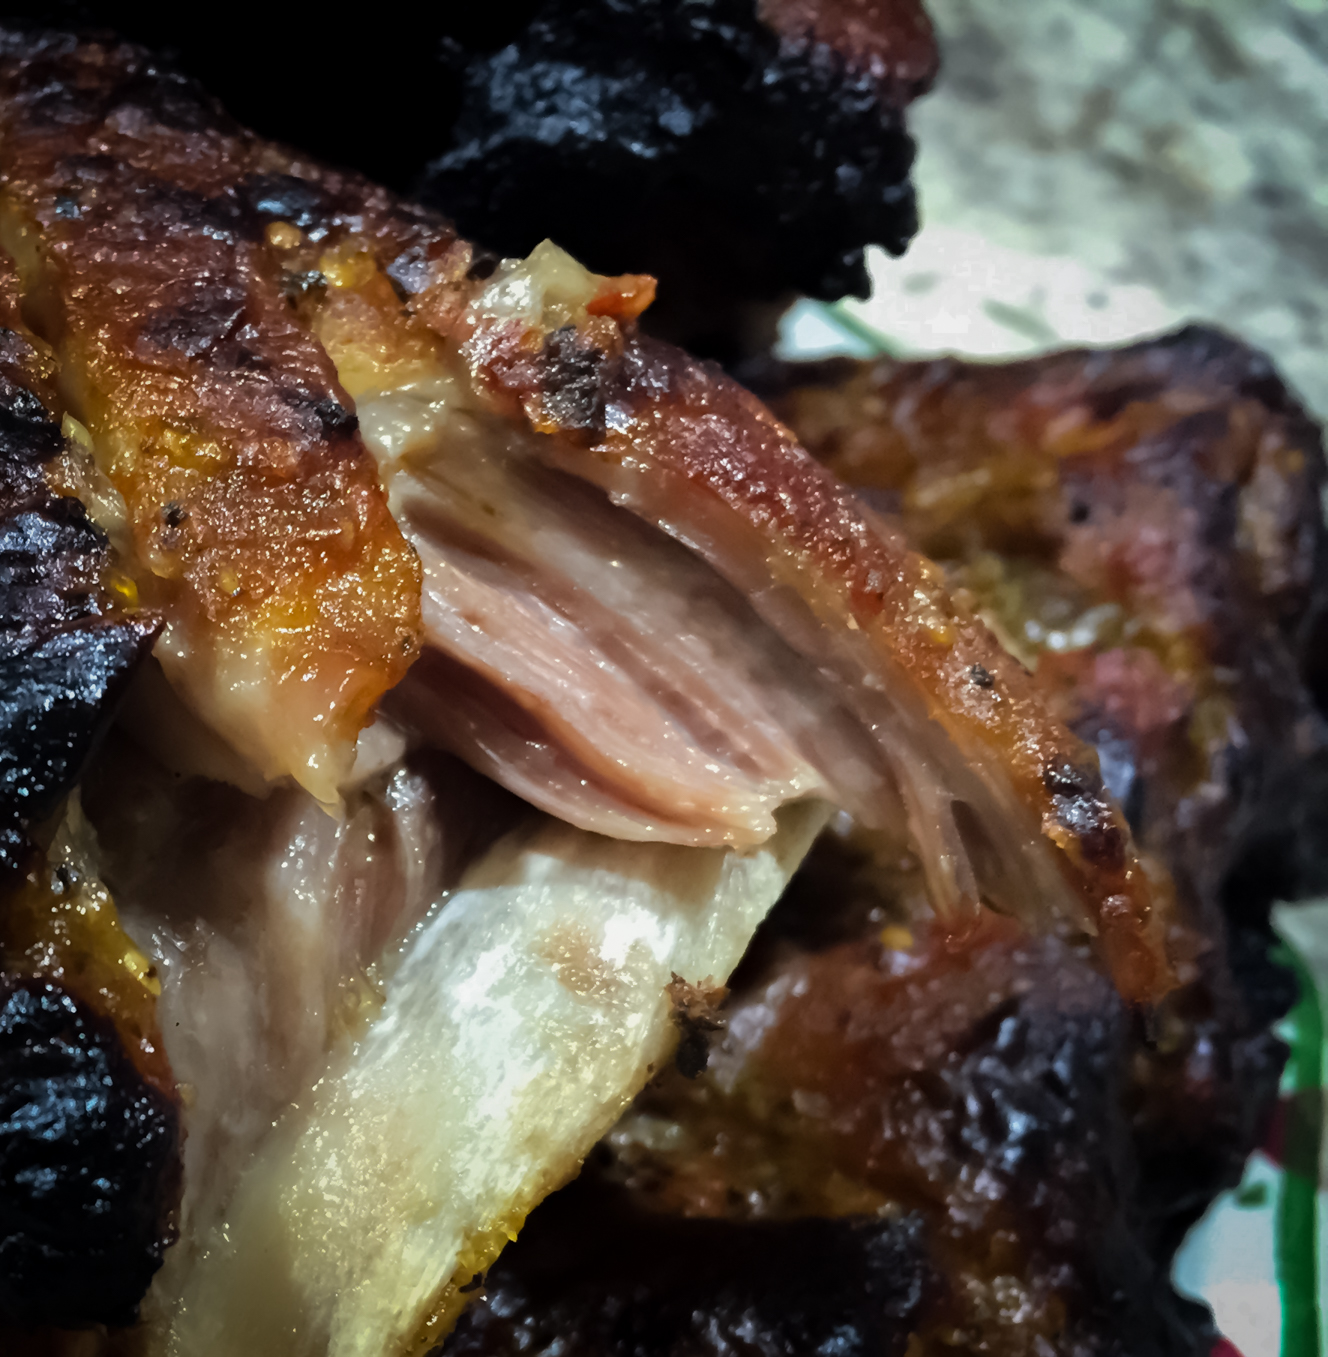
closeup1The meat is falling off the bone tender, the glaze is a little tangy, a little sweet, a little spicy and plenty delicious! Great recipe, definitely a perfect option for those living in the USA with the 4th of July celebrations coming up…

This post is dedicated to my Dad, who left us 11 years ago today.
He would have loved these ribs…

Papai

ONE YEAR AGO: Ten Years Ago

TWO YEARS AGO: Someone Got a Summer Shave

THREE YEARS AGO: Border Grill Margaritas

FOUR YEARS AGO:  Goodbye L.A.

FIVE YEARS AGO:  Vermont Sourdough

SPINACH AND MUSHROOM STUFFED PORK TENDERLOIN

The pi day last week made me realize that for a blog that is almost 6 years old, I have very few pies to share. Not the type of stuff we make that often, and of course, it reflects on their limited presence in the site. On the opposite side of the spectrum we have pork tenderloin, by far one of the types of meat I make the most. This version is a little more dressed-up than usual, and perfect for a weekend dinner. The recipe comes from Fine Cooking magazine, and for those who care to know nutritional details, it is Paleo-friendly (if you omit the cream sauce) and low-carb. It is also elegant, and flavorful, which is what really matters 😉

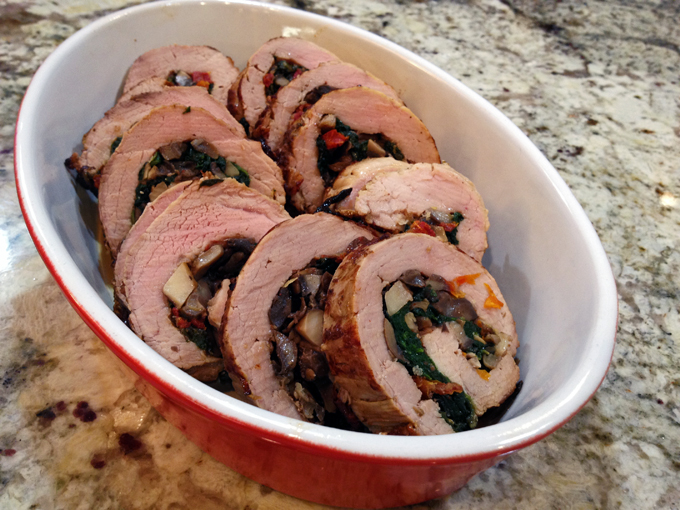
StuffedPorkTenderloinSPINACH AND MUSHROOM STUFFED PORK TENDERLOIN
(slightly modified from Fine Cooking)

5 Tbs. extra-virgin olive oil
3-1/2 oz. cremini mushrooms, thinly sliced (1-1/2 cups)
1/2 cup sun-dried tomatoes, packed in oil, drained and diced
salt and freshly ground black pepper
6 oz. baby spinach (5 lightly packed cups)
1 large pork tenderloin (about 1-1/4 lb.)
zest of one large lemon
2 tsp of lemon juice
1 large shallot, finely diced
3/4 cup low-salt canned chicken broth
2-1/2 Tbs. sherry vinegar
2 Tbs. heavy cream

Set a rack in the center of the oven and heat the oven to 450°F. Heat 2 Tbs. of the oil in a heavy, ovenproof 12-inch skillet over medium-high heat until shimmering hot. Add the mushrooms, sprinkle with 1/2 tsp. each of salt and pepper, and cook, stirring, until browned and tender, about 3 minutes. Stir in the spinach and sun-dried tomatoes, sprinkle with salt, and cook, tossing well with tongs, until the spinach is wilted, about 2 minutes. Transfer the mixture to a colander and set the skillet aside.

Butterfly the tenderloin by making a horizontal slice lengthwise through the meat almost all the way to the other side. Open the meat flat, like a book. Cover with plastic wrap, and using a meat mallet, a small, heavy skillet, or the heel of your hand, lightly pound the pork so that it’s 1/4 inch thick. Rub the pork all over with 1 Tbs. of the oil, the lemon juice, and sprinkle all over the zest of the lemon and about 1/2 tsp. each of salt and pepper.

Squeeze any excess liquid from the spinach and mushrooms. Spread over the pork, leaving bare a 2-inch border along one long edge. Starting with the long side that’s covered with filling, roll the stuffed tenderloin toward the bare-border side so that it forms a cylinder, and tie it with kitchen twine.

Wipe the skillet clean if necessary. Heat the remaining 2 Tbs. oil in the skillet over medium-high heat until shimmering hot. Sear the pork on all three non-seam sides until well browned, about 6 minutes total. Flip onto the seam side, then transfer the skillet to the oven. Cook until an instant-read thermometer inserted into the thickest part of the roast registers 140ºF, 15 to 20 minutes.

Transfer the meat to a clean cutting board, tent with aluminum foil, and let rest for 10 minutes. Meanwhile, return the skillet to the stove over medium-high heat (be careful; the skillet’s handle will be hot). Add the shallots, season with 1/4 teaspoon salt, and cook, stirring, until the shallots soften and brown, about 2 minutes. Add the chicken broth, sherry vinegar, and simmer briskly until the mixture reduces by a bit more than half, about 4 minutes. Stir in the cream and season with salt and pepper to taste.

Slice the pork into 1/2-inch-thick slices and serve with the sauce.

ENJOY!

to print the recipe, click here

composite1
Comments: The only problem when cooking pork tenderloin is the delicate nature of this meat, and its tendency to dry during roasting because it has such low-fat content. By filling it with the sautéed mixture of veggies, you won’t run such risk.  I prepared the filling, rolled the meat, wrapped it in plastic and left it in the fridge for several hours, then finished it all up for our dinner on a Saturday evening, back in January.

You can serve it with any type of starchy side you’d like, pasta, rice, mashed root veggies, but in this particular dinner I went with a much lighter option, and enjoyed it with a side of grated carrots lightly seasoned with lemon juice & olive oil.  I like to keep it in the fridge for an hour or so, then add salt and pepper right before serving. It is amazing what a touch of lemon juice can do to grated carrots.  I first read about it on Leite’s Culinaria, after a tip from our friend Cindy. Try it sometime, nothing could be simpler, but you’ll find yourself making it again and again.

served11


ONE YEAR AGO: Crispy Chickpea and Caper Spaghetti

TWO YEARS AGO: Spring has Sprung!

THREE YEARS AGO: Chickpea and Fire Roasted Tomato Soup

FOUR YEARS AGO: Double Asparagus Delight

FIVE YEARS AGO:  Sun-dried Tomato and Feta Cheese Torte

BLOG-WORTHY ROASTED BUTTERNUT SQUASH

Normally I would refrain from blogging about such a simple recipe. Hard to even call it a recipe, actually. Most people know too well how to roast ANY veggie. Cut it, coat pieces with olive oil, season lightly and into the oven it goes. But, I feel that this version is worth talking about as it exceeded my expectations.  All you have to do is use coconut oil as the fat, and add some Southwest spice mix from Penzey’s or make your own version mixing the usual suspects listed in the ingredients. For my taste, this was 2 logs above the level of deliciousness of your regular roasted squash, demanding the exact same amount of work and time. That’s blog-worthy in my book!

RoastedButternutSquash


OVERVIEW OF THE  RECIPE:  cut a butternut squash in 1/2 inch to 1 inch chunks. Add to a large bowl.  Melt 1 to 2 Tablespoons of coconut oil and drizzle all over. Sprinkle a nice amount of Southwest spice, a little extra salt, some freshly ground black pepper.  Quickly toss it all together, the coconut oil will solidify and turn white again, do not worry about it.  Place it as a single layer on a baking dish, and roast at 400 to 425 F until nicely brown, it should take a maximum of 30 minutes, depending on the size of the pieces of squash, and your chosen temperature. Adjusting seasoning with salt right after roasting. If you had issues to distribute the coconut oil evenly, move the pieces around a few minutes into the roasting.

ENJOY!

composite

Since this was actually a non-recipe, I will include a bonus goodie by sharing the recipe for the pork tenderloin I served with it. Same approach as the basic 7-6-5 method  blogged about years ago, but with a new type of marinade.

PORK TENDERLOIN WITH MAPLE-BALSAMIC MARINADE
(from the Bewitching Kitchen)

1 pound pork tenderloin
2 tablespoons maple syrup (or honey)
2 tablespoons olive oil
1 teaspoon Herbes de Provence
1/2 teaspoon roasted garlic powder (or fresh garlic, minced)
1/2 teaspoon paprika
1/2 teaspoon freshly ground black pepper
3/4 teaspoon salt
zest of 1 lemon

Prepare the marinade by combining all the ingredients, whisking well. Place the tenderloin in a bag or shallow dish, pour the marinade all over, and place in the fridge for 2 to 12 hours. Overnight should be ok too.

Remove the meat from the marinade, place the meat on the grill, close the lid and grill for 7 minutes. Turn the pork tenderloin over, close the lid again, and grill for 6 minutes.  Don’t open the lid, just turn off the heat and keep the meat inside for 5 minutes. The internal temperature should be 145 F to 150 F. If not, close the lid and leave the meat for a few more minutes.  Remove the meat to a serving platter and let it rest for 5 minutes before slicing.

ENJOY!

to print the recipe, click here

servedDinner is served!
Pork tenderloin, roasted butternut squash & coleslaw.

Come to think of it, this is a meal that could be on the cover of The Modern Cavemen Magazine. 🙂  Paleo or not, I could enjoy it anytime without complaining. Flavorful, light and filling at the same time.  The coconut oil is really spectacular on the butternut squash, but of course, if you prefer a more classic take, stick with olive oil. Coleslaw is a concoction that doesn’t get enough attention. When prepared from fresh ingredients with a home-made dressing it’s a fantastic side dish.  Goes well with all types of main dishes, beef, poultry, seafood.  Refreshing, crunchy, it’s got it all…

ONE YEAR AGO: Chocolate Currant Sourdough Loaf & Roasted Beet Hummus

TWO YEARS AGO: Sesame and Flax Seed Sourdough

THREE YEARS AGO: Spanakopita Meatballs

FOUR YEARS AGO: Saturday Morning Scones

FIVE YEARS AGO: Pain de Mie au Levain