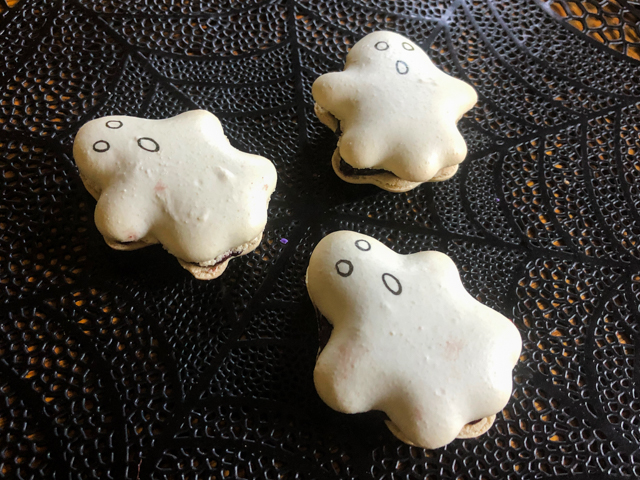
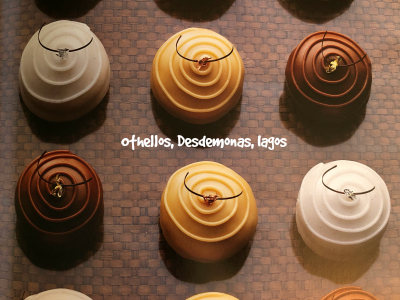
It’s been a long time since I tried my luck with bonbons. Six months, to be precise. Every weekend I kept adding it to my list of little culinary adventures, but somehow postponing it to that uncertain time called “near future.” But it finally happened. I tricked myself by making the filling first, so that I had to put it to use. Psychology 101. It worked. If you are not interested in making bonbons, consider the filling for macarons or sandwich cookies. I had some leftover and made a small batch of macarons to take care of it. They turned out into “Funky Rose Macarons” and I share photos in the end of this post.

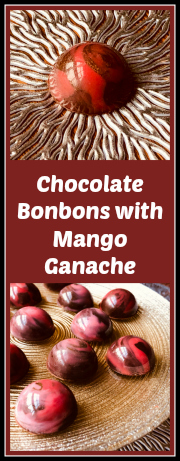
CHOCOLATE BONBONS WITH MANGO-GANACHE FILLING
(from the Bewitching Kitchen, adapted from several sources)
for the shells:
300g dark tempered dark chocolate for shells
100g cocoa butter
1/2 tsp titanium oxide
two colors of fat-soluble dye of your choice
gold pearl dust (optional)
150g tempered dark chocolate for closing bonbons
for the filling:
160g dark chocolate, chopped (I used Lindt 70%)
56g heavy cream
35 g mango purée
7 g light corn syrup
7 g butter, soft ⅛ ounce
1/8 tsp ground coriander
Start by making the filling. Place the chopped chocolate in a medium-size bowl. Pour the cream into a small, heavy-bottomed saucepan and add the mango purée and corn syrup. Cook over medium-high heat until the cream mixture reaches a rolling boil. Pour onto the chopped chocolate. Let sit for 2 minutes undisturbed, then stir slowly to incorporate. Once the ganache cools to about 95F add the butter and the coriander. Place the ganache in a piping bag, and it can be piped into tempered shells once it is at 88F. You can make the ganache in advance and warm gently to use.
Make the shells. Clean your mold with alcohol and rub every cavity very well with a cotton ball or a make-up pad. Heat the cocoa butter very gently, preferably don’t let it go over 115F. Add titanium oxide and blend it vigorously with an immersion blender. In the composite photo below, you’ll see that melted cocoa butter is translucent, yellow. Once you add titanium oxide it will turn white and opaque, that’s what you need as a starting point to add any color you want. Divide the cocoa butter in two portions, add the color you want (make sure it is fat-soluble or your cocoa butter will seize). Add each color to a piping bag (do not cut the tip). Now, gently roll the bag on a surface, back and forth, back and forth, so that the cocoa butter cools and tempers.

Check the temperature every few minutes, it will cool reasonably fast. If you have an infra-red thermometer, that’s the easiest way to do it. Once the temperature drops to 92F it will be ready to add to the molds. Simply use a gloved finger and paint each color inside the cavities. If you want to add some gold tones to it, once the cocoa butter sets, you can brush lightly with pearl dust.
Temper 300g of dark chocolate and fill the cavities. Tap the mold to release any air bubbles, then invert the mold to let the excess chocolate drip (do that on top of plastic wrap so you can collect the chocolate to use again later, or to do some decorations while it’s still tempered. I made some spider webs, because…. that’s the spirit!

Let the mold sit inverted and suspended over your countertop (the easiest way to do it is to use those silicone dough strips so that the mold does not touch any surface. After one hour at room temperature, you can flip the mold and fill the cavities with your prepared ganache (make sure it is not over 88F so that your shells won’t be melted and lose temper). Make sure to leave a little space for the chocolate that will seal the bonbons.
Now temper 150g chocolate and use it to cover the shells. Right before you pour the chocolate, heat the surface of the mold with a hairdryer very very briefly. You do that to melt just a bit the edge of the shells. Pour the chocolate and place a sheet of acetate covering the whole mold. Hold the top with one hand, and use the other hand to scrape the acetate very hard, so that all excess chocolate will drip out and the acetate will be stuck to the mold.

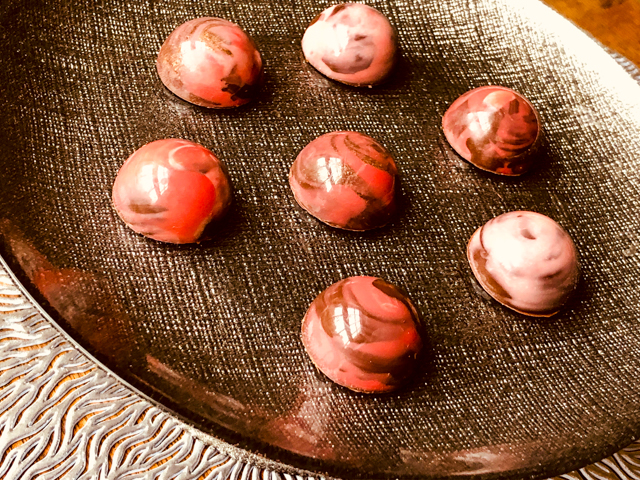
Ideally, wait for 12 to 24 hours to un-mold, but you can also leave it for 1 hour at room temperature and then place it in the freezer for exactly 15 minutes. The shells will contract and be ready to un-mold then. Be brave and bang the mold hard on a countertop, the shells should pop out. Full crystallization of the chocolate will happen over time, just leave it at room temperature. Marvel at the random pattern of colors you got.
ENJOY!
to print the recipe, click here

Comments: I had some issues with the painting of the mold, my colored cocoa butter kept forming a puddle at the bottom instead of painting nicely on the sides, although the temperature seemed “spot on” (to quote Paul Hollywood). So I kept cleaning it all with cotton balls (it was nightmarish) and trying again, and again. Finally, in complete despair, I stuck the clean mold in the freezer for 5 minutes and that worked like a charm, because the cocoa butter then set exactly where I wanted it to be. Of course, when making bonbons you are “in the dark” about the whole process until the very end – the thrilling moment of un-molding the beauties.

If you read my first adventure with bonbons, at that time I had some problems closing the shells. This time I used a different method, much more efficient. Pour the tempered chocolate on the filled molds, and press a sheet of acetate (cut to size) right on top of it, then scrape it firmly using one of these tools of a cake smoother. The chocolate will crystallize beautifully on the acetate, giving a nice shine to the bottom of the bonbon.

I wanted to dye the shells orange and red, but realized I did not have fat-soluble orange dye, so I went with pink and red, which would be more appropriate for a raspberry filling. But I am so happy with the results, the shells turned out super shiny and not a single bonbon cracked during un-molding. The gold dust did not show too well, I was afraid of over-doing it, next time I will add more.
The bonbons had a very thin and delicate shell, very uniform all the way around. All in all, it was a successful project. The kitchen looked like the aftermath of a paintball fight, and I was that player who was killed 9 times, but it was all worth it!
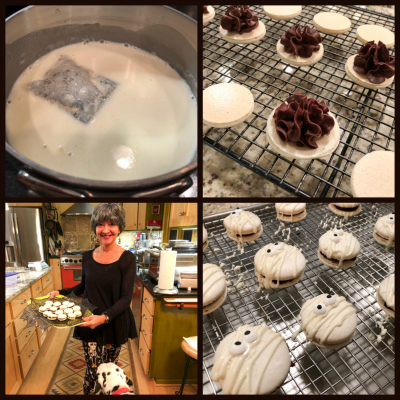
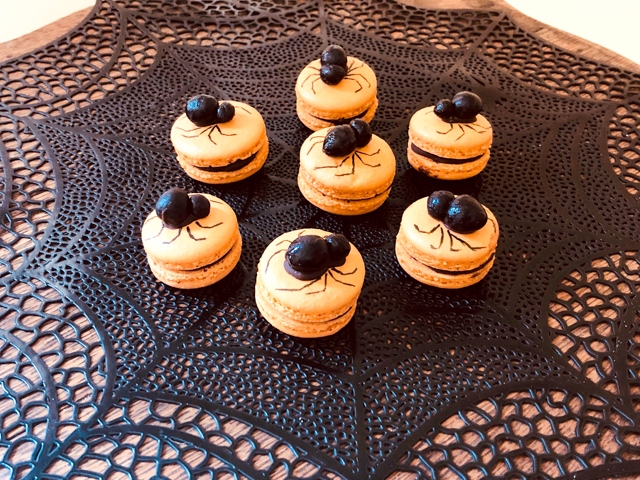
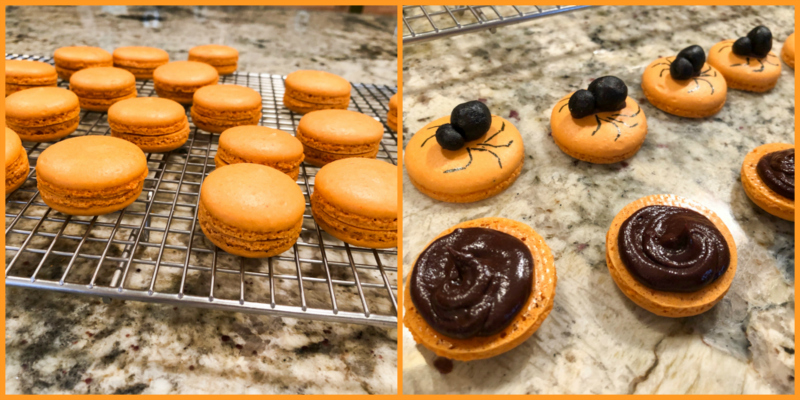
As I mentioned, I had leftover ganache. I kept it at room temperature, and next day whipped it with a handheld blender so that it was easier to pipe. Macarons were made using the Broma Bakery recipe (Swiss-meringue based), and orange food dye. Half the batter I did the macaronage to the normal level and piped round shells. Half the batter I kept a lot thicker and piped with a Wilton 1M tip in rosette shape as I did in the past. I painted the edges of the petals with black, gold, and copper pearl dust dissolved in vodka. In some shells I used an air-sprayer with black dye, but I thought those turned out a bit too dark.


The tempered spider web decorations were also put to use on cupcakes. I will be making a blog post in the near future (yes, that time frame I am so fond of!).
I hope you enjoyed my third adventure int the world of chocolate bonbons.
I have the feeling it won’t take me six more months to try again…
ONE YEAR AGO: Giant Cookie Meets Mousse
TWO YEAR AGO: The Brazilian Battenberg
THREE YEARS AGO: Salzburg Sourdough
FOUR YEARS AGO: If I had One Hour
FIVE YEARS AGO: Apple Cinnamon Oatmeal Cake
SIX YEARS AGO: Sourdough Rye Bread with Flaxseeds and Oats
SEVEN YEARS AGO: Apricot-Raspberry Sorbet: A farewell to Summer
EIGHT YEARS AGO: Marcela’s Salpicon
NINE YEARS AGO: Pork Kebabs
TEN YEARS AGO: Fondant au Chocolat
ELEVEN YEARS AGO: Got Spinach? Have a salad!