I admit I am passionate about many things. If that’s a crime, I plead guilty without thinking twice. Currently, my list of passions include all things designed by the brilliant patissière Ekaterina (aka Miúda) from the blog verdadedesabor. I have attempted one of her recipes in the past, and dream over every single of her creations. Every time I get an email notification of a new post in her blog, I cannot wait to see what it is all about. It still amazes me that she keeps her site all the way from Russia in two languages, one of them being Portuguese. Too cool! Recently she shared two desserts using Angel Food Cake as a starting point. One of them seemed way too complex for my level, but the second one I thought that maybe I could do without losing whatever is left of my mental sanity. I had a few issues here and there, cannot say I hit it perfectly, but I am happy with the way it turned out. A nice mixture of flavors and textures, this might be a perfect cake to celebrate Valentine’s Day…
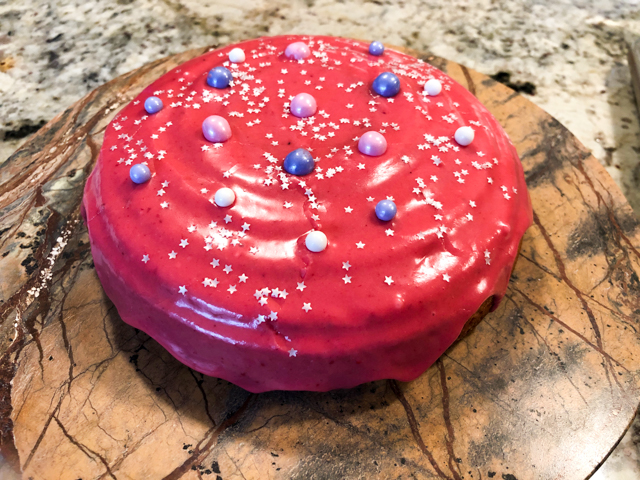
RASPBERRY ANGEL FOOD CAKE
(slightly modified from Verdadedesabor)
for the cake:
125 g cake flour
75 g powdered sugar
240 g egg whites
a pinch of salt
1/4 tsp cream of tartar
135 g superfine sugar
15 g vanilla sugar (I used this one)
for the raspberry confit:
150 g raspberry puree (seeds sieved out)
90 g of sugar (or to taste)
3 g pectin NH
for the raspberry mousseline:
125 g milk
125 g raspberry puree (seeds sieved out)
90 g of sugar
3 g vanilla sugar
6 g cornstarch
8 g flour
1 egg
130 g softened butter
for the mini-meringues:
35 g egg white
35 g of superfine sugar
35 g powdered sugar
a pinch of cream of tartar
pink food coloring
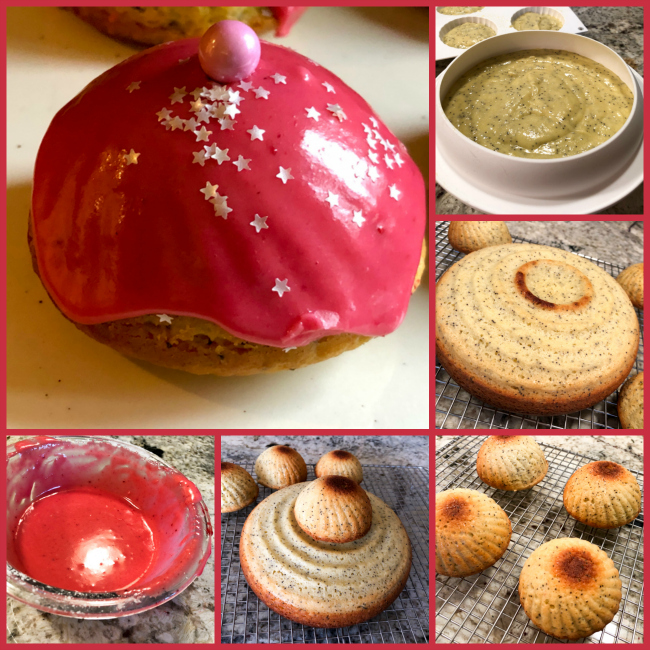
Make the cake: heat the oven to 350 F. Line a baking sheet with parchment paper or a silicone mat. Place a 8 in x 8 in square frame on top. Sift flour and powdered sugar together. Reserve.
In the large bowl of the mixer, using the wire whisk, beat the egg whites until they begin to froth. Add the cream of tartar and a pinch of salt. Gradually add sugar and vanilla sugar. Continue to beat until firm peaks form. Turn off the mixer. Sieve the flour with the powdered sugar again on top of the beaten egg whites. With the help of a silicone spatula, gently mix the batter.
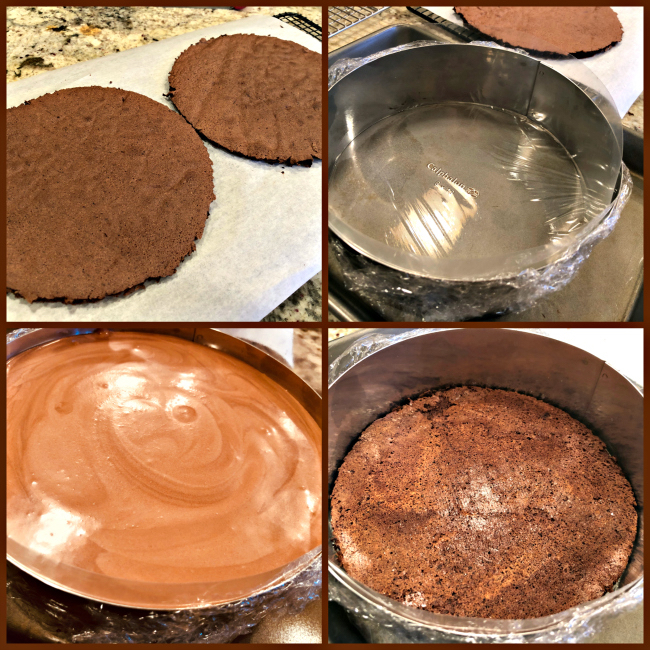
Transfer the batter to the prepared ring, smooth the surface. Bake for about 35-40 minutes until the cake is lightly golden and a toothpick inserted in the center of the cake comes out clean. Remove from the oven and allow to cool in the ring. Remove the ring, and if you like, shave the sides to show the white crumb.
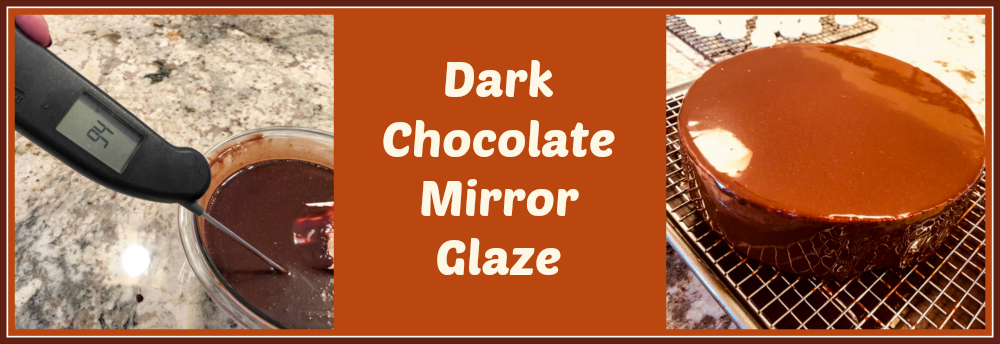
Make the raspberry confit: In a pan, heat the puree with half the sugar until it reaches 104 F (about 40 C). Add the rest of the sugar mixed with the pectin. Cook for 1 minute, stirring constantly. Remove from heat, transfer to another container, cover with plastic film touching the surface, let it cool to room temperature then place in the fridge.
Make the mousseline: In a small saucepan, combine the sugar, vanilla sugar, cornstarch and flour. Stir well with a wire whisk. Add the milk and the raspberry puree stirring constantly. Add the egg and incorporate well. Heat the mixture for about 5 minutes, until the cream thickens, and the temperature reaches about 180 F. Remove from heat, transfer to another container and cover with plastic film touching the surface. Allow to cool to room temperature, place in the fridge.
Thirty minutes before making the mousseline, remove the cream from the fridge. Beat the butter until creamy. Gradually add the cream (it is important that the cream and butter have the same temperature), continuing to beat until you get a fluffy cream. Transfer the cream to a confectioner’s bag with a 1M tip or another tip of your choice.
Make the mini-meringues: Heat the oven to 185 F. Line a tray with parchment paper or silicone mat. In a large bowl, beat the egg whites until firm, but do not let them dry. Slowly, add the sugar and beat at the top speed until it has dissolved. Reduce the speed to the minimum and gradually add the powdered sugar and the pink food dye.
With a piping bag fitted with a round tip, pipe very small meringues in the prepared tray, and bake for about 2 hours or until they are dry and crunchy. Turn off the oven and let the meringues cool inside.
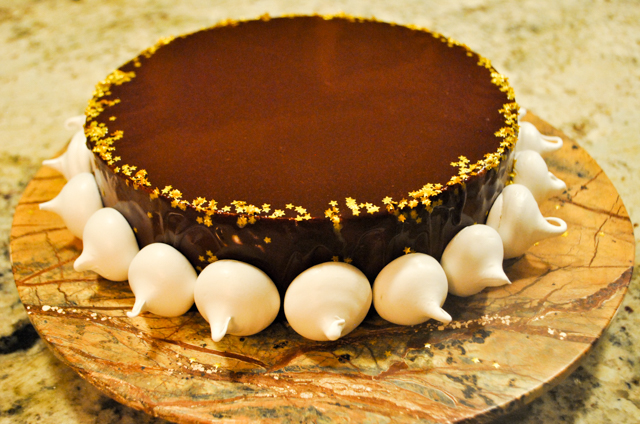
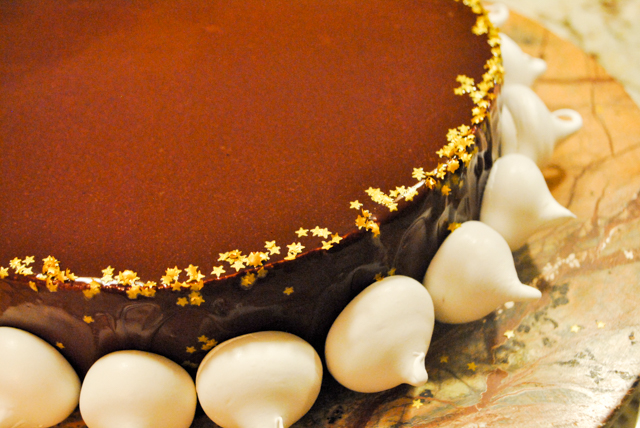
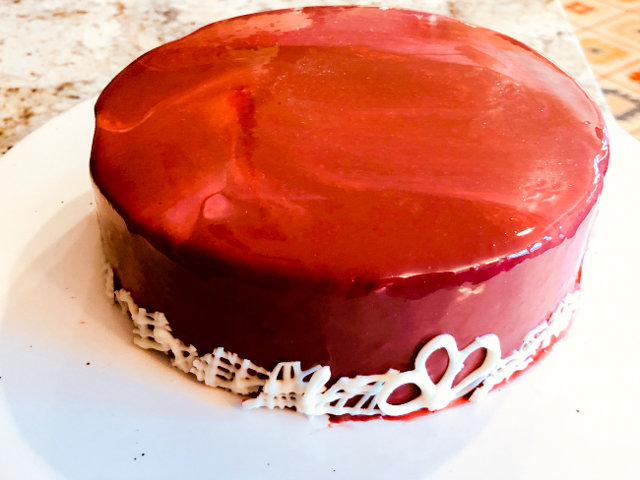
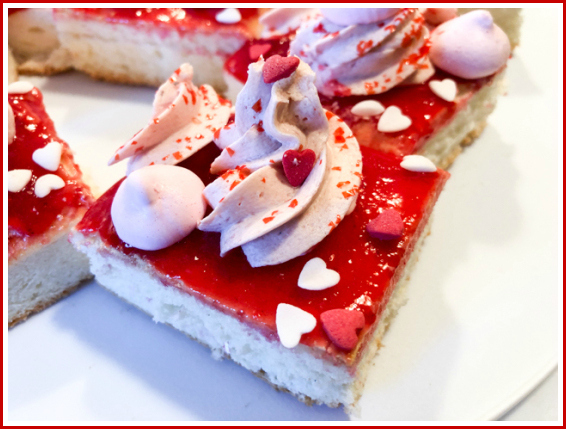
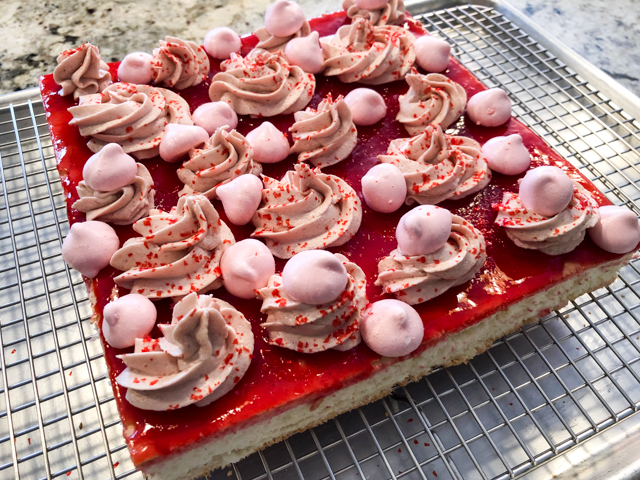
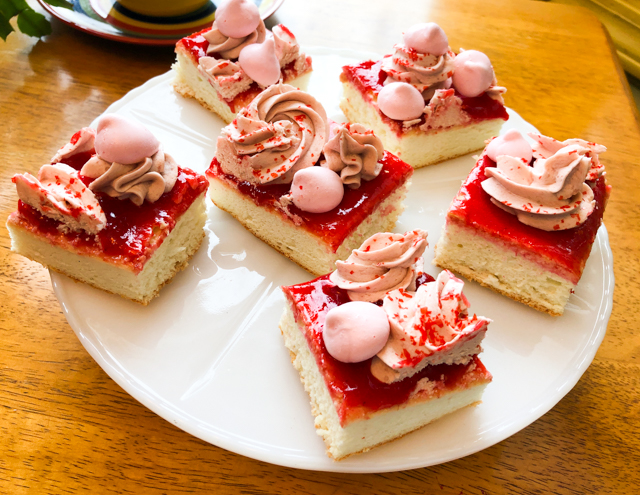
Assemble the cake: Apply a thin layer of confit to the top of the cake. Then, with the help of the pastry bag, spread the mousseline cream on top. Decorate with the mini-meringues, and sprinkles of your choice. Cut in squares and serve.
ENJOY!
to print the recipe, click here

Comments: This was my first time making Angel Food Cake, one of Phil’s favorite cakes. Ever since I met him he talks about his Grandma’s Angel Food Cake with a particular type of frosting that as far as I can tell might be a boiled frosting known as Ermine. Obviously, I have a mental block about baking that cake, how could I compete with sweet childhood memories? But perhaps this little adventure into angelic territory will give me a bit more confidence.
I made the cake and the mini-meringues on a Saturday, and also prepared the raspberry puree (sieving that stuff is not something I look forward to), reserving everything in the fridge. Sunday was dedicated to making the confit and raspberry mousseline (mousseline-virgin here). There were moments of drama, as so often happens when Sally bakes cake. Mousseline: I was very careful monitoring the temperature of butter and raspberry custard component, I swear they were similar but still the whole mass turned grainy right in front of my eyes. I checked what time it was in Moscow – middle of the night. What would be the chances that Miúda suffers from chronic insomnia and checks her blog at 1:55am? Not very high, I’d say less than 5%. So, I took matters in my own desperate hands, and grabbed my personal life-saving device, the hair-dryer. Warmed up the side of the bowl, continued beating and sweating (from nerves, not the hair-dryer thing), and then, all of a sudden, I had the most beautiful mousseline ever seen in Manhattan, KS. My sense of relief was palpable.
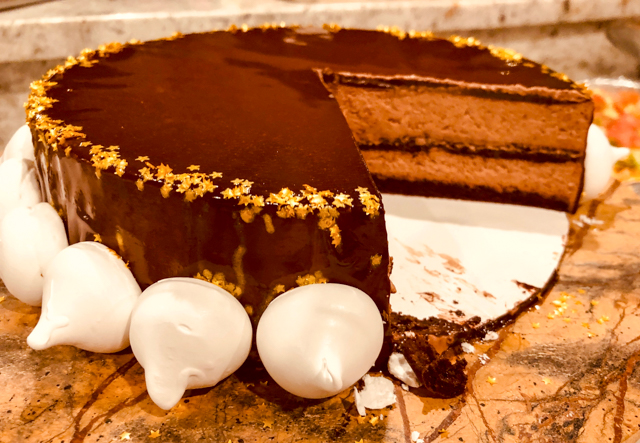
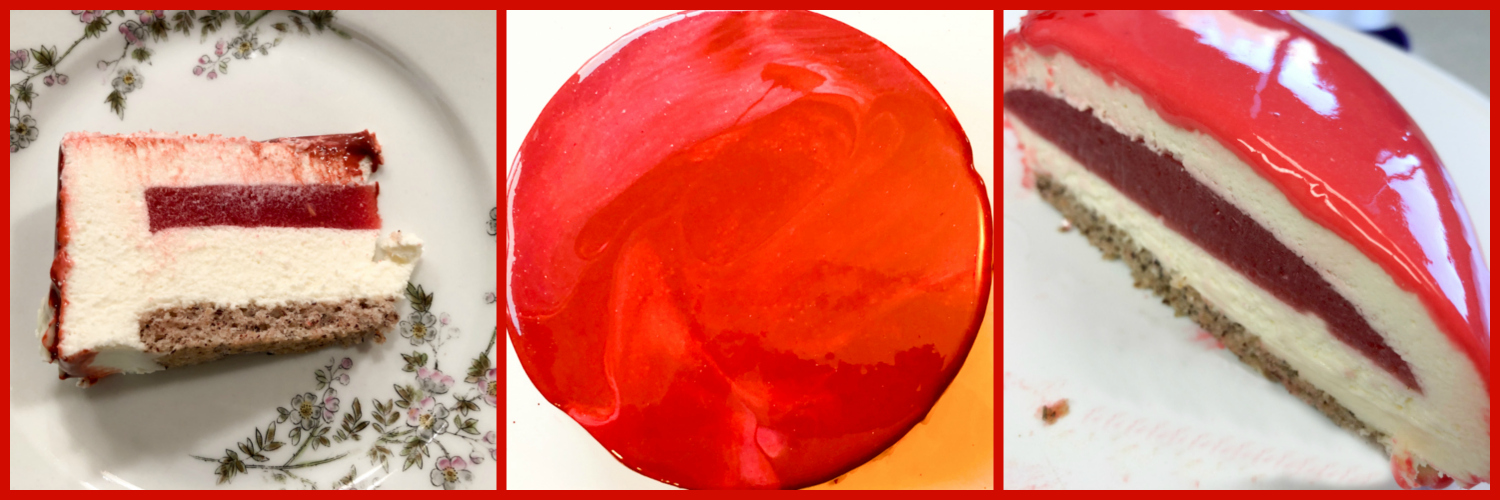
I really loved how all the components worked together in this dessert. The angel food is a kind of a humble cake, with unique smooth texture but not much in the flavor department. The raspberry confit is quite the opposite, it’s all about flavor, hitting you intensely with the tart-sweetness of the fruit. Then it all gets mellowed down by the mousseline cream. The mini-meringues surprised me because at first I thought about skipping them, but they give this dessert an additional crunchy texture that is pure joy. If you make this cake, bake a batch of meringues, you will be glad you did.
Notes to self:
add a little pink food dye to the mousseline…
spread the confit layer a little bit thinner…
pipe meringues with slightly more pointy tops…
Thank you, Miúda, for your patience with my questions and your words of encouragement… Looking forward to your upcoming baking adventures at verdadedesabor…

ONE YEAR AGO: Caramel Chocolate Tartlets
TWO YEARS AGO: Chicken Korma-ish
THREE YEARS AGO: Sunday Gravy with Braciole
FOUR YEARS AGO: In My Kitchen, February 2015
FIVE YEARS AGO: Avocado and Orange Salad with Charred Jalapeno Dressing
SIX YEARS AGO: Green Olive, Walnuts and Pomegranate Salad
SEVEN YEARS AGO: Romanian Flatbreads
EIGHT YEARS AGO: Ziti with Artichokes and Meyer Lemon Sauce
NINE YEARS AGO: Blasted Broccoli, Stove-top version