Every Monday I like to take a bake to our department, and try to keep it varied, never the same type of sweet two weeks in a row. I always have too many options in my mind and go into a state of paralysis when the weekend arrives and I need to decide what to make. Last weekend was particularly tough, so I asked the husband to help me out. He did not even blink. Why not a chocolate cake with coconut frosting? And that’s how this cake was born.
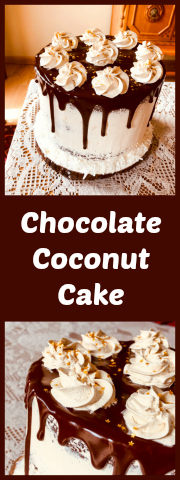
CHOCOLATE CAKE WITH COCONUT BUTTERCREAM
(adapted from Ina Garten and Stella Parks)
for the chocolate cake (make one day in advance):
(after Ina Garten)
228g all-purpose flour
400g sugar
75g unsweetened cocoa powder
2 teaspoons baking soda
1 teaspoon baking powder
1 teaspoon salt
1 cup buttermilk
1/2 cup vegetable oil
2 large eggs
1 teaspoon pure vanilla extract
1 cup freshly brewed hot coffee
for coconut creme patissiere:
1 cup coconut milk
4 large egg yolks
65g granulated sugar
2 + 1/2 tablespoons cornstarch
1/2 teaspoon coconut extract
2 tablespoons unsalted butter
1/2 cup shredded sweetened coconut
for coconut frosting:
(after Stella Parks)
170g egg whites
340g turbinado sugar
1/2 teaspoon kosher salt
1/4 teaspoon cream of tartar
1/2 tsp vanilla paste
450 g butter (4 sticks) softened to about 65 F
115g virgin coconut oil
for the drip glaze:
113 g semisweet chocolate, coarsely chopped
4 tablespoons unsalted butter, cut into pieces
2 tablespoons light corn syrup
Make the cakes. Heat the oven to 350°. Butter three 7-by-2-inch round cake pans and line them with parchment; butter the paper. Dust the pans with flour, tapping out any excess.
I In a bowl, whisk the buttermilk with the oil, eggs and vanilla. Place the flour, sugar, cocoa powder, both leavening agents and salt in the bowl of a KitchenAid type mixer. Turn the mixer on, and after a few seconds slowly beat the buttermilk mixture into the dry ingredients until just incorporated. Slowly pour the warm coffee. Batter will be pretty thin.
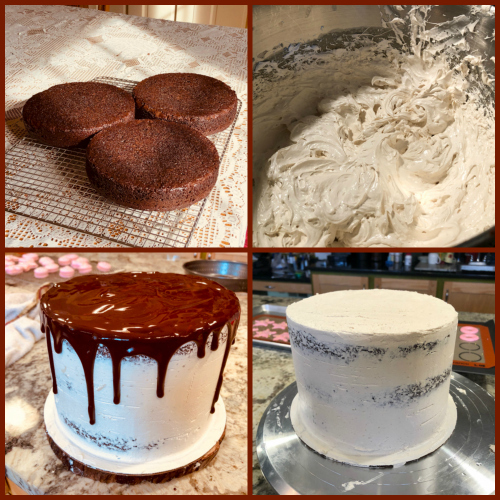
Pour the batter into the prepared pans. Bake for 35 minutes, or until a toothpick inserted in the center of each cake comes out clean. Let the cakes cool in the pans for 20 minutes, then invert the cakes onto a rack to cool. Peel off the parchment. When completely cold, refrigerate to finish next day.
Make the creme patissiere (can be made the day before). Bring the coconut milk up to a simmer in a medium saucepan. In a small bowl, whisk the egg yolks, sugar, cornstarch, and extract until pale in color. Slowly pour in the hot coconut milk while whisking continuously. Return the mixture back to the saucepan and whisk over medium-high heat until it boils. Boil for two minutes (important step, to destroy amylases in the egg yolks, that would prevent the cream from setting properly). Pour the pastry cream through a fine-mesh sieve then stir in the butter. Place a piece of plastic wrap directly on top of the pastry cream, making sure it is touching the surface, and refrigerate until cooled completely. Stir in the shredded coconut when ready to use in the cake.
Make the coconut frosting. Make a Swiss meringue by mixing egg whites, turbinado sugar, cream of tartar, salt and vanilla paste in a large bowl and bringing it to 185F over simmering water, whisking constantly. Transfer to Kitchen Aid type mixer and whisk at high-speed for about 12 minutes until temperature is around 90F.
Add butter, one tablespoon at a time, then add the coconut oil. Whisk a couple more minutes until fully smooth, and use right away. You can also store it in the fridge, bring it to 70F and whisk again before using.
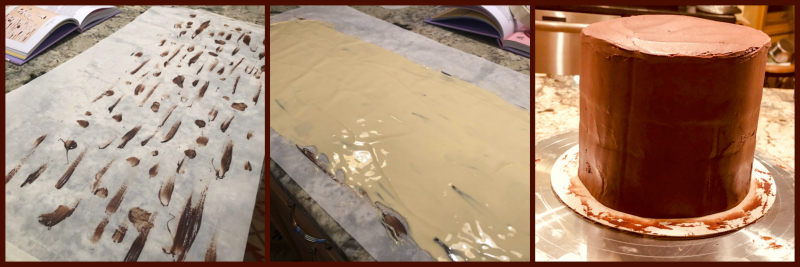
Make the drip glaze. Warm all ingredients in a bowl over simmering water. Once chocolate is fully melted and incorporated with other ingredients, remove from heat. Cool to around 98F to use.
Assemble the cake. Place one layer over a cake board. Add a layer of coconut frosting, top with a small amount of coconut creme patissier. Add second layer of the cake, repeat filling. Add final third layer, frost top and sides with a crumb coat of frosting. Put in the fridge for 20 minutes.
Add a final coating of the coconut frosting, work with a scraper to the remove a bit from the sides, exposing some of the layers. Place back in the fridge, so that it is very cold before you add the drip glaze.
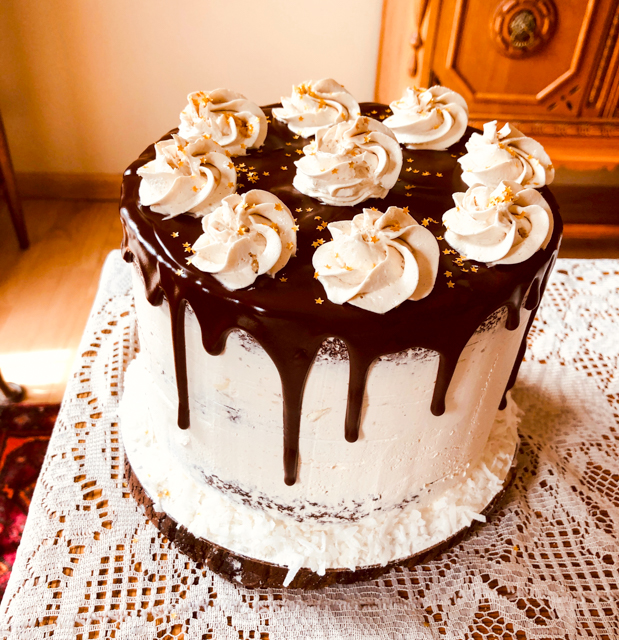
Add the drip glaze with a spoon, dripping around the sides, then fill the top of the cake with a thin layer. Refrigerate again for 15 minutes or until the drip glaze is set. Add swirls of coconut buttercream, decorate the base with shredded coconut, if so desired. Sprinkles are optional.
ENJOY!
to print the recipe, click here
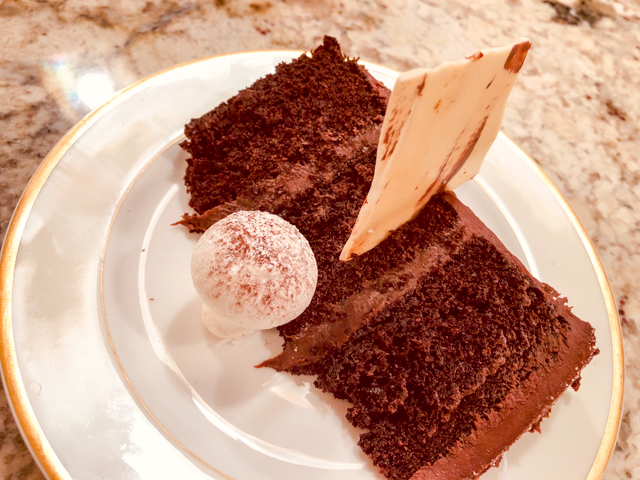
Comments: The chocolate cake is a favorite of mine. I’ve used it in the past, and was my cake of choice for a very special celebration back in December. It is moist, it is intense, it holds well in layers. I was a bit worried that so much chocolate would obliterate the coconut component, but we are talking a duel between Ina and Stella, two Baking Titans. Stella Parks’ coconut frosting rose to the challenge. I do think my little contribution of the creme pat was also pretty nice, so I discreetly offered myself a pat in the back.

Usually, when we think about chocolate cake with coconut frosting, the first idea that comes to mind is a mountain of white frosting with shredded coconut all over it. I don’t particularly care for the texture of shredded coconut when it is prominent like that. So for my personal taste this version is more appealing. And it does have a touch of elegance, I think.

I loved doing the drip glaze thing. It is not as dramatic as mirror-glazing, in fact it is much more Zen, because you can plan your drips and watch them form. Plan your drips. Yeah, that is one odd statement, but it’s the best I could do. It’s early and coffee has not kicked in yet.
I think this cake goes easily into my top five list.
ONE YEAR AGO: Berry Rebellion Tarts
TWO YEARS AGO: Bergamot-Cherry Macarons
THREE YEAR AGO: Roasted Veggies with Queso Cotija Dressing
FOUR YEARS AGO: Creamy Broccoli and Mushroom Casserole
FIVE YEARS AGO: Maple Walnut Biscotti
SIX YEARS AGO: Barley Risotto with Peas
SEVEN YEARS AGO: Oatmeal Fudge Bars
EIGHT YEARS AGO: Cauliflower Steaks
NINE YEARS AGO: Soft Spot for Chevre
TEN YEARS AGO: Quick sun-dried Tomato Crostini