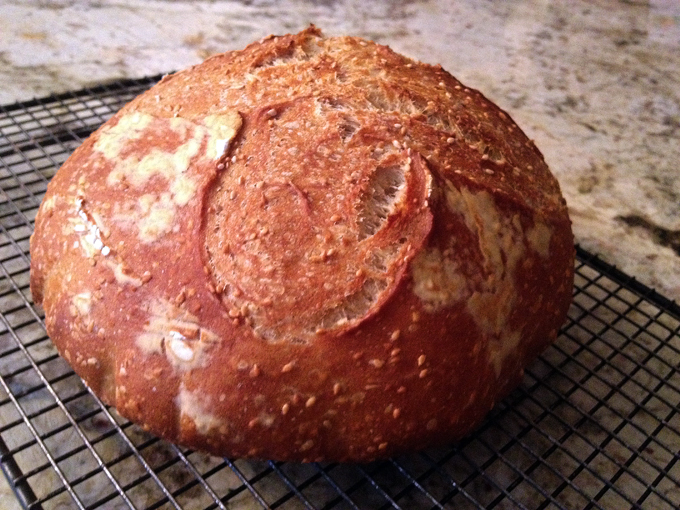
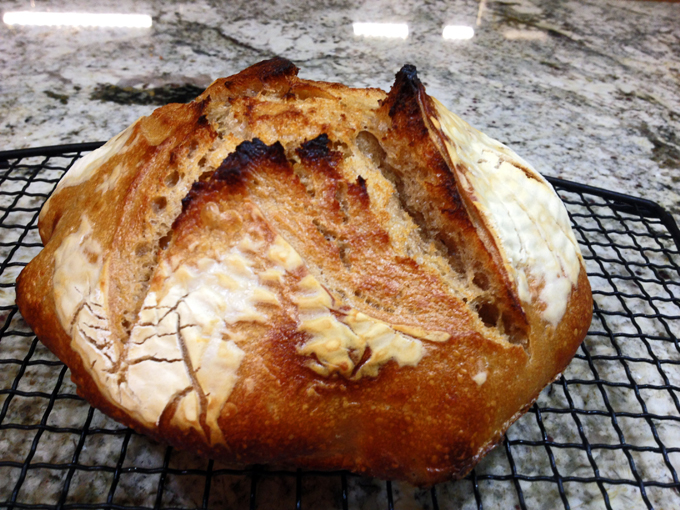
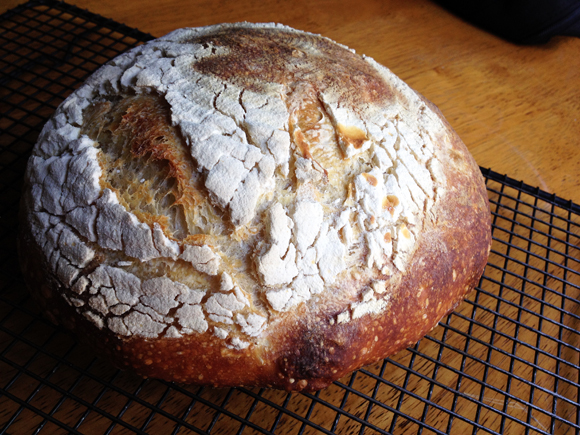
JOSEY BAKER’S OLIVE BREAD

You would think that I’m done talking about gifts. Sorry, there is one more, a super special gift received from Celia, the bread baking Goddess Extraordinaire from Australia, hostess of the equally extraordinaire food blog Fig Jam and Lime Cordial.  She found out that it was my birthday last month (full disclosure: I told her), and sent me a bread cookbook: Josey Baker Bread.   I was traveling at the time, but could not wait to get my hands on some flour, salt, and yeast to put my gift to use.  Of course, my first thought was sourdough, but we’ve been so busy lately, that every Wednesday would come and go, and I never remembered to revive my starter, hibernating in a – 20°C freezer.  Finally, I could not wait any longer, and tried one of the simpler recipes using commercial yeast.  This is by far one of the easiest breads you can make. All it takes is preparing a pre-ferment with whole-wheat flour, allowing that to sit at room temperature overnight, then proceed with a no-knead formula next day.

unnamed-12

OVERVIEW OF THE RECIPE: to make this bread, you will start by mixing whole wheat flour with water and a little commercial yeast.  That mixture will bubble away overnight, and will be part of the final dough, which contains only white flour, a little salt, lemon zest, fresh rosemary, and of course black olives.  I actually omitted the rosemary because I did not have any at home then.  I increased the amount of lemon zest, but other than that the recipe was followed to a T.

It is essentially a no-knead bread, with a very flexible schedule as far as preparing the dough and baking it. This is one of the things I loved the most about his cookbook: Josey offers a timetable for all his recipes, so that you can adjust making bread to your own schedule, no matter how busy you are. If you rather stay up late to bake, follow one particular timing. If you prefer to bake first thing in the morning, follow another one. Baking in the end of the afternoon? At lunch time? It’s all doable. Part of the beauty of working with yeast. If you are new to bread baking, this book will be perfect for you, because it totally demystifies the process. Reading the book is the closest thing to having a class on bread baking given by a pro who behaves more like a friend, not a snotty professor. Yeap, that is what Josey Baker’s book is all about.

If you want the full recipe, it is available online, reprinted with permission from Josey on this site.


unnamed-13
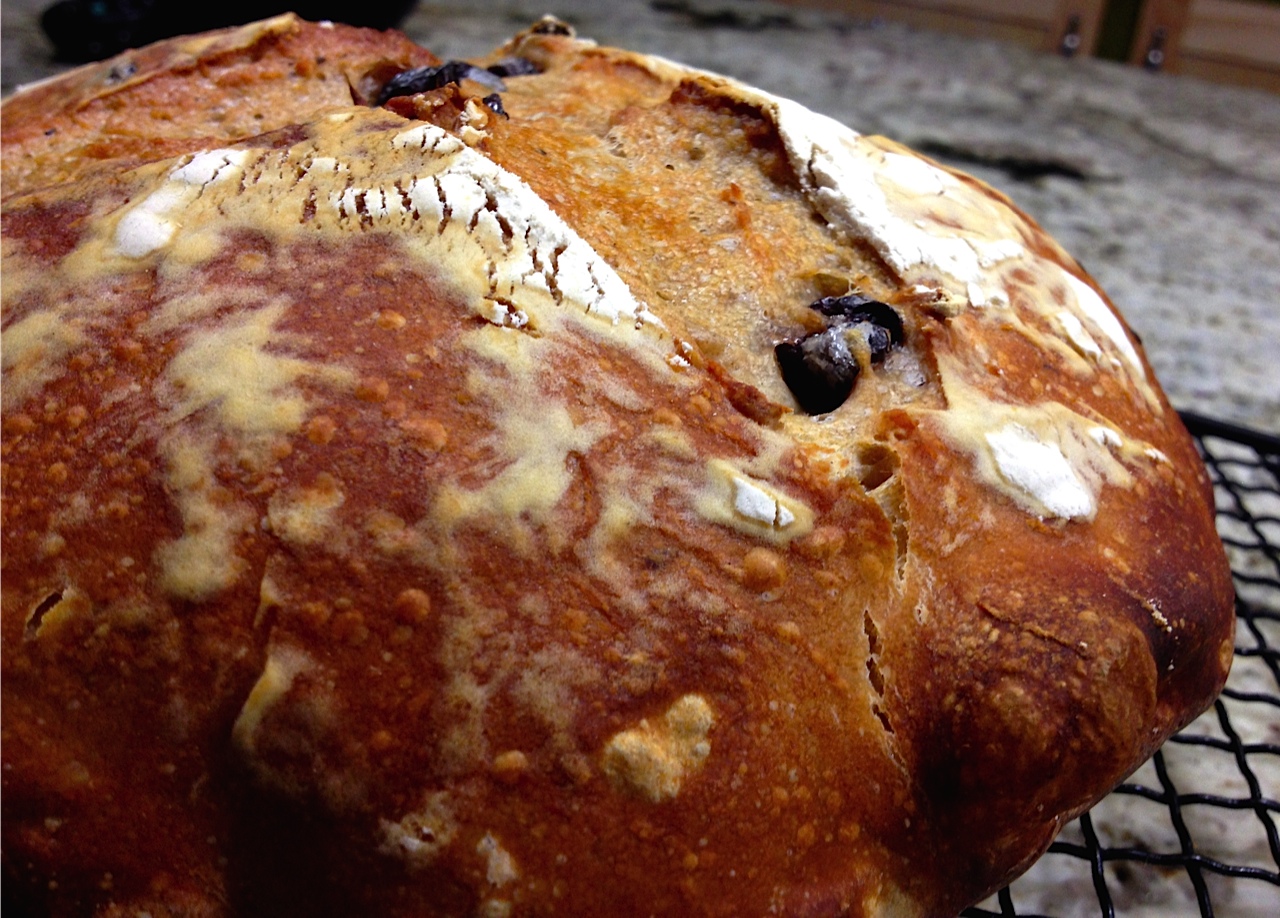
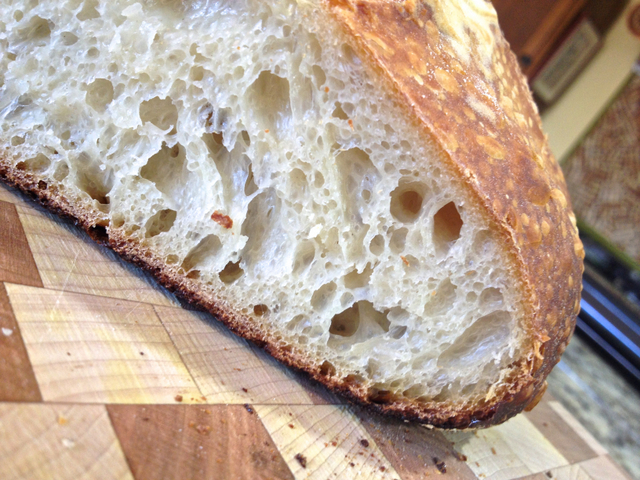
For a no-knead bread, the crumb has quite a nice structure, and the taste is wonderful!  The lemon zest was very prominent, and I think rosemary would make this bread perfect. But I would never substitute dried rosemary because I dislike its texture. In fact, one of the spices I rarely use in dried form is rosemary for that very reason.  Unless it is part of mixes such as Herbes de Provence, but in that case it is pretty much pulverized and the drawback of harsh texture is eliminated. Still, get your hands on some fresh rosemary, grab your bag of flour and make this bread. The smell while it bakes is out of this world delicious! And refrain from grabbing one of those olives that will be peeking on the surface of the loaf.  It is bad bread etiquette, and resisting that temptation builds character. HA!

Celia, thanks so much for the thoughtful gift! Special friends make getting one year older “almost’ painless…
😉

ONE YEAR AGO: Almonds, a Cookbook Review

TWO YEARS AGO: Pumpkin Shrimp Curry

THREE YEARS AGO: In My Kitchen, April 2012

FOUR YEARS AGO: A Dutch Tiger

FIVE YEARS AGO: Banana Bread


FOCACCIA WITH CHILE AND COTIJA CHEESE

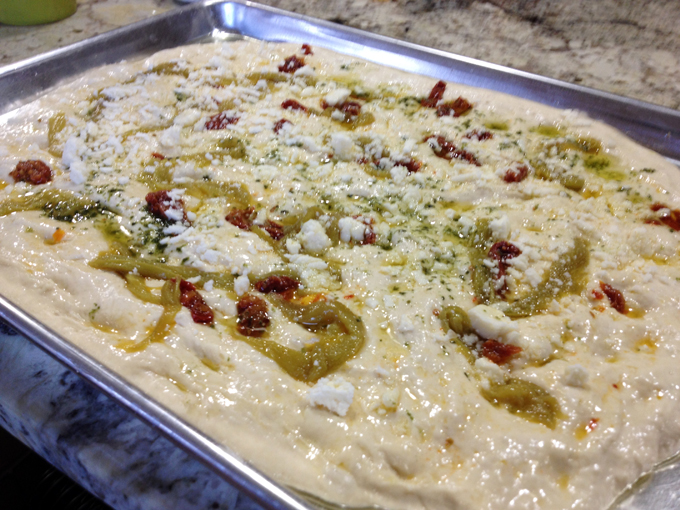
A while ago – June 2013, to be precise – I made a type of Italy-meets-Mexico-focaccia using a sauce with tomatillos. It turned out so tasty that I wanted to re-visit the same type of fusion cuisine again. It took me a while, but here is my second take on the subject.  I used my default recipe for the dough, topped with a mixture of olive oil, avocado oil, New Mexico chiles, and Cotija cheese. Some sun-dried tomatoes for a bit of concentrated sweetness, and voilà…

IMG_6521FOCACCIA WITH CHILE AND COTIJA CHEESE
(from the Bewitching Kitchen)

1 recipe of focaccia dough
Green New Mexico chiles, thinly sliced
Cotija cheese, crumbled (you can use feta, or even Mozzarella)
sun-dried tomatoes
olive oil
avocado oil
salt & pepper

Open the dough on a well-oiled baking dish, stretching with your hands, and making plenty of dimples all over its surface.

Add a good coating of olive and avocado oil, mixed about 50:50. Distribute the slices of chile, cheese, and sun-dried tomatoes all over the dough.  Season with salt and pepper.

Bake as directed in the original foccacia post.

Cut in slices and serve.

ENJOY!

I am not offering a printable version, since the main recipe for the dough is from a previous post. The toppings don’t really need any type of precise measurement, so add as much or as little of each component you feel like. Black olives could be wonderful too, by the way…

prebaked
For the chiles, I used the brand featured in this post, a gift from our friends V & K. They have amazing flavor, and of course go very well with Cotija cheese, one of those matches made in heaven.  Like V & K.

♥♥♥♥♥♥♥♥♥♥♥♥♥♥

The focaccia squares freeze well, I like to wrap 3 to 4 squares in small packages and enjoy them for weeks. Simply remove from the freezer 30 minutes before your meal, and heat them in a low oven until warm and fragrant.

I am submitting this post to Susan’s Yeastspotting event…

ONE YEAR AGO: Crispy Chickpea and Caper Spaghetti 

TWO YEARS AGO: Leaving on a jet plane

THREE YEARS AGO: Crispy Herb-Crusted Halibut

FOUR YEARS AGO: Almond Butter Cake

FIVE YEARS AGO: Bonjour!

KEN FORKISH’S WARM SPOT SOURDOUGH

First bread post of 2015!  Not the first bake of the year, because this was made for Phil’s birthday on the last week of December. He chose the whole menu, which consisted of oysters on the half-shell as a first course, and clam chowder as the main dish. Also according to his request, no dessert to keep things moderate.  Perfect for me.  The bread was all that bowl of chowdah needed to shine in its creamy glory!

Warm Spot Sourdough1

WARM SPOT SOURDOUGH

I am not going to share the full recipe (from Ken Forkish’s book Flour Water Salt Yeast), but you can find it online with a visit to Karen’s site. And don’t just limit yourself to that recipe,  look around and be amazed by her talent. Just a recent example: she tackled Pretzel Rolls, the traditional Laugenbrötchen. That is on my mile-long list of things to try this year. Now, back to my sourdough…

A little walk through the method… The bread takes three days to prepare, but don’t let that intimidate you. It is worth your time. The interesting twist in the recipe is keeping your sourdough starter at a higher temperature of fermentation, around 85 F. During the winter that can be a challenge, but I am the lucky owner of a bread proofing box. Problem solved. Because the starter ferments at a higher temperature you will need to refresh it more often than usual, but as I mentioned in my previous sourdough post, Ken is particularly helpful in laying out a nice schedule for each of his recipes.

After the bulk fermentation, in which I gave four folding cycles to the dough, the bread is shaped, and retarded in the fridge overnight. From the fridge it goes straight into the hot oven, no need to bring it to room temperature.

One of the things I did differently in this bake was to flour my banetton, cover it with plastic wrap (Saran Wrap type), flour the plastic and place the shaped dough for its final proof, seam side UP (going against Ken’s usual method).  Next morning, I inverted the bread on parchment paper, slashed the surface and baked it with my normal method of steam (Dutch oven covered with a wet lid).  Ken likes to allow his breads to open naturally, so he proofs the shaped loaf with the seam side down, then simply inverts it on the baking sheet without slashing. I did this on my first time making this recipe a couple of months ago, and even though the bread tasted as good as this one, it failed to open in a more dramatic way.  Take a look:

FirstLoaf

Maybe it is just a matter of personal preference, but I rather help the bread open in a more defined way.  One more remark before I go: I liked the use of the plastic wrap because it gave me extra confidence removing the bread from the banetton. I’ve had too many situations of dough sticking and compromising the shape of the loaf in the end.  I suspect my skills to shape the loaf and generate enough surface tension need improvement. Until then, I will be using this trick, and if you had problems with dough sticking give it a try…

The bread had good oven spring, the crust was just the way we love it!

CrumbCRUMB SHOT

So there we have it, another birthday celebration, with good music, juicy oysters, delicious bread, and a warming bowl of soup, all in the comfort of our home!  Life is good…

I am submitting this post to Susan’s Yeastspotting event…

ONE YEAR AGO: Bran Muffins, Rainbows, and a wonderful surprise!

TWO YEARS AGO: Cider-Marinated Pork Kebabs

THREE YEARS AGO: Golden Age Granola

FOUR  YEARS AGO: Mushroom Souffle for Two

FIVE YEARS AGO: Stollen

KEN FORKISH’S PAIN AU BACON

PainAuBacon2It’s been a while since I baked a loaf of sourdough bread. A quick browse through my archives proves this sad turn of events: October 13th was my last adventure in the Land of the Wild Yeast. But, with so much going on, trips, busy schedule, I was forced to let my starter sleeping in the freezer a lot longer than I expected.  Finally, the second weekend of December shaped up as a perfect opportunity to resume bread baking. The weekend schedule seemed flexible enough – just a cocktail party Saturday night – and the perfect weather to crank the oven up all the way to 450 F.  Sometimes a tropical being is forced to find positive aspects in outside temperatures falling below 60 F.  I sat down next to our fireplace with quite a few of my bread cookbooks, and went through the very elaborate process of choosing which recipe to work on.  Keep in mind that if I have to dress up for a party, my outfit is decided in 5 minutes, accessories included. But choosing a sourdough bread takes me hours. And I mean  hours  in the strict sense of the term, in which 1 hour equals 360 seconds.  After intense mental struggle, I picked a winner from Ken Forkish’s book “Flour Water Salt Yeast“.   It was worth all the pacing back and forth, the many stick-it notes, and the snide remarks of the husband asking if I needed another couch to spread some more cookbooks. Very uncalled for. Obviously, I can only endure this type of treatment because I am an easy-going, serene, and forgiving human being. PainAuBacon1PAIN AU BACON
(recipe reprinted with permission from Ken Forkish)

Makes one loaf.

for the levain:
50 g mature active sourdough starter
200 g unbleached all-purpose flour
50 g whole wheat flour
200 g lukewarm water

for the final dough:
432 g unbleached all-purpose flour
8 g whole wheat flour
343 g water (warmed to about 90 degrees F)
10 g fine sea salt
250 g (about 1/2 pound) bacon, fried to crispy, and then crumbled
1 T reserved bacon fat
108 g of the levain
.
Mix the levain ingredients in a medium bowl, cover with plastic wrap, and let sit for about 10 hours, until bubbly. In a large bowl mix the flours and water by hand until just incorporated. Cover and let it rest for 20 to 30 minutes (that is the autolyse step).
.
Sprinkle the salt all over the flour mixture, then add the levain.  Using wet hands to prevent the dough from sticking, mix the dough by pinching it to distribute the salt. Cover and rest for 10 minutes.
.
Spread the bacon fat over the dough and add the crumbled bacon. Using the pincer method alternating with folding, mix all of the ingredients in the bucket. Cover the dough with plastic wrap, and let it sit for 30 minutes. In the next 2 hours, stretch and fold the dough 4 times, every 30 minutes. Cover and let rest at room temperature for 12 hours, until about tripled in volume.

Gently shape the dough into a loose boule. Flour a banneton,  shape the dough into a medium tight ball and place it seam side down into the proofing banneton. Cover with oiled plastic wrap. Let the loaves proof for about 4 hours, depending on the room temperature.

About 45 minutes before baking, heat the oven to 475 degrees F with an empty covered Dutch oven placed on the middle rack.

Remove the Dutch oven from the oven and remove the lid. Place a piece of parchment over the banneton with the proofed bread inside, and a flat baking sheet over it. Flip the dough over, remove the basket, and place the shaped boule in the Dutch oven using the parchment to help move it. The paper can stay in during baking.  Cover the Dutch oven and place it in the hot oven.  Wet the lid of the Dutch oven, and quickly use it to cover it. Alternatively, you can use your own favorite method to generate steam during baking.

Bake covered for 30 minutes, and then uncover it and bake it for 15 to 20 minutes more, until the interior of the bread reaches 205 to 210 degrees F and the bread is a deep brown.

Cool on a rack completely before devouring it…

ENJOY!

to print the recipe, click here
composite1

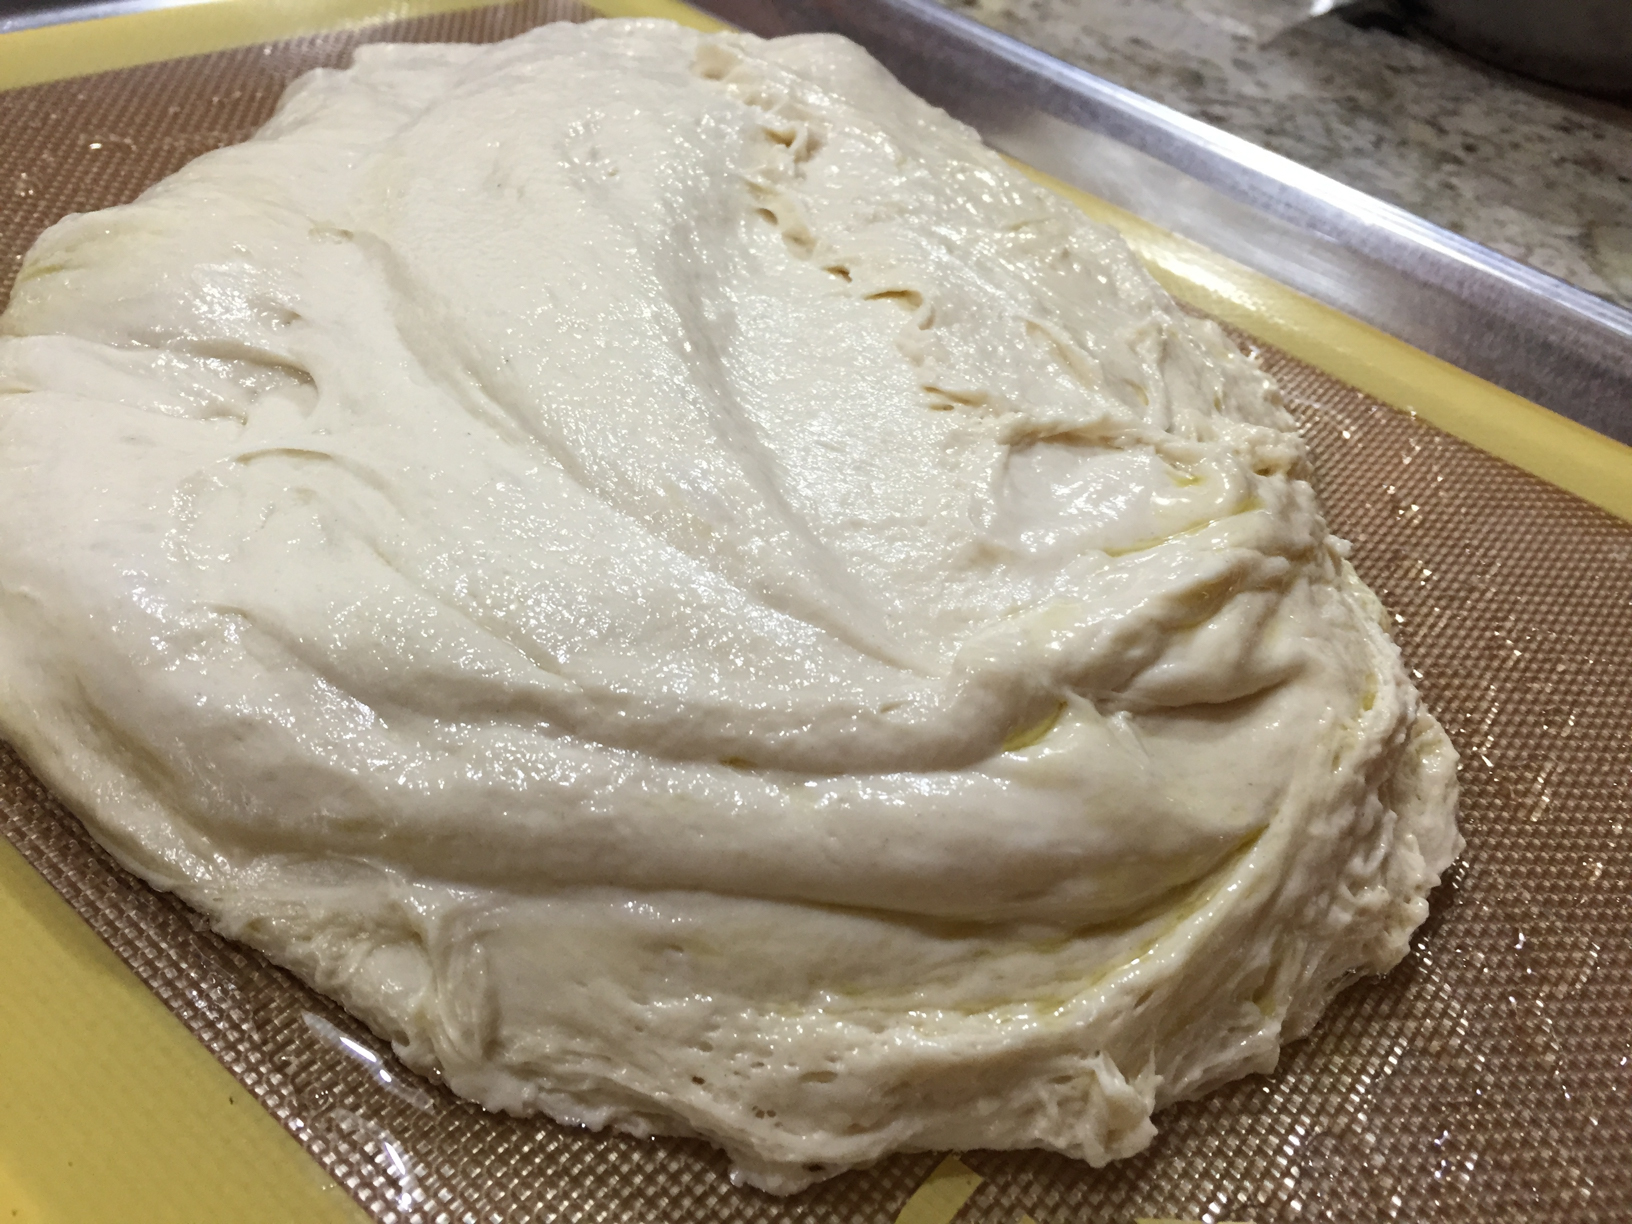
Comments:  After such a long time away from my starter, I get a little anxious when baking a loaf like this.  I was particularly worried about leaving the dough to ferment at room temperature for 12 hours, something I had never done before.  But, the dough behaved exactly as Ken mentioned in the book.  Take a look at these couple of shots:

Before…
Before

After…
After

A very nice, soft, bubbly dough, quite easy to work with and shape as a boule.
Proofing

One of the things I love about Ken’s book, is that he offers a sample timeframe for all recipes. Just for fun, I include my notes, prepared the night before. On top you see his suggestion of timing, and as I move along, I jot down my actual timing, adapted to fit my schedule. If you have the book, you may notice I actually halved the recipe to make a single loaf instead of two.

Notes(click to enlarge, if so desired)

The subtle smell of bacon while the bread baked was wonderful!  I made this bread especially to share with my youngest stepson and our great friends from Oklahoma who were coming to visit us the following weekend. So, the bread cooled completely over a rack, rested for a day, and the following morning I sliced it and froze the slices, in small packages.  It is a perfect way to have bread as good as freshly baked at a moment’s notice.

Here is the mandatory crumb shot…
CrumbShot

And the slices on their way to the freezer…

Bagged

This was a superb loaf of bread!  In fact, when we served it – alongside a hearty pasta with Bolognese sauce – it was hard to believe that bacon was the only ingredient added. It tasted very complex, almost as if a mixture of nuts were also incorporated into the dough. Salty, spicy, and smoky at the same time.

Ken, thank you for allowing me to publish the recipe for one of the most flavorful loaves of bread I ever made!I am submitting this post to Susan’s Yeastspotting event…

HAPPY HOLIDAYS, EVERYONE!

maracujaDad and son enjoying a nice passion fruit “caipirinha”…

ONE YEAR AGO: Carrot and Cumin Hamburger Buns

TWO YEARS AGO: Potato Galettes a l’Alsacienne & Book Review

THREE YEARS AGO: Caramelized Carrot Soup

FOUR YEARS AGO: Miso-Grilled Shrimp

FIVE YEARS AGO: Pain Poilane


SOURDOUGH RYE BREAD WITH FLAXSEEDS AND OATS

This is that type of bread that begs for mindful eating. No sitting down in front of the TV grabbing one piece here, another there, or sharing it with friends in the middle of a loud party.  No, this is a bread that deserves attention. It is dense without being overly heavy, and its flavor is quite complex due to the use of assertive flours and flax seeds. The recipe was created by Rosa, from Rosa’s Yummy Yums, a food blog that not too long ago celebrated its 9th anniversary!  Nine years.  No small feat, folks, considering that each of Rosa’s post is a masterpiece: carefully composed text (with recipes in two languages, English and French), matched with her incredibly beautiful photography. Hers is the type of blog that just like this bread, deserves full attention.

Rosa Yum Yum BreadMade July 26th; Blogged October 13th

WHOLE-WHEAT AND RYE SOURDOUGH WITH FLAX SEEDS AND OATS
(from Rosa Mayland’s blog)

(for one round loaf; check her site for full version that makes 2 loaves)

1 heaping tablespoon of flax seeds 1/2 Tbs Flax seeds
150g whole-wheat flour
100g white flour
35g rye flour
35g buckwheat flour
100g active sourdough starter

188-200 g/ml lukewarm water
A pinch of dry yeast
1 heaping tablespoon of olive oil

20g Rolled oats
7g fine sea salt

Put the flax seeds in a small bowl and add 63g/ml of boiling water (this will make them slimy). Stir and leave to cool.

In the bowl of your stand mixer put the flours, sourdough, water, yeast, olive oil, flax seeds (+soaking water).  Mix until all the ingredients are just combined. Let the dough rest (autolyse) for 2 hours.

Add the salt as well as the oats and continue mixing for about 5-8 minutes (add a little flour if the dough is too wet), until the dough reaches medium gluten development.  Transfer the dough to a slightly oiled container and cover with plastic wrap. Let the dough ferment/rise, at room temperature, for about 2h30 (or until doubled in size), folding at 50 and 100 minutes.

Shape it as desired (sandwich loaves, boule, bâtard, banneton, etc…). Sprinkle your loaves with flour and cover them with plastic wrap let proof for about 90 minutes or until doubled in size.

Bake at 230° C (450° F) using your favorite method to generate steam during the initial 20 minutes of baking. Total baking time will be approximately 40 minutes.  Leave the bread in the oven for 5 minutes with the door ajar once you turn the oven off.  Cool it completely on a rack before slicing it.

ENJOY!

to print the recipe, click here

crumb
Now, if that crumb doesn’t make you sigh, there is something wrong with you… This was a very nice baking project, perfect for a weekend in which we had nothing planned, no social commitments, no need to go to the lab, just taking each hour as the hour shaped up.   If you stop by Rosa’s original post, you’ll see that she coupled this recipe with a text about the importance of slowing down, a praise for idleness. Food for thought, as usual for her posts. It is nice to be able to take a step back and do nothing. Or, if doing nothing seems like too much of a shock for  you 😉  grab your flours and make this bread. Then, slowly slice it, and close your eyes when you taste it.   Yes, it is that wonderful!

Rosa, thank you for a great recipe, and above all, for the effort you put into your blog, a pleasure to visit every single time!  See you around the blogosphere 😉

I am submitting this post to Susan’s Yeastspotting event…

ONE YEAR AGO: Apricot-Raspberry Sorbet: A farewell to Summer

TWO YEARS AGO: Marcela’s Salpicon

THREE YEARS AGO: Pork Kebabs

FOUR YEARS AGO: Fondant au Chocolat

FIVE YEARS AGOGot Spinach? Have a salad!