VALENTINE’S DINNER FOR TWO: OPENING ACT

I am absolutely thrilled about this post!  I usually don’t publish blogs linked to special celebrations such as Thanksgiving, Christmas, or 4th of July.  However, this Valentine’s Day will receive special attention from the Bewitching Kitchen. I was invited by Jamie (who hosts the great blog “Cooking in Red Socks“)  to write a collaborative series of posts to celebrate it.  So here is the deal: we will both be blogging three days in a row to cover the appetizer course, dinner, and dessert. My posts will center on a romantic meal for two.  Jamie will blog on the same courses, but her posts will be about Valentine’s Dinner for Friends. Her posts are made super special as one of her best friends, Allie, celebrates her Birthday on V-day.   How cool is that?  😉 Make sure to stop by her blog and marvel at her choice for the appetizer course: Sun-Dried Tomato Palmiers… WOW!

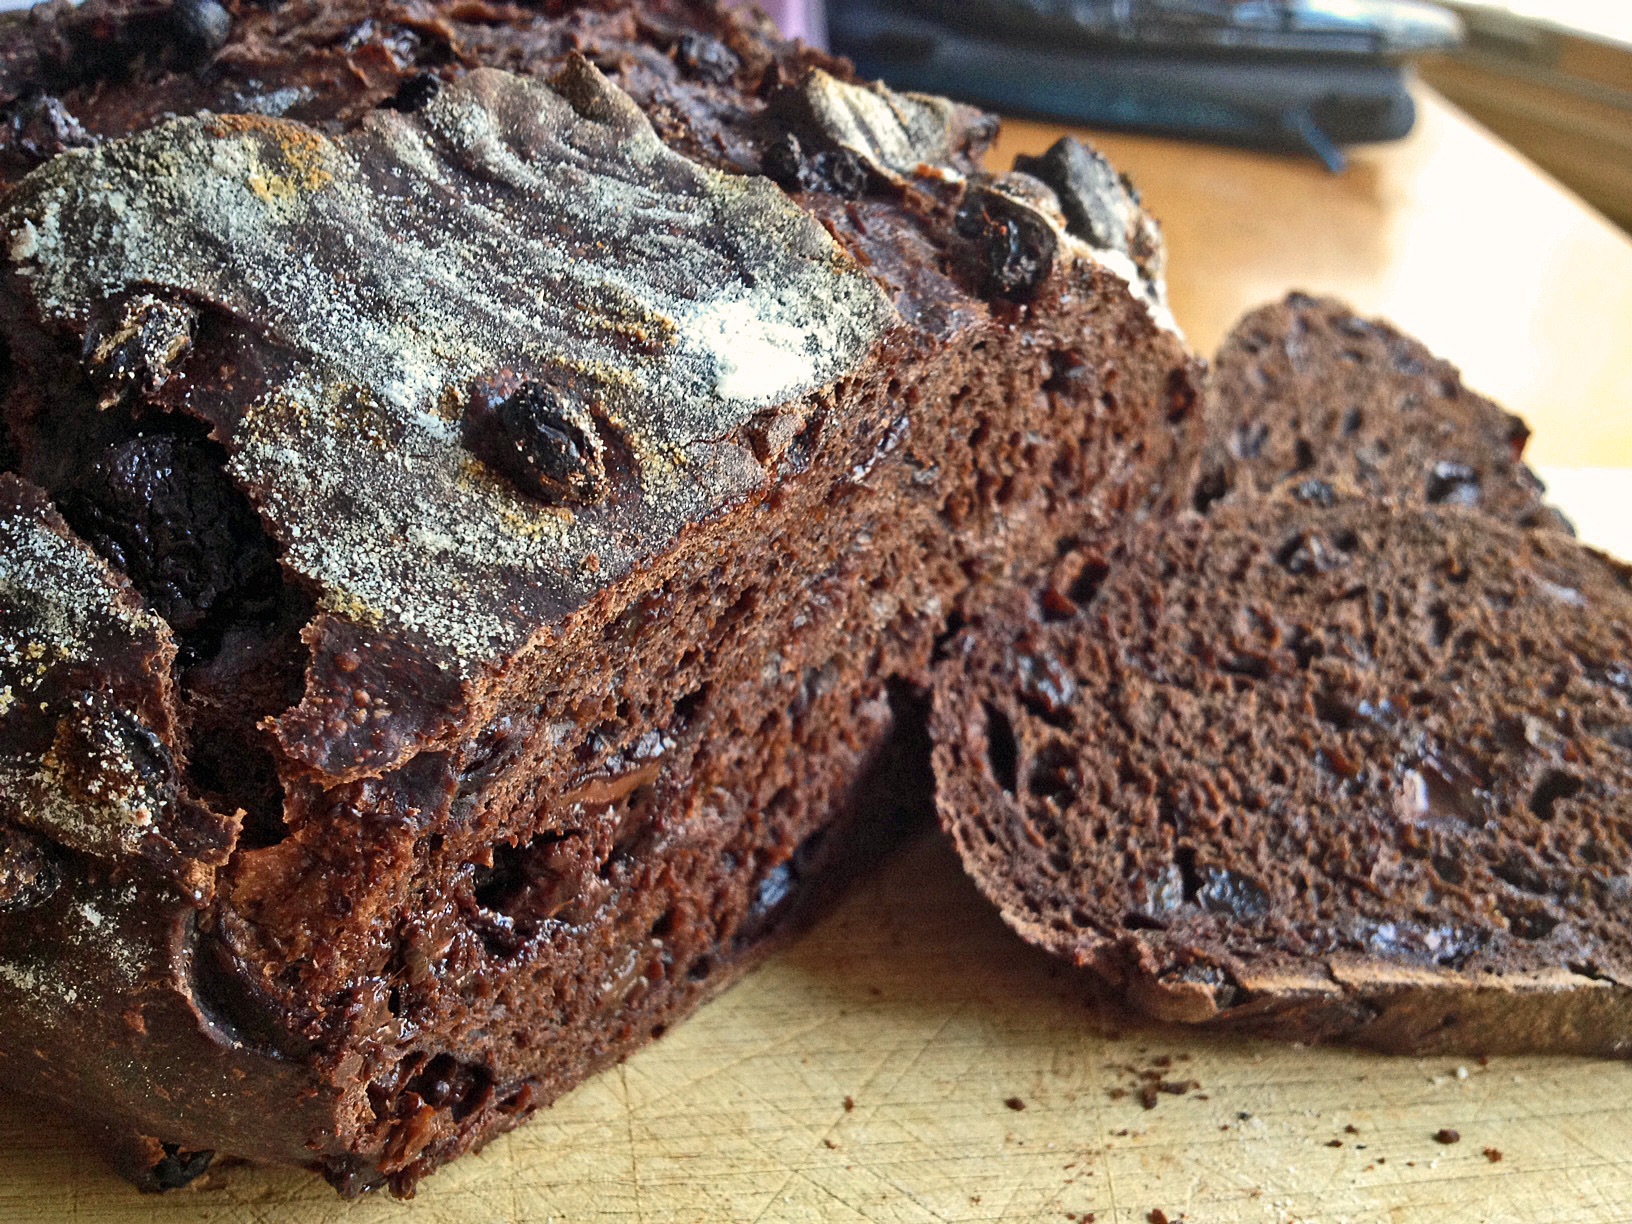
To start the day on a great note, I offer a perfect Valentine’s Day breakfast bread: Chocolate Currant Sourdough.  A slice, slightly toasted, and a cup of hot cappuccino: heavenly!
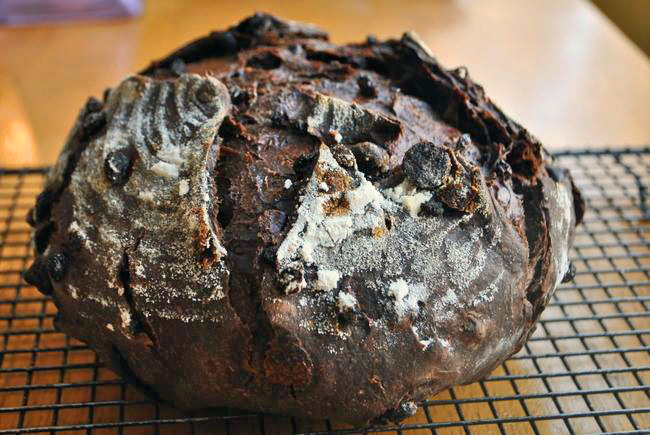
Chocolate Currant Sourdough

ChocolateSourdoughCHOCOLATE CURRANT SOURDOUGH BREAD
(from Farine’s blog, original recipe from How to Make Bread)

Recipe overview:  This bread takes a regular sourdough starter, at 100% hydration.  The starter is incorporated into a final dough containing white flour, cocoa powder, chocolate chips, and currants. After a series of foldings, the dough is shaped, either as two small loaves (as shown in Farine’s blog), or as a large round boule (as I did).  My shaped loaf fermented for 4 hours in our bread proofing box, temperature set to 78 F.   I baked it inside a covered clay pot for 30 minutes at 435 F, then removed the lid, and baked for 15 more minutes.

For the detailed recipe, visit Farine’s site or get  your copy of Emmanuel Hadjiandreou’s book.  Both links are included underneath the recipe’s title. 

Comments: Even though this bread contains a good amount of chocolate and currants, it is not overly sweet. The cocoa powder and the sourdough starter  act together to counteract excessive sweetness.  We loved it, in fact I did not expect to like it as much as I did.  If you have a starter going on in your kitchen, add this bread to your “to bake soon” list.  And don’t keep it there for too long…

♥♥♥♥♥♥♥♥

Now, let’s move on to the appetizer course of our romantic meal for two… I wanted something light, and red. Hummus is a favorite in our home, so I went with a twist on this classic, turning it into a shockingly red dip. Food coloring? No way!  This is a Roasted Beet Hummus, and it was absolutely wonderful…
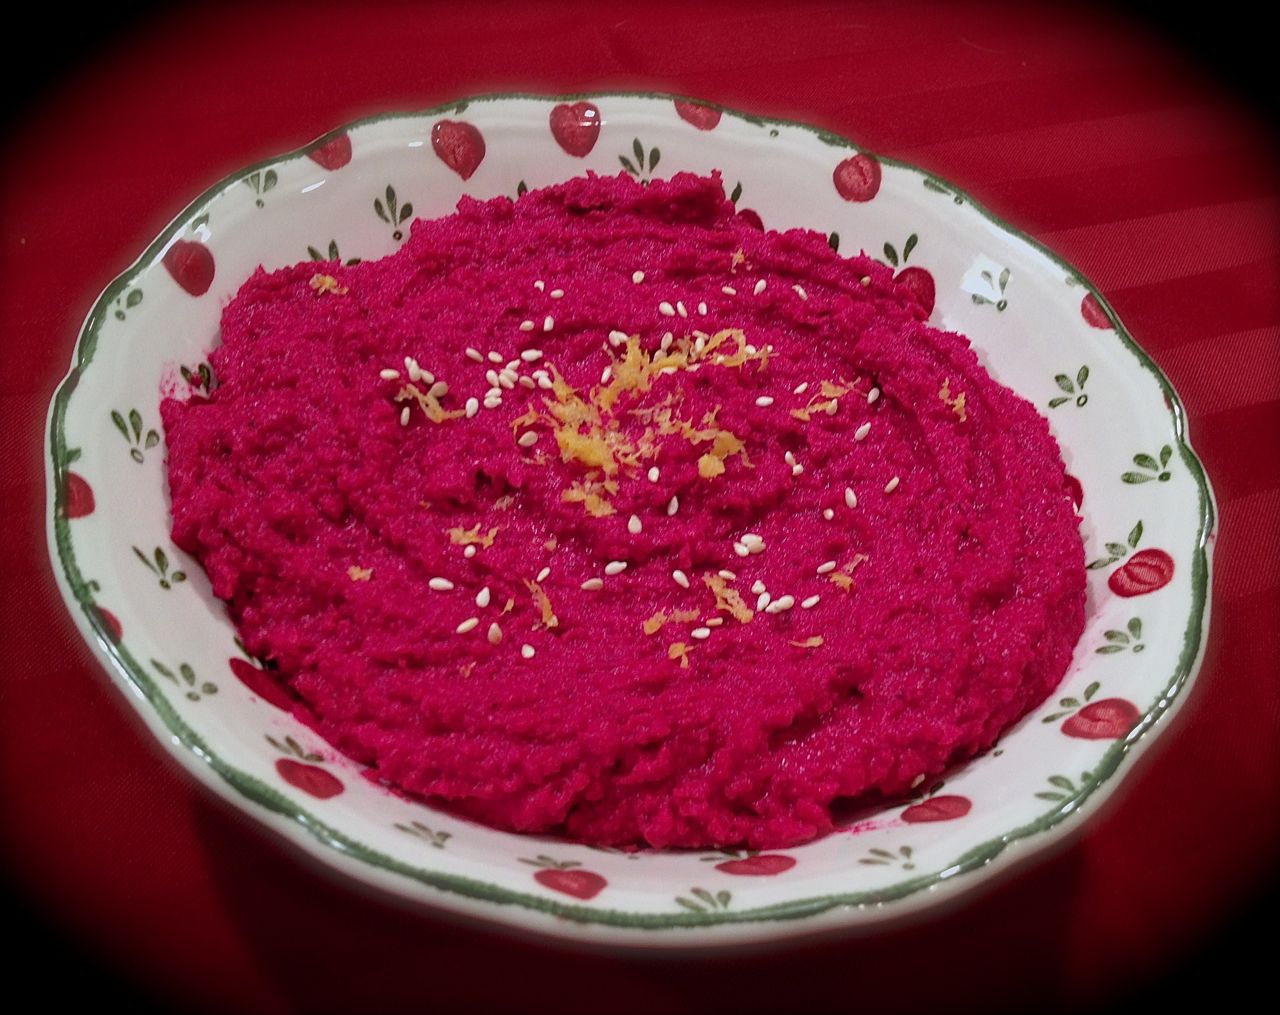
Roasted Beet Hummus

ROASTED BEET HUMMUS
(from the Bewitching Kitchen)

1 medium beet
olive oil
salt and pepper to taste
1 can (15 ounces) of chickpeas, drained, rinsed, peeled
1 lemon, zest and juice
1/4 tsp ground cumin
1/4 cup tahini
2 Tbs olive oil
salt and pepper to taste
cold water to desired consistency
sesame seeds and lemon zest for decoration

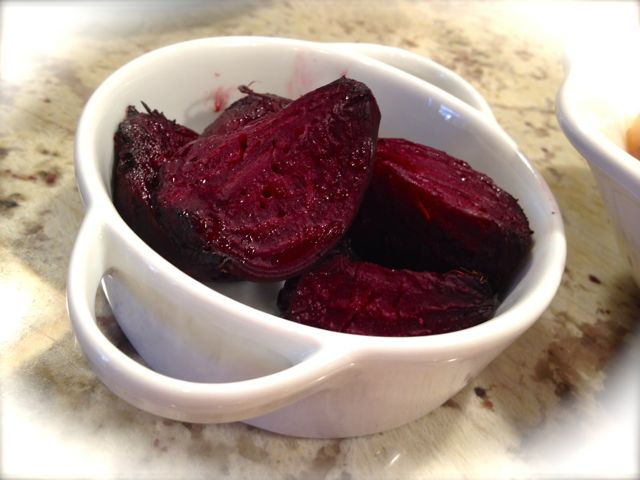
Peel the beet, cut it in quarters, coat with a little olive oil, season with salt and pepper.  Place in a roasting dish covered with foil, and roast at 400 F for 30 minutes or until fully cooked through.

Place the roasted pieces in the bowl of a food processor, and process it for a few seconds.  Add all other ingredients, up to olive oil.  Process until completely smooth.  Season with salt and pepper, and adjust consistency with water if necessary. Taste and adjust seasoning if necessary.   Depending on the acidity of your lemon and your personal taste, a little more lemon juice right before serving might be a good idea.  Sprinkle sesame seeds and lemon zest on top, and…

ENJOY!

to print the recipe, click here
RoastedBeets

Comments:  Phil is not too fond of beets, so I took a risk by choosing it for a Valentine’s Day menu.  But the flavor of this spread is very complex, and the beets stay mildly sitting in the background, their presence big in color but mellow in flavor.  Perfect for those who don’t jump up and down with joy when such bright red beings are found in the middle of the groceries. Serve this spread with crackers, or for a lighter appetizer course, celery or carrot sticks.

Make sure to visit Jamie’s site for her appetizer course on a Valentine’s Day Party for Friends! Stay tuned for the dinner course tomorrow…

♥♥♥♥♥♥♥♥

ONE YEAR AGO: Sesame and Flax Seed Sourdough

TWO YEARS AGO: Spanakopita Meatballs

THREE YEARS AGO: Saturday Morning Scones

FOUR YEARS AGO: Pain de Mie au Levain

ALMOND MILK CREAMED SPINACH

Remember my cauliflower puree made with almond milk instead of cream?  In that post I mentioned another recipe from Food and Wine that uses almond milk: a creamed spinach finished in the oven with a coating of bread crumbs and Marcona almonds.  Of course, right after publishing that post, Marcona almonds were nowhere to be found…  Apparently there has been a shortage of these almonds in Spain, so if you happen to find them where you live, act fast.   Our Dillon’s store got a shipment last month, and I grabbed a bag faster than Buck catches a cookie in mid-air.

Almond Milk Creamed Spinach

ALMOND MILK CREAMED SPINACH
(from Food and Wine magazine)

Four 5-ounce bags baby spinach
4 tablespoons unsalted butter
2 shallots, thinly sliced
3 tablespoons all-purpose flour
2 cups unsweetened almond milk
1/2 cup grated Cotija cheese
Salt
Freshly ground pepper
3/4 cup panko (Japanese bread crumbs)
2 tablespoons finely chopped marcona almonds

Preheat the oven to 425°. In a large saucepan, heat 1 inch of water. Add the spinach by the handful; allow each handful to wilt before adding more. When the spinach is wilted, drain it, pressing out as much water as possible. Wipe out the pot.
.
Melt 2 tablespoons of the butter in the pot. Add the shallots; cook over moderate heat until softened. Stir in the flour and cook for 1 minute. Add the almond milk and simmer until very thick, whisking occasionally, 5 minutes. Stir in the cheese and spinach. Season with salt and pepper. Spoon into a baking dish.
.
In a small bowl, melt the remaining 2 tablespoons of butter. Stir in the panko and almonds and sprinkle over the creamed spinach. Bake for 15 minutes, until golden.

ENJOY!

to print the recipe, click here

served

Comments:  My Mom used to make creamed spinach the old-fashioned way, basically a bechamel-sauce into which some sautéed spinach was mixed in. Much to her despair, I never touched it.  I actually never touched spinach in any type of recipe, raw, cooked, even a ravioli with spinach filling was not welcome on my plate. But, of course I wised up at some point and to quote my virtual friend Sawsan:  “I made peace with spinach”.  😉

When I made this recipe, I did not think it would have a happy ending.  The key point is to have the right proportion of almond cream to spinach, and that’s not very easy to achieve.  I  printed the recipe exactly as published in Food and Wine, but I halved it.   To do so, I needed only 10 ounces of spinach, but more spinach would have been better.  I advise you to made the almond cream, wilt all the spinach you have and then hold back some of the cream. You want the spinach to be  nicely coated by cream, but not swimming in it.   I did not add melted butter to the Panko, just sprinkled all over the dish and half way through baking I softly pressed the coating into the cream. Since my concoction already seemed to have too high a cream to spinach ratio, I thought the melted butter would complicate matters further.  So, to summarize, I think this recipe has potential, but it needs some tweaking.

Creamed spinach goes very well with fish, so I served it with grilled salmon & white rice.  Simple, but very tasty. Almonds and spinach make a very nice combination. If you don’t like almond milk, a regular bechamel sauce like my Mom used to make, decorated with toasted slivered almonds would be a nice dish too.


SWEET FIFTEEN

Today Chief turns 15 years old!  He was just a tiny, incredibly cute puppy when I got him, but his strong personality was already evident. Whenever I corrected him with a loud and firm “NO!” he would furiously bark back at me, much like a teenager challenging the orders of a parent. To celebrate such an important milestone in the life of our dear four-legged friend,  let me share  a few pictures.

chief11This is perhaps my favorite shot of Chief ever!  Before getting married to Phil, I lived in a small house, my backyard separated from the neighbor’s by a simple wire fence. My neighbor also had a dog, a female Springer Spaniel called Maria. Chief used to squeeze through the holes of that fence very easily to play with her. At some point, I traveled to attend a meeting, and left Chief with a friend.  When I came back 10 days later, he had grown so much that passing through the holes was impossible! The photo captured well his expression of frustration faced with a reality he could not quite comprehend. 😉

Chief2He loved to eat his treats laying over the lawn. But you can more or less read his thoughts… “Why are you taking my picture?  I am not sure I should allow it!“

chiefp~1All those treats gave him strong jaws!  As an adult dog, he had no problem to deal with leftovers from a pulled pork.   The bone ended up clean as a whistle… And, in case you are wondering about that bulky thing on his collar, it is a gadget he had to wear all the time to prevent him from digging under the solid wood fence in our home in Oklahoma. Quite a digger!

CrzyMidgt3He loved playing with the hose… Still does, but his jumping days are over…

mudchiefAnd loved playing in mud almost as much. This particular photo was taken 45 minutes after a bath, and almost caused me to go into cardiac arrest.

DSCN1279Always able to find the best spot in any room…

compositeHe loved his buddy Pits, and we know his life has never been quite the same ever since we had to say goodbye to our beloved dalmatian. Pits had the patience of a saint. Seriously.

sallybr
Happy Birthday, Chief, you will always be a puppy for me!

photo

ONE YEAR AGO: Sesame and Flaxseed Sourdough

TWO YEARS AGO: Green Beans with Miso and Almonds

THREE YEARS AGO: Saturday Morning Scones

FOUR YEARS AGO: White Bread

AVOCADO AND ORANGE SALAD WITH CHARRED JALAPENO DRESSING

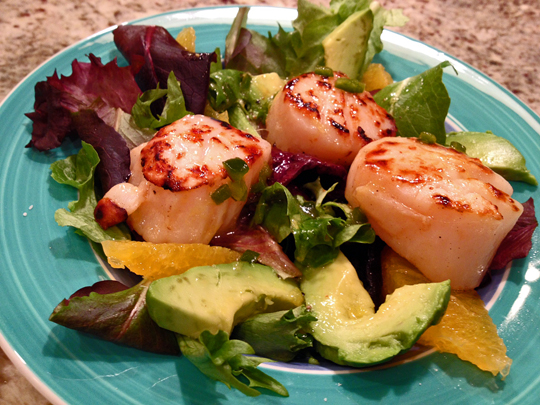
No hesitation to jump on the preparation of this salad: from the moment I saw the post at Fer’s site to enjoying it as our dinner only 20 hours  elapsed.  Keep in mind that most recipes sit on my “to make soon” folder for months, not hours.  Some have been waiting there for a decade! The protein quotient of this salad was increased by the addition of seared scallops on top, with a delicate drizzle of this amazing dressing.  One word: awesome.

Scallops, Orange and Avocado Salad
AVOCADO AND ORANGE SALAD WITH CHARRED JALAPENO DRESSING
(adapted from Chucrute com Salsicha, original recipe from Bon Appetit)

1/2 cup fresh orange juice
1 jalapeño
1 small shallot, finely chopped
2 tablespoons white wine vinegar
salt & freshly ground pepper
1/4 cup grape seed oil
1 tablespoon extra-virgin olive oil
2 avocados, sliced
2 oranges, cut in segments
mixed greens
6 large sea scallops (optional)

Simmer orange juice in a small saucepan until syrupy and reduced to about 2 Tbsp.  It should take a little over 5 minutes. Let cool.

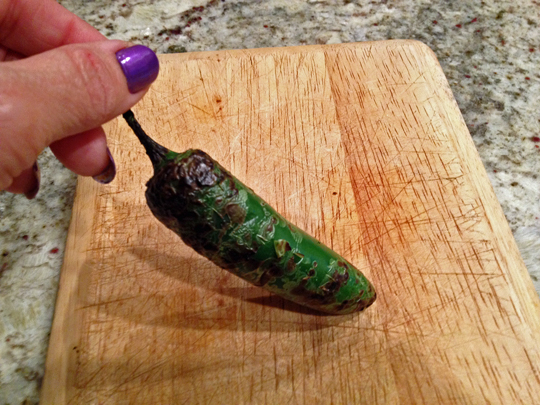
Roast jalapeño directly over a gas flame, turning occasionally, until charred on all sides.  Let cool; remove stem, skin, and seeds, then finely chop.

Whisk shallot, vinegar, reduced orange juice, and the jalapeño in a medium bowl; season with salt and pepper. Whisk in vegetable oil, then olive oil. Set vinaigrette aside.

Toss avocados, orange segments, salad greens,  and vinaigrette in a bowl.  Serve with seared scallops on top, if so desired.

ENJOY! (I know you will….)

to print the recipe, click here

charred
Comments:  You might be tempted to use store-bought orange juice for the dressing, but fresh is best, since it will be concentrated by cooking.  Also, I wimped out and used only half the jalapeño, but it would be even better with the whole pepper.  Go for it and you won’t be disappointed. What a great twist the charring of the jalapeno!  I do that all the time with bell peppers, but had never seen a recipe applying the same treatment to a much smaller (and hotter) pepper.

For the scallops, I used a sprinkle of Mycryo to help get that nice sear, but use whatever method you like.  Just do not over-cook them.   The salad will stand on its own without the scallops, it is very flavorful. Great combination of ingredients, plus a dressing that will be made often in the Bewitching Kitchen.  I can see it would be wonderful spooned over a thick piece of grilled salmon…

ONE YEAR AGO: Green Olive, Walnuts and Pomegranate Salad

TWO YEARS AGO: Romanian Flatbreads

THREE YEARS AGO: Ziti with Artichokes and Meyer Lemon Sauce

FOUR YEARS AGO: Blasted Broccoli, Stove-top version

ZUCCHINI PASTA WITH CILANTRO-CASHEW PESTO

ZucchiniPasta1

I won’t lie to you, making zucchini pasta with the spiral cutter is a task that requires patience (a virtue that I lack)  and probably one or two less than spectacular outcomes. By that I  mean overcooked zucchini that will lay as a limp mass on the plate and make you wonder if take-out sushi was that bad an idea after all. If you want to see the gadget I used in action (by someone who is a lot better than me at handling it), take a look at this youtube video.

Once you master the spiral cutter and how to deal with the zucchini strands, you will be on your way to a satisfying, flavorful and unique dish.  After butchering a few Cucurbita pepo, I was rewarded with a beautiful bowl of veggie strands.

ZucchiniSpirals
ZUCCHINI PASTA WITH CILANTRO-CASHEW PESTO
(adapted from Martyna’s recipe at Wholesome Cook)

for the pesto:
2 bunches fresh cilantro leaves, chopped
1 Serrano chile, seeded and minced
¼ cup raw cashews
1/4 cup grated Parmesan cheese
1/4 cup grape seed oil
½ tsp sea salt flakes
freshly ground black pepper to taste
zest of 1/2 lemon
squeeze of lemon juice

for the “pasta”:
enough zucchini to make a large bowl of strands
(save the collateral damaged ones for veggie stock, stir-fries, soups)

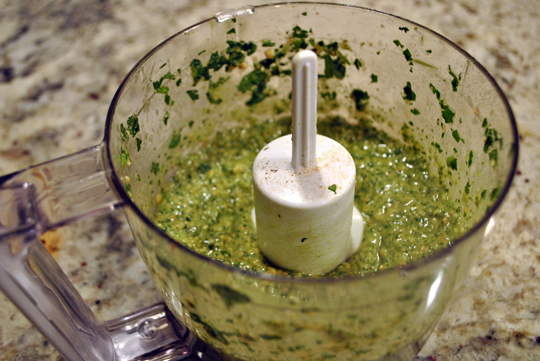
Make the pesto by adding the cilantro, chile, cashews, and cheese to the bowl of a food processor.  Process until a paste forms.  Add grape seed oil until you achieve a consistency you like. I tend to add a lot less oil than most recipes call for.  Adjust to your taste.   Process until smooth, season with salt, pepper, the lemon zest, and juice.  Process again. Reserve.

Cook the zucchini by placing the strands in boiling water for 20 seconds, drain well, incorporate with the pesto and serve.   Alternatively, you stir-fry the zucchini quickly in a small amount of olive oil, then mix with the pesto.

Sprinkle roasted cashews, and…

ENJOY!

to print the recipe, click here

CashewPestoMy beloved mini-food processor did a great job on the pesto…

Comments:  On my first attempt at making zucchini “pasta”, I overcooked the strands, which is very easy to do.  The taste was still pretty good, but the poor zucchini looked almost gray.  No bueno.   This time, the 20-second blanching worked much better.  I might even cut the cooking shorter next time. You can sauce this dish any way you like, including a marinara sauce, which was on our menu the following week, by the way.  I still need to master the spiral cutter better, our kitchen looked like a crime scene when I was done, and zucchini bits were found on my hair later that evening.  That’s some wild cooking prep.  😉

noname-5

For those interested in gluten-free side dishes, or low carb pasta-like concoctions, this recipe fits the bill nicely.  For those who simply enjoy trying a new preparation for the under-appreciated zucchini, the same applies.

Zucchini Pasta with Cashew PestoA little shredded Asiago to gild the lily…

ONE YEAR AGO: Bran Muffins, Take Two

TWO YEARS AGO: Brown Butter Chocolate Chip Cookies

THREE YEARS AGO: Mogo Mojo

FOUR YEARS AGO: Slow-Roasted Chicken Thighs: an Ice-Breaker