HANIELA’S CHEESE CRACKERS

I am a bit late to share this recipe, as I’ve made these delicious crackers back in December. They are super easy and the baker’s ammonia gives them a very unique and pleasant texture. If you have a bottle of this special leavening agent hanging around (maybe because you love baking Springerle), give this recipe a try… If you don’t have bakers’ ammonia, just use regular baking powder.

CHEESE CRACKERS
(from Haniela’s blog)

1 cup all-purpose flour (143grams)
1/2 cup Parmesan cheese finely grated
1/2 tsp baking ammonia (or baking powder)
1/2 tsp salt
1/8 tsp ground black pepper
1 tsp dry rosemary
4 tbsp cold butter, cut into pieces
3-4 tbsp cold water
1 tbsp kosher salt for topping or sea salt


Heat oven to 400F.

Combine flour, salt, ground black pepper, rosemary, grated parmesan cheese and baking ammonia in the bowl of a food processor. Pulse until combined, Add cubes of cold butter and pulse until coarse mixture forms.


Gradually, while pulsing, pour cold water until the dough starts to form a bowl as you process it. Scrape the dough out of the bowl onto a lightly floured surface, gather it with your hands, and flatten it into a disk. Roll out the dough 1/8 thick between 2 parchment sheets or silicone baking mats. Lightly dust the surface with flour.


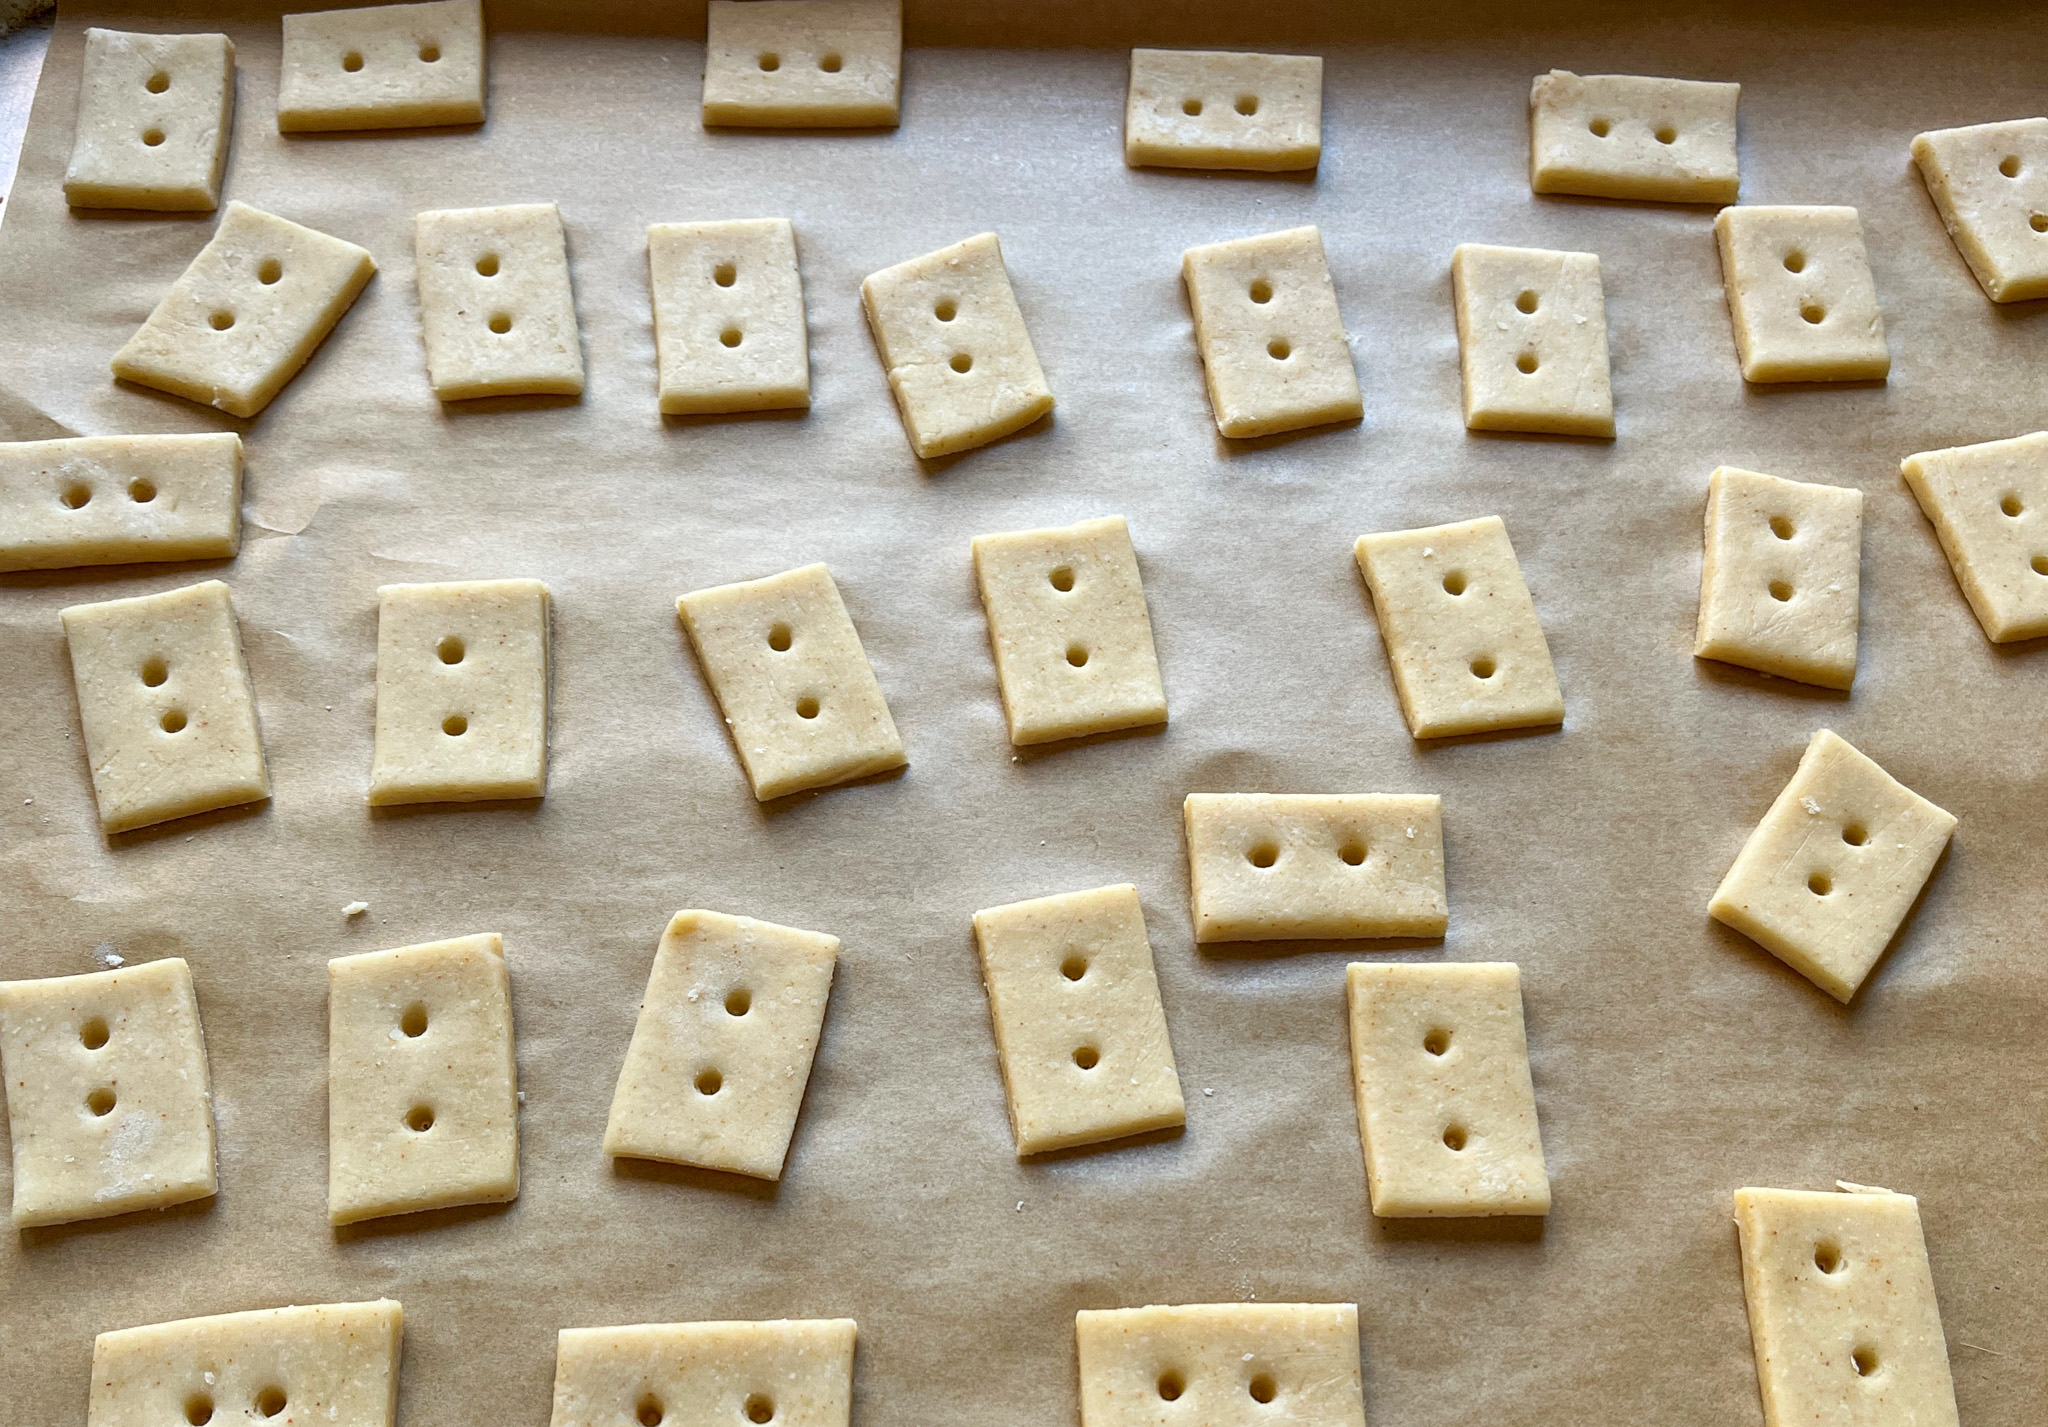
Slice the rolled-out dough into about 1-inch wide strips and then cut 1-inch strips perpendicular to the first set of stripes. Slide the baking sheet or silicone mat onto the baking sheet or rimless cookie sheet. Sprinkle with sea salt or kosher salt. If desired, use chopsticks to make two small holes in the center, or make the wholes with a small icing tip.


Bake crackers in the preheated oven for 10-12 minutes until the edges are golden.

ENJOY!

to print the recipe, click here

Comments: These crackers are similar in the overall method to the ones from Caro, that I blogged about last year (for my post click here, for Caro’s post click here). The main difference is indeed the baker’s ammonia, so make them both and see what you think. Personally, I think one cannot have too many cheese cracker recipes! Salty, flavorful, delicious!

ONE YEAR AGO: Shrimp Tacos with Jicama-Mango Salsa

TWO YEARS AGO: Mini-Egg Brownies

THREE YEARS AGO: The Luck of the Irish

FOUR YEARS AGO: When life gives you Eye-of-the-Round

FIVE YEARS AGO: Carrot Cake Macarons

SIX YEARS AGO: Soup Saturday: Say Goodbye to Winter

SEVEN YEARS AGO: Manchego and Poblano Soup

EIGHT YEARS AGO: A Smashing Pair

NINE YEARS AGO: Spinach and Mushroom Stuffed Pork Tenderloin

TEN YEARS AGO: Crispy Chickpea and Caper Spaghetti

ELEVEN YEARS AGO: Spring has Sprung!

TWELVE YEARS AGO: Chickpea and Fire Roasted Tomato Soup

THIRTEEN YEARS AGO: Double Asparagus Delight

FOURTEEN YEARS AGO:  Sun-dried Tomato and Feta Cheese Torte

SHOKUPAN MARBLED BLACK SESAME BREAD

Not too long ago I got notification of a new blog post by my friend Karen. You can check her post here. She mentioned the yudane method, a kind of tahgzhong on steroids. I am familiar with tangzhong and love it, but yudane was new to me. I could not wait to give it a try. I ended up following this recipe that was linked at the end of Karen’s post.

In the tangzhong method, part of the flour is gently cooked until a paste forms. To make yudane, you boil water and mix with the flour, then place in the fridge for 4 to 24 hours. That gets incorporated into the bread dough. Fascinating, Mr. Spock, fascinating…

I loved making this bread. For the full recipe, please visit Bread Experience (click here). My modifications were just a few: I did not have white whole-wheat, and did not have kamut in the pantry, so I used the full amount of regular whole-wheat, King Arthur’s brand. For the liquid component I used oat milk. Finally, I used store-bought black tahini, just eye-balled about 2 tablespoons and got a nice dark color. The dough is a pleasure to work with, and the marbling worked perfectly!

The crumb is soft, tender, and the bread is absolutely delicious with a hint of sesame taste. I highly, highly recommend you give yudane a try. This is what it looks like…

Just don’t forget it in the fridge, make sure to grab it when you are ready to make the dough! (Yes, I almost forgot about it).

And look at that crumb!

I hope you give yudane a try, the bread stays soft and moist for at least a couple of days. After that I sliced and froze for later.

THANK YOU, KAREN AND CATH FOR THE BREAD INSPIRATION!


ONE YEAR AGO: Chicken with Pasilla-Pecan Sauce

TWO YEARS AGO: A Versatile Silicone Pan

THREE YEARS AGO: Buffalo Chickpeas

FOUR YEARS AGO: Bi-Color Croissant and Pain au Chocolat

FIVE YEARS AGO: Lemon-Blueberry Entremet Cake

SIX YEARS AGO: Walk Strong3: Jessica Smith’s latest workout program

SEVEN YEARS AGO: Pork Medallions with Black Berry Compote

EIGHT YEARS AGO: Indian-Spiced Chicken with Chickpeas and Spinach

NINE YEARS AGO: Curry Cardamon Cookies

TEN YEARS AGO: In My Kitchen, March 2014

ELEVEN YEARS AGOBoeuf Bourguignon for a Snowy Evening

TWELVE YEARS AGO: Chickpea Salad

THIRTEEN YEARS AGO: Soft Spot for Chevre

FOURTEEN YEARS AGO: Roasted Onion and Asiago Cheese Miche

FOR THE LOVE OF BROCCOLI

Three old recipes, and a new one for you today. We have broccoli at least once weekly, and these are the recipes in rotation because we never get tired of them. Contrary to many people, we are not too wild about simply roasting broccoli because for my taste it gets a little too harsh and bitter. I much rather enjoy it in different ways, although if you invite me over for dinner and serve me roasted broccoli, I will lick my plate clean, no worries. Let’s start with the new recipe, a super simple Broccoli Soup. No cream, no special ingredients, it is simple, light and delicious…

LIGHT BROCCOLI SOUP

LOW-FAT BROCCOLI SOUP
(slightly adapted from The Spruce Eats)

1 tablespoon olive oil
1 shallot, chopped
1 stalk celery, chopped
1 medium Yukon Gold potato, peeled and cubed
4 cups broccoli, chopped
2 cups vegetable broth
1 cup almond or oat milk

Heat oil on medium heat in a large stockpot. Sauté the shallot and celery for 3 to 4 minutes, until fragrant. Add the cubed potato, broccoli, broth, and milk. Bring to a boil. Reduce heat, cover, and simmer for 20 minutes, or until all the vegetables are tender.

Allow the soup to cool slightly. Transfer to a blender and blend until smooth in two batches. Return the blended soup to the pot and heat gently until ready to serve.

Top with croutons or sautéed almonds, whatever your heart desires.

ENJOY!

to print the recipe, click here


.

Comments: So far I’ve made this soup three times, and it’s been perfect each time. It has a very creamy texture, maybe it is that small amount of potato speaking. Truly magical. Try it, if you want a light but luscious soup for your dinner. Now moving on to the three oldies but goodies…

SMASHED BROCCOLI WITH CHEESE

This was originally posted last year (check the post here). It was already in the Incredibly Simple files, but I simplified it further by steaming the broccoli in the microwave, using a plastic cover recommended by my friend Marie Louise (click here to see it). I place the florets in a microwave-safe plate, with just enough water clinging to the surface from washing the florets. Place the over on top and steam for 1 minute. If already getting tender, I proceed with the smashing and roasting with cheese as described in the post. If still too tough, hear a few more seconds in the microwave.

.

PAN-STEAMED BROCCOLI, ANY WAY YOU LIKE


Basic method described in this post. I usually keep it super simple. In the final 3 minutes of cooking I whisk a little olive oil with lemon juice in a small bowl. Sprinkle some salt. When the broccoli comes out of the pan, into a serving bowl it goes, and my little dressing is poured on top while the broccoli florets are super hot still. How often can you have a flavorful side dish that is ready in…. 8 minutes total? You can season it in the end in countless ways – miso, as in my post, vinaigrettes, sesame oil, anything goes.

.

BROCCOLI PUREE A LA JACQUES PEPIN

Not the best picture I’ve ever taken, but this is truly delicious and I make it often. The original post is from 2014, so yes, I’ve been making it for 10 years (click here for full recipe). I now omit the brown butter and after cooking the broccoli florets until tender in salted water, I process them with full-fat yogurt, salt, pepper, and if needed a bit of the cooking water. I rarely need the water, usually I just adjust the consistency with yogurt. The spinach goes into the processor raw. I eye-ball everything, taste as I go. Once the consistency is right and the seasoning to my liking, it goes into a serving dish. If I want a little more richness, I sprinkle cheese on top and bake it until the cheese melts a bit.

ONE YEAR AGO: Spanakopita, Crackers and the Adventure of Phyllo Dough

TWO YEARS AGO: Chicken Noodle Soup

THREE YEARS AGO: Floral Chocolate Stick Cookies

FOUR YEARS AGO: Sally’s Spicy Mango and Coconut Macarons

FIVE YEARS AGO: Bouillabaise for a Chilly Evening

SIX YEARS AGO: Bergamot-Cherry Macarons

SEVEN YEARS AGO: Roasted Veggies with Queso Cotija Dressing

EIGHT YEARS AGO: Creamy Broccoli and Mushroom Casserole

NINE YEARS AGO: Maple Walnut Biscotti

TEN YEARS AGO: Barley Risotto with Peas

ELEVEN YEARS AGO: Oatmeal Fudge Bars

TWELVE YEARS AGO: Cauliflower Steaks

THIRTEEN YEARS AGO: Soft Spot for Chevre

FOURTEEN YEARS AGO: Quick sun-dried Tomato Crostini