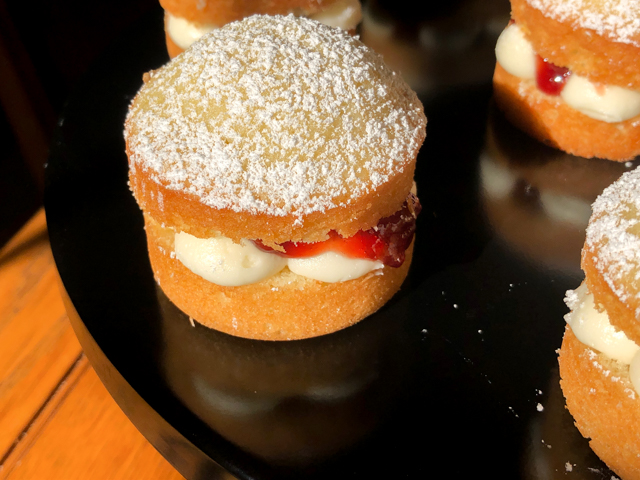
I made these cakes in November 2019, if you can believe it… Sometimes things take their sweet time to go from a folder with pictures to the blog post. Victoria Sponge is a true classic from the UK, named after Queen Victoria, because it was her favorite sweet to enjoy during afternoon tea. It is a sandwich type cake with strawberry jam, often whipped cream, and usually not iced, the top and sides left naked. Many variations exist, I am sharing a version that makes them in individual format. I find them irresistibly cute.
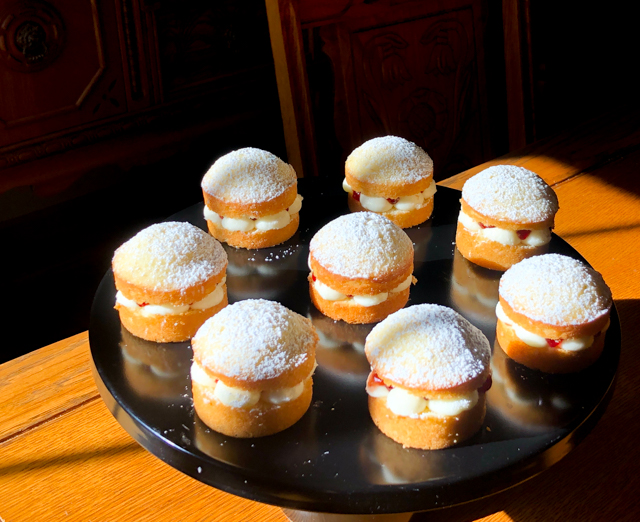
VICTORIA SPONGE MINI-CAKES
(adapted from this article)
175g unsalted butter, at room temperature
175g granulated sugar
3 large eggs, beaten
1 tsp vanilla extract
185g all-purpose flour
1 + 1/8 tsp baking powder
Pinch of salt
whipped cream lightly sweetened
strawberry jam
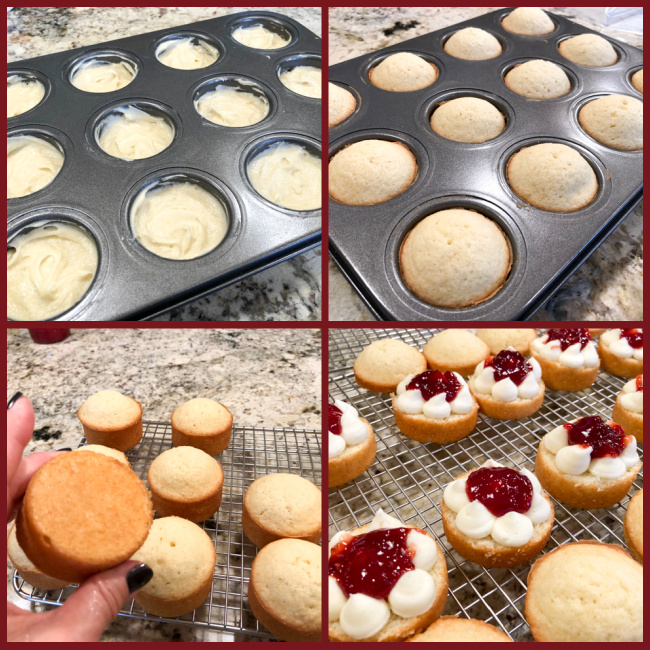
Heat the oven to 350°F. Very lightly grease the molds of a mini-cake pan.
Sift together the flour, baking powder and salt. Reserve.
Cream the butter and caster sugar together until the mixture is pale and light. Gradually add the beaten eggs, mixing well between each addition and scraping down the sides of the bowl from time to time. Add the vanilla extract and mix again.
Add the flour mixture to the batter, mixing gently until smooth. Fill the mini-cake mold, each cavity 3/4 full, no more than that. You should have enough for 12 mini-cakes. Bake on the middle shelf of the oven for 15 to 20 minutes until golden, well risen and a wooden skewer inserted into the middle of one of the cakes comes out clean.
Leave the cakes to cool in the tin for 5 minutes and then ease out onto a wire cooling rack and leave until completely cool. Cut each cake in half, and pipe the whipped cream onto the bases, in dots. Drizzle the jam over the buttercream dots, place the sponge tops on and lightly dust the cakes with icing sugar.
ENJOY!
to print the recipe, click here
Comments: I had to play around with the recipe a bit to get it right, adjusting the baking powder amount and not filling the mold to the top, so that the doming was just right. It was a huge hit with our departmental colleagues, I got several emails about it. The cake is tender and moist. The original recipe called for American buttercream for the filling, but I decided to go with whipped cream, stabilized with gelatin. Follow the recipe from this link. For the pan, I used this one. At the time I bought it on ebay, but could not find it available right now.
I think whipped cream is less sweet and makes the cake feel a bit lighter, but if you prefer to go with buttercream, follow the original recipe in the link I included.

ONE YEAR AGO: Red Beet Sourdough
TWO YEARS AGO: A Modern Take on Tarte Tatin
THREE YEARS AGO: Minnie-Macarons, a Fun Project with a Happy Ending
FOUR YEARS AGO: Nigella Lawson in the Bewitching Kitchen
FIVE YEARS AGO: Walnut-Raisin Bran Muffins
SIX YEARS AGO: Gingersnaps with White Chocolate Chips
SEVEN YEARS AGO: Turkey Chili with Almond Butter
EIGHT YEARS AGO: Secret Recipe Club: Leek and Cheese Tart
NINE YEARS AGO: Secret Recipe Club; Triple Chocolate Brownies
TEN YEARS AGO: Shaved Asparagus Salad
ELEVEN YEARS AGO: Indonesian Ginger Chicken