
Second post of a series of three on Sugar Cookie Decorating
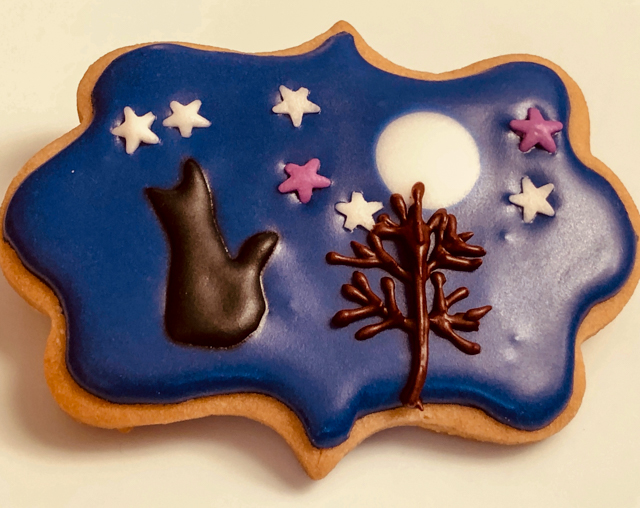
For one of her bake-along tutorials, Tanya showed how to make little silhouette details using Royal icing. They can be made way in advance (pretty much last forever) and saved to add to your cookies previously flooded and fully dry. The possibilites are endless, as you can imagine. And the great thing for us who cannot draw to save their lives, is that you can find clipart to download and print for free, adjust them to the size you want and use them to pipe your little decor. She demonstrated with a gorgeous deer’s head, I went first with a cat. She also demonstrated how to make a winter scene with a full moon and trees, so I joined both techniques in a single cookie.
BROWN SUGAR AND SPICES SUGAR COOKIES
(adapted from Bake at 350)
360g all-purpose flour
2 tsp baking powder
1/2 tsp cinnamon
1/4 tsp ginger
1/8 tsp nutmeg
1/8 tsp allspice
1/8 tsp cardamon
150g granulated sugar
50g brown sugar
226g butter, cut into chunks
1 egg
1/4 tsp salt
Heat oven to 350.
Whisk the flour, baking powder and spices, set aside.
Cream the sugars and butter. Add the egg and salt and mix until well-blended. Gradually add the flour mixture and beat just until combined. Roll on a floured surface to about 1/4″ and cut into shapes. Place on parchment lined baking sheets and freeze for 10 minutes.
Bake for 10-12 minutes, depending on the size of your cutter. Let sit a few minutes on the sheet, then transfer to a cooling rack.
Use Royal icing to decorate, recipe in previous post.
ENJOY!

Comments: There are countless sites that offer free downloadable templates for all sorts of drawings. You can then print them side by side and place a sheet of parchment paper on top of the printout. Using Royal icing with the consistency Tanya demonstrates in her tutorial and a very fine piping tip, carefully outline the drawing. Make more than you need, because they are obviously very fragile. They are best if allowed to dry overnight.

For the stars, in some cookies I used sprinkles… and in others I followed the technique demonstrated by Tanya, pulling small white dots with a needle.
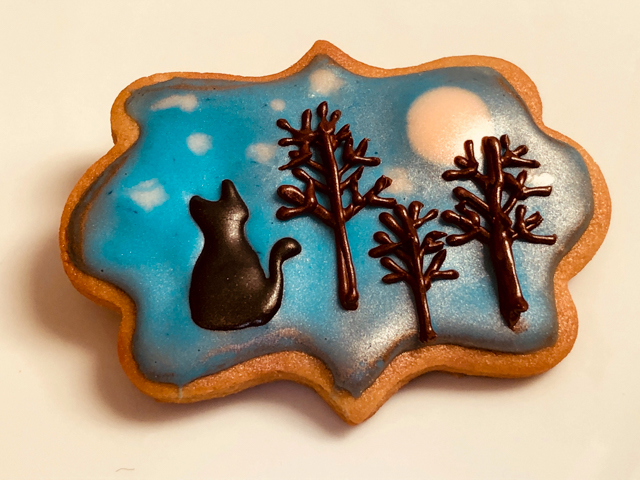
That surface is allowed to dry overnight, and then the silhouette is glued, and the trees piped. In the cookie above, I used some silver air-brushing just for fun.
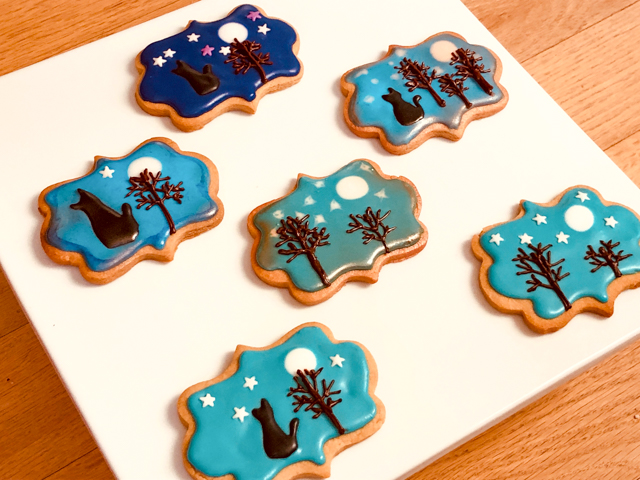
Here they are, all my babies! Before watching Tanya’s tutorials, I would never dream of making cookies with so many little details.
I will be back tomorrow with the final post about sugar cookies, using the same recipe (Brown Sugar and Spices). and a slightly different way to decorate them.


ONE YEAR AGO: Cherry-Chipotle Chicken Thighs
TWO YEARS AGO: White Chocolate Mini-Mousse with Sugared Cranberries
THREE YEARS AGO: You Say Ebelskiver, I say Falafel
FOUR YEARS AGO: Happy Thanksgiving!
FIVE YEARS AGO: Two Takes on Raspberries
SIX YEARS AGO: Spice Cake with Blackberry Puree & The Global Pastry Review
SEVEN YEARS AGO: Own Your Kitchen with Cappuccino Panna Cotta
EIGHT YEARS AGO: Chicken Parmigiana, the Thriller
NINE YEARS AGO: Wild Mushroom Risotto
TEN YEARS AGO: Tartine Bread: Basic Country Loaf
ELEVEN YEARS AGO: Pugliese Bread
