SALMON RILLETTES, A CLASSY APPETIZER

My last post featured the main dish I chose for Phil’s birthday dinner. Now it’s time to share with you a nice appetizer from the same evening: salmon rillettes. When we lived in Paris, rillettes were a favorite item we ordered in restaurants. Often pork, sometimes duck rillettes. In one of the little neighborhood bistrots, Aux Artistes, they would serve them (as well as their country terrine) family style. A big dish would be brought to the table, so you could serve yourself some, then the waiter would take it away for others to enjoy. Very civilized in that unique French way. Hard to imagine the same situation in the US. What? You expect me to eat something that was already on someone else’s table?  Manipulated by other human beings? You must be out of your mind!  I say “Vive la différence!”  And pass me the rillettes, will you?

I found this recipe in Karen’s site. She loved it so much that she confessed to having it for breakfast, lunch, and dinner several days in a row. That, my friends, is what food endorsement is all about.  I knew I had to make it sooner rather than later.
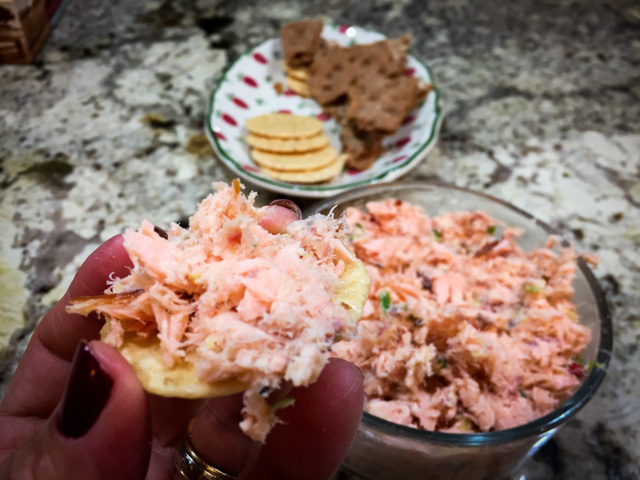
Salmon Rillettes2

SALMON RILLETTES
(from Karen’s Kitchen Stories)

1 lemon
1/2 cup vermouth
1/2 cup water
1 bay leaf
1 jalapeno pepper, sliced in half, one half minced
5 to 10 white peppercorns
5 to 10 coriander seeds
2 to 3 green onions, cut into 3 inch slices
salt
1/2 pound salmon fillet, cut into 1/2 inch cubes
6 ounces smoked salmon (peppered coho smoked salmon, if available)
3 tablespoons unsalted and softened butter
salt and pepper to taste
1 large shallot, peeled and minced
1/2 tsp pink peppercorns, crushed
1/2 tsp crushed red peppers
With a vegetable peeler, cut off a strip of the peel of the lemon.  Finely zest the rest of the lemon and set the zest aside. Set the lemon aside.
.
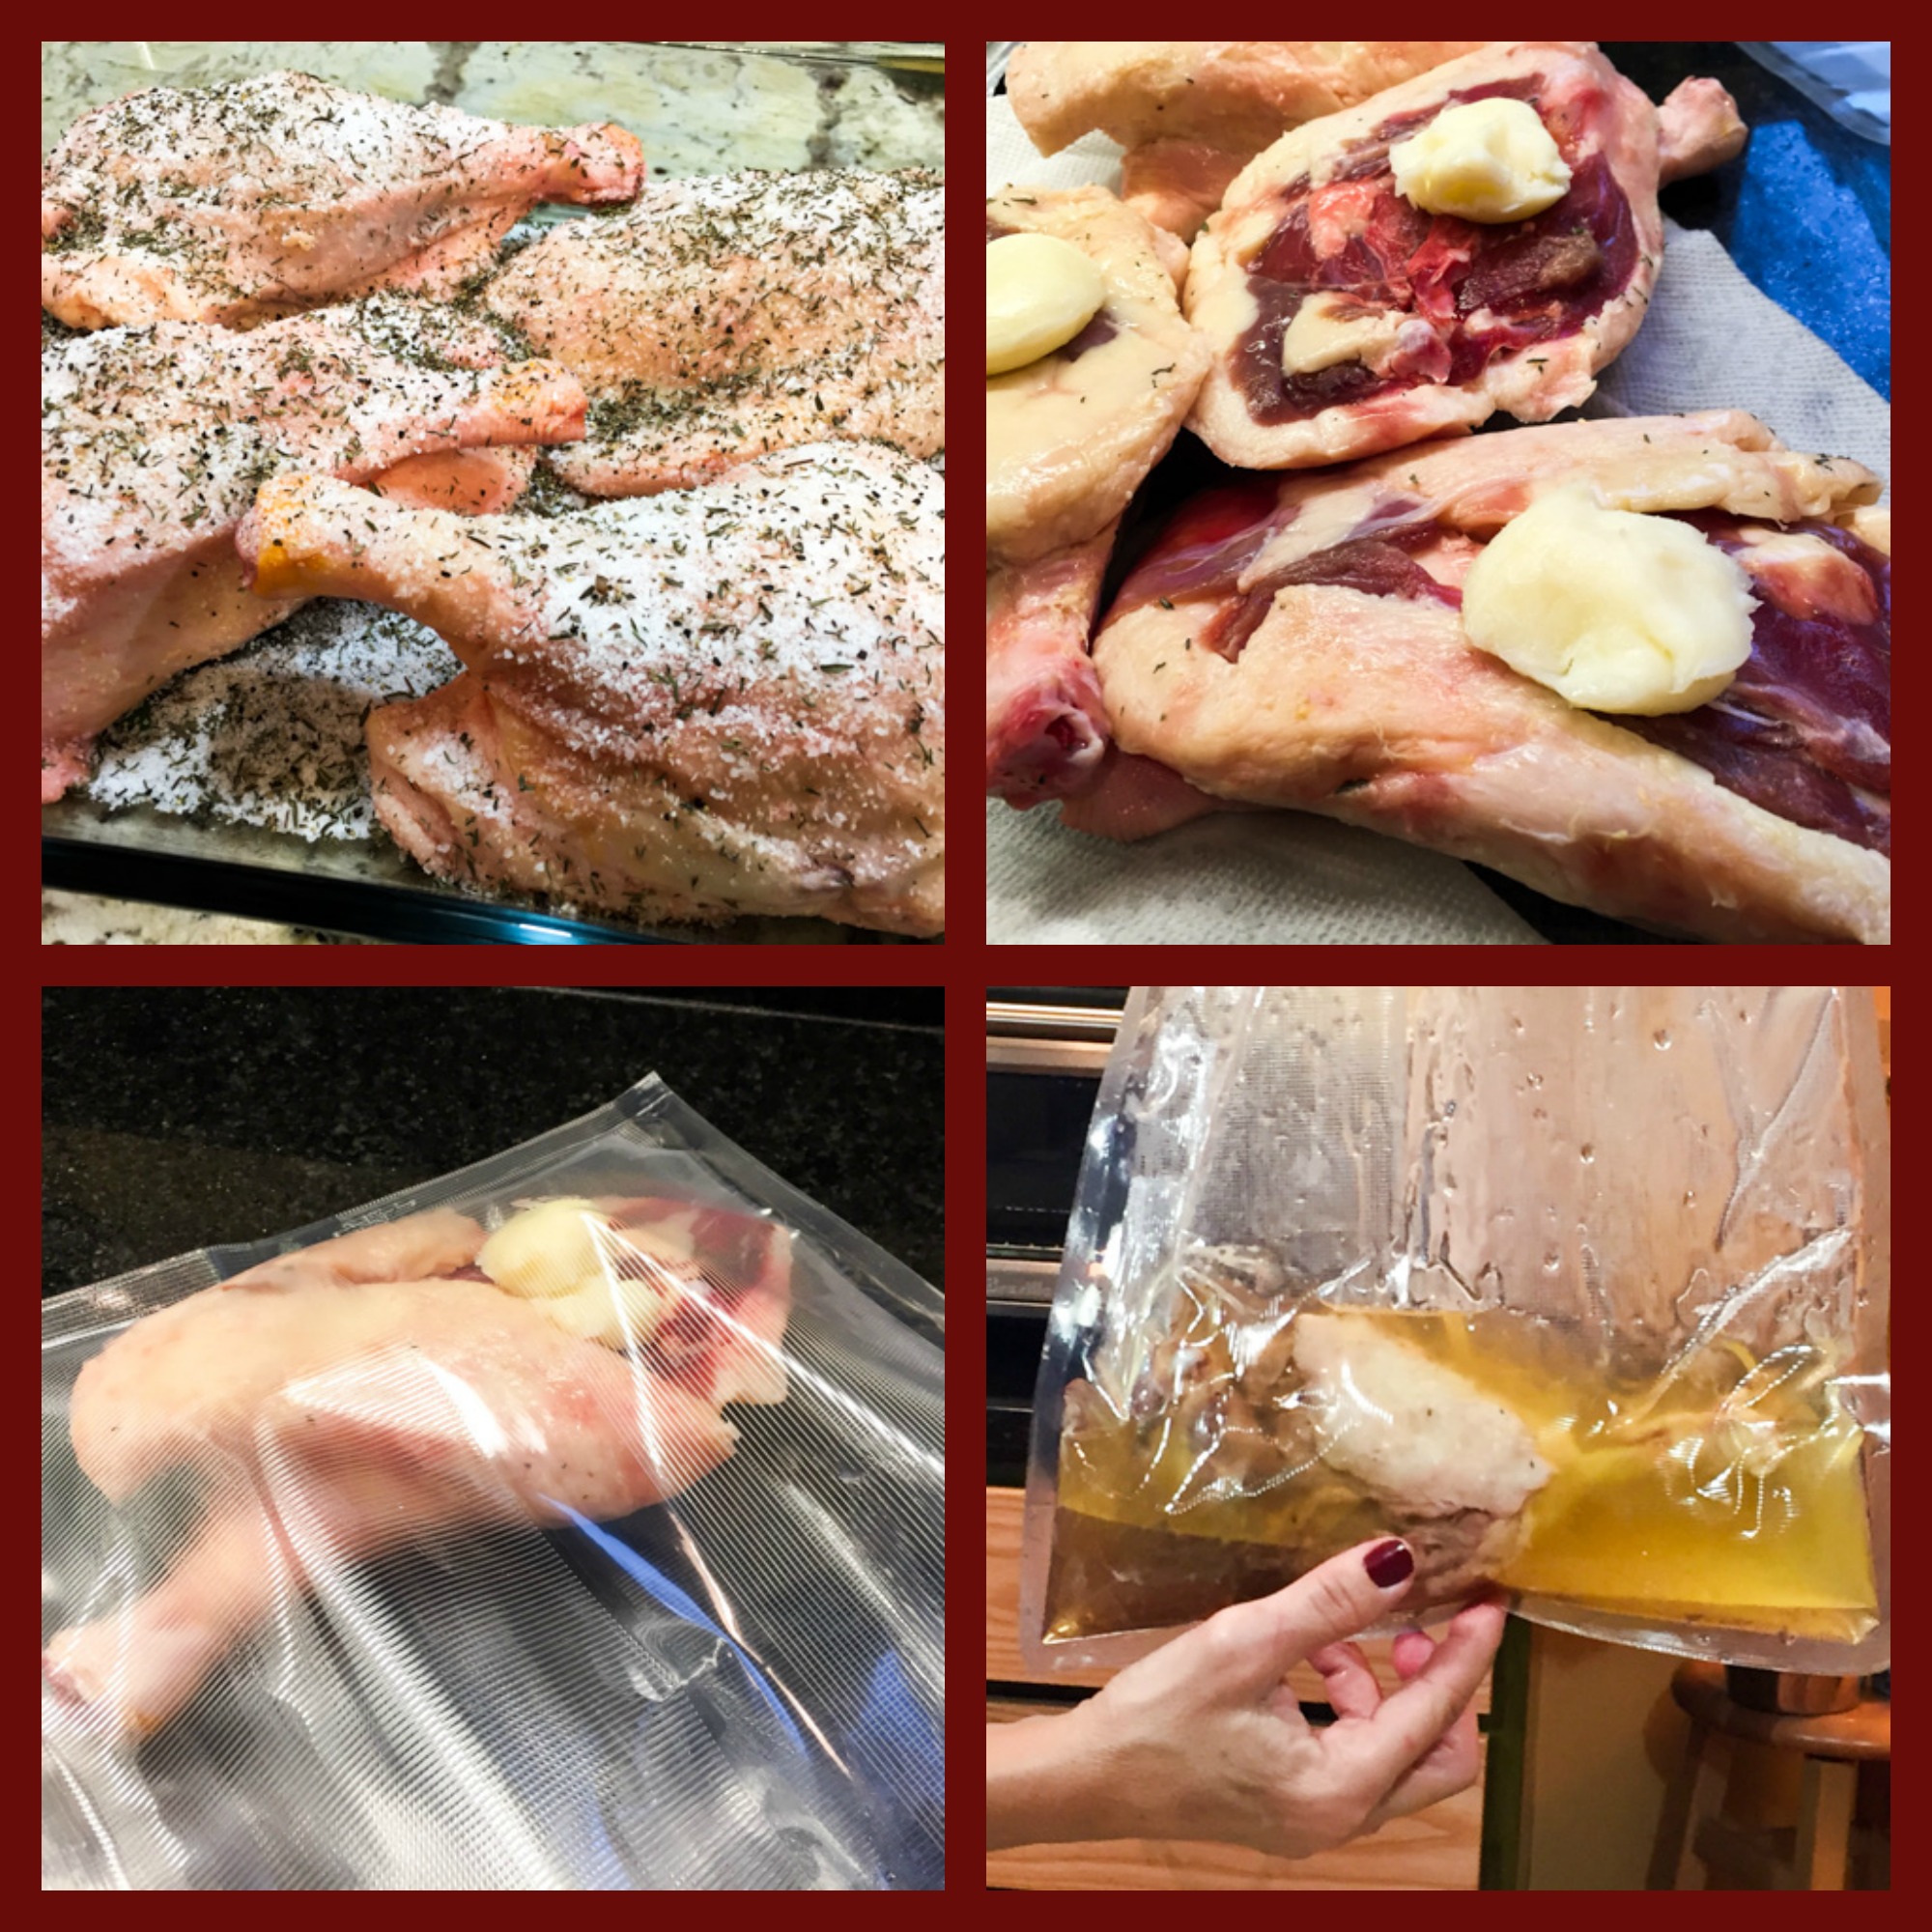
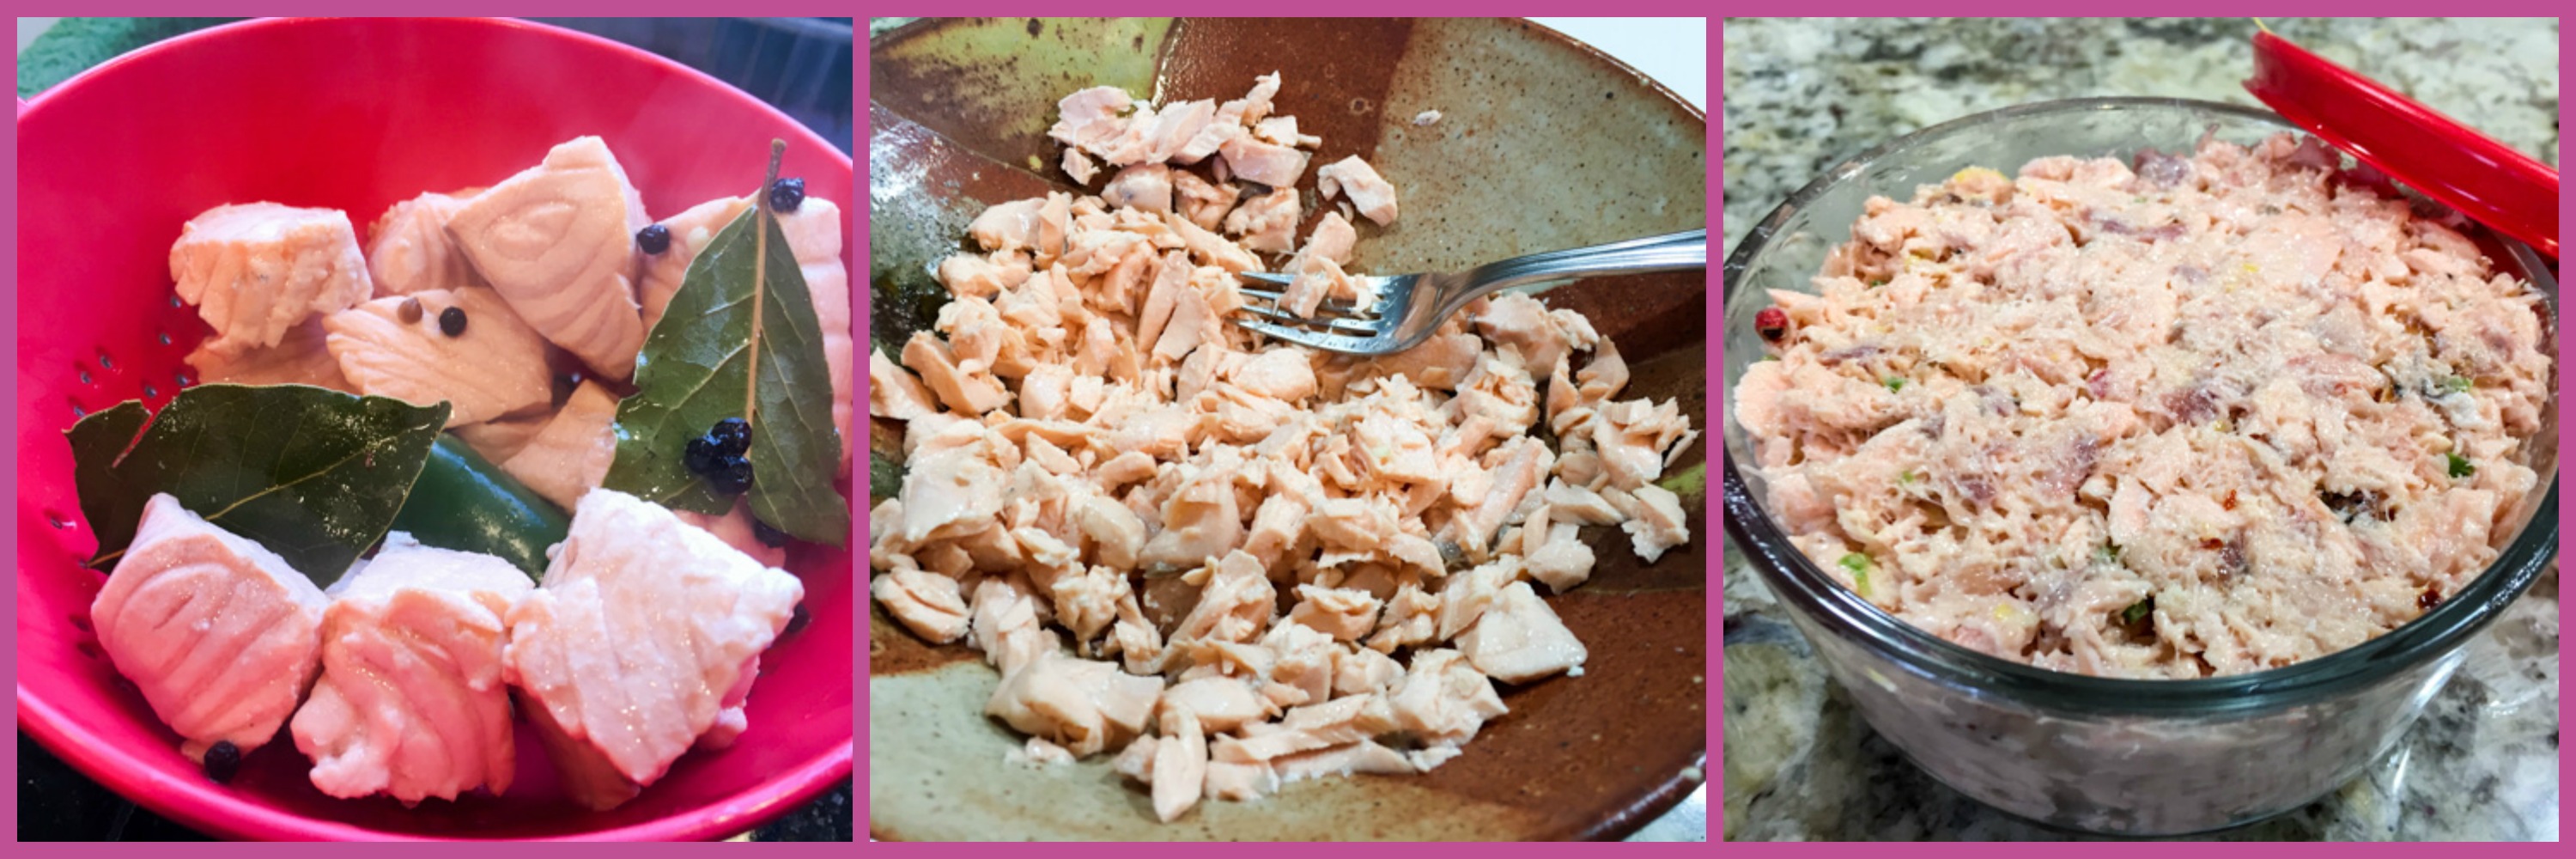
Place the unchopped half of the jalapeno into a small saucepan. Add the vermouth, water, bay leaf, peppercorns, and coriander seeds. Bring the mixture to a boil over medium heat. Add the green onions and fresh salmon cubes. Reduce the heat to low, cover,  and simmer for three to five minutes. Drain in a colander. Discard the vegetables and place the salmon in a medium bowl.
.
Mash the salmon roughly with a fork. Add the smoked salmon and mash with a fork.  Add the butter and blend with a fork.  Add some of the juice from the lemon, the lemon zest, along with some salt and pepper to taste.  Add the shallots, minced jalapeno, crushed pink peppercorns, and crushed red pepper. Mix thoroughly. Stir in more lemon juice, to taste.
Pack the mixture into a canning jar or other container. Press the top with plastic wrap and refrigerate for at least 2 hours and up to a day before serving for the first time. The rillettes will last up to 3 or 4 days.
.

ENJOY!

to print the recipe, click here


rilletecollage

Comments: This was incredibly tasty, just as Karen promised it would be, and got better each day.  The mixture of smoked salmon with the lightly poached fish, the lemon, the spices, everything works together in perfect harmony. It is surprisingly mild in flavor. Plus, what a fun recipe to make!  I don’t know why I never attempted rillettes at home, but now that I did, I feel like trying my hands at some pork rillettes, served ‘comme il faut’, with those small cornichons, and a crusty baguette. I will be catapulted straight back to Aux Artistes, although between you and me, the place brings mixed feelings. Yeah, the food was awesome, prices affordable, great atmosphere. but the owner, a gorgeous blonde, tall, bright-blue-wandering eyes, could not – I repeat – could not stop flirting with Phil. Oh, well… as a mentor of mine used to say… attractive people attract.  I took it all with my best smile, sips of Bordeaux, and a few discreet but assertive kicks under the table.  Let’s keep in mind though, that two can play that game. Not that I would ever… you know, I am just not the vindictive type…

😉

I hope you try this recipe on your next dinner party. Not only it is unusual and elegant, but you will be better off making it in advance. It’s the hostess’ dream come true!
.

Karen, once again I should thank you for the constant inspiration!


ONE YEAR AGO: Special Important Announcement

TWO YEARS AGO: Pear, Blue Cheese and Walnut Salad

THREE YEARS AGO: Keema Beef Curry

FOUR YEARS AGO: Pork Tenderloin with Soy, Ginger, and Lime

FIVE YEARS AGO: No-Fuss Coffee Cake

SIX YEARS AGO: Swedish Limpa


DUCK CONFIT FOR A SPECIAL OCCASION

It is hard to beat duck confit when you want to have a memorable meal. I will never forget the first time I had it, actually. I was all alone in Paris (my first trip to Europe!), having flown from Brazil to take part of a scientific workshop sponsored by The World Health Organization. The 2-week workshop launched the sequencing of the whole genome of Mycobacterium leprae. In those days, sequencing DNA was a cumbersome, slow, and painful process, nothing to do with what it is today. I was one of the lucky people invited to participate of that initial workshop. I knew very little about automated DNA sequencing, but even less about duck confit. On my first evening, very tired and a bit insecure to walk around town, I crossed the street and bravely entered a restaurant near Institut Pasteur (Le Pot au Feu). The special of the day was duck confit, so that’s what I ordered. I thought I had died and gone straight to heaven, arriving at dinner time. Unforgettable experience, even if all alone sitting at my table, staring at couples in love all around me. Or so it seemed…  Paris and romance go always hand in hand.

I made duck confit twice in the past, before my blogging years. Even though both meals turned out great, the process was not very pleasant: a lot of fat to deal with, and a pretty intense smell lingering in the house for way too long.  This time, I used sous-vide to cook the duck legs and I have one word to describe it: WOW! I go as far as saying that buying the Anova circulator is worthy it just to make duck confit.  Easy, very little fat needed, no lingering smell, and once the duck legs are cooked, they can go still in the bags to the fridge and stay there for 2 to 3 days until showtime.  Cannot get much better than that…

Duck Confit1


DUCK CONFIT
(from the Bewitching Kitchen)

3 tablespoons salt
2 cloves garlic, smashed (optional)
1 shallot, peeled and sliced
6 sprigs thyme (I used dried thyme)
4 sage leaves
Coarsely ground black pepper
4 duck legs with thighs
4 tablespoons duck fat

Sprinkle 1 tablespoon of salt in the bottom of a dish or plastic container large enough to hold the duck pieces in a single layer. Evenly scatter half the garlic, shallots, and thyme in the container. Arrange the duck, skin-side up, over the salt mixture, placing one sage leaf underneath each piece of duck. Sprinkle with the remaining salt, garlic, shallots, and thyme and a little pepper. Cover and refrigerate for 24 to 48 hours.

Rinse the duck pieces well, to remove the coarse salt. Dry the meat with paper towels. Place each piece in a plastic bag, adding 1 tablespoon of very cold duck fat inside, vacuum-seal the bags.  Submerge the sealed bags in a water-bath set at 82 C (180 F) for 10 hours.  When the time is up, chill the pieces in an ice bath and place in the fridge, still sealed.

About 45 minutes before dinner time, remove the duck from the fridge, open the bag and scrape off most of the congealed fat. Place in a roasting pan, skin side up, cover with aluminum foil and warm up in a 375 F oven for about 30 minutes. Before serving, place the pan under the broiler to crisp up the skin. Alternatively, you can warm up the pieces and then sear the skin on a blazing hot skillet.

ENJOY!

to print the recipe, click here


DuckConfitcomposite

Comments: I made this recipe for a very special dinner. First, it was my beloved’s Birthday, and since it falls very close to Christmas, it’s tricky to have a party for him.  Most people are away visiting family, or too busy with the holidays. But, it turns out that two VERY special friends made a trip all the way from Brazil to be here with us on that special day!  And they are amazing cooks, so the pressure was high on me to deliver a nice meal. Needless to say, I did a lot of research on duck confit sous-vide before settling on the method I shared here.

Several things are important. The duck itself. The best kind to get is Moulard duck, so I special ordered it from d’Artagnan (remember my latest IMK post?). Then, the salting to cure the meat before cooking. Some sous-vide methods advise you to do that step in vacuum-sealed bags, but the meat can turn out overly salty. I decided to salt the pieces in a baking dish in the fridge for 36 hours, then rinse the meat well before cooking it. The sous-vide step is another major consideration. I visited a discussion forum (eGullet), and read everything I could find on duck confit before settling on my choice of 10 hours at 82 C (180 F).  As to the amount of fat to use, one tablespoon is enough, but you could even omit adding any extra fat. If you look at the last photo on the composite picture above, you’ll notice that there was a lot more than one tablespoon of fat in each bag. The fat rendered from the leg itself will be more than enough to properly coat it during cooking. So, if you rather  not render duck fat or buy pre-rendered fat, simply go from the salting step to vacuum-sealing. It will work like a charm. Of course, you could get by with olive oil too. The main goal is to cook the meat submerged in some type of fat, duck fat being the best one for flavor.

I feel that I hit the jackpot with that combination of time and temperature, would not change it in the future.  Finally, the last consideration is how to warm up the meat before serving.  I did not want to deal with a hot skillet and searing the skin, making a huge mess right before our meal, so I went with a regular oven. First 375 F for about 30 minutes, then running the pieces under the broiler to crisp up the skin.  Would not do it any other way, it was spectacular!  The meat had the exact texture I remember from my first duck confit enjoyed in Paris! Not too salty, not too greasy, simply perfect!

plated2

Dinner is served!  Duck confit and gratin of potatoes…
Life is good!

bday

ONE YEAR AGO: Ken Forkish’s Warm Spot Sourdough 

TWO YEARS AGO: Bran Muffins, Rainbows, and a wonderful surprise!

THREE YEARS AGO: Salmon Wellington

FOUR YEARS AGO: The Green Chip Alternative

FIVE YEARS AGO: Weekend Pita Project

SIX YEARS AGO: Let it snow, let it snow, eggs in snow

GOODBYE, DEAR DAVID

Your music will forever be the soundtrack of my life.

I like the smell of your flesh
I like the dirt that you dish
I like the clothes that you wear
I’d like to beat on your drum

(Beat of your Drum, David Bowie, 1987)

12552816_10153918315924312_2332307284916511422_n


1511603_10153379161633581_3761529794906273681_o

Space Oddity, played in orbit

DB5

(comments are shutdown for this post)

HERMIT COOKIES

If you expect me to stick with the usual type of posts published by most food bloggers in January, I shall now disappoint you. I have a cookie post to share. And a great one. The recipe comes from Geoffrey Zakarian, which pretty much means it is going to be awesome. If there is one chef I’d like to sit down and chat with, is GZ. He seems like a nice person, and extremely knowledgeable about food. This is one of his favorite cookies, by the way, which shows we have at least a couple of things in common: a passion for spice cookies, and allowing our hair to go totally gray. HA!

Hermit Cookies

HERMIT COOKIES
(from Geoffrey Zakarian)

Yield: about 18 cookies

for the cookies:
2 cups plus 2 tablespoons all-purpose flour
1 teaspoon ground cinnamon
1/2 teaspoon baking soda
1/2 teaspoon fine salt
1/4 teaspoon ground allspice
1/8 teaspoon ground ginger
8 tablespoons unsalted butter, at room temperature
1/2 cup packed dark brown sugar
1/2 cup unsulfured molasses
1 teaspoon pure vanilla extract
2 large eggs
Zest of 1 orange
1/2 cup semisweet chocolate chips

 for the glaze:
2 cups confectioners’ sugar
2 large egg whites
1 vanilla bean, split and seeds scraped out

Whisk together the flour, cinnamon, baking soda, salt, allspice and ginger in a medium bowl and set aside.

Beat the butter, brown sugar and molasses together in a stand mixer fitted with a paddle attachment until light and fluffy, about 2 minutes. Beat in the vanilla, eggs and orange zest. Scrape down the sides of the bowl and mix until incorporated. Add the spiced flour mixture and beat until the dough just comes together. Fold in the chocolate chips.

Scoop the dough into large balls (about 1.5 inches in diameter) and refrigerate on a baking sheet lined with parchment paper until firm, about 1 hour. Meanwhile, heat the oven to 325 degrees F. Bake the cookies until the tops of the hermits are no longer glossy and the edges are firm, 12 to 14 minutes. Let cool on the baking sheets for a few minutes and then transfer to a rack to cool completely.

For the glaze: While the cookies cool, mix the confectioners’ sugar, egg whites and vanilla seeds in a stand mixer fitted with a paddle attachment until smooth and shiny. Transfer the glaze to a piping bag or zip lock bag with a corner cut, and pipe stripes onto the cooled hermits. Store at room temperature in an airtight container for up to 3 days.

ENJOY!

to print the recipe, click here

hermitcomposite

Comments:  Let me share what GZ has to say about these babies: “This is my favorite holiday cookie, because it blends two of my favorites: soft chocolate chip cookies and spicy gingerbread — the best of both worlds.”  I totally agree.

Did you know that Hermit cookies have been around since 1877? Amazing!  The name is a big mystery, actually.  They were also known as tea cakes, made traditionally as little squares. You can read all about them here. Hermit cookies are soft the way I like, spicy, sweet, and the glaze goes perfectly with them, although I am sure the glaze is a modern take on the original recipe. I normally like a plain cookie, but must admit the extra work for the glaze pays off in this recipe.

Hermit Cookies2

The holiday season is over, but I see absolutely nothing wrong with baking a batch of spice cookies when the mood strikes… You?

😉

ONE YEAR AGO: Cremini Mushroom Meatloaf

TWO YEARS AGO: Ottolenghi & Tamimi’s Roast Chicken with Clementines

THREE YEARS AGO: Eight-Ball Zucchini: The Missing Files

FOUR YEARS AGO: Grilling Ribbons

FIVE YEARS AGO: Peppery Cashew Crunch

SIX YEARS AGO: Ossobuco Milanese: an Italian Classic

KADOO BORANEE: BUTTERNUT SQUASH PERFECTION

My first cooking post in 2016 needs to be special, and special it will be. Maybe you don’t like butternut squash, maybe you are anti-pumpkin in general, but even if you are, please bear with me.  I fell in love with this recipe from the moment I tried the first bite, not sure what to expect. Kelly blogged about it a while ago, a great post crowned with the sweetest photo of her and her husband on the evening they got engaged just a few months ago (wink, wink, wink). I can understand how this humble butternut squash preparation could leave such a strong impression. It is warm, it is creamy, it is luscious, at the same time refreshing due to the acidity of the yogurt. You must, absolutely must make it. Even if you live with a crowd of picky eaters who are afraid of squash. Dare them to try a little bite. They won’t be able to stop there.

Kadoo
KADOO BORANEE
(very slightly modified from Inspired Edibles)

for the butternut squash:
1 large yellow onion, coarsely chopped
3 Tbsp olive oil
1 pound butternut squash, cubed
1 Tbsp fresh ginger, thinly sliced
1 tsp ground turmeric
1 tsp ground cumin
1/2 tsp chili powder
1/2 tsp ground coriander
1/4 tsp ground ginger
1 Tbsp tomato paste
2 Tbsp coconut sugar
1/2 tsp sea salt
1 cup liquid (mixture of veggie stock + water)

for the yogurt sauce:
3/4 cup plain Greek yogurt
1/4 cup sour cream
good pinch of salt
1 clove garlic, smashed

for topping: 
toasted slivered almonds and dried mint

Make the yogurt sauce by whisking together: yogurt, sour cream, salt and garlic in a bowl – cover and place in fridge while prepping the remaining ingredients.

Purée onion in a small blender/food processor. In a separate small dish, combine the dry spices: turmeric, cumin, chili, coriander & ginger.

Meanwhile, heat oil in a large skillet over low-medium heat and sautée onion until golden. Add fresh ginger, and the ground dry spices: turmeric, cumin, chili, coriander and ground ginger, stirring until the seasonings are well combined and fragrant. Add tomato paste, broth, water, sugar and salt, mixing well to combine. Bring the mixture to a boil and add the cubed butternut squash.

Reduce heat and simmer covered for 10 minutes (lifting the lid to stir the squash once or twice during this time). Remove the lid for the remaining cooking time until the squash is tender but still holding its shape. Continue to stir the squash on occasion and use more water or stock while cooking, if needed. The goal is to have about 80% of the seasoned liquid absorbed into the squash while retaining the remaining liquid as a golden sauce.

Remove yogurt sauce from the fridge, reserve about 2 tablespoons, and spread the rest on plates to make a base for the squash. Top each yogurt base with some of the warm butternut squash, then add a bit more yogurt sauce on top, sprinkling the toasted almonds and dried mint right before serving.

ENJOY!

to print the recipe, click here

Kadoo2

Comments: This preparation goes to my personal Hall of Fame of Veggies. I cannot think of a better way to enjoy butternut squash, in fact it would work for all kinds of pumpkin, I am sure, as long as you respect their optimal cooking time.  As Kelly says in her post, you could omit the sour cream if you prefer to keep it lighter, but it does add a lot to the dish in terms of texture and also taste.  Try it exactly this way, you won’t be disappointed. I added toasted slivered almonds, my main modification to the recipe. I like the added crunch and feel that almonds go very well with squash and all the spices in the sauce.

Kelly, thanks for yet another great recipe!

Looking forward to more deliciousness coming from your blog…

 .holidays


ONE YEAR AGO: Creamy Broccoli Soup with Toasted Almonds

TWO YEARS AGO:
Fennel and Cheddar Cheese Crackers

THREE YEARS AGO: A Festive Pomegranate Dessert

FOUR YEARS AGO: My First Award!

FIVE YEARS AGO: A Message from WordPress

SIX YEARS AGO: Turkish Chicken Kebabs