AWESOME BROCCOLINI

Ah, the bliss, the joy, the thrill of a stove with hot burners!  Stir frying, and any  other cooking style that imparts a wonderful, golden brown color – promises of great flavor ahead – just can’t materialize without intense heat.  I look at the powerful flame on our stove, and discreetly wipe a tear from my eye … Some things get to me.  A big sink to wash dishes.  An oven with three racks and the capability of 500 F.  Stuff like that.  But, back to food.  I found  some organic broccolini at the grocery store.  It’s a great veggie, a perfect side dish for anything from poultry to seafood.  BTW, it’s not baby broccoli,  but a cross between broccoli and  kai-lan, a Chinese leafy cabbage.  The cross mellows the broccoli character, almost yielding the flavor of asparagus, which explains one of its alternative names: asparation (I’m glad this name didn’t stick!  ;-))

My take on broccolini is a slight departure from the stove-top version of broccoli that I posted a year ago.

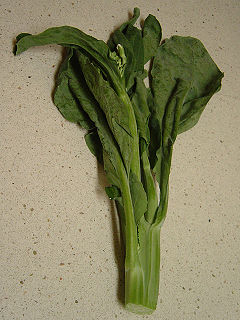
BROCCOLINI WITH GINGER AND LEMON
(from the Bewitching Kitchen)

2 small bunches of broccolini, preferably organic
2 tsp olive oil
red pepper flakes
1 tsp grated ginger
zest and juice of half a lemon
salt and pepper
splash of water (if needed)

Heat the olive oil in a large stainless steel skillet (that will hold the veggies without crowding), when smoking hot add the red pepper flakes, swirl for a couple of seconds and immediately add all the broccolini. Do not move them around, let them get a nice brown color at the bottom. Season with salt and pepper. After a couple of minutes, add the ginger and lemon zest, and shake the pan to move the broccolini and coat well all sides with the ginger, lemon zest, and oil.

Cover the pan, let it cook for 2-3 minutes more, then add the lemon juice – test the broccolini with a fork to see if it’s done to your liking.  If it’s not, and the pan is too dry, add a splash of water and cover the pan again, checking after a minute.  Once it’s cooked al dente, transfer to a serving dish and…

ENJOY!

to print the recipe, click here

Comments:  If you are anti-broccoli and think broccolini resembles it too much, please reconsider!  There’s absolutely none of the broccoli flavor/smell that many object to.  Avoid over cooking it, and buy young broccolini, with a bright green color and a firm flesh. This recipe is low in carbs and fat, but sky-high in flavor!  Lemon, ginger & red pepper flakes might very well be my favorite flavor mix right now: good on everything!

ONE YEAR AGO: Pizza! Pizza!

TWO YEARS AGO:  From Backyard to Kitchen

Add to FacebookAdd to DiggAdd to Del.icio.usAdd to StumbleuponAdd to RedditAdd to BlinklistAdd to TwitterAdd to TechnoratiAdd to Yahoo BuzzAdd to Newsvine

DOUBLE ASPARAGUS DELIGHT

Here’s a clever approach that Michel Richard published in his cookbook “Happy in the Kitchen” :  asparagus spears paired with an asparagus “vinaigrette.”   If you love green vegetables, as I do, you will delight in this recipe.  It’s a model of simplicity because it involves so few ingredients, but you must pay attention to the details, and above all, avoid overcooking the spears.  I can’t imagine a better way to welcome Spring!

ASPARAGUS ON ASPARAGUS
(from Happy in the Kitchen)

24 large asparagus
2 Tbs extra virgin olive oil
1 tsp Dijon mustard
1 Tbs fresh lemon juice (I used Meyer lemons)
pinch of  sugar
pinch of salt

Set aside 4 whole spears for the dressing. Cut off the tough bottom ends of all asparagus spears and set those aside for the as well. With a vegetable peeler, peel the remaining asparagus starting about one inch below the tip.

Have a bowl with ice cold water ready.  Steam the asparagus spears for 5 to 6 minutes only, until they are just tender when gently pierced with the tip of a knife.  knife. When the asparagus is cooked, lift the spears with a pair of tongs and plunge them in the ice bath to cool, then remove and dry on kitchen paper or a towel.

Make the asparagus sauce: cut the 4 reserved spears into 1-inch pieces. Place them in a small saucepan with the trimmed asparagus bottoms and add ¼ cup water and the olive oil. Bring it to a simmer, cover, and gently cook for 8 to 10 minutes, or until the asparagus is completely softened. The water should have evaporated, leaving the asparagus  stewing in only the oil.

Transfer the asparagus to a blender or food processor and puree it until completely smooth. Transfer the puree to a small bowl and whisk in the mustard, lemon juice, salt, and pepper. Serve the asparagus on a platter, with the vinaigrette in a small dish or ramekin on the side for dipping or dousing the spears.

ENJOY!

to print the recipe, click here

Comments:  Peeling the asparagus may seem like work, but don’t skip it.   Use large asparagus for this dish, and the peeling will ensure a wonderful texture and even cooking.  I enjoyed them as a light lunch with homemade bread and a sunny-side egg, but the dish is also a perfect option as an appetizer at a dinner party.  The asparagus lovers among your guests will never forget it!

The sauce or dressing is an excellent adaptation for the tough ends of the spears, so consider making some whenever you cook asparagus.  I imagine that it will also complement other dishes, like grilled salmon, with a sprinkle of fresh dill on top.  Must try that soon.

The beginning of asparagus season always makes us happy!

ONE YEAR AGOSundried Tomato and Feta Cheese Torte

Add to FacebookAdd to DiggAdd to Del.icio.usAdd to StumbleuponAdd to RedditAdd to BlinklistAdd to TwitterAdd to TechnoratiAdd to Yahoo BuzzAdd to Newsvine

MOGO MOJO

A few weeks ago a reader left a comment on my post about “mandioca frita.” He told me about “mogo,” a common dish in Indian restaurants in the UK, that also starts from cooked manioc root, but instead of frying, the root is seasoned with a mixture of spices and roasted.   I was intrigued, and put google to work, searching for an authentic recipe.  Very quickly I realized there is no consensus about it.   The only common denominator in mogo recipes is that you start with cooked roots, prepared as I described in this post.  After that, some recipes call for roasting, some for frying  then roasting, others for gently cooking on the stove.   Some recipes use tomatoes, some only peppers, others add coconut milk.  Spices also vary a lot.   With all that complexity facing me,  I shutdown my computer and improvised.  So, here is my version of mogo, a delicious, hearty dish that will be showing up at our table on a regular basis.  Well, as regularly as I can find manioc root at the store…  😉

MOGO
(from the Bewitching Kitchen)

10-12 pieces of cooked manioc root
1 Tbs olive oil
1 shallot, finely diced
1 garlic clove, minced
1/4 tsp red pepper flakes (or more)
1/2 tsp curry powder
salt and black pepper
1 can diced tomatoes with their juices (14.5 oz, about 1 + 3/4 cups)
1/2 cup coconut milk
chopped cilantro leaves

Cook the manioc root until tender. Cut in serving pieces and reserve (cooked manioc can sit in the fridge for a few days, or be frozen for months).

Heat the oil in a saute pan, add the shallots, cook until soft and starting to develop some color.  Add the minced garlic and the red pepper flakes, cooking for a minute or two. Season with salt and pepper, add the tomato with the juices, cook on gentle heat for 5 minutes, stirring a few times.  Add the coconut milk, curry powder, cook for a couple of minutes, add the cilantro leaves, taste the seasoning and adjust to your taste.  You can add some hot pepper sauce if you like it really hot.

Spread the cooked manioc on a baking dish, pour the tomato-coconut sauce on top, cover with aluminum foil and bake at 375 F for 45 minutes.  Remove the foil, and serve or, if you prefer less sauce and some browning on the cassava root, increase the heat to 400 F to finish roasting.

ENJOY!

to print the recipe, click here

Comments: I will be forever in debt with Jack for the heads up about this recipe.  We enjoyed it with roast chicken, but next day it was a meal in itself re-heated in the microwave and served over Israeli couscous.  Wonderful!   Change this basic recipe around by adding roasted bell peppers to the sauce, increasing the heat level with a hot sauce, maybe some smoked hot paprika.

I hope my Brazilian readers will give mogo a try, as they have access to excellent quality manioc root in farmers markets and grocery stores everywhere. Manioc root is not a very popular item in the US, but hopefully that will soon change!   😉

ONE YEAR AGO: Slow-roasted chicken thighs

Add to FacebookAdd to DiggAdd to Del.icio.usAdd to StumbleuponAdd to RedditAdd to BlinklistAdd to TwitterAdd to TechnoratiAdd to Yahoo BuzzAdd to Newsvine

CARROT AND LEEK SOUP

Here in California the warm weather hangs around,  making me almost forget that Thanksgiving is right around the corner.  But when the latest issue of Fine Cooking was delivered in the mail, the gorgeous cover showing a croquembuche in all its glory was a clear reminder:  the holidays will soon be here, it’s time for comfort food.  Lots of things I want to cook right away from the magazine, but I started with a carrot and leek soup that turned out light and satisfying at the same time.

CARROT AND LEEK SOUP
(adapted from Fine Cooking)

1 T olive oil
1/2 T butter
1 medium-size leek, white and light green part only, thinly sliced
1 shallot, diced
1/2 pound carrots, sliced (about 6, medium)
2 cups water (or chicken stock)
salt and pepper
2 tsp fresh thyme leaves
1/2 cup low fat yogurt
2-3 T fresh orange juice

Melt the olive oil and butter in a medium-sized pan, cook the shallots and leeks until soft but not brown,  seasoning lightly with salt and pepper.   Add the sliced carrots, water (or stock),  thyme leaves,  bring to a boil, cover the pan and reduce the heat.   Cook until the carrots are soft, about 15 minutes.

Using an immersion blender, puree the soup to the consistency you enjoy (we prefer it with a little body, not fully smooth).  Alternatively, you can use a blender or food processor (be careful when blending hot liquids).   Bring the pureed soup back to the stove, add the yogurt and orange juice, heat very gently.   Taste, adjust seasoning with salt and pepper if necessary.   Serve with croutons and minced chives.

ENJOY!

to print the recipe, click here

Comments: I changed the recipe quite a bit, so if you want to make their original version (that includes fancy homemade herb croutons and a few more bells and whistles), buy the magazine. You won’t be disappointed:  the cookies section alone and the step-by-step recipe for Beef Wellington are well worth the small investment… 😉

Yogurt is a perfect addition for certain soups, when a hint of richness is welcome, but you don’t want to go overboard. This recipe is similar to the creamy broccoli soup I recently blogged about, and the same basic method might be used for other veggies: butternut squash, cauliflower, even asparagus, although I haven’t quite optimized a method to get a nice, smooth texture when pureeing asparagus.  Just another little item to add to my list of culinary challenges…  😉

Note to self:  Make soup more often.

ONE YEAR AGO: Chicken Parmiggiana 101


Add to FacebookAdd to DiggAdd to Del.icio.usAdd to StumbleuponAdd to RedditAdd to BlinklistAdd to TwitterAdd to TechnoratiAdd to Yahoo BuzzAdd to Newsvine

FARRO: GOOD FOR YOU AND TASTES GREAT TOO

Farro:  a fun word for a mysterious grain, about which a lot of controversy exists as to its origin.  Some say it’s a type of wheat, but that’s not the case,  farro is a grain from a related, but different plant.  It was a staple at the height of the Roman Empire,  and persevered since those days until now in central parts of Italy, where it’s still grown,  consumed and exported.   Farro is loaded with vitamins and low in gluten, so even people with gluten allergies may enjoy it. Plus, it performs well in  many kinds of recipes, from risottos to breads, from stews to salads.  What an amazing little grain, that’s perfect as the focus of my 200th post!   😉

BEWITCHING FARRO SALAD
(from my kitchen)

to cook the grain:
1 cup farro  (not the pearled variety)
2.5 cups water
1/2 tsp salt

for the dressing (it will make more than you need):
1/2 cup olive oil
juice and zest of 1 lemon (or other citric fruits, alone or in combination)
pinch of salt
ground black pepper

for the salad:
asparagus, finely sliced in tiny “coins”
radishes, cut in match sticks
diced tomatoes
diced cucumbers
minced cilantro (optional)

Cook the farro by mixing it with water and salt in a saucepan, bringing it to a boil and gently simmering it for 45 minutes (or a little longer, taste to decide when it’s fully cooked, but don’t let it get mushy).  If the grain cooks but there’s some water left, drain it. Otherwise just fluff it with a fork and allow it to cool to room temperature.

Make the salad dressing by mixing the olive oil with lemon juice, zest, salt and pepper.  Reserve.  Add the asparagus and radishes to a small bowl and sprinkle with some of the salad dressing, mixing to lightly coat them.

At serving time, mix the cooked farro with the diced tomatoes, cucumbers, cilantro (if using), asparagus and radishes, add more dressing to taste, adjust the seasoning.

ENJOY!

to print the recipe, click here


Comments: A couple of years ago I watched Anne Burrell  use raw asparagus as the main ingredient in an unusual salad.  She inspired me in this farro recipe.   Since the asparagus spears are raw,  thinly slice both them and the radishes.   If you add some dressing to these two ingredients and allow them to rest while you prepare the remainder of the salad, it will mellow their sharpness.

I haven’t given any exact amounts for the ingredients so that you can play with them, using more or less, depending on your own taste.  Skip some, add something else (onions, diced olives, capers, mint leaves), and adapt the dressing too: orange juice complements asparagus and farro quite nicely!

The grain doesn’t go mushy in the fridge overnight, and in fact the salad was still outstanding next day. I can see raw asparagus in our future quite often: couscous, orzo, and cracked wheat salads will never be the same…

My husband, after polishing off leftovers, said: “You are making this again, right”? – I guess food bloggers’ partners live in fear of never tasting the same dish twice… 😉

ONE YEAR AGO: From Sea to Table:  SUSHI

Add to FacebookAdd to DiggAdd to Del.icio.usAdd to StumbleuponAdd to RedditAdd to BlinklistAdd to TwitterAdd to TechnoratiAdd to Yahoo BuzzAdd to Newsvine