
And three small changes in my overall sourdough approach… I will save those for the comments, check it out in case you are interested. But first things first, the method to make a scary good sourdough bread in the comfort of your kitchen…

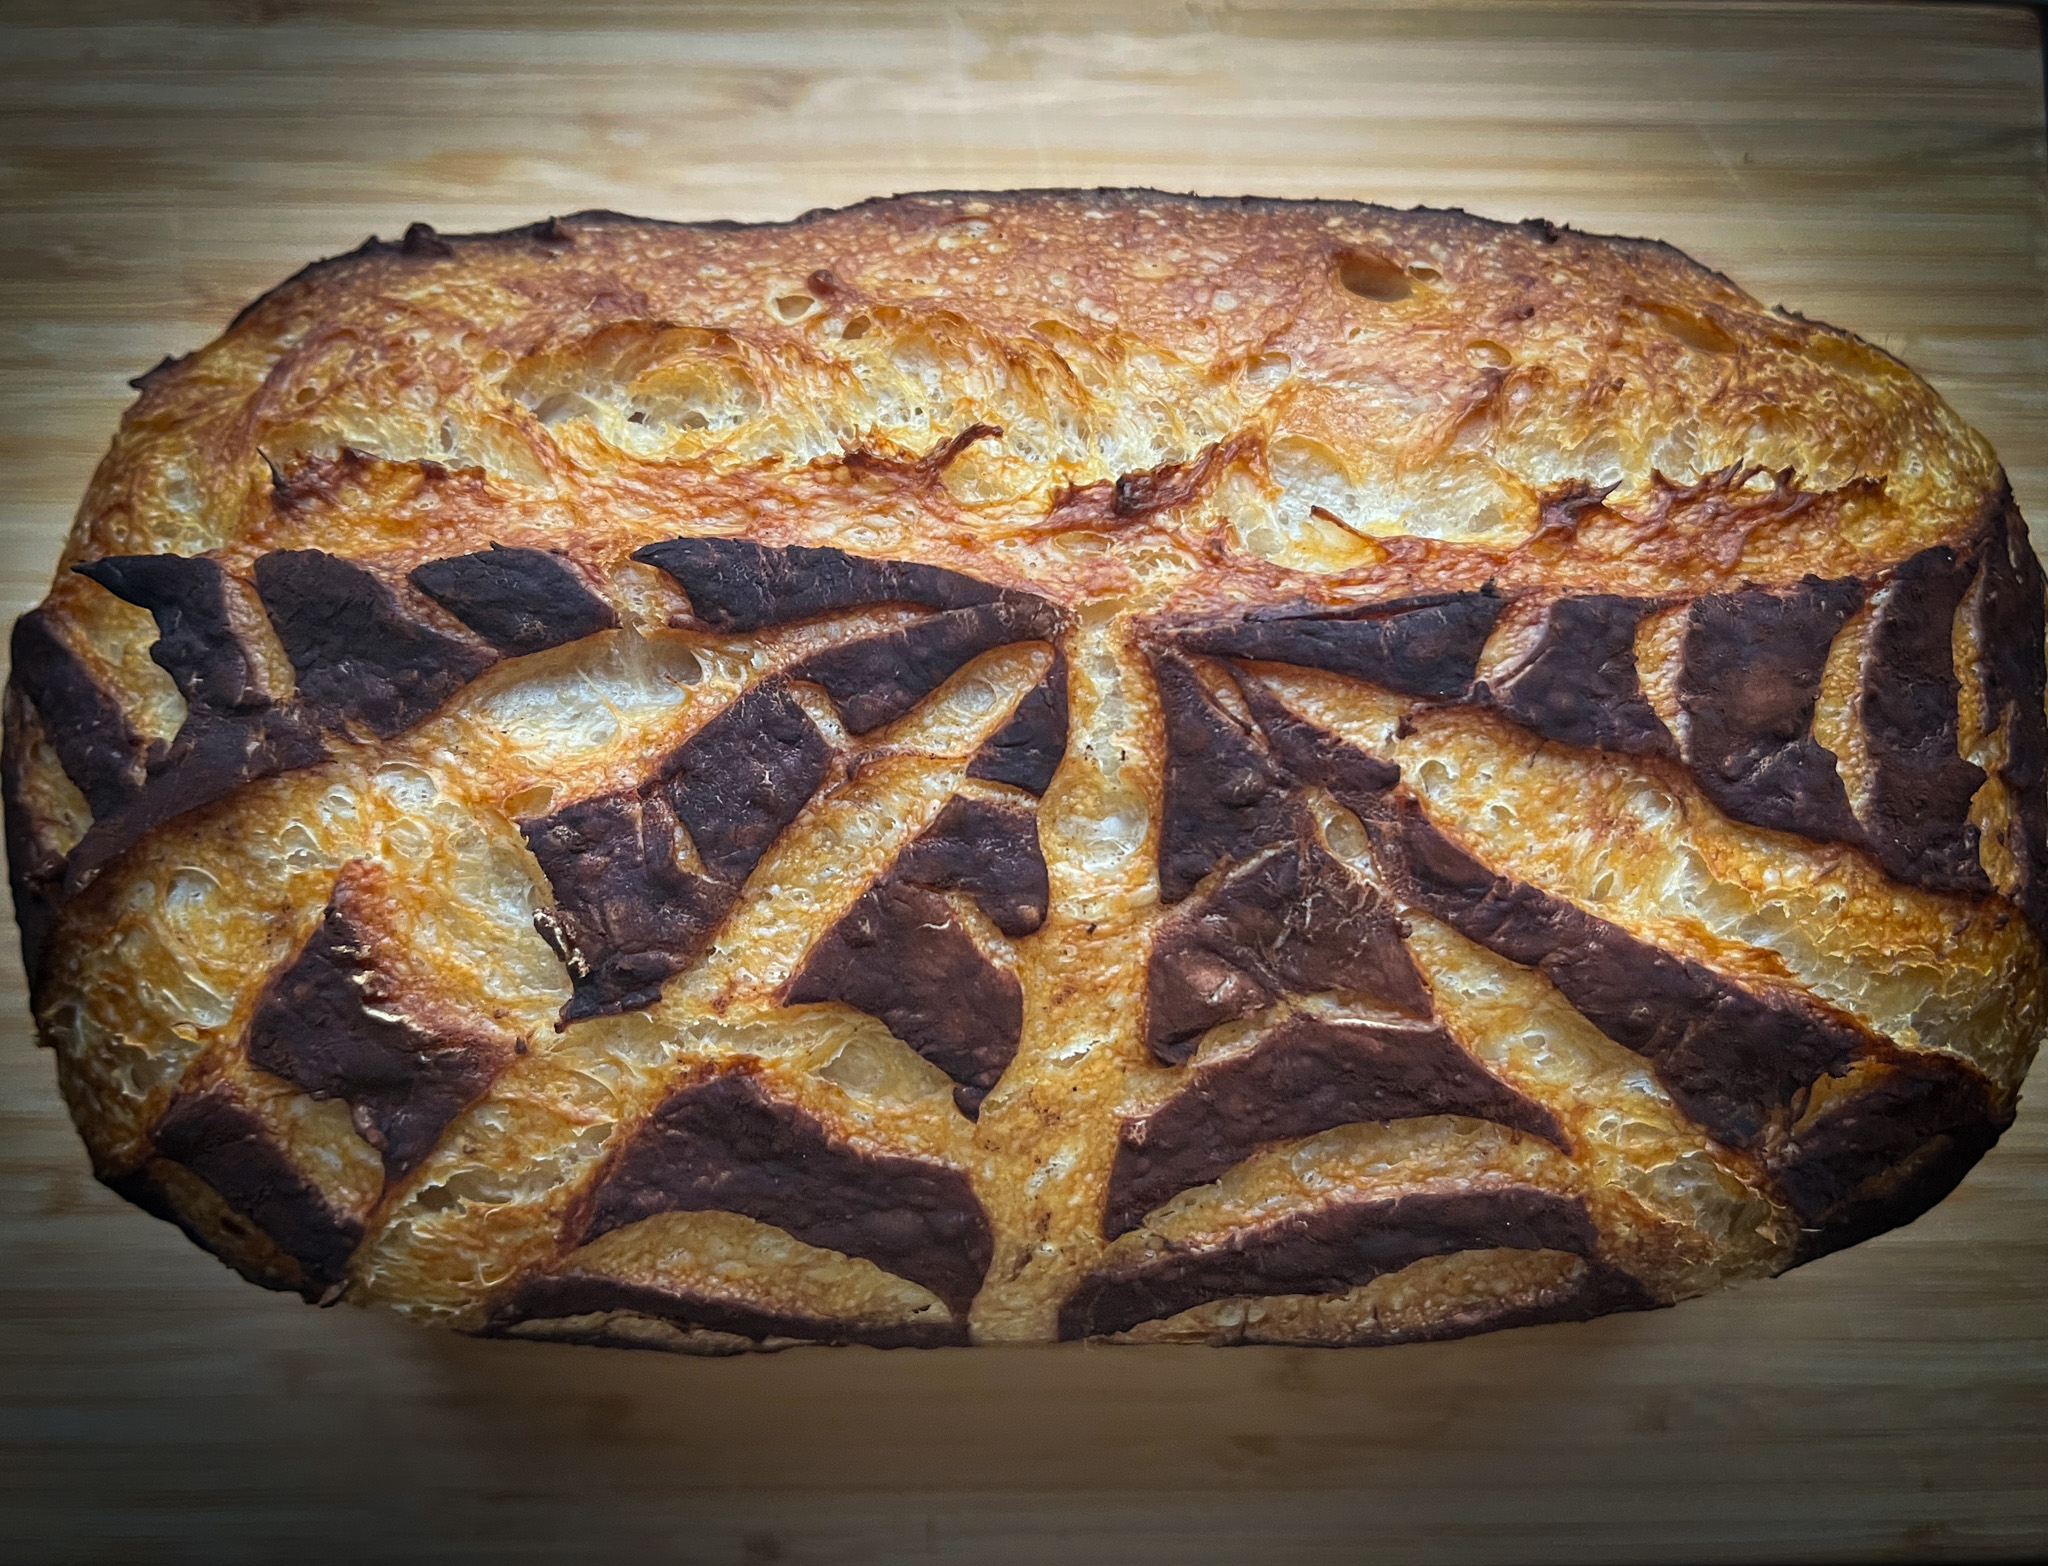
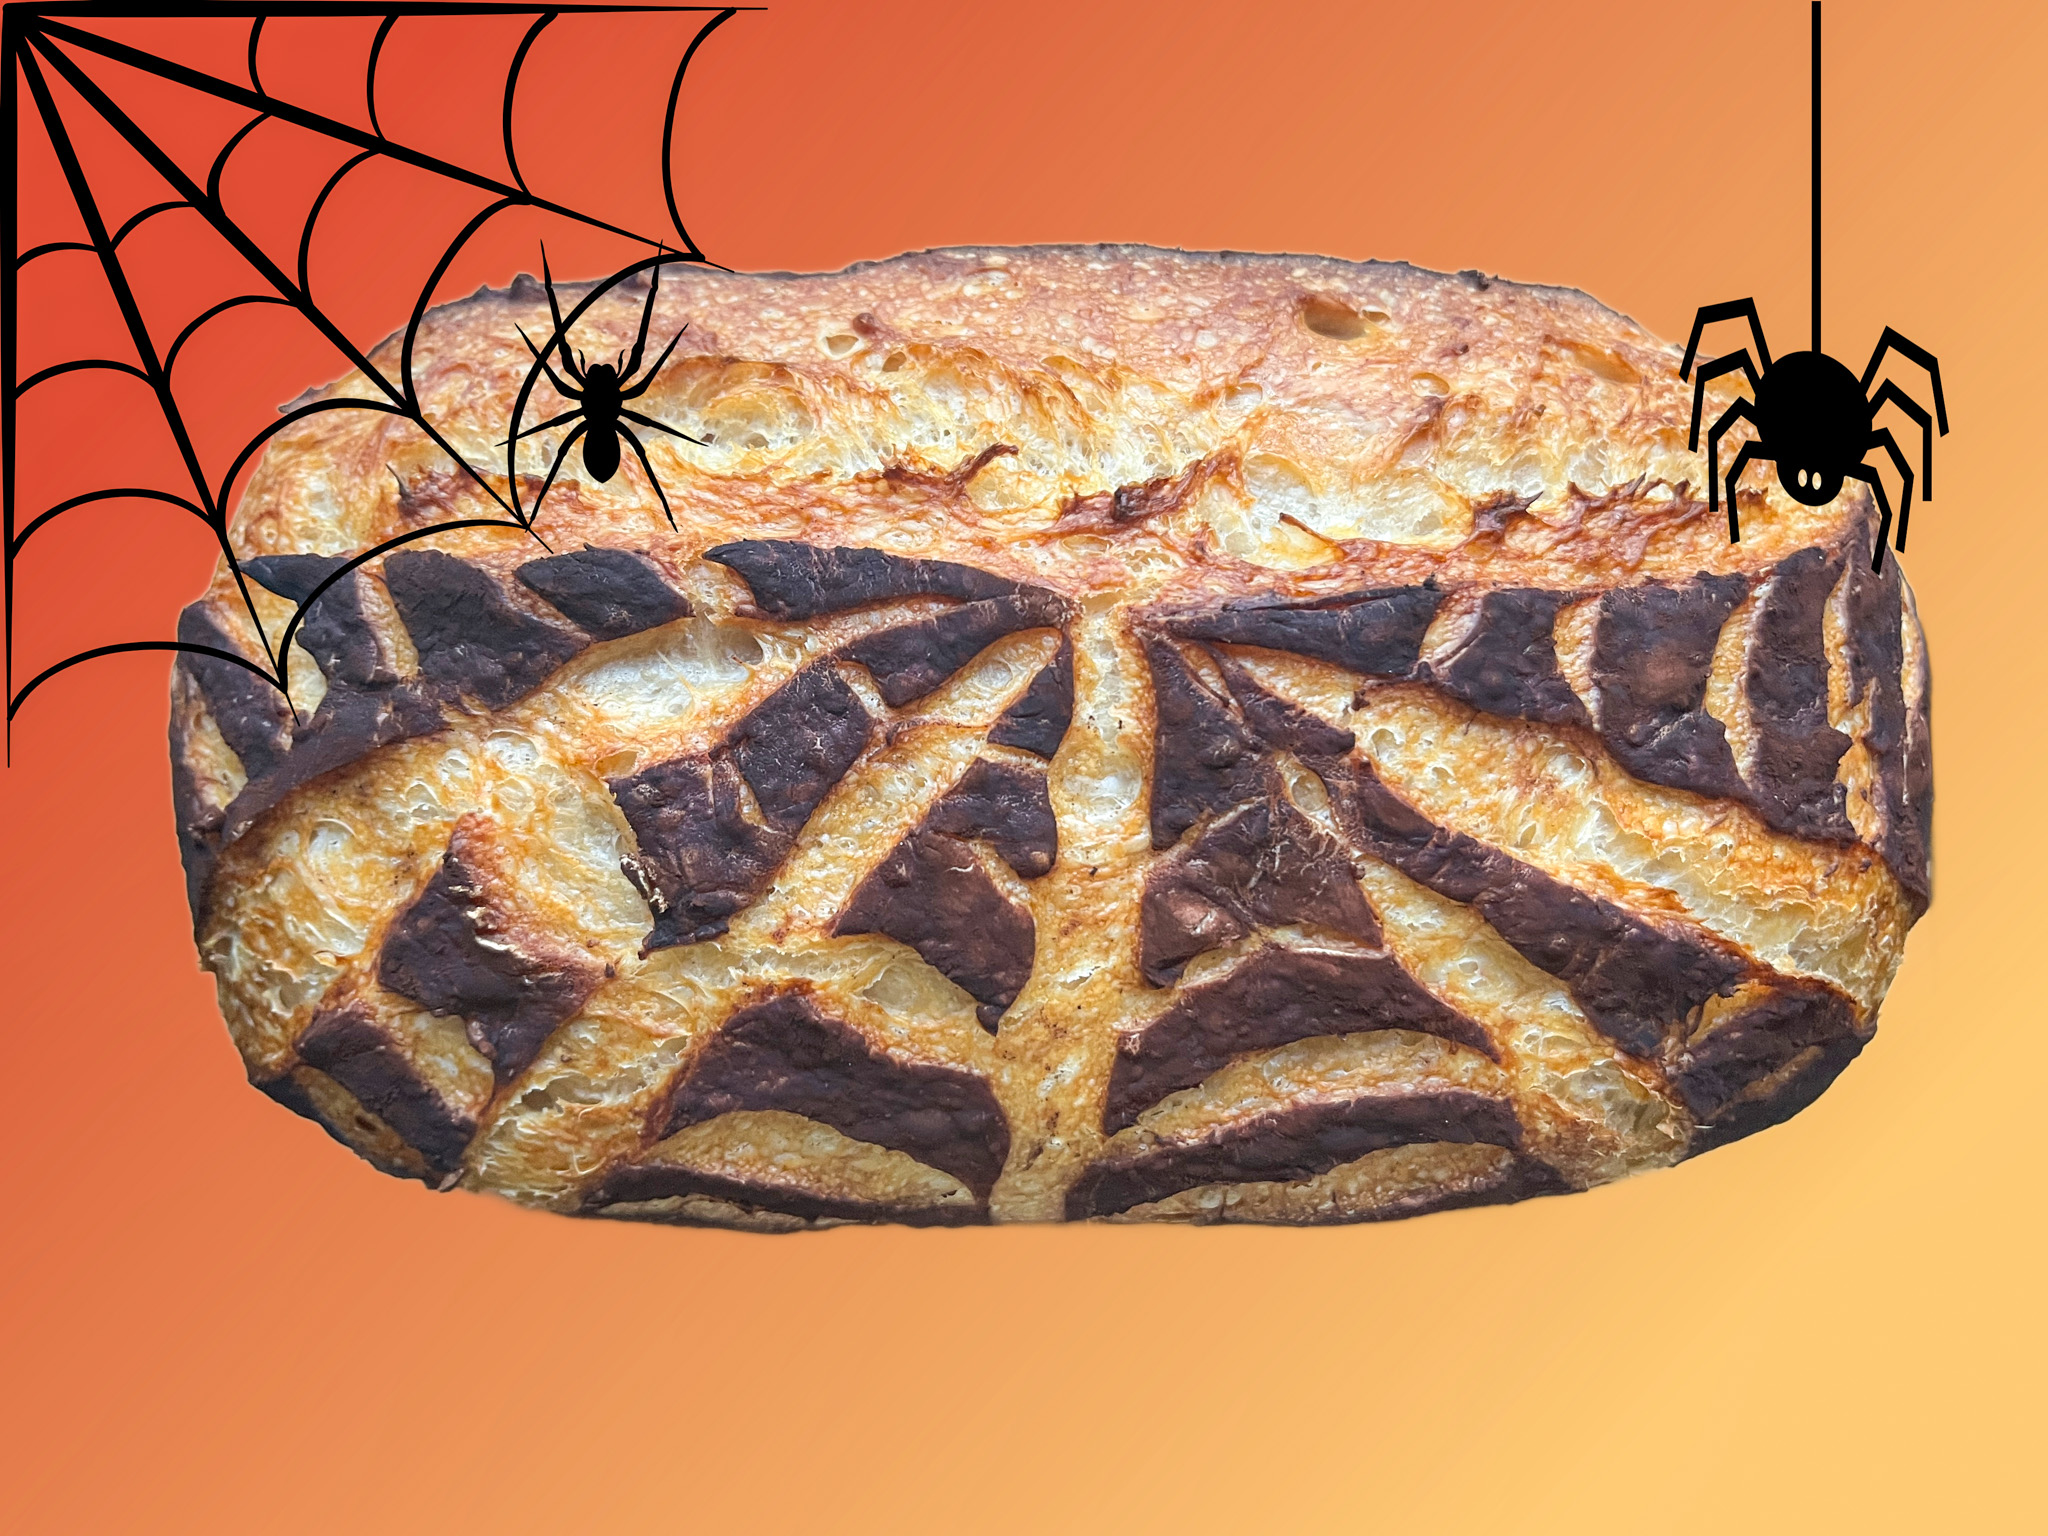
SPIDER WEB SOURDOUGH LOAF
(from The Bewitching Kitchen)
410g bread flour
275g water
8g salt
75g starter (I used stiff, at about 75% hydration)
Mix all ingredients in the bowl of a KitchenAid type mixer fitted with the dough hook. Knead gently for about 4 minutes (first or second speed maximum).
Transfer dough to a lightly oil bowl and do a bulk fermentation with 4 folds made 45 minutes apart. Before you start the fermentation , remove a very small amount of dough to a small glass container (like those that hold spices), and mark where the level of the dough is with a permanent marker. Keep that at room temperature to monitor fermentation.
After the last folding cycle, keep an eye on the fermentation using the small vial. Ideally you want to let the dough ferment until it is double in size. Depending on the day, temperature of your kitchen, it might take 8 hours or more. Be patient, it will pay off.
Once bulk fermentation is over, shape the dough and place in a floured banetton. Place in the fridge overnight.
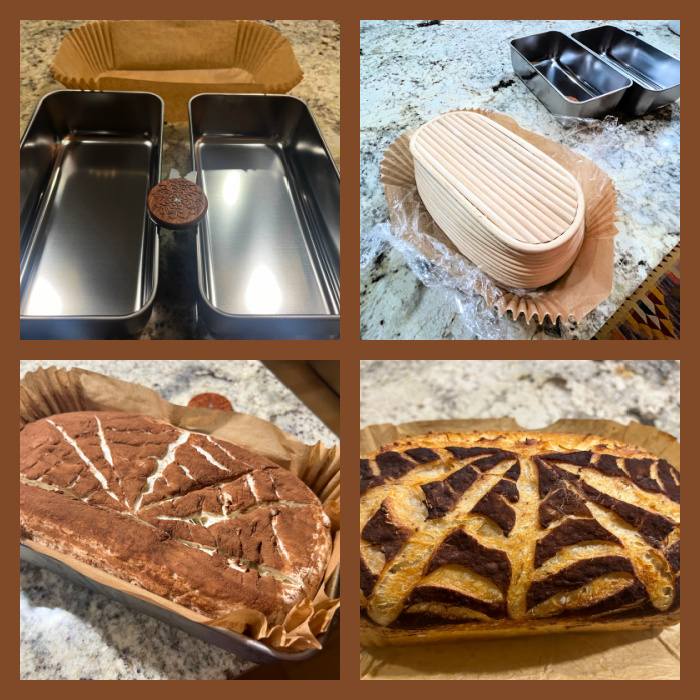
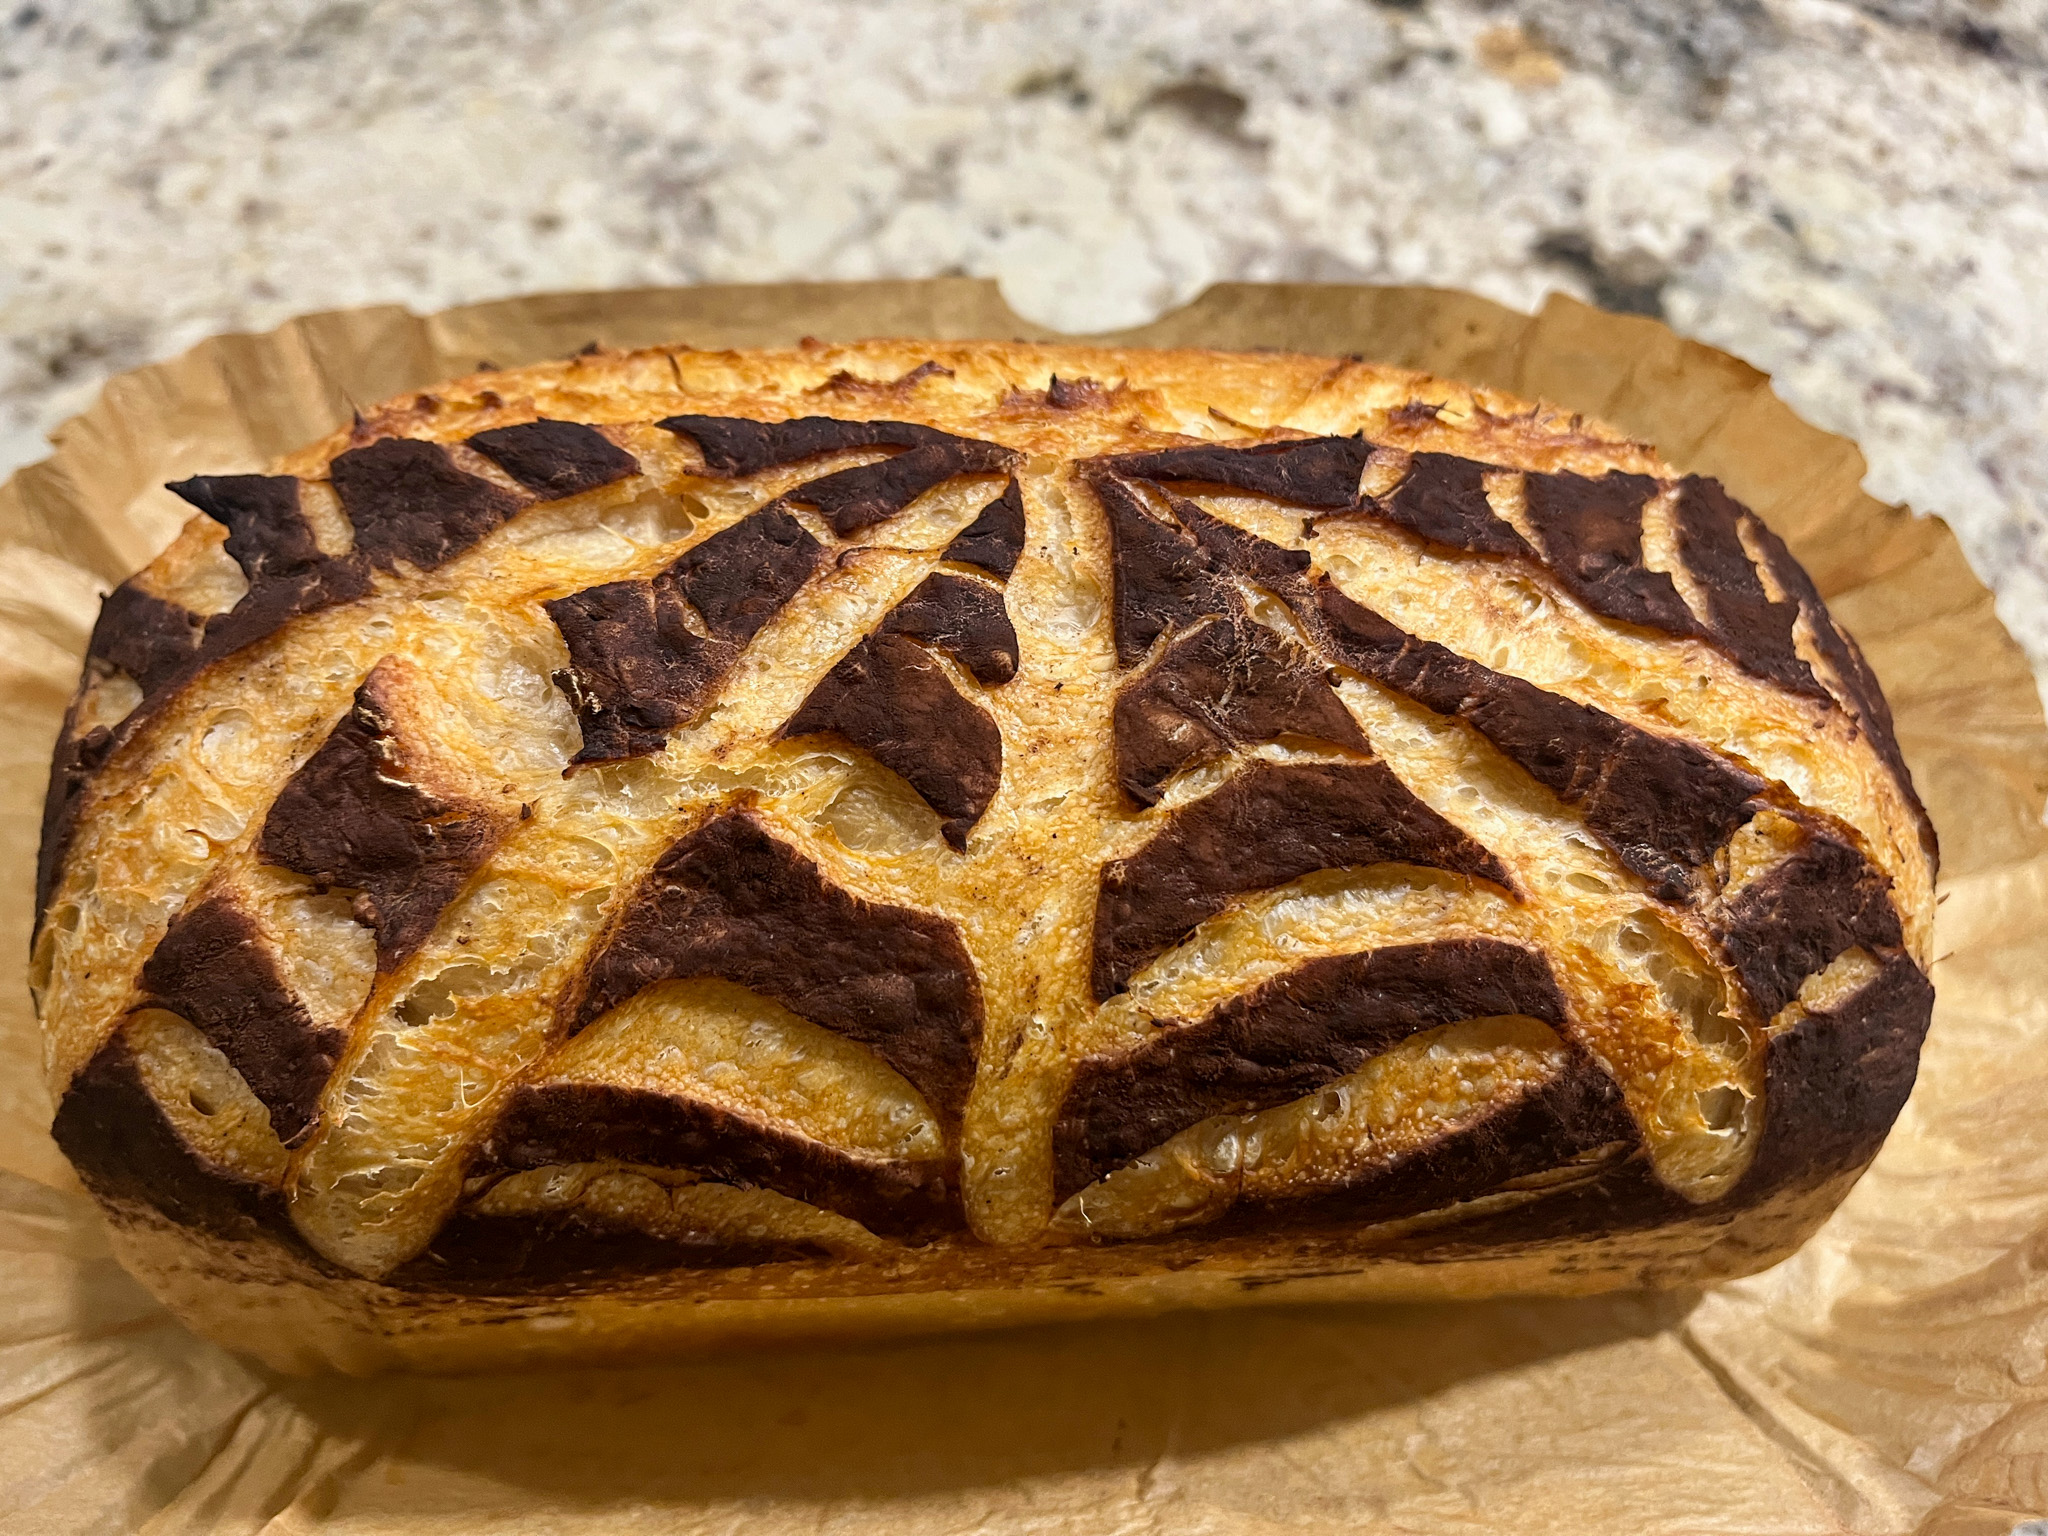
Next day, freeze the dough for 30 minutes in the banetton, to make it easier to score later. Invert the dough on the paper liner, place in the loaf pan. Add cocoa powder on the surface and score the pattern of a spider web.
Place small cubes of ice on the four corners of the pan, sliding the ice cubes between the metal pan and the paper liner. Place an inverted pan on top to act as a lid, and bake at 450F for 30 minutes. Remove the top pan, and allow the bread to bake further for another 15 minutes or so.
If when you remove the bread from the pan the bottom seems a little soggy, place it back in the oven over a rack and bake for 5 minutes outside of the pan.
Let it cool completely before slicing.
ENJOY!
to print the recipe, click here
.
Pan liners available here
Loaf pans similar to these ones. I have a set of four, could not find the exact match. But they are 9 x 5 (inches).
.
Comments: I’ve been playing quite a bit with my default recipe for sourdough and the main change is that I now prefer to use a stiff sourdough starter to make my dough (sourdough starter from my fridge + 80g flour + 60g water, for a 75% hydration level). I like the way it handles, I like that it stays at maximal height for longer time than the 100% hydration version. In some bakes I have reduced the hydration to 60% – in this case the starter almost behaves like a dough that you can knead to mix – but after talking with my friend Philip, who recently also got into stiff starters, I settled for 75%. The good news is that I don’t need to adjust anything in the recipe, I can use my formula with the exact same amount of stiff versus loose starter. The difference in the amount of total flour is negligible and does not affect the outcome.
My second change is following the fermentation
with a small amount of dough removed once I mix it.
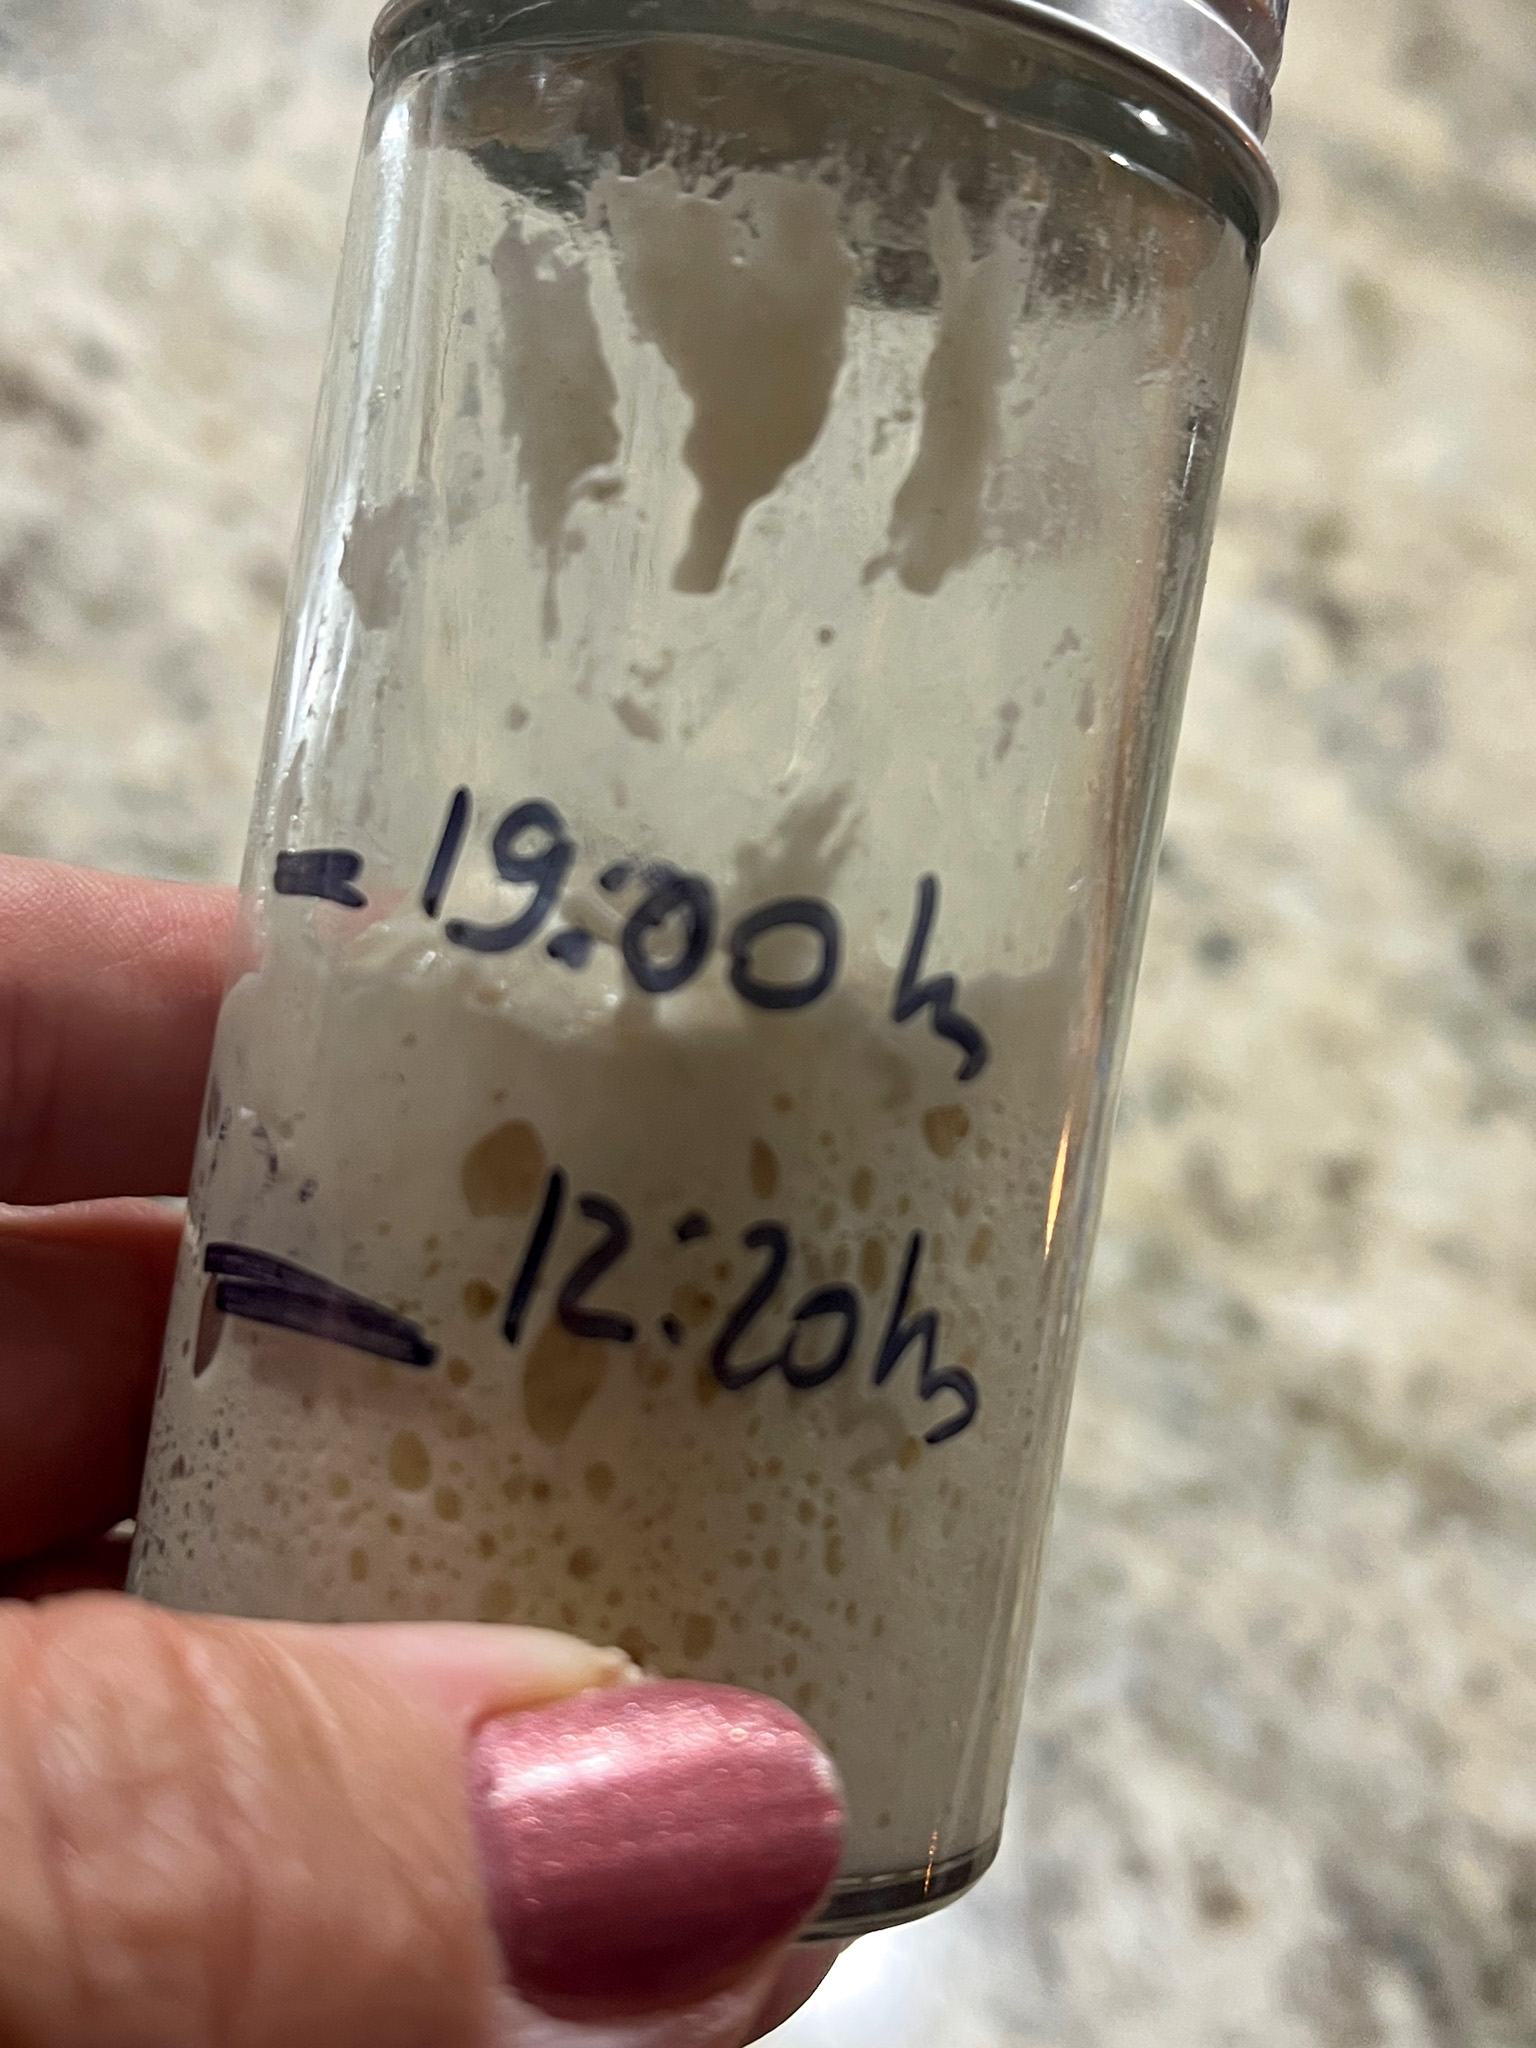
It turns out that I never bothered doing that, and yes, my bread was usually pretty good, no problems, but I had some inconsistencies from loaf to loaf that were hard to explain. It turns out that I always left the dough for 5.5 hours in bulk fermentation and after monitoring my dough with this method, I realize that in most cases I was cutting it a bit short. What I love about this simple detail is that I now wait until it doubles or almost doubles, shape the dough and retard in the fridge. It is really fun to see how it is quite sluggish in the first few hours and then in the last 90 minutes or so it gets going at a faster pace. No need to buy special gadgets that monitor the fermentation under controlled temperature. A simple little glass vial is all you need…
And finally, the third change is that I now freeze the dough for 30 minutes before inverting it out of the banetton and doing the scoring. Especially when doing more intricate designs, freezing the surface helps a lot. If you are just slashing the dough with two crossed lines, no need to freeze, but anything that requires a bit of more time you will notice a huge improvement.
And let the countdown to Halloween begin!
ONE YEAR AGO: Halloween Almond Cookies
TWO YEARS AGO: Miso-Honey Chicken Thighs
THREE YEARS AGO: Raw Zucchini and Chickpea Salad with Tahini Yogurt
FOUR YEARS AGO: Black Tahini Shortbread Cookies
FIVE YEARS AGO: A Fruitful Trio (of Macarons)
SIX YEARS AGO: Halloween Entremet Cake
SEVEN YEARS AGO: Pork with Prunes, Olives and Capers
EIGHT YEARS AGO: Kansas Corn Chowder
NINE YEARS AGO: Impossibly Cute Bacon and Egg Cups
TEN YEARS AGO: Pulling Under Pressure
ELEVEN YEARS AGO: Cooking Sous-vide: Two takes on Chicken Thighs
TWELVE YEARS AGO: Miso Soup: A Japanese Classic
THIRTEEN YEARS AGO: On my desk
FOURTEEN YEARS AGO: A must-make veggie puree
FIFTEEN YEARS AGO: Vegetarian Lasagna
SIXTEEN YEARS AGO: Brazilian Pão de Queijo
