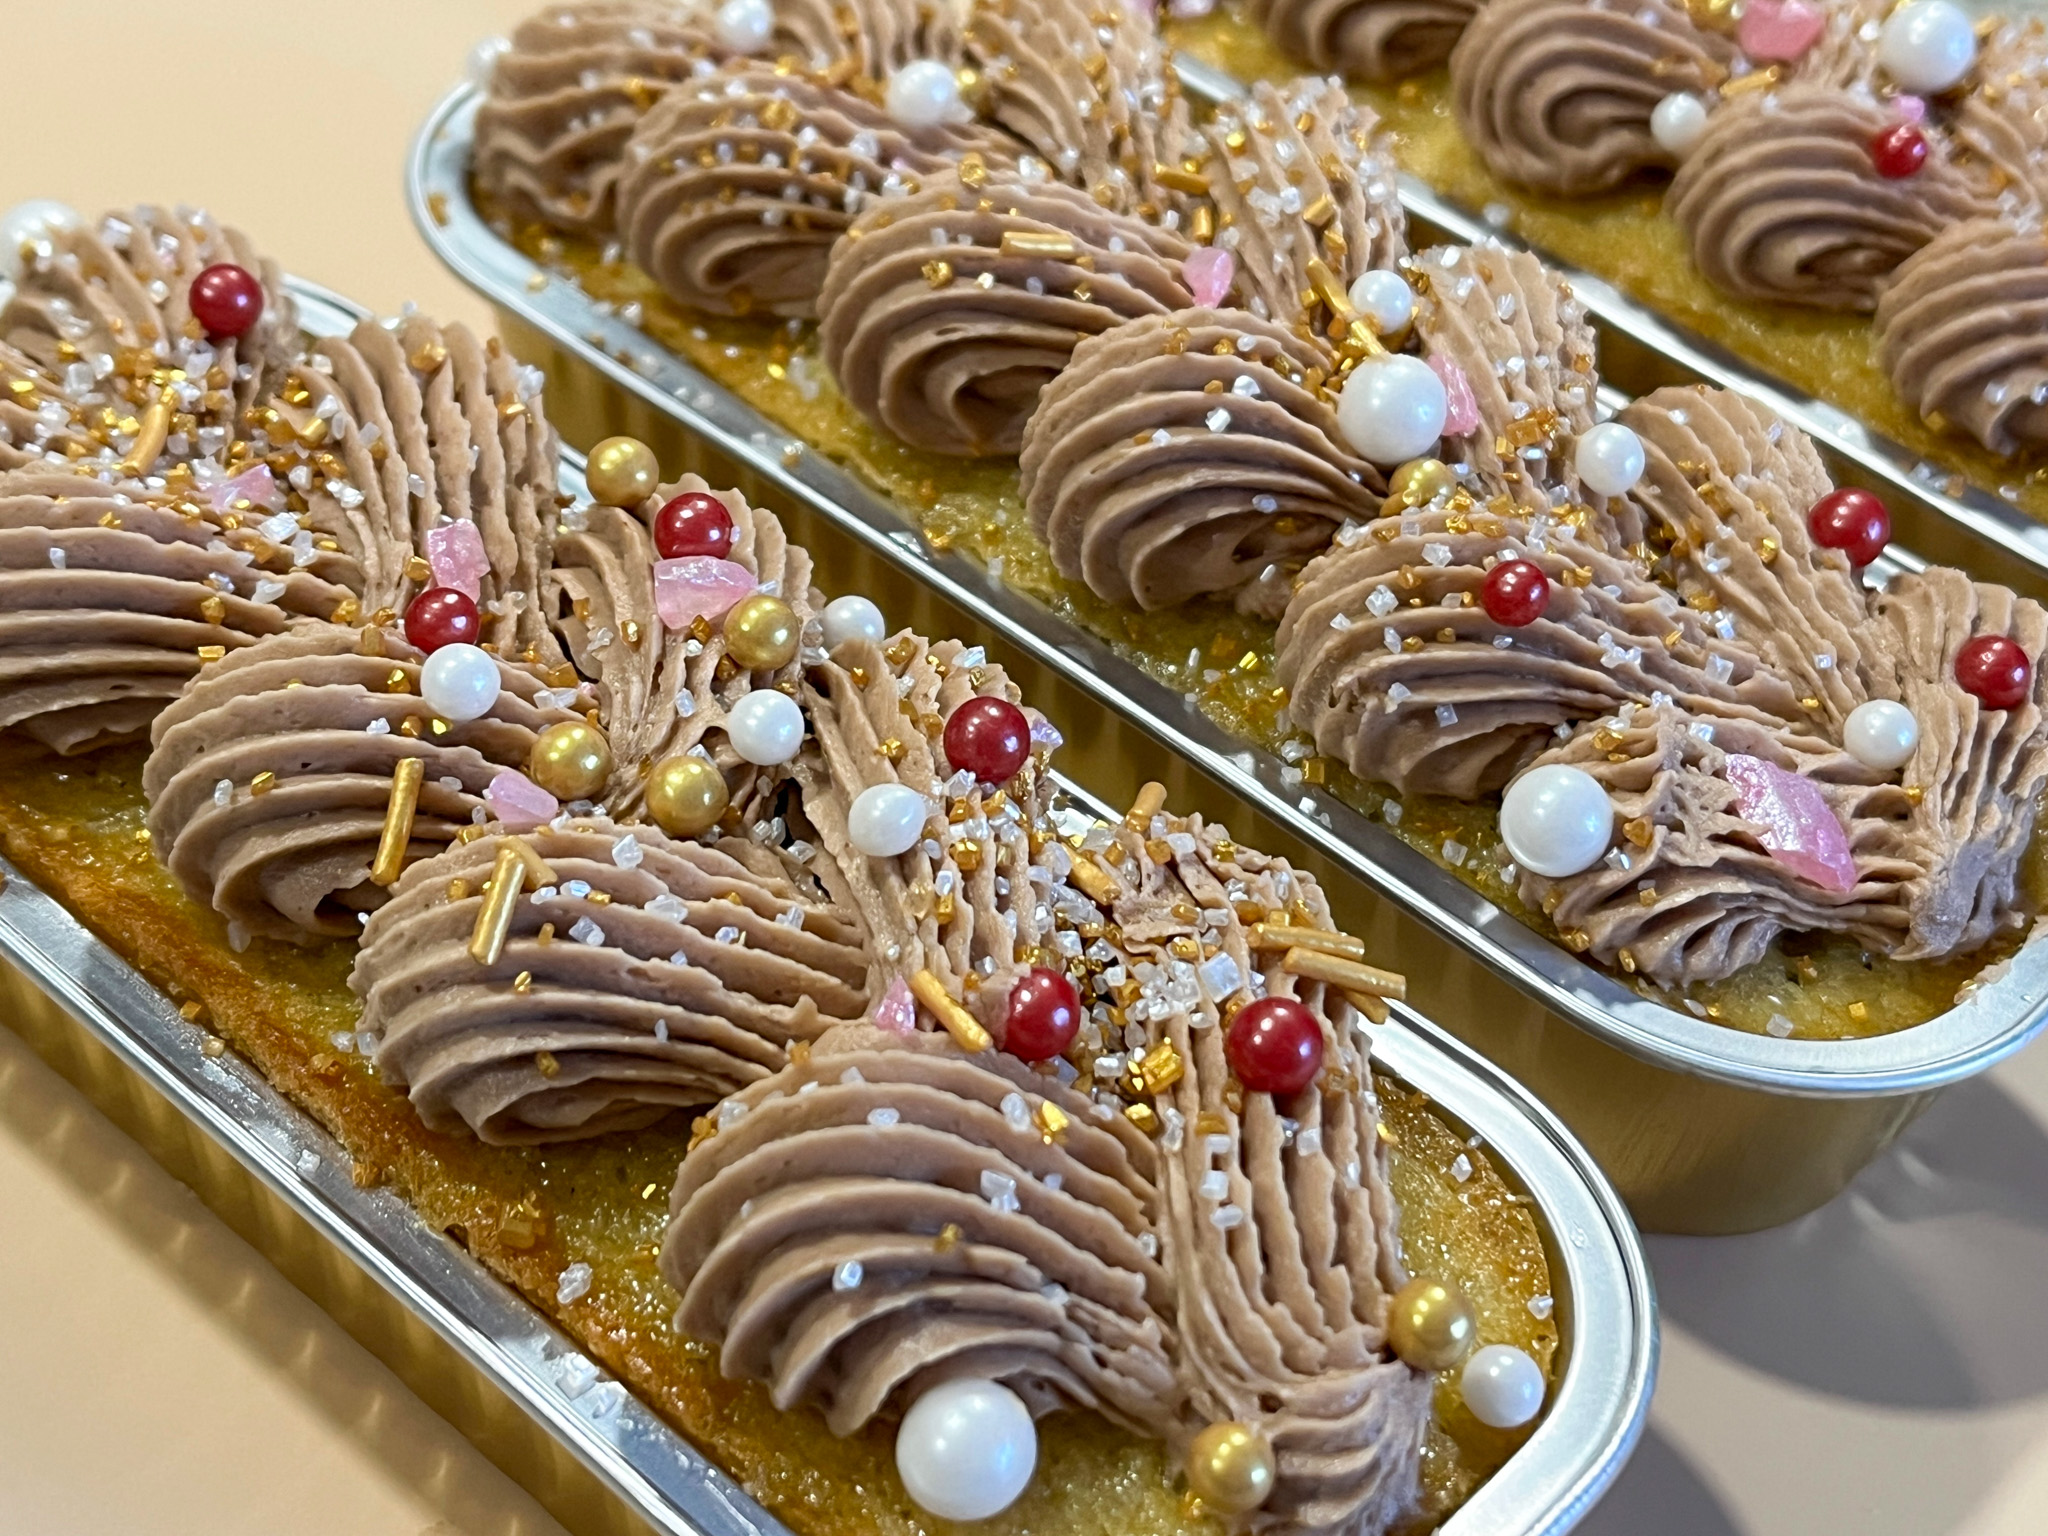
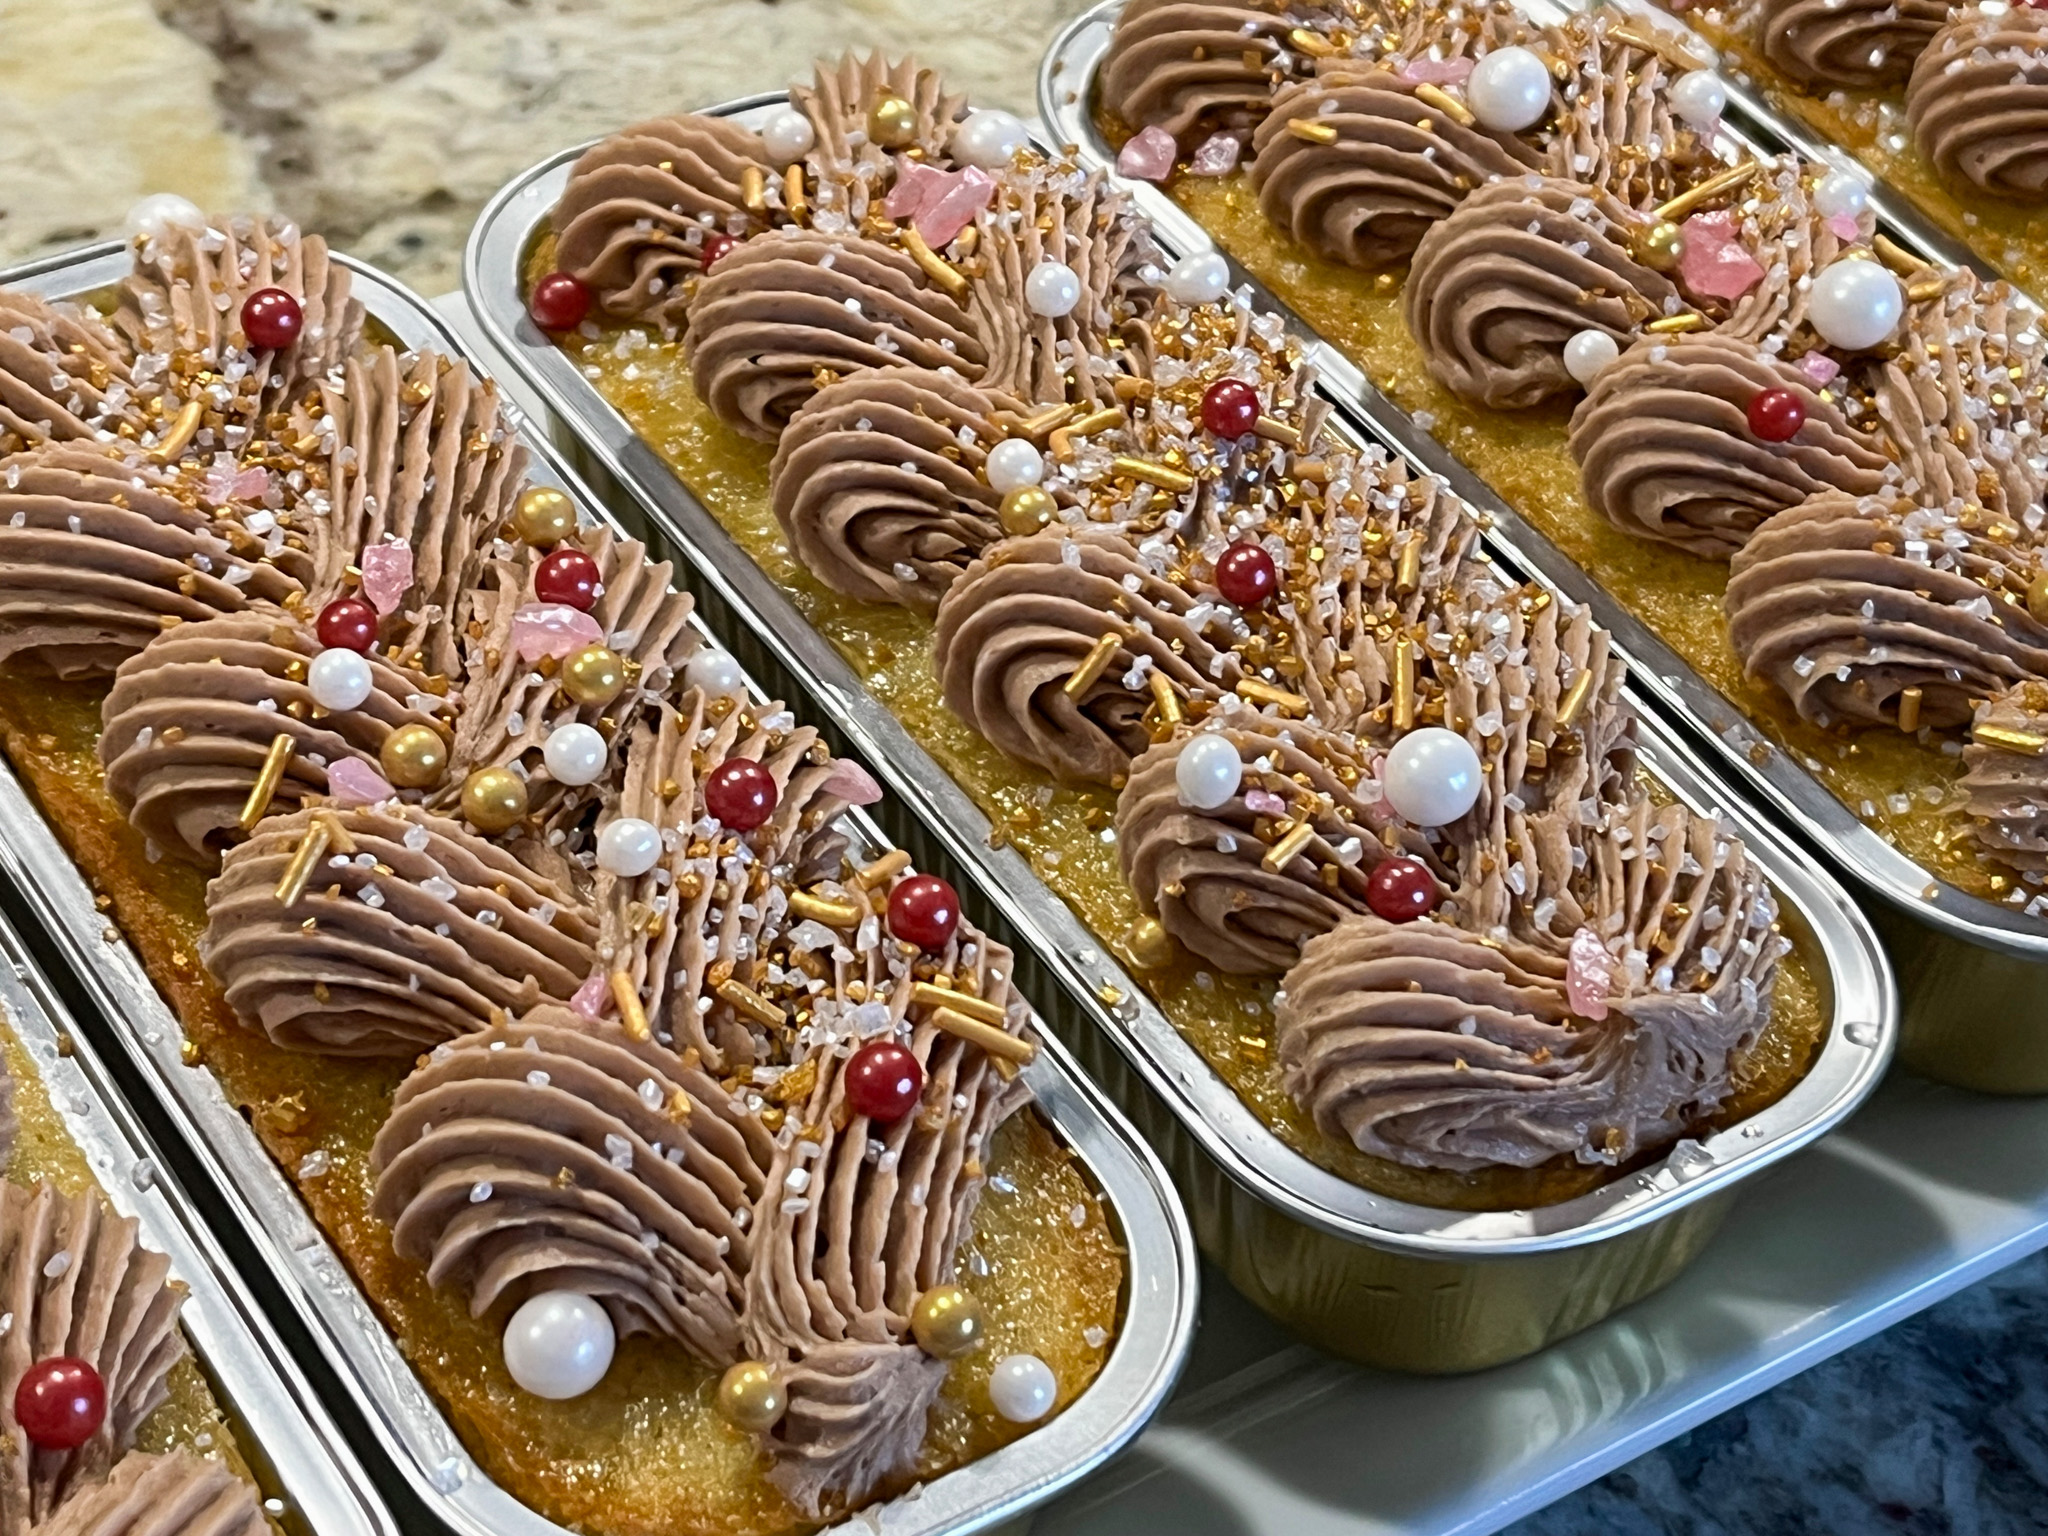
Today I want you to meet (at least virtually) a very special baker, Chef Faye Palmqvist. She hosts a group on Facebook that is geared towards advanced baking, often involving one of her specialties, mini-loaf cakes. They are elegant, unique, and she sure knows how to make them ultra special. You can visit and join her group for free, clicking here. Without further ado, here is my batch of Vanilla Cake following her recipe perfectly adapted for the mini-loaf environment, with a slight twist on her Swiss Meringue Buttercream, incorporating Nutella into it.
I cannot share the recipe, as it is copyrighted from her cookbook, available in her website. But her method produces flawless cakes that bake perfectly in the little aluminum tins (like these ones).
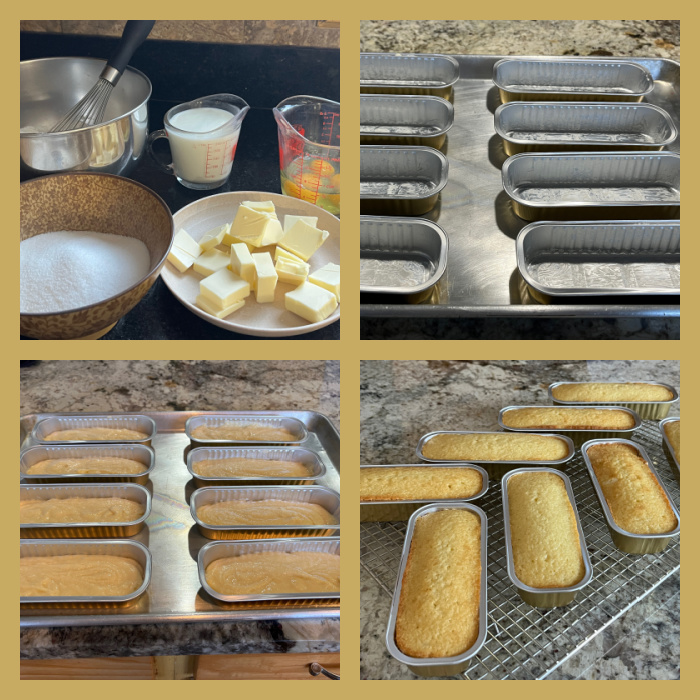
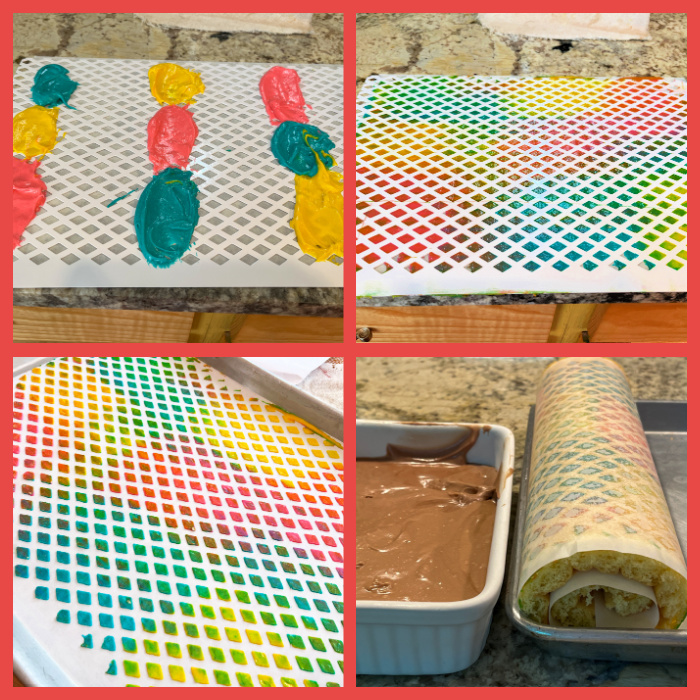
Below, the prep work and the pans before and after baking.
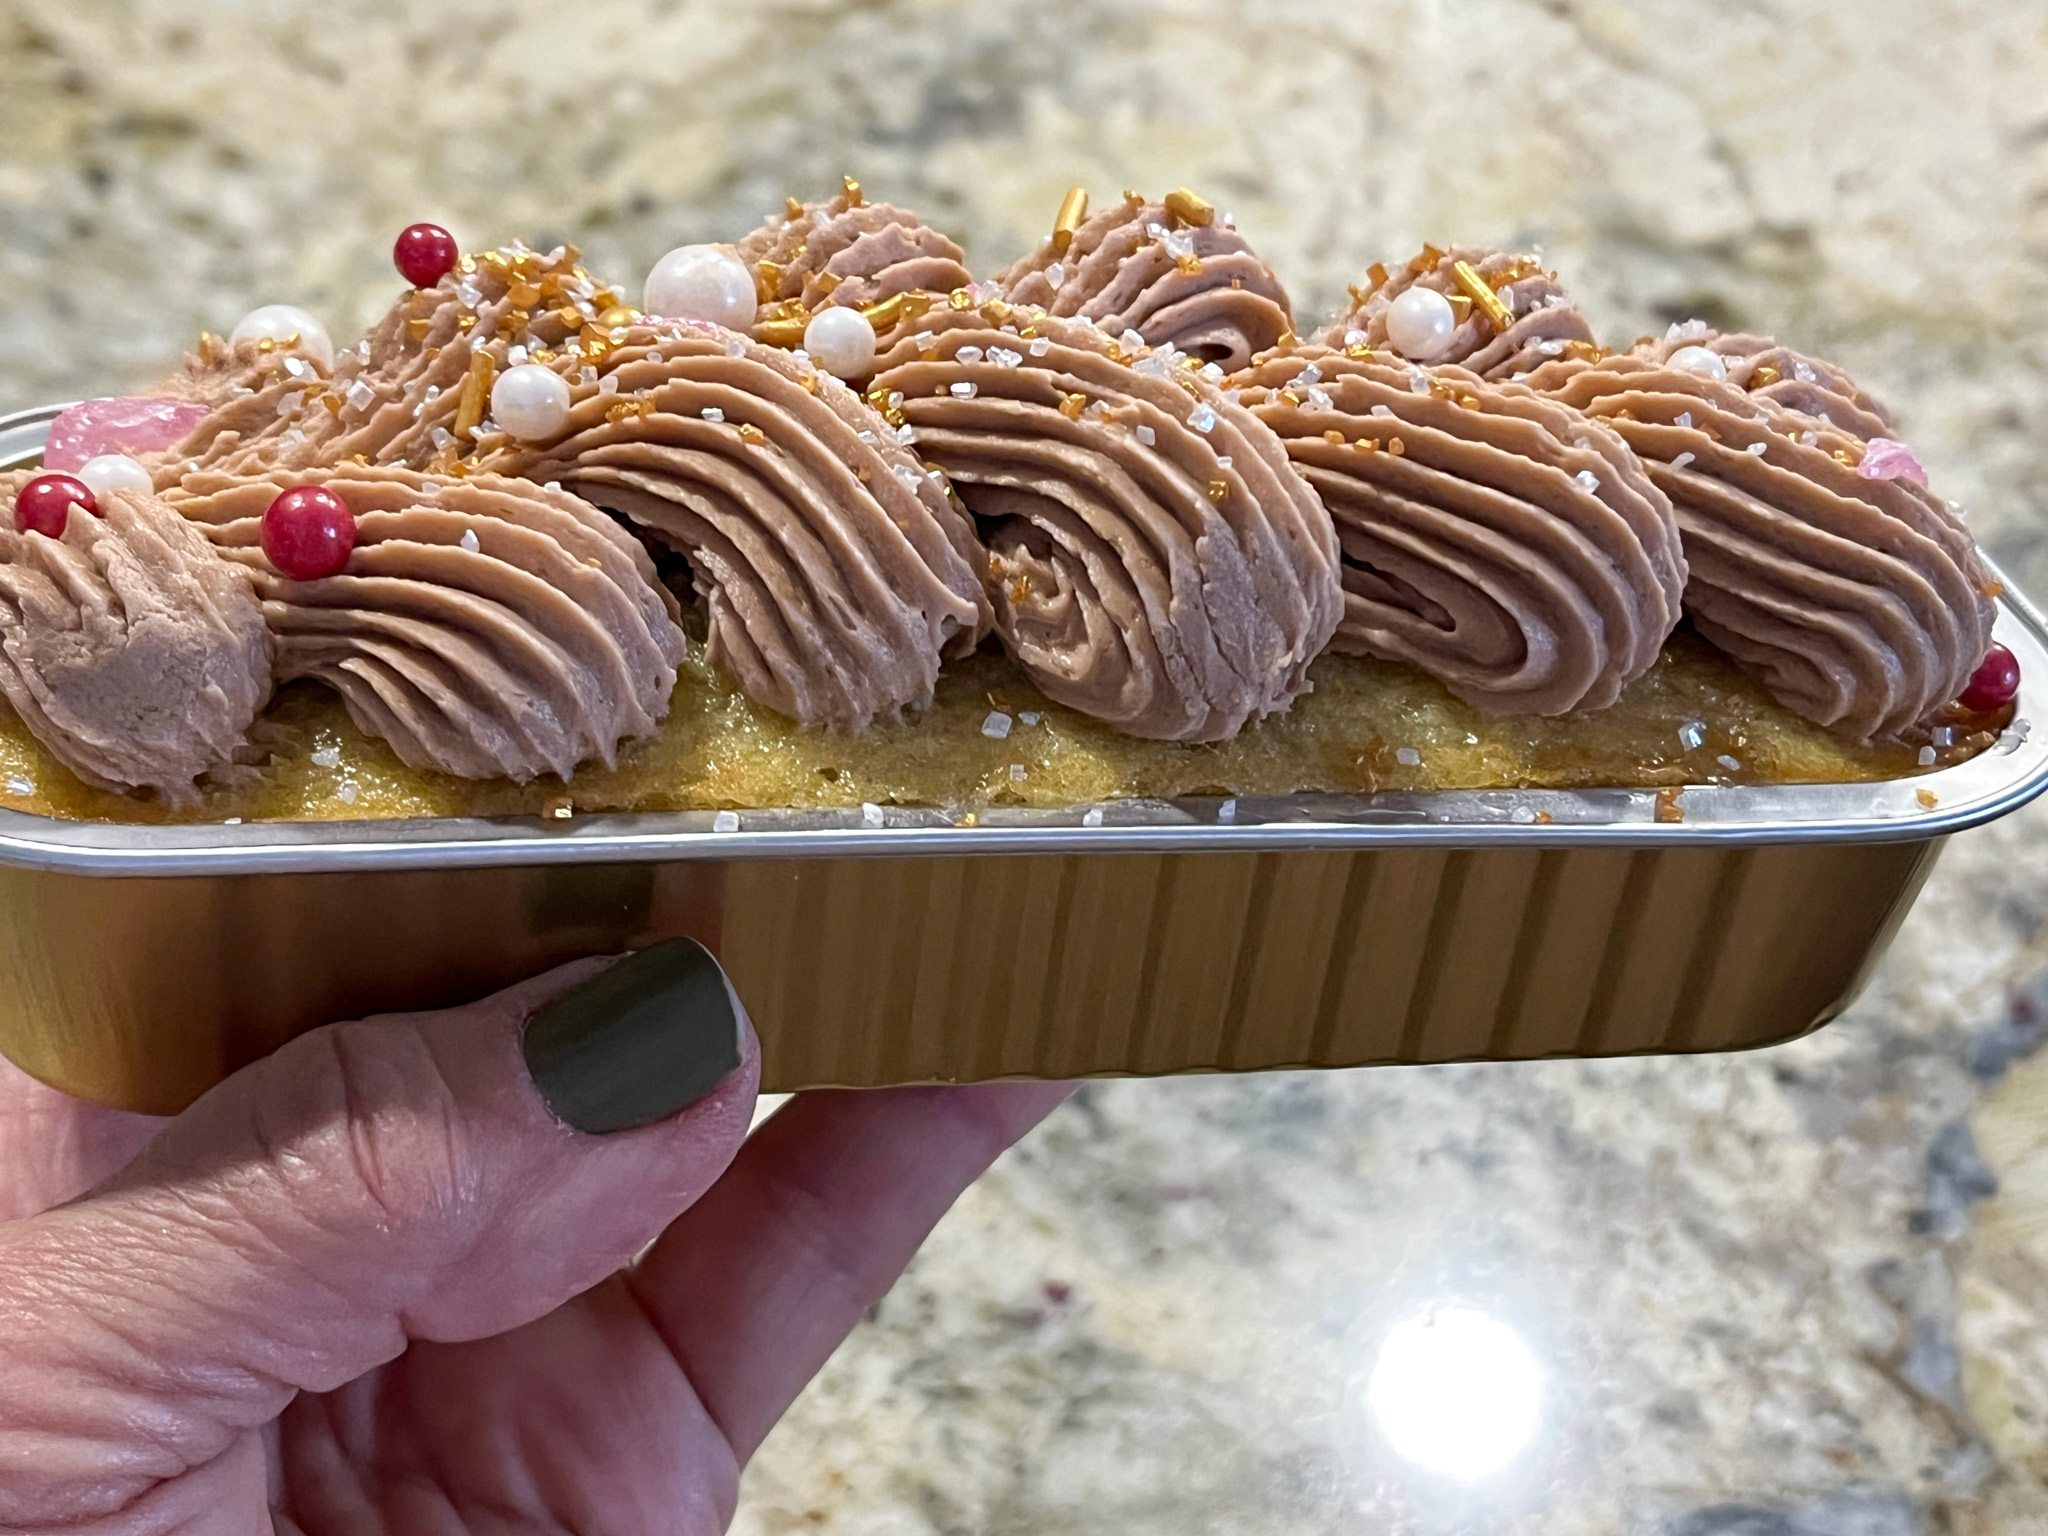
I used one of her methods to pipe the buttercream that I find quite attractive and was suprisingly easy to accomplish!
I hope you join her Facebook group to profit from her knowledge and meet other baking aficionados. On Tuesdays, she posts a feature where you can ask any question about baking, other days are dedicated to professional baking – advice on selling, advertising, stuff like that. And she often encourages members to share pictures of their bakes, so it is a friendly and warm spot in the internet. I feel that is what we all need right now.
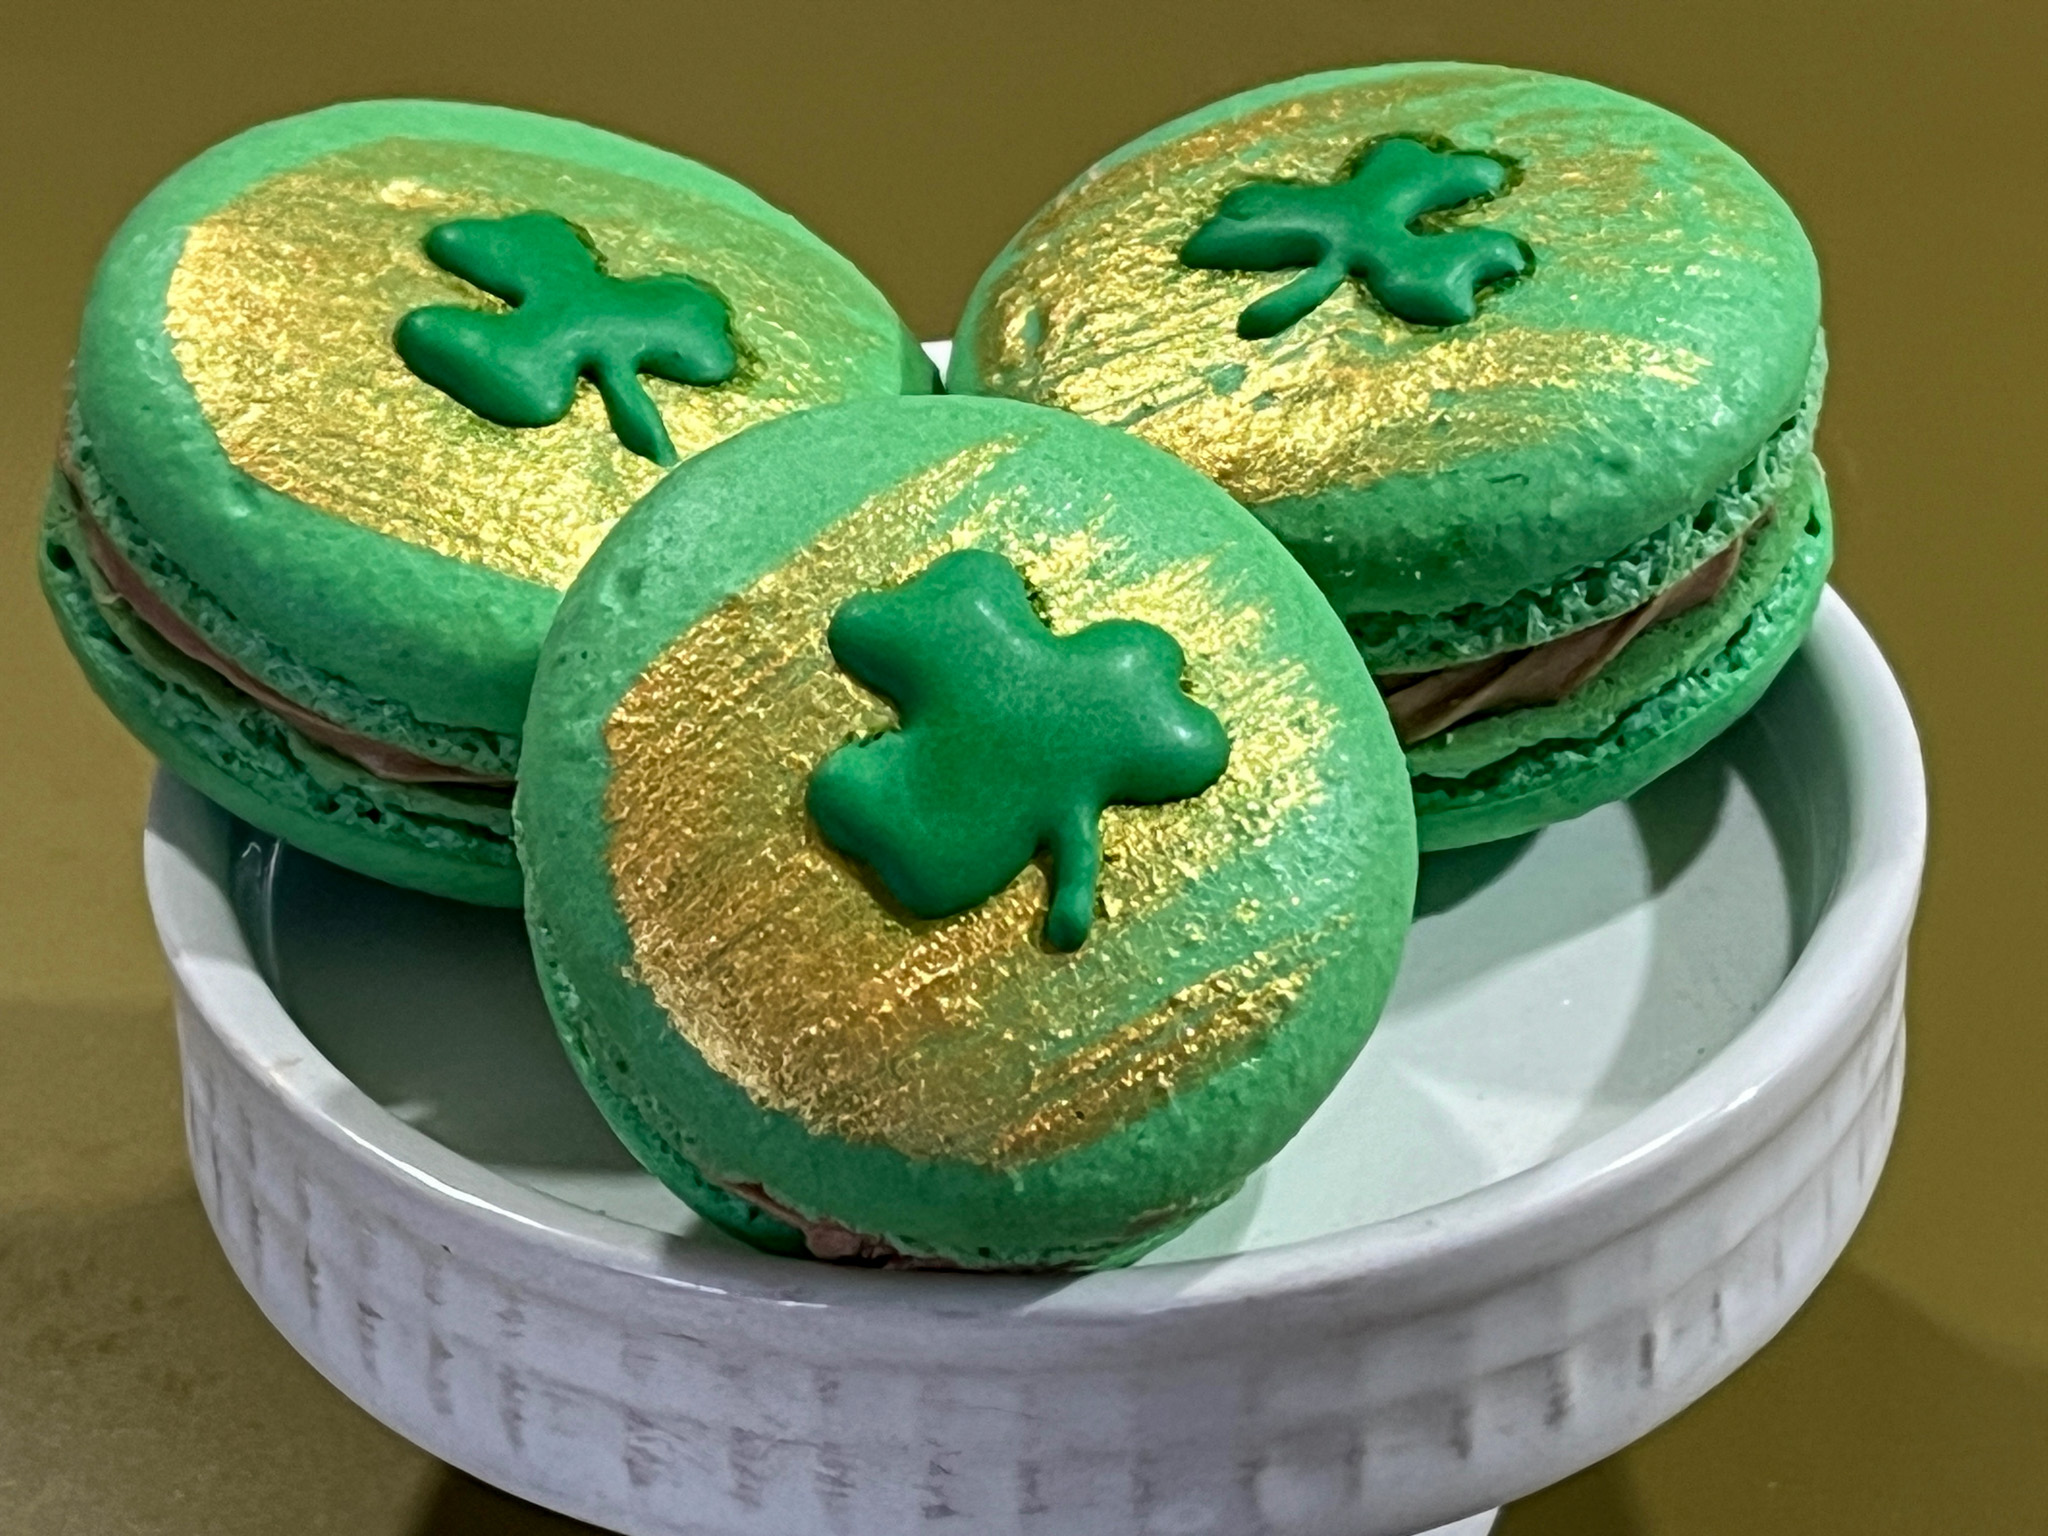
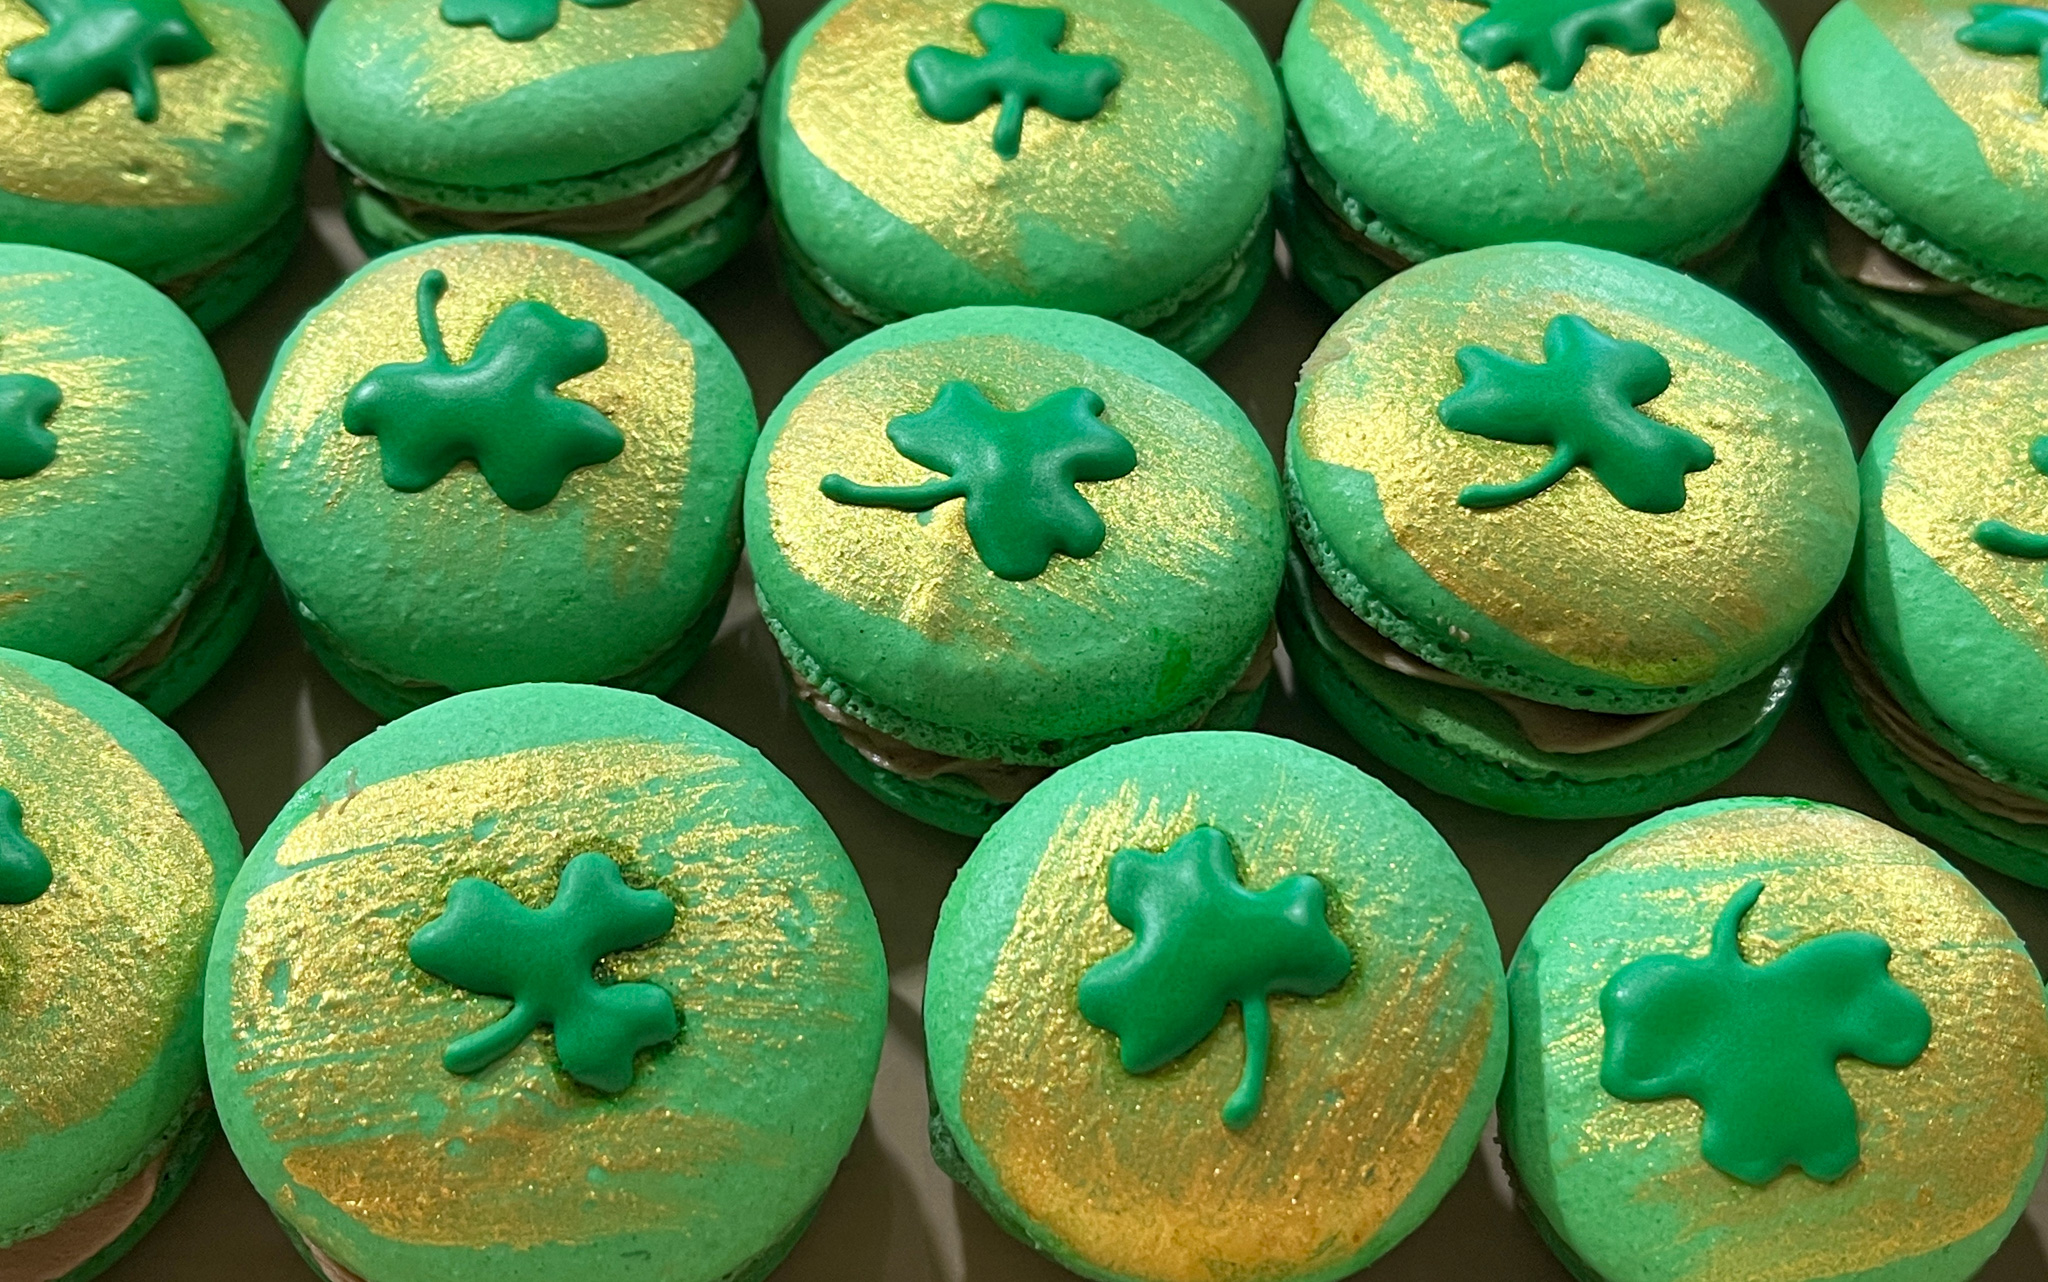
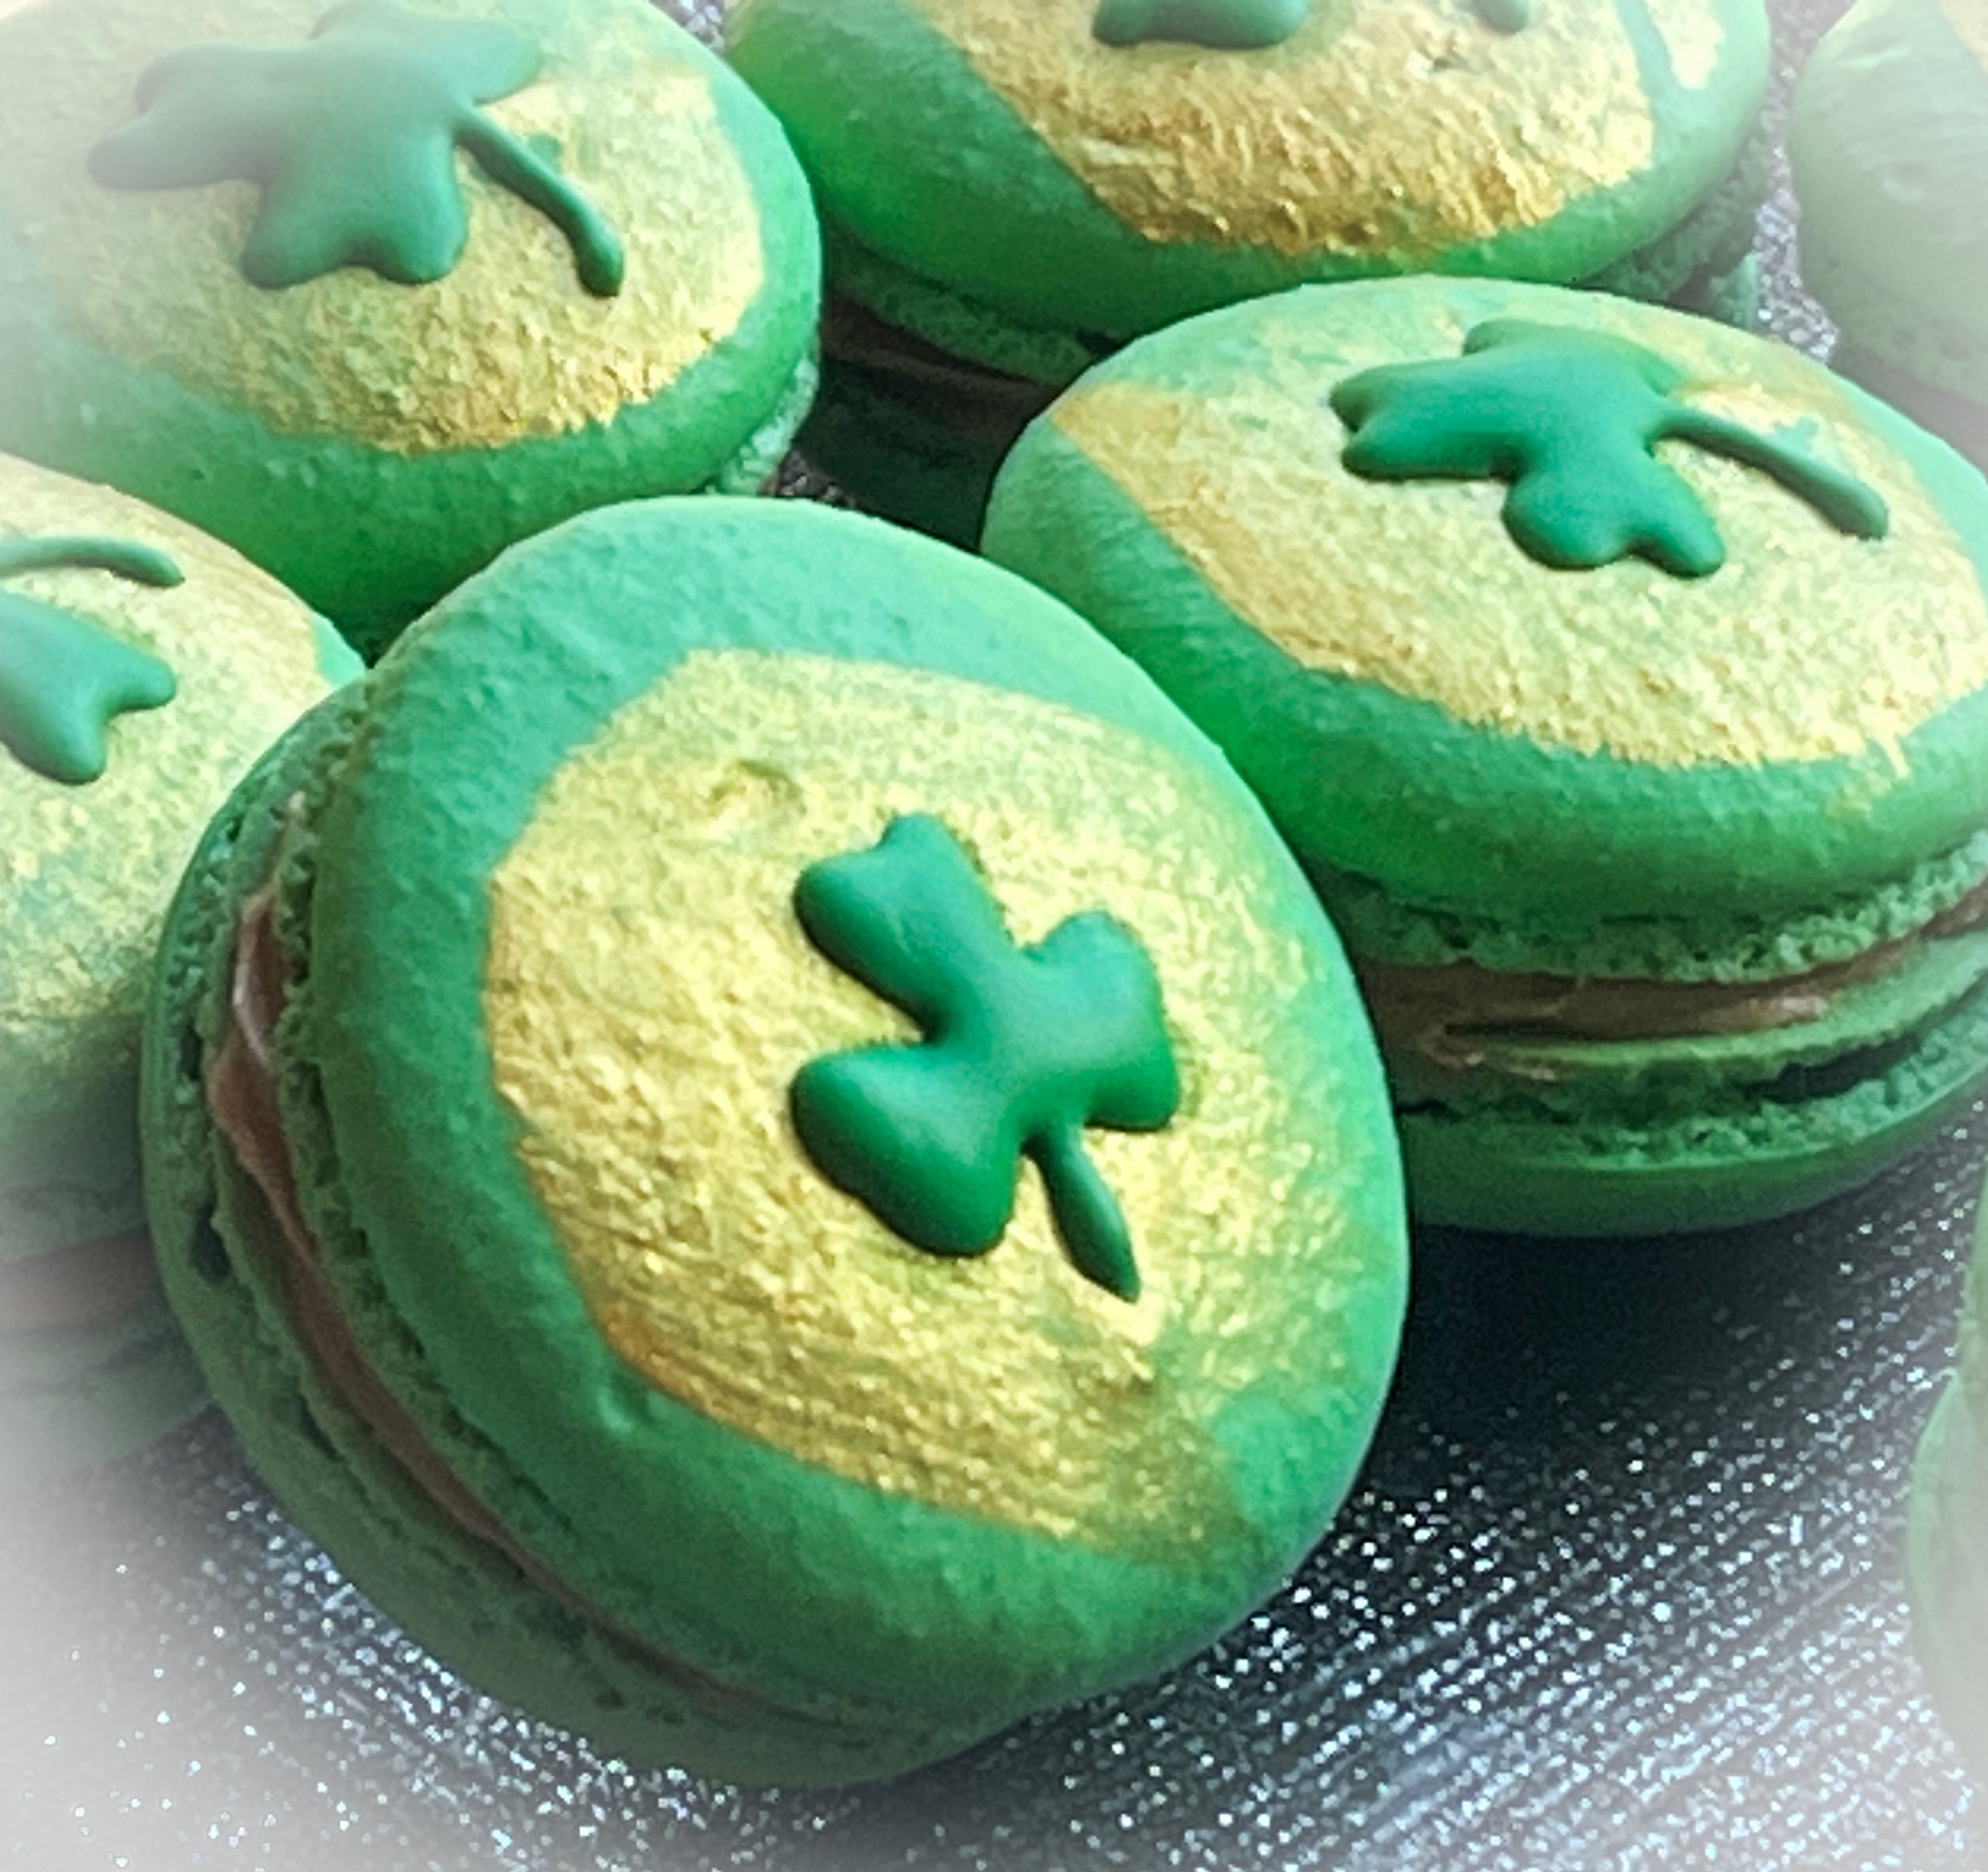
Green. Green for Spring, green for St. Patrick, green is definitely the color of March. These macs are simple to decorate, especially if you can free-hand the piping, which unfortunately I cannot. A little stencil to airbrush the shape helped me out.
NUTELLA SHAMROCK MACARONS (from The Bewitching Kitchen)
For the shells: 200g Icing/powdered sugar (1 ⅔ cups) 115 g Almond Meal (1 + scant ¼ cup) 115 g egg whites at room temperature (approx. 4 eggs) 1/8 tsp of cream of tartar (optional) 100 g granulated sugar (½ cup) 1/8 tsp vanilla extract leaf green food gel
Line 3 heavy baking sheets with parchment/baking paper or Silpat mats. Layer the powdered/icing sugar and ground almonds/almond meal in a food processor. Pulse until the mixture looks like fine meal, about 12 pulses. Pass through a sieve and transfer to a small bowl or to a sheet of parchment/baking paper. Set aside.
Place the egg whites and cream of tartar in the bowl of a stand mixer fitted with the whisk attachment. Make sure that the bowl and the whisk are impeccably clean. Starting on medium speed, whip the whites with the cream of tartar until they look like light foam. The whites should not appear liquid. The foam will be light and should not have any structure.
Slowly rain in the granulated sugar in five additions, trying to aim the stream between the whisk and the side of the bowl. Turn the speed up to high. Continue to whip the meringue until it is soft and shiny. It should look like marshmallow creme (marshmallow fluff). Add the vanilla and food gel color. Whip the egg whites until the mixture begins to dull and the lines of the whisk are visible on the surface of the meringue. Check the peak. It should be firm. Transfer the whites to a medium bowl.
Fold in the ground almond/almond meal mixture in two increments. Paint the mixture halfway up the side of the bowl, using the flat side of a spatula. Scrape the mixture down to the center of the bowl. Repeat two or three times, then check to see if the mixture slides slowly down the side of the bowl. Add drops of gel color and mix them briefly with a toothpick. Put the mixture in a piping bag fitted with your choice of piping tip (round, ¼ or ½ inch in diameter or 6 – 12 mm). If you don’t have a macaron mat, draw circles on baking/parchment paper about 2inches/5cm in diameter & turn the paper over before placing on the baking sheets. Pipe shells, I like to count numbers in my head and use the same count for each shell so they end up similar in size.
Slam each sheet hard four to six times on the counter/worktop. Let the unbaked macarons dry until they look dull but not overly dry. Drying time depends on humidity. In a dry climate, the macarons can dry in 15 to 20 minutes; in a humid climate, it can take 35 to 40 minutes.
While the macarons are drying, heat the oven to 300 F (150 C/130C Fan oven/Gas Mark 2). Bake one sheet at a time on the middle rack. Check in 11 minutes. If the tops slide or move (independently of the ‘feet’ when you gently twist the top), then bake for 2 to 3 more minutes. Check one or two. If they move when gently touched, put them back in the oven for 1 to 2 more minutes until they don’t move when touched. Let the macaroons cool for 10 minutes before removing from the pan. The macarons should release without sticking.
Assemble the macarons: find two macarons similar in size and add a good amount of filling to the bottom of one of them. Place the other on top and squeeze gently to take the filling all the way to the edge. Store in the fridge for 24 hours for perfect texture.
For the filling:
NUTELLA BUTTERCREAM 60g unsalted butter softened 125g powdered sugar 40g Nutella 1 to 2 tbsp heavy cream to adjust consistency
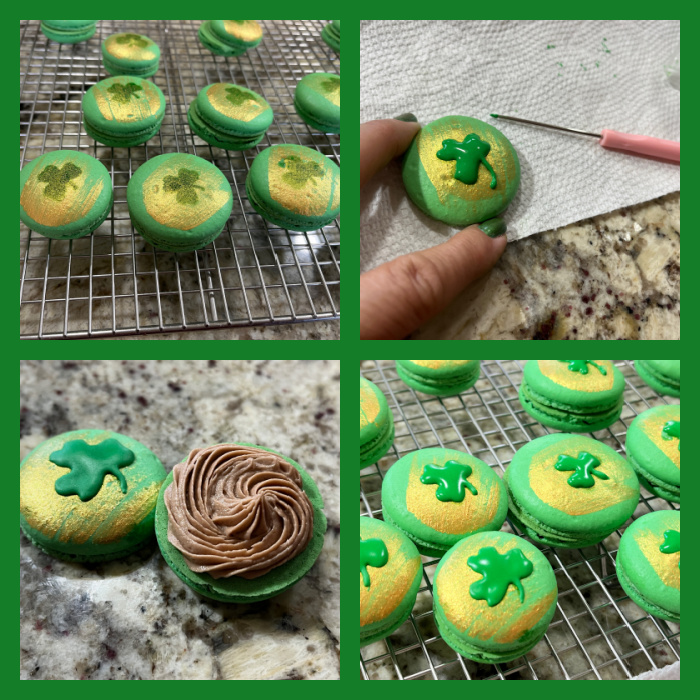
Whisk butter, powdered sugar and Nutella until light and fluffy. Adjust consistency with heavy cream, if needed. Transfer to a piping bag fitted with a open star tip. Match similar sized macaron shells with each other, fill and sandwich the cookies. Decorate the top with Royal icing in the shape of a shamrock, and if you like add a brush of gold before piping the decoration for added bling.
Comments: At first I wanted to make them filled with mint, but I have done two batches in a row with that flavor, so these went the Nutella route, which I also love… As to the decoration, I cut a small stencil to airbrush the leaf, but if you are brave and talented, skip the stencil and just go for it. Some of the steps are shown below.
.
I really like the way they turned out, and hope they brought a little smile to those who got them…
I’ve been on a roll for the past month or so. After a long time – maybe a couple of years – not making this type of cake, I flirted with a few different methods, including some by very reputable sources, but they did not please me for one reason or another. In this post, I share a very simple recipe. Simple in the sense that you don’t have to separate egg whites and yolks, it rolls very well thanks to the addition of a very small amount of melted butter, and the texture is not dry like most versions, again kudos to butter. Plus, you won’t need a special size of baking pan, it works well in a half-sheet, which most people have in their kitchen. You can of course, skip the patterned decoration, but, why would you not go for it?
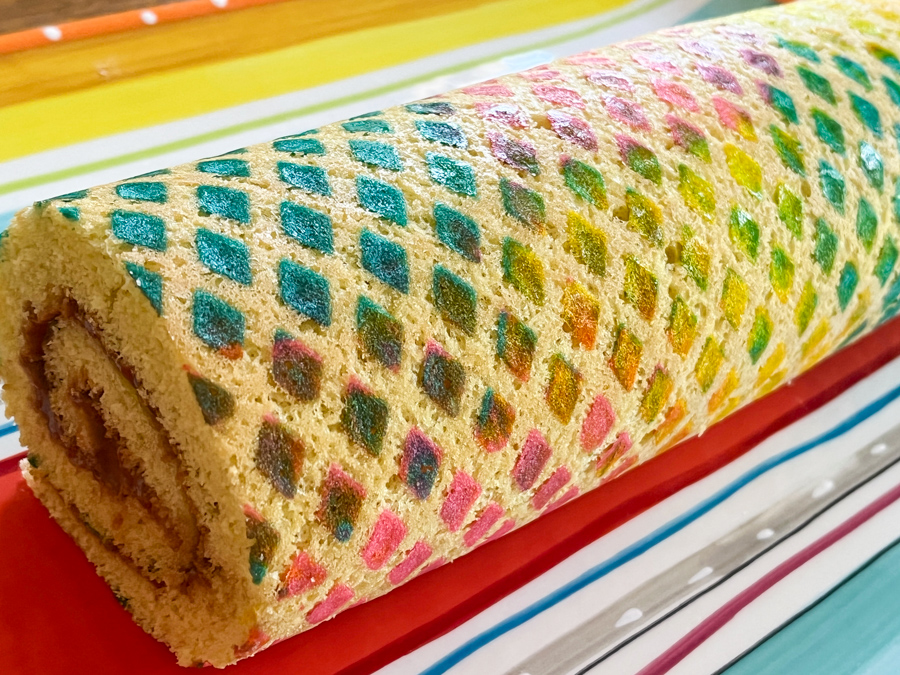
FESTIVE DIAMOND ROLL CAKE WITH NUTELLA FILLING (from the Bewitching Kitchen)
for the decoration: 50g butter, softened 50g powdered sugar 50g egg whites 50g all-purpose flour pink, yellow and teal gel colors
for the cake: 130g cake flour 1 teaspoon baking powder 5 large eggs, at room temperature 200 g granulated sugar Zest of 1 lemon 1/2 teaspoon lemon extract 1/2 teaspoon vanilla extract ¼ teaspoon kosher salt 2 tablespoons butter, melted and cooled
For the filling: 170g (6 ounces) cream cheese, softened to room temperature ¼ cup heavy whipping cream ½ cup powdered sugar ½ cup Nutella 1 tablespoon cocoa powder
Make the piping decoration by beating the butter with powdered sugar in a small bowl until fully combined. I used a hand-held electric mixer. Add the egg whites and beat for a couple of minutes. Add the flour and mix by hand with a spoon, divide in three portions. Color them pink, yellow and teal.
Place a diamond stencil over a sheet of parchment paper and add small amounts of each color as shown in the composite picture included in my post. Spread the colors in one direction, trying not to move them back, but making sure to cover all the little diamonds. Carefully remove the stencil frame and freeze the parchment for 30 minutes or so.
Heat oven to 375°F. Sift the flour and baking powder into a small bowl. Reserve. Place the eggs and sugar in the bowl of a standing mixer fitted with the paddle attachment. Beat until the mixture form ribbons, about 12 minutes. Add the lemon zest, lemon extract and vanilla. Beat until combined. Sift the flour mixture over the beaten eggs, fold gently. When the flour is mostly incorporated, add a little bit of the mixture to the melted butter, whisk well. Pour that into the cake batter, whisk gently to disperse. Pour over the frozen parchment paper placed in a half baking sheet, and smooth the surface.
Bake the cake until it begins to pull away from the sides, about 12 minutes.
Transfer the pan to a cooling rack, cover the cake with a towel and let it cool fr 10 minutes. Remove the towel, sift a little powdered sugar over the surface and flip it over parchment paper. Gently peel off the paper with the design, flip the cake again over a clean towel. Starting with a short side of the cake, roll the cake gently, using the towel to support the cake as you go. Let the cake cool all rolled up in the towel, seam side down.
While cake cools make filling by using a handheld mixer or standing mixer to beat cream cheese and heavy cream on high until light and fluffy, 3 to 4 minutes. Add ½ cup powdered sugar, Nutella, and cocoa powder. Start the mixer on low and slowly increase speed, beating until the filling is light and fluffy. The filling should be thick and spreadable. Refrigerate for 30 minutes, so that it sets a little.
Carefully unroll the completely cool cake, spread the filling, then roll it again. Wrap the cake in plastic and refrigerate for at least 3 hours, overnight is best. When ready to serve, slice a small piece of each of the ends, so that it looks more polished.
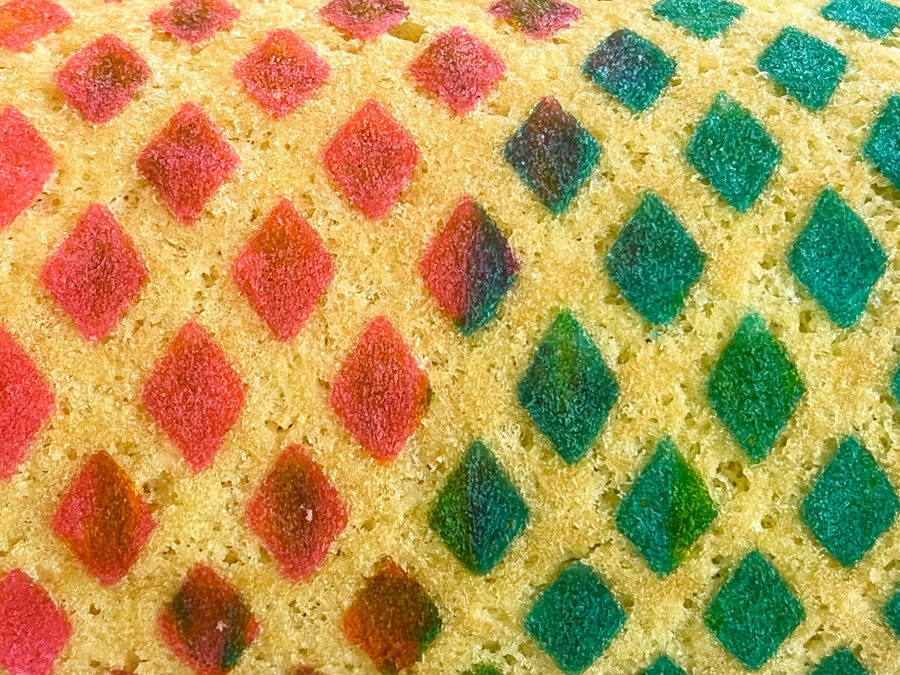
Comments: For this pattern, I used three colors of the paste, and placed them in alternating spots over the large stencil, that covers the whole surface of the half-sheet. The thickness of the stencil determines the amount of paste that gets into the paper. The design transfers very well to the surface of the cake, and does not interfere with rolling it.
I’ve had this stencil frame for many years, bought it on eBay, but could not find it anymore. This one is very similar, in case you are interested.
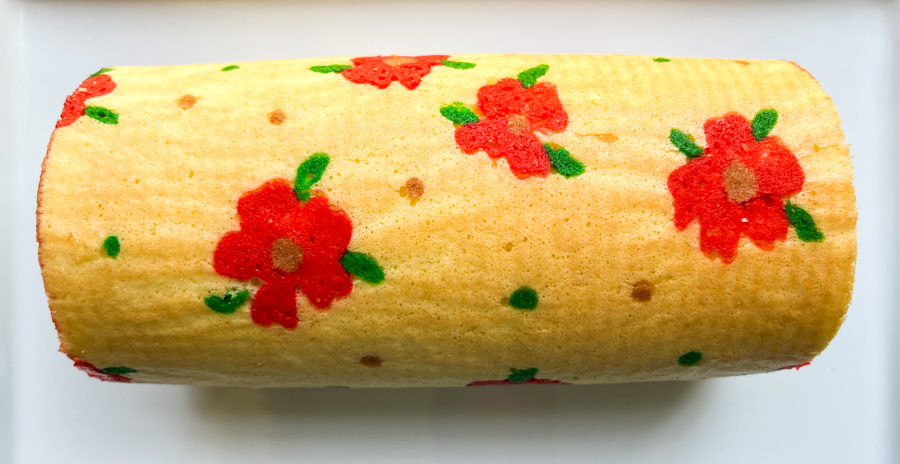
If you don’t have a stencil frame, there are plenty of alternatives to decorate, one of them drawing little flowers on the paper, and pouring the batter on top. Two things are important to remember: first, the design cannot be too large, or it will pull the cake during baking, and might even make a crack in those spots. Second, the layer of the design should be as thin as possible, because it you make it too thick, it might not incorporate well into the cake batter, and pull away during baking. Make sure to use white parchment paper, because it helps keeping the cake layer lighter, giving better contrast with whatever pattern you go for.
The Nutella filling is excellent! I’ve used it to fill macarons a couple of days later. The cream cheese does a little magic to cut the sweetness of Nutella. It has a wonderful spreadable consistency, but the macarons stored in the fridge held up pretty well, once moved to room temperature for 20 minutes or so. I hope you give it a try, either to fill a regular cake, make sandwich cookies, or…. a patterned roll cake!
Growing up as a picky eater, small and skinny, my Mom used to keep a jar of Nutella around because if nothing else, she knew I would not be able to resist its calling. I would hit that jar several times a day, with a small spoon and a big smile. It didn’t make me tall and voluptuous, but I was hooked …
Of course, I now respect Nutella’s caloric content: nuts, chocolate, and sugar, a deliciously dangerous combo. The big jar sits in the pantry, waiting for a reason to come out and play, like in these cookies that Giada made a few months ago. They remind me of snickerdoodles with a suntan. 😉 NUTELLA DROP COOKIES (from Giada de Laurentiis)
1 cup (2 sticks) butter, at room temperature
1/4 cup powdered sugar
1 teaspoon pure vanilla extract
2 cups flour
1/2 cup Nutella, at room temperature
1 cup powdered sugar (for rolling the cookies: optional)
Heat the oven to 350 degrees F. Line baking sheets with parchment paper or Silpat type liners.
In a stand mixer fitted with the paddle attachment, beat the butter and sugar (1/4 cup) on high speed until light and fluffy, about 3 minutes. Beat in the vanilla. With the machine running on low speed, gradually add the flour until incorporated. Beat in the Nutella. Using a small cookie scoop or a tablespoon, drop small balls of dough onto each baking sheet. Bake until the bottoms of the cookies flatten out slightly, 10 to 12 minutes. Cool for 5 minutes and transfer to a wire rack to cool completely.
If you want to sugar-coat the cookies, place 1 cup of powdered sugar in a medium bowl, and roll the cookies in the sugar until coated. Alternatively, you can add the sugar to a sieve and sprinkle some on the surface of the cookies once they are cool. Store in an airtight container at room temperature.
If you read the many reviews of this recipe in the FoodTV website, you’ll notice not everyone fell in love with it. I suspect it’s all related to how long you bake these cookies: under-baking is the key, or they’ll be too hard and dry.
I liked the simplicity of the recipe, very few ingredients, quick to put together and bake. But the best is that it gave me the chance to use for the first time my brand new cookie dough dispenser – loved it!