Well, maybe not really a star, but a new blog site… As you may have noticed, I’ve been baking a lot of cookies lately, and the idea of concentrating them in a new blog has been in my mind for a while. The new site, launched a few minutes ago, is called “For the Love of Cookies.” It will be kept very short and sweet. No recipes, just sharing pictures of my cookie adventures. If this is something that interests you, please stop by and subscribe to my new virtual spot. I’d love to see you there!
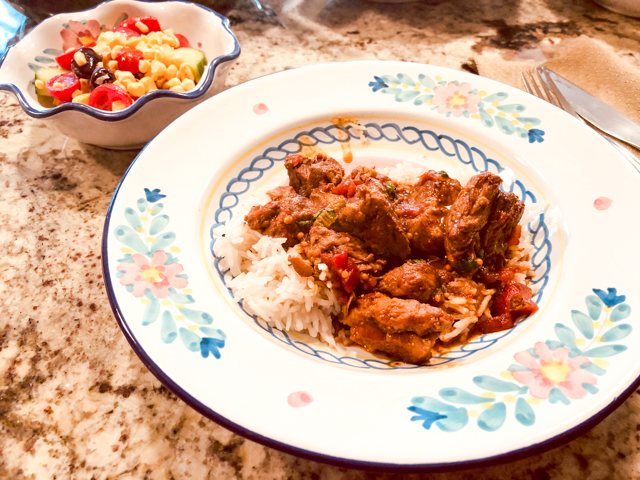
If you are not wild about spicy food, I must warn you that this recipe might not please you. However, you will have no issues enjoying the simple side dish I served with it, a fresh corn salad that beautifully tamed the fires of the Vindaloo. This version is considerably simplified from the traditional, but does not cut corners in the flavor department.
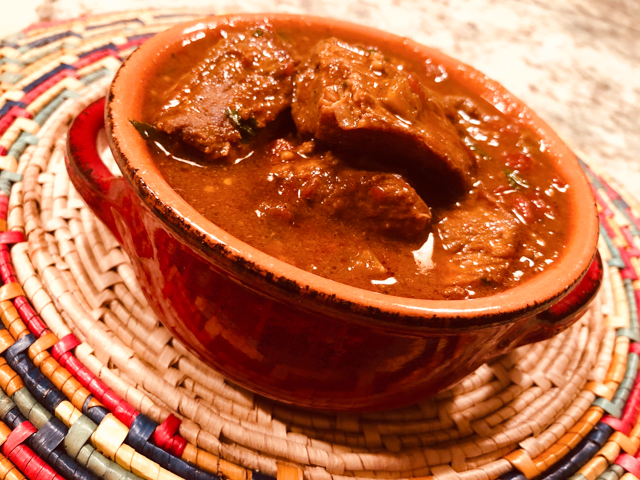
PORK VINDALOO (adapted from several sources)
2 pounds boneless pork butt, cut in 1.5 inch pieces 2 onions, diced (or substitute 2 large stalks of celery + 2 carrots, minced) 4 garlic cloves, minced (omit or use garlic powder if you have digestive issues) 1.5 tsp salt 1 tsp black pepper 2 tablespoons grapeseed oil 2 tablespoons smoked paprika 2 teaspoons garam masala 1/8 teaspoon cayenne pepper 1/4 teaspoon Aleppo pepper 2 tablespoons all-purpose flour 1 tablespoon mustard seeds 1 teaspoon sugar 3 cups chicken broth 1 can (14.5 oz) diced fire-roasted tomatoes 1 tablespoon red wine vinegar
Heat the oil in a Dutch oven or large pan. Add pork pieces, onions (or celery and carrots), garlic, salt and pepper. Cook, stirring every couple of minutes, until the meat gets golden brown, about 15 minutes.
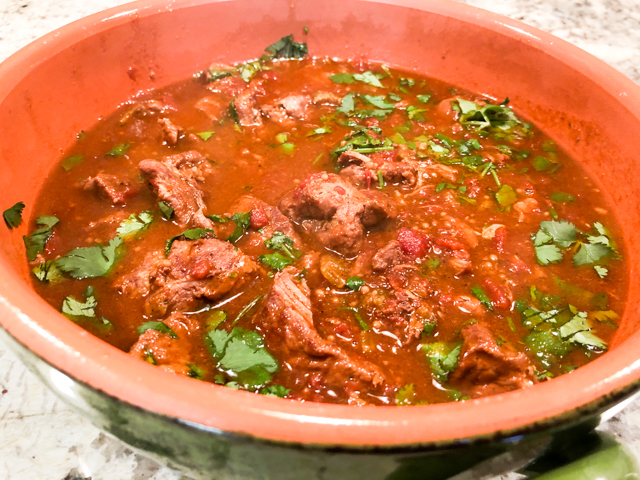
Stir in the spices and garlic powder (if using), cook for a minute until fragrant, add the flour, cook while stirring for another minute, then add the chicken stock, canned tomatoes, mustard seeds, and sugar. Bring to a simmer. To finish the dish, you have several options:
Crockpot: add vinegar, transfer to a crockpot and cook on low for 5 to 7 hours.
Regular oven: add vinegar, place in a 325F oven for 3 hours, covered.
Pressure cooker: add vinegar, bring to full-pressure and cook for 35 minutes. Release pressure manually and simmer down to reduce the sauce, if necessary.
Right before serving, add minced fresh cilantro leaves.
Comments: Pork Vindaloo has its origins in Portuguese cooking, a fiery concoction known in Portugal as “vinha d’alhos.” Garlic and onion are important components, but due to food sensitivities I make our vindaloo with no onions and just used some garlic powder (1/2 teaspoon to be precise). The heat of the dish mellowed down next day, but we did not find it excessive even right after cooking. The use of smoked paprika is not authentic, but I like the different flavor it adds to the sauce.
Of all methods of cooking, I favor the pressure cooker because I like the resulting texture and how quickly it all comes together, but the two other methods I listed will work perfectly well.
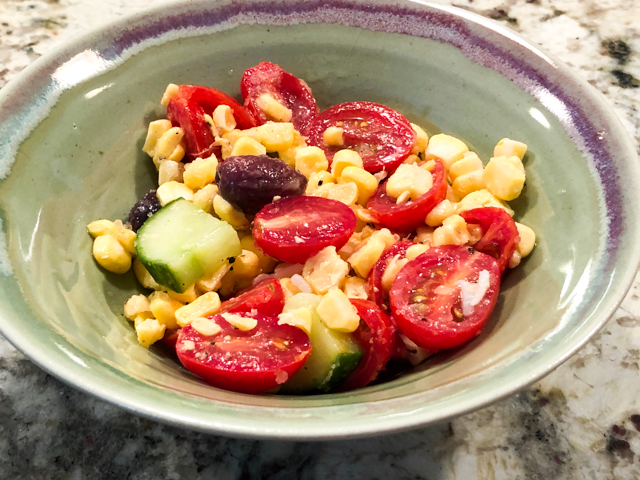
The side dish: pretty much a non-recipe… Shave kernels from 3 corn cobs, add grape tomatoes cut in half, black kalamata olives, pitted, and English cucumbers, sliced. Mix 1 tablespoon of white vinegar with a little salt and pepper, drizzle 1/4 cup olive oil, whisking constantly to emulsify. Add the dressing to the veggies, place in the fridge for a couple of hours, then enjoy with your fiery Vindaloo, or with any other main dish of your choice. It is refreshing and satisfying.
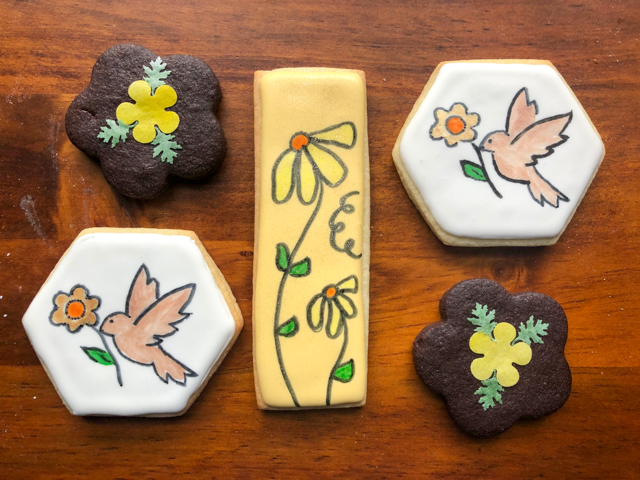
Four top-notch cookie decorators. Two from the US, one from Canada, one from Spain. Marlyn and Amy get together virtually on Tuesdays for Cookie Therapy (I am undergoing treatment). On Fridays, Marlyn, Haniela and Amber join efforts in their Cookie Lunch Break (videos available here). Both virtual events showcase cookie decorating techniques live, as they chat, share tips, and answer eventual questions from those watching. It starts at noon where I live, so it is now a nice routine for me, I have my lunch and cookie therapy at the same time. Today I share two examples of goodies that were recently showcased by Marlyn and Amy in their Tuesday series. They have in common the use of wafer paper flowers. Needless to say, I fell in love with the technique…
HONEY SUGAR COOKIES WITH WAFER PAPER FLOWERS (from the Bewitching Kitchen, decoration following Amy’s tutorial)
1 cup butter (226g), cut in pieces, cold 200g sugar zest of 1/2 lemon 2 eggs 1 tsp honey extract (Olive Nation) 1/2 tsp vanilla extract 420 g all-purpose flour 60 g cornstarch 1/2 tsp salt 1/4 tsp baking powder
Mix the flour, cornstarch, salt and baking powder and reserve.
Cream sugar, butter and lemon zest in the bowl of a Kitchen Aid for a couple of minutes until the sugar is incorporated well and does not feel gritty. Add the eggs, honey emulsion and vanilla extratc slowly and mix until incorporated, but don’t over-mix.
Add the flour mixture slowly, mixing in low-speed. If needed, add a little more flour, up to 1/4 cup. Once the dough comes together, stop, and form three discs. You should have three discs with about 330g each. Dough can be rolled out immediately or placed in the fridge to roll out later. It also freezes extremely well.
Cut in shapes, freeze the cut-outs for 10 minutes, then bake in a 350F oven for about 13 minutes. Ice and decorate as desired.
For my favorite Royal Icing recipe, visit Tanya’s blog with a click here.
Comments: The hexagonal cookie tutorial with detailed explanation on making the flowers, starts at 41 min this video. Wafer paper sheets are available from the seller of all things, amazon.com. To make the flowers and leaves, you’ll need mini puncher cutters, (several other kinds available like this) or a considerable amount of patience to cut the shapes by hand. The wafer paper is white, so you have two options to color it: before or after cutting the shapes. I strongly advise that you spray paint or brush color on the sheet, let it dry and then cut the shapes, because they are very delicate and harder to paint after cutting. When you cut them, they will be flat. To give a tri-dimensional look, you can gently wrap them around the tip of a small plastic bottle (eye-drop bottles will work great), or what Amy suggests, using the tip of an air-brush dye bottle like these. Both methods work like a charm, just be gentle. Even if the center rips a little bit, when you add the centers it will hide the boo-boo. As to the centers, they can be dry Royal icing transfers, or you can just pipe a little blob of icing when you glue the flowers on the cookie’s surface. The great thing about these decorations, is that they last a long time, so you can make a little treasure chest with flowers, leaves, and save them for a cookie (or cupcake) emergency.
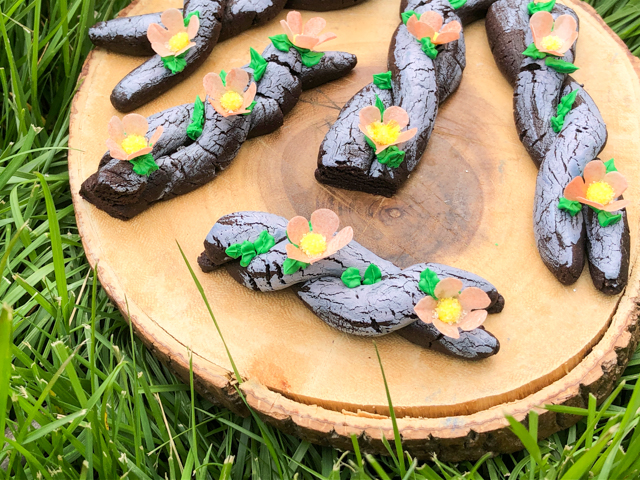
CHOCOLATE TWIG COOKIES
I find these cookies absolutely adorable! I cannot share the exact recipe I used, as it is available exclusively for Marlyn’s supporters through her Patreon site. You can certainly use your favorite chocolate cookie recipe, as long as it does not have leavening agent. It is also a good idea to pick a recipe that calls for some brown sugar, so that the dough will be more flexible and smooth.
Detailed method for shaping and decorating can be found here starting at 32 min and 30 seconds. Her flowers are logs above mine, with added details that I felt were beyond my skill level. She performs magic with the air-brush! They end up looking exactly like cherry blossoms, but I am still pretty thrilled with my little babies.
The secret to get the bark look, is brushing the cookies with Americolor Ash right before baking. This step is optional but I believe it adds a lot of charm.
As you might notice, I re-use parchment paper. The twigs were baked right after the hexagonal cookies from Amy’s tutorial, as well as some stick cookies, you can still see their ghost images in there…
After baking, you’ll need green Royal icing in stiff consistency to pipe leaves and glue the flowers over the surface.
Another way to use the wafer paper is sticking them on the surface of a freshly baked cookie, the residual heat will make the decoration stick and lay flat on it.
Now, I should also mention that the decorations look very nice, but not everyone will enjoy the mouthfeel of the wafer paper. So tell your guests or whoever will be enjoying the cookies that they can just peel off the decorations if they prefer. You can also minimize the amount of wafer paper by coupling the flower with Royal icing leaves.
I hope you’ll consider joining Cookie Therapy on Tuesdays, or Friday Cookie Lunch Break, at 1PM EST. They are always coming up with interesting things that will open your horizons to cookie making and decorating. I promise you will love it!
Watch it at 13:00hs EST (or anytime later) via youtube here..
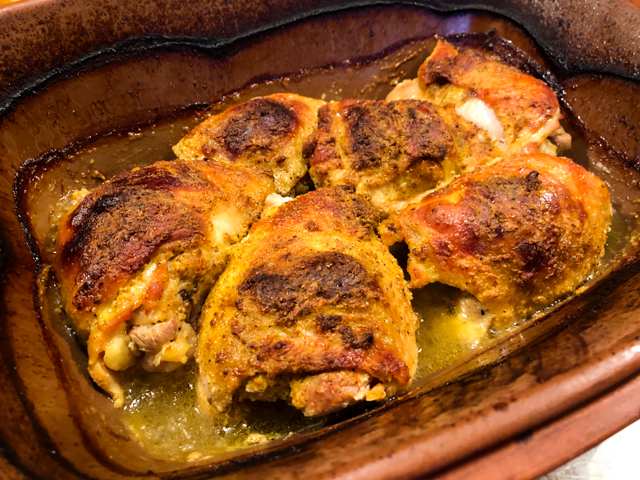
No clay pot? No problem, the recipe works in a regular oven, so stick around. We loved the flavors so much I’ve used this marinade in whole chicken, and also Cornish hens. The unusual twist is the incorporation of ground almonds in the mix. If you are intrigued, I totally understand because I was also. It adds a little texture and more “staying power” on the meat. I hope you’ll try it, I think it might become a favorite in your home.
CLAY POT MASALA CHICKEN THIGHS (adapted from Made in India)
6 chicken thighs, bone-in, with skin 1 tablespoon cumin seeds 1 tablespoon coriander seeds 5 cloves 1 teaspoon black peppercorns ¼ cup ground almonds 1/2 tsp cinnamon 1/2 teaspoon ground turmeric 1/4 cup whole-milk yogurt 1 + 1/2 teaspoons salt
Put the cumin seeds and coriander seeds into a dry non-stick frying pan over high heat until they get fragrant, don’t let them burn. Put the toasted seeds into a spice grinder, along with the cloves and peppercorns, and grind together. Put them into a big bowl and add the ground almonds, cinnamon, turmeric, yogurt, and salt. Rub this marinade all over the chicken thighs, making sure to stick some underneath the skin. Cover and let marinating int the fridge for 1 to 12 hours, the longer the better.
If cooking in a regular oven, heat it to 400F, place the chicken thighs in a baking dish, cover with aluminum foil and roast for 45 minutes, remove the foil and roast until the skin is golden brosn.
If using the clay pot, soak it in cold water for a couple of hours. Drain the water, place the chicken pieces inside, close the lid and place the pot in a cold oven, turn it to 450F. Cook for 1 hour, remove the lid and roast for another 15 to 20 minutes, until the skin is nicely brown.
Comments: You can use almonds that you grind yourself, but I opted for almond meal, as I always have it around due to my macaron-baking addiction. It gives a subtle nutty flavor the the meat, and definitely allows the marinade to speak louder in the final dish. Originally I saw this marinade used in a whole chicken. The recipe called for cutting some slits on the skin over the breast to rub the marinade underneath. However, during roasting the skin teared apart too much and although it was still delicious, I did not care for the way it looked. So I will stick to using it for chicken thighs. Full disclosure: I already made it three times…
It is hard to believe it’s been two years since Aritri left us. But it is even harder to believe and accept that someone so full of energy and joy had to face such cruel fate. She still had a lot to do, a lot to live, a lot to give and receive. The unfairness of it all. Hard to find words.