PUMPKIN UNCANNED

A little over 3 years ago, I shared with you our recipe for pumpkin pie that uses home-made pumpkin puree. Phil is absolutely adamant about it, having grown up watching his Grandma and his Mom make the puree from scratch and producing delicious pies with it. But, there’s more than pie to pumpkin, and by making the puree yourself, you can also enjoy your own roasted pumpkin seeds. Plus, one large pumpkin will give enough puree to last for a year!  Yes, you can do it with large pumpkins, even if they are a little more fibrous. And yes, it freezes quite well. Without further ado, here’s how we make it…

First, you need to cover a working surface with newspaper, and your body with a nice apron. Then cut open a lid on the top of your pumpkin, and scoop out all the seeds and the fibers that glue them together. Reserve them for later.
seeding

Next, cut large slices that will fit over baking sheets, and place them in a 350 F oven, with the cut side down. No need for salt, no need for oil. Easy as pie.
intotheoven
Bake the pumpkin for about 1 hour, or until soft. A good test is pushing your finger lightly on the skin, it should form an indentation.
bakingready

Now, let the fun begin!  Scrape the flesh into a bowl, and go to the sink, carrying the cooked pumpkin, an empty bowl, and a potato ricer.  Place some of the pulp in the masher, and squeeze out with a light pressure, just to release what is mostly water.  Let that go down the drain.  Once you feel most of the watery stuff is released, puree the pulp into the clean, empty bowl.  Do that in batches until all the pulp is passed through the holes of the ricer.
composite2

Now, marvel at the beauty of the mashed pumpkin you made yourself, or at least that you took pictures from while your husband worked hard at it… 😉
pureeready
You can use it to make a nice pumpkin pie like the one I blogged about…
sliced
And save the rest in the freezer. I normally make a few 1-cup and some larger portions. Make sure to label, because the freezer can quickly turn into a parallel universe, unknown and mysterious.
freezer
My next two posts will feature goodies I made with our uncanned pumpkin…  First, I will show you an interesting take on roasted pumpkin seeds, and next…  well, next I cannot tell you yet.  It’s a secret.  😉

ONE YEAR AGO: Pork Ragu

TWO YEARS AGO: Friendly Kuri Squash

THREE YEARS AGO: Celery and Apple Salad

KEEMA BEEF CURRY

If you prefer your curry to be mild instead of incendiary, this recipe is for you.  I actually don’t mind a very spicy version, but when serving a meal for guests I usually tone it down just to be safe.  This recipe from Food and Wine magazine was another great recommendation by our friend Cindy. I made it over the holidays for my stepson and his girlfriend, and we all loved it.  I served it over white rice, but it coud lalso be enjoyed as a stew, with soft naan bread.  The potatoes make it almost a complete meal.

served1

KEEMA BEEF CURRY
(adapted from Food and Wine Magazine, January 2012)

1 TB canola oil
1  pound lean ground sirloin
1/2 pound ground turkey (or use all beef, omitting the turkey)
1  shallot, finely chopped
2 TB minced fresh ginger
1 garlic clove, minced (optional)
1 + ½ TB Madras curry powder
salt and freshly ground pepper to taste
1 large Yukon Gold potato, cut into 1/2-inch dice
1 + ½ cups chicken broth
1 can (14-ounce) unsweetened coconut milk (light is perfect)
1 can (14-ounce) diced tomatoes with their juices
1 + 1/2 cups frozen baby peas
Chopped cilantro to taste (optional)

In a large, deep skillet, heat the oil. Add the ground beef and turkey (if using) and cook over high heat, stirring to break up the lumps, until no longer pink, about 5 minutes. Add the shallot, ginger, garlic and curry powder and season with salt and pepper.

Cook over high heat, stirring frequently, until the onion is softened, about 3 minutes. Add the potato, broth, coconut milk and the tomatoes and their juices and bring to a boil. Cook over moderate heat, stirring occasionally, until the potato is tender, about 15 minutes.

Using the back of a spoon, lightly crush some of the potato. Add the peas and cook just until heated through. Serve in bowls with cilantro, if you like.

ENJOY!

to print the recipe, click here

plated3

My only modification of the recipe was to use some ground turkey together with the beef. Not so much to make it lighter, but to use some ground turkey I had bought with the firm intention of making meatballs.  It turns out that the intention was not as firm as I thought, so a mixed-meat curry was born.  As I mentioned, this version is mild, if you like more spice, use a hotter curry mix or add more pepper or even a red pepper sauce (my never-ending love for Sriracha shows).  I love the inclusion of potatoes and the trick of mashing some of them to add body to the curry.  And the green peas give that boost of color and a healthy “feel”.

Cindy, thank you once again for another winner! 

ONE YEAR AGO: Pork Tenderloin with Soy, Ginger, and Lime

TWO YEARS AGO: No-Fuss Coffee Cake

THREE YEARS AGO: Swedish Limpa

SALMON WELLINGTON

I have the great pleasure of introducing another guest post by my beloved husband!

Although I’d like to say that Beef Wellington is everyone’s festive delicacy, that’s surely a falsehood, because for many, many people filet of beef is a profanity, and its accoutrement, foie gras, is an atrocity. Not that there’s anything wrong with that, but  Sally and I don’t share those sentiments. We love the Wellingon! We love it so much that we sought other variants.  The one that we found, or in this case it’s even fair to say “invented,” is Salmon Wellington. Concocting a salmon Wellington is a bit like making an exquisite ham sandwich: you can garnish it with cheese or mustard or lettuce, or all three and more.   So, we created our own variation of the dish, that includes Alaskan snow crab and a phyllo dough shell.  It’s a light, …(OK, lighter)  and a fresh experience that’s still rich with flavor.
plated111SALMON WELLINGTON
(from the Bewitching Kitchen)

2 pieces of center-cut filet of salmon, skin removed
1/2 cup of Alaskan crab meat, cooked and shredded
1 Tbsp grape seed oil
1 celery stalk, finely minced
1 shallot, finely minced
1 lemon, zest and juice
1/2 tsp grated ginger
1/2 tsp fresh dill, minced
salt and pepper to taste
6 sheets of phyllo dough, thawed
melted butter

Heat the oil in a small skillet and saute the shallots and celery in medium-low heat until translucent and fragrant, about 4 minutes.  Add the lemon zest and turn the heat off.  Transfer to a small bowl and allow it to cool to lukewarm or room temperature.   Mix the veggies with cooked crab meat, add the ginger and dill, mix well and season with salt and pepper.

To prepare the fish,  buy a thick piece of  fresh atlantic or wild salmon and cut it into 3″ by 4″ pieces, or a bit larger if you desire.   Remove the skin with a sharp knife (I prefer a ceramic knife for this) and carefully scrape away the central vein of dark, oily meat.  Rinse the filet under running water and dry it on paper towels.

Open the sheets of phyllo dough, 2 at a time, and brush them lightly with melted butter (you can also use olive oil if you prefer). Lay 6 sheets on top of each other and place half of the crab mixture over the center, leaving a large border all around.  Try to spread the crab mixture to cover more or less the same area that the salmon will occupy.   Lay the salmon filet on top, season with salt and pepper, and squeeze a small amount of lemon juice over it.  Wrap the phyllo dough around the filet.  Invert the package, so that the crab is on top, and place it on a baking sheet lined with parchment paper.  Cut away any excess dough.  Brush a little melted butter on top of the phyllo, and bake at 375 F for 25 minutes, until golden brown.

ENJOY!

to print the recipe, click here

composite

Comments:  As Phil said, we LOVE the Wellington, it is probably our “signature dish”, the one we turn to when we want to make a special meal. In fact, it was the first recipe we cooked together when we started dating, we even made the puff pastry from scratch.  Fun times… 😉 This variation is quickly becoming my favorite, though. Salmon and phyllo dough make a winning combination, and the crab meat doesn’t hurt either.  Over the years,  we’ve made Salmon Wellington with many different toppings. Once, while living in Paris we made it for our Valentine’s dinner.  Phil came up with a topping using a citric fruit similar to clementines, that was in season at the time.  It was outstanding!  Come to think of it, Valentine’s Day is not far away, and this would be a great meal for the occasion!

sliced22

ONE YEAR AGO: The Green Chip Alternative

TWO YEARS AGO: Weekend Pita Project

THREE YEARS AGO: Let it snow, let it snow, eggs in snow

CIDER-MARINATED PORK KEBABS

large

I’ve been on an apple cider kick, as this region of the US brags the right to make top quality cider.  One sip of  this brand  was all it took me to become addicted. Phil and I always buy a huge bottle and before it gets half-empty, we get another one, just to be on the safe side.  We keep wondering for how long cider will be available at our grocery stores, and hope the feast won’t end anytime soon.  So far, so good.  I used some of this wonderful apple cider in a marinade for pork tenderloin.  Coupled with a few spices that seemed right to play with the cider, voila’: a very simple and tasty main dish was served!

CIDER-MARINATED PORK KEBABS
(from the Bewitching Kitchen)

2 pork tenderloin filets
1/2 cup apple cider
1/8 cup olive oil
zest and juice of 1 lemon
1 Tbs agave nectar
1 tsp fennel pollen
1/2 tsp pimente d’Espelette
salt to taste

Remove the silver skin of the pork tenderloin, and cut the meat in large cubes.  Make a marinade by whisking all ingredients (except salt) until fully combined.   Place the pieces of pork in a large bowl and add the marinade, coating all pieces well with it.   Leave it in the fridge, covered, for a few hours or overnight.

Remove the meat from the marinade, thread it into skewers (if using wooden skewers, soak them in cold water for a few hours). Season with salt, and grill to your liking, turning the skewers once during grilling.

Serve with slices of lemon to squeeze over the meat.

ENJOY!

to print the recipe, click here

At first, my idea was to include a fennel bulb and a red bell pepper that were laying in the fridge to make a more colorful kebab with the pork.  But, the day was long, and the patience was short.  I kept it ultra simple and the meat went to the grill all by itself.   Still, this was a great weeknight dinner!  The meat was juicy and the addition of agave nectar gave that extra dark grill mark that I find a must…   We had the pork with a little orzo and green beans, simple and delicious.   Leftovers were still quite juicy next day, even when subjected to microwave torture.

Of course, I think fresh slices of fennel would be perfect in these kebabs, echoing the fennel pollen in the marinade, so if your day is shorter and the patience longer, go for it!  😉

ONE YEAR AGO: Golden Age Granola

TWO  YEARS AGO: Mushroom Souffle for Two

THREE YEARS AGO: Stollen

AUVERGNE COURONNE FROM LOCAL BREADS

First bread post of 2013!

closeup

A change from the usual boule or batard, this bread is fun to make, beautiful to look at, and a pleasure to eat!   The recipe comes from Local Breads, by Daniel Leader (with Lauren Chattman), a book that any serious bread baker should own.  I actually have his first book too, Bread Alone, and keep both volumes together on the shelf as lovely siblings.  Bread Alone is an excellent starting point for beginner bread bakers as well as those who want to try their hands at baking with wild yeast. Local Breads is perhaps slightly more “advanced”,  lots of sourdough, with formulas that  focus on regional recipes that Leader collected through his  travels around Europe. Reading his books is like having a master bread baker giving you a private lesson, going through the details that make a difference between a so-so loaf of bread and one that makes you dream.

I wanted my first bread post for 2013 to be special, and this loaf surpassed my expectations. It is surprisingly simple, no special flours, no grains, no seeds.  Just a well-fed sourdough starter, the best quality flour you can find, and a little tender loving care to shape the dough and bake it.
bread2AUVERGNE CROWN
(formula from  Local Breads, published with permission from Daniel Leader)

Levain Starter (you will not use the full amount prepared):
45g levain starter, firm (about ¼ cup)
95g unbleached all-purpose flour
5g stone-ground whole wheat flour
50 g tepid water

for the bread:
500g  unbleached all-purpose  flour
340g water
125g levain (less than the amount prepared above)
10g sea salt

Prepare the levain: Pinch ¼ cup of your stiff levain and place in a bowl with 50 mL water.  Mash the levain with a whisk  until it dissolves, then add both types of flour and stir.  Turn the mixture onto a work surface and knead to fully incorporate the flour.  Place the levain in a covered container and let it sit at room temperature (70 to 76°) for 8-12 hours or until it has doubled in volume and the surface is domed.

Make the bread: Pour the water into a large mixing bowl or the bowl stand mixer. Combine the flours until all the ingredients are incorporated. Cover and let it rest for 20 minutes, while the flour hydrates.Uncover the dough, add the salt and the levain and incorporate with your hands or a spatula using a fw firm strokes.  Knead the dough with the dough hook by mixing on low-speed (2 on a KitchenAid) for a minute.  Increase speed to medium (4 on a KitchenAid) and knead until smooth and muscular; an additional 8 to 9 minutes. Transfer the rounded dough to a lightly oiled container, preferably clear, so you can mark the level of the dough with a masking tape.  Let the dough ferment until doubled in size, 3 to 4 hours at a temperature of 70 to 75 F.

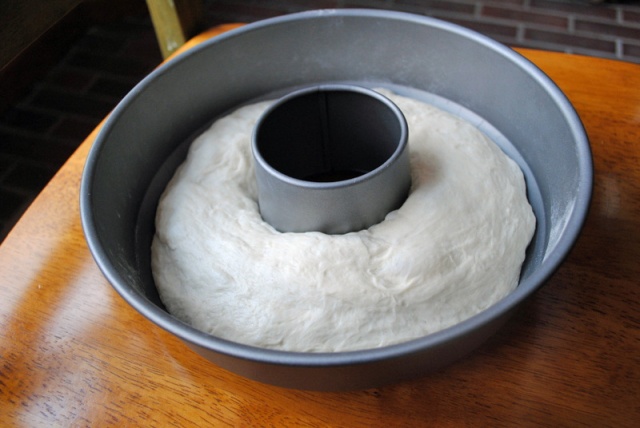
Shape the crown.  Cover a surface with a little flour.  Place the risen dough over the counter and roll it very gently into a long fat rope, about 8 inches long and 3 inches wide. Connect the ends of the rope overlapping by about 4 inches. Press the ends together to seal. Dust a ring baking pan with flour and carefully drop the shaped dough inside.  Allow it to proof at 70 to 75 F until it looks “pillowy”,  1 to 1 and a half hours. When you press your finger tip into the dough, it should spring back slowly.  As the bread proofs, heat your oven to 425 F and place a large roasting pan, without the lid, inside.

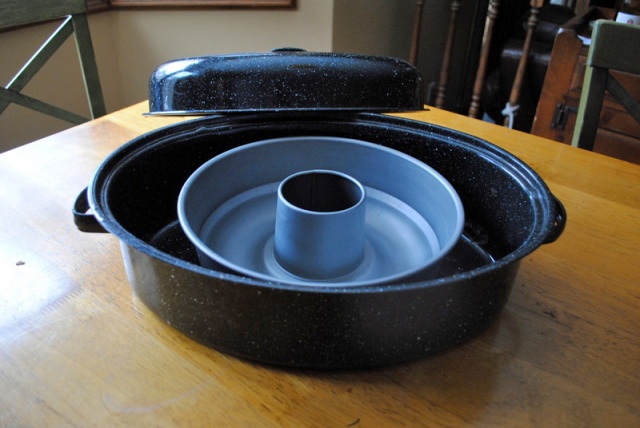
Bake the bread. Once the bread is proofed, slash the outer edge of the round with a razor blade, and place the ring pan inside the roasting pan, and close with the lid slightly moist with tap water.   Bake covered for 30 minutes, uncover, remove the ring pan from the oven, carefully invert it to remove the bread, and finish baking the bread sitting on the oven rack, for 15 to 20 more minutes.

Let it cool completely on a rack before slicing through.

ENJOY!

 to print the recipe, click here

bread1
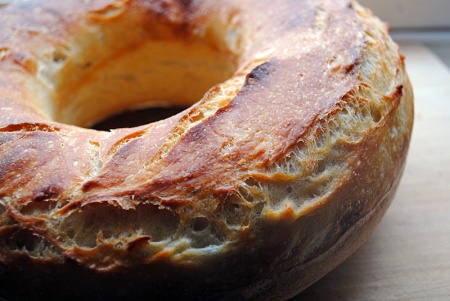
Comments: In the past, I’ve made a few loaves of ring-shaped breads, and had problems moving the bread to the oven after the final rise. I ended up deflating the dough too much and also messing its shape.  This time, I tried something a little different: after shaping the loaf, I placed it in a well-floured ring baking pan, and let the dough go through the final proofing in the pan.  When it was time to bake, I quickly scored the outside edge of the dough, and placed the pan and all inside a pre-heated, large roasting pan.   The next couple of photos should help explain my strategy, which, I am thrilled to inform, worked quite well!
doughbakingpan
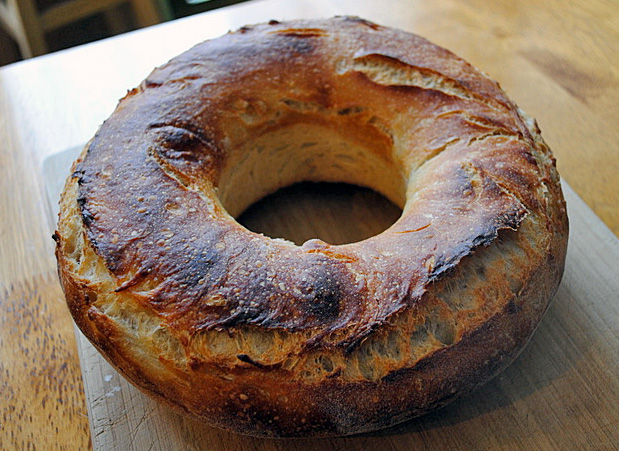
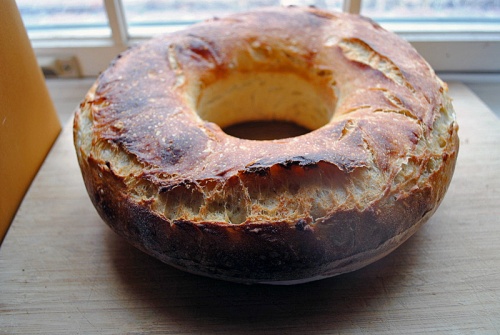
After 30 minutes baking with the lid closed, I removed the lid, took the ring pan carefully out, inverted it quickly over the counter to release the bread, and placed the bread on the oven rack, without any baking sheet underneath, so that the crust would get a final roasting free of constraints.   I like to bake my bread until it’s really dark, because that’s when the taste of the crust delivers the punch I like, the one that transports me to a Parisian bakery…

ABOUT LOCAL BREADS: Ten years passed between Leader’s publication of his first book, Bread Alone, and Local Breads. During that period, he worked with many master bakers in Germany, Italy, and Eastern Europe. In the first chapter of his book, he talks about his bread journey and how he’s gained a special respect for simple but crucial details such as the choice of flour. After a couple of chapters devoted to general lessons on equipment and technique (a must read, by the way), he shares his many recipes in sections divided  according to region. He will take you from France to Italy, stop in Germany, Poland, Austria, and the Czech Republic, sampling some of their unique yeast concoctions.

If you enjoy baguettes, you’ll be happy to know that Leader offers recipes for French, Italian, and German baguettes, so you can bake them all and compare their “personalities”. He also shares his recipe for the famous miche from Pain Poilane in France, as well as German Rye Sourdough, two examples of bread that, in my humble opinion,  can be quite intimidating.  With his detailed instructions, you’ll feel ready to tackle any project, Pain Poilane included!  So, if you don’t have Local Breads on your shelf, correct this severe cookbook handicap with a simple click here.  😉

I would like to thank Dan Leader for his permission to publish this great recipe. This post goes straight to Susan’s Yeastspotting!

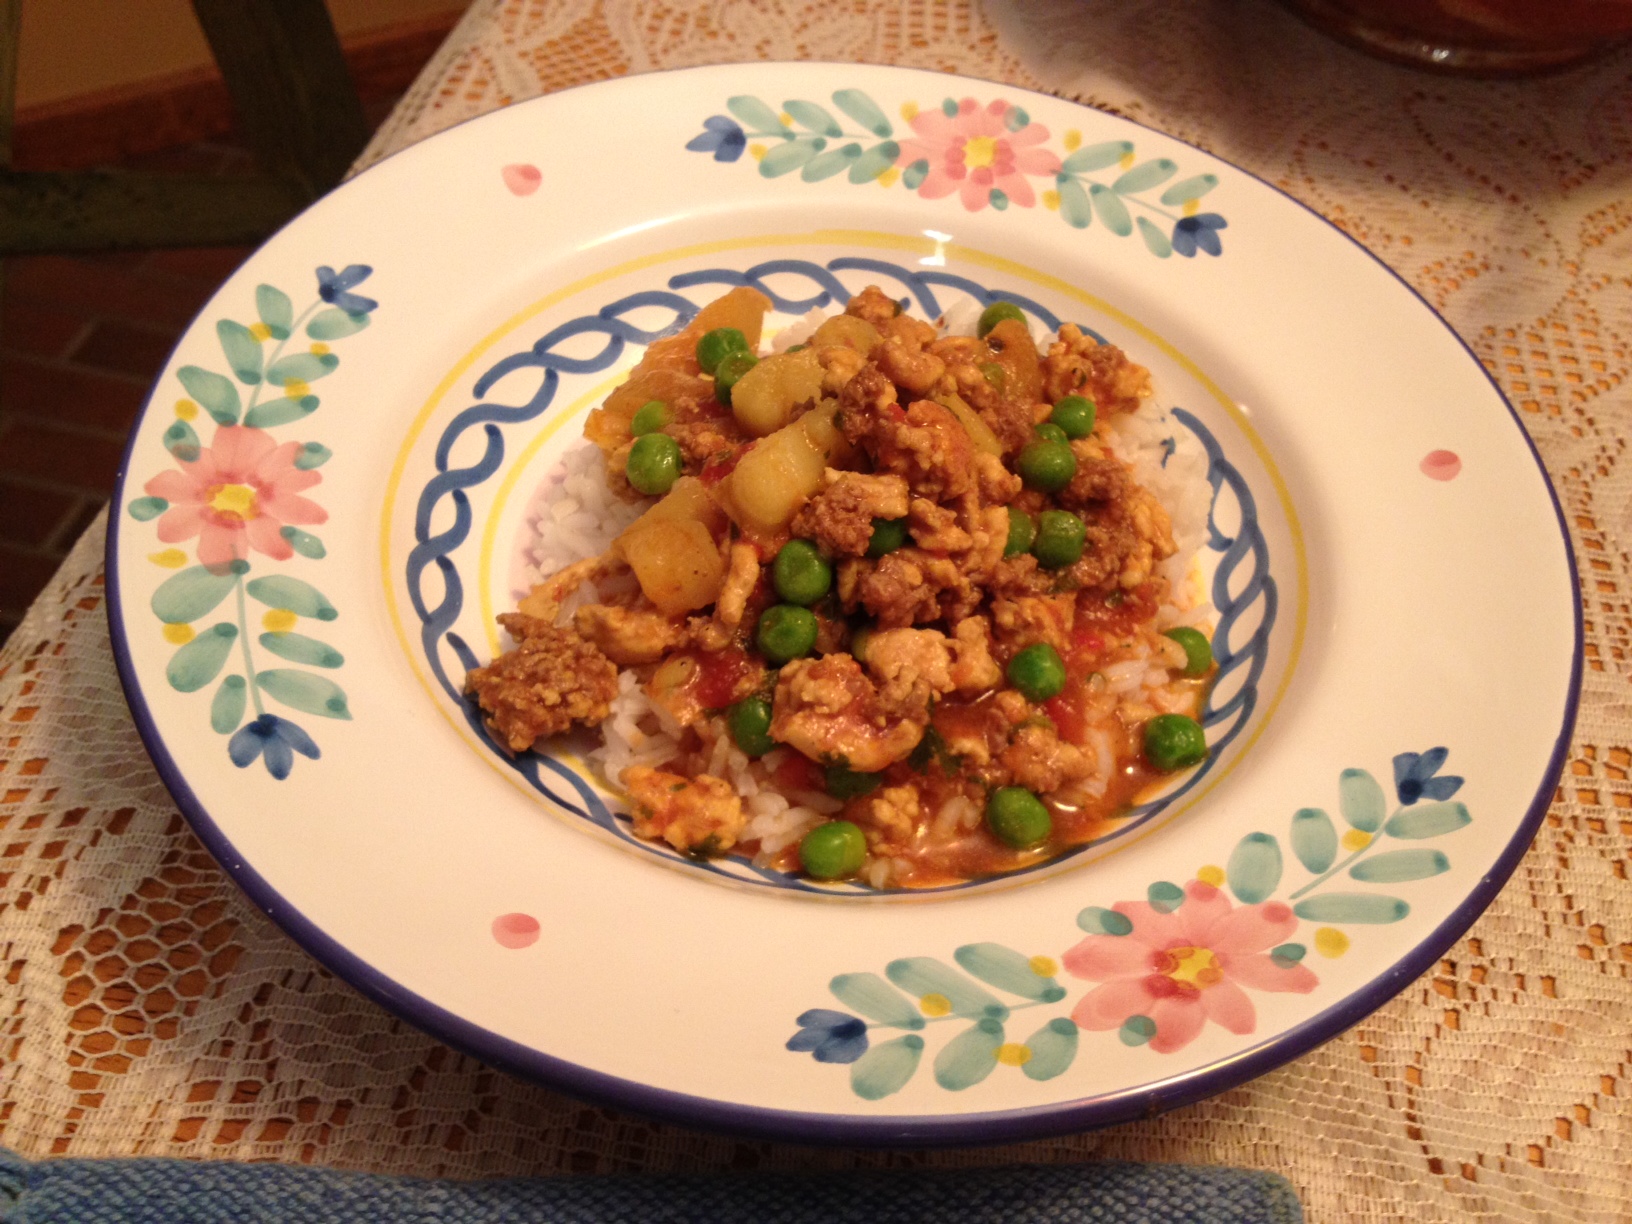
ONE YEAR AGO: Orange-Pomegranate Chicken

TWO YEARS AGO: The Getty Museum

THREE YEARS AGO: Crowd-Pleasing Pulled Pork