PEAR, BLUE CHEESE & WALNUT SALAD

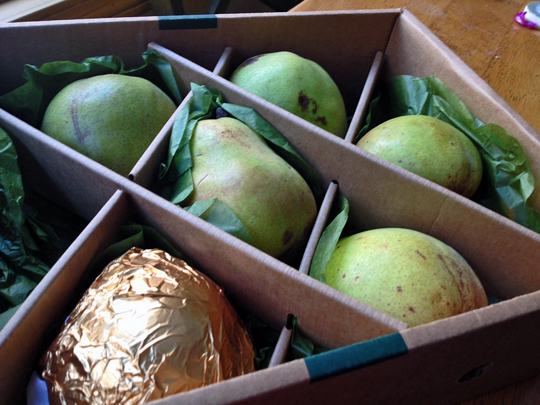
One of the gifts we’ve received during the holidays was a super special box of Royal Riviera pears from Harry and David.  Inside the box, a little card with a recipe for a salad that would make the pears shine.  They ship the pears slightly unripe, with instructions on the best way to store them as they reach their peak, and also on how to tell when they get there.  We had to wait for a little less than a week, then enjoyed the juiciest pears ever!   The salad? It was so good that we made it again a couple of days later… Come to think of it, that in itself is a huge endorsement, because I tend not to crave salads during the cold months of the year.

Rogue Valley Salad

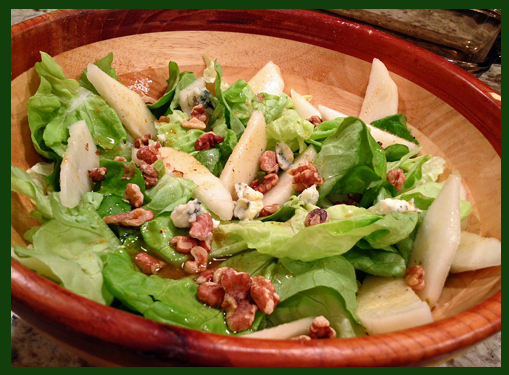
ROYAL RIVIERA ROGUE VALLEY SALAD
(recipe adapted from Harry & David)

for the dressing:
2 tbsp Champagne vinegar
1 tbsp Dijon mustard
1 tsp agave nectar
1/2 tsp sea salt
1 tsp freshly ground pepper
1/2 cup walnut oil (I used less)

for the salad:
1 head butter lettuce, washed and dried
1 large Royal Riviera Pears, peeled, cored and sliced
1/4  cup Rogue Creamery or other blue cheese, crumbled
1/2 cup  toasted walnuts

Make the dressing: Mix together the first five ingredients. Gradually whisk in the walnut oil. Chill for 20 minutes.

Gently tear the lettuce into bite sized pieces. Arrange on four chilled plates. Top with fans of pear slices. Sprinkle blue cheese evenly over the pears and lettuce and top with nuts. Drizzle the dressing generously over the salad, and serve at once.

ENJOY!

to print the recipe, click here

Pears

The recipe calls for 1/2 cup of walnut oil, I used a lot less than that but kept the other amounts the same. I like my salad to be just barely coated with dressing and prefer it a little less oily. Also, considering the price for walnut oil, I rather use it with a little less abandon.  😉   On my second time preparing this recipe, the dressing was similar, but instead of walnuts I used very thinly sliced celery.  I mixed the celery with the dressing as it chilled for 20 minutes and then incorporated both into the other components.  Two pears were consumed in the name of this delicious salad, the others we enjoyed late at night, usually watching nice movies…  Like the trilogy:  Before Sunrise, Before Sunset, and Before Midnight.  I highly recommend those, Julie Delpy is simply superb!

ONE YEAR AGO: Keema Beef Curry

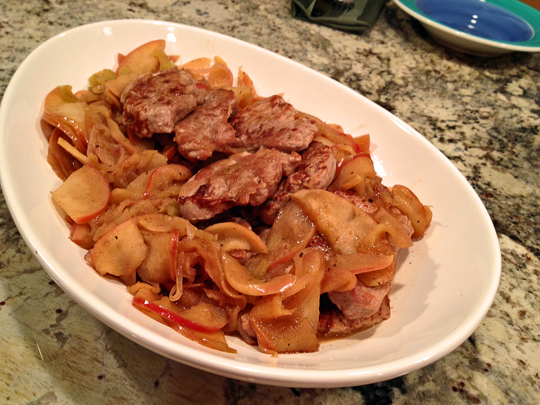
TWO YEARS AGO: Pork Tenderloin with Soy, Ginger, and Lime

THREE YEARS AGO: No-Fuss Coffee Cake

FOUR YEARS AGO: Swedish Limpa

CELEBRATE WEDNESDAY WITH PORK TENDERLOIN & APPLES

This was a lightning quick dish to prepare, with a deliciously tasty outcome… Pork and apples go together quite well, but often a recipe will call for cooking down the apples to a saucy consistency. Not the case here, and that was a nice change of pace.   The apples retain their bite, the pork gets tender and super-juicy.

Pork Tenderloin with Apples and Cider

PORK TENDERLOIN WITH SAUTEED APPLES
(inspired by a recipe from Cooking Light magazine)

1 pork tenderloin, cut in 12 pieces
salt and pepper
1 Tablespoon grape seed oil
1 leek, sliced thin (white and light green part only)
Gala apples, sliced thin
3/4 cup apple cider
1 cup chicken (or veggie) stock
squeeze of lemon juice

Pound each piece of pork lightly, protecting the meat with a piece of Saran Wrap. Season lightly with salt and pepper.

Heat the oil on a large skillet.  Sauté the pork slices in two batches if necessary, until they are golden brown on both sides.  Remove the meat to a platter.  Add a little more oil if the pan seems too dry, and sauté the leeks until they begin to get soft. Add the apples and cook for a couple of minutes, stirring gently.  Add the cider, cover and cook for a couple of minutes longer.

Add the chicken stock, put the meat back in the pan, cover it and simmer on low heat until the meat is cooked to your liking and the apples start to disintegrate, but still keep their shape.  Adjust seasoning, add a squeeze of fresh lemon juice right before serving.

ENJOY!

to print the recipe, click here

composite

Comments: When I bought the pork tenderloin, my idea was to grill it. But that particular Wednesday the temperature was a “balmy” 11 degrees Fahrenheit, which is known to kill creatures born and raised in São Paulo, Brazil.  Since Phil was coming home straight from a meeting and therefore unavailable to brave the elements, I quickly changed gears and searched for options compatible with my survival.  I happened to have all ingredients to prepare this dish, as apples and cider are always in our fridge this time of the year.

plated2Dinner is served!

ONE YEAR AGO: Salmon Wellington

TWO YEARS AGO: The Green Chip Alternative

THREE YEARS AGO: Weekend Pita Project

FOUR YEARS AGO: Let it snow, let it snow, eggs in snow

BRAN MUFFINS, RAINBOWS AND A WONDERFUL SURPRISE

Found it on the 3rd. Baked it on the 5th.  That is how fast I jumped on this recipe once I saw it at Pastry Studio. I’ve mentioned before that one of Phil’s favorite breakfast item is a bran muffin studded with raisins and nuts.  I know that baking the version of his past is akin to finding the pot of gold at the end of the rainbow, so I simply enjoy the path of trying different recipes and getting feedback on how close or far I am from the muffin of his hippie days.

Buttermilk Bran Muffin3

BUTTERMILK BRAN MUFFINS
(from Pastry Studio)
Makes 16 muffins

1 cup (8 oz) buttermilk at room temperature
1 cup (2 oz) wheat bran
1/2 cup + 2 tablespoons (89 grams) all-purpose flour
1/2 cup + 2 tablespoons (89 grams) whole wheat flour
1 teaspoon baking soda
1 teaspoon baking powder
1/2 teaspoon salt
3/4 teaspoon cinnamon
1/4 cup + 2 tablespoons (3 oz) canola oil
1/2 cup (3 1/2 oz) dark brown sugar, packed
1/4 cup (2 1/4 oz) molasses
2 tablespoons (1 oz) honey
2 eggs at room temperature
1 1/2 teaspoons vanilla
zest of 1/2 orange
1/2 cup (2 1/2 oz) raisins, chopped (I kept them whole)
1/2 cup (1 3/4 oz) pecans, chopped

Preheat oven to 350 degrees F.  Grease 16 wells in standard size muffin tins or use paper liners.

Place the buttermilk and bran in a bowl and stir to combine.  Set aside.

Sift both flours, baking soda, baking powder, salt and cinnamon.  Set aside.

In another bowl big enough to hold all the ingredients, whisk the oil, brown sugar, molasses and honey.  Add the eggs and combine thoroughly.  Mix in the vanilla and orange zest.  Add the bran and buttermilk mixture.  Whisk in the flour mixture just until there are no streaks.  Do not over mix.  Fold in the raisins and pecans.

Divide the batter equally in the prepared muffin cups.  Bake until the muffins spring back when pressed gently in the center or a tester inserted comes out clean, about 13 minutes.  Place on a wire rack to cool for 10 minutes.  Use a small thin knife or small metal spatula to remove from the pan.  Cool completely.

(I made half the recipe and that was enough for 7 regular-size muffins)

ENJOY!

to print the recipe, click here

Comments:  I am not wild about bran muffins, but in the name of food blogging I decided to try a little bite of one.  Surprise!  I enjoyed it so much it became my lunch that Sunday. 😉 Very moist, sweet but not as sweet as I expected for a muffin that contains honey, molasses, AND brown sugar. The molasses taste is the strongest and I think it masks the harshness of wheat bran very well.  My kind of bran muffin.

Did I hit the jackpot with these? I am one step closer, but feedback from the resident former hippie suggests me to triple the raisins, use walnuts instead of pecans, and at least double that amount too. No wonder I have a hard time re-creating the concoction of his past.  Obviously,  it was not a muffin. It was a block of walnuts and raisins with just enough crumb to hold it all together.  And, I must buy a jumbo muffin pan.   So, that will be taken care of soon.  But, the muffin part – the amount of bran and the overall sweetness – were spot on!

Now we move to the surprise part of this post.   I was featured on “Food Writer Friday“, a publication run by Maureen from “The Orgasmic Chef” and Helene from “Masala Herb“.  If you are interested, take a look at the amazing article she wrote by clicking here.  My jaw kept dropping as I read it,  and I developed this permanent smile on my face that lasted for a few days…   The idea that someone on the other side of the planet (literally) would take the time and energy to write such a thoughtful article about someone she doesn’t even know personally,  melts my heart…

When you’ve been blogging for a while, it is hard to know how you come across to your readers, and her article gave me a nice snapshot of it.  Nothing pleased me more than realizing that my relationship with Phil is a big part of it.  The fact that she chose my post on bran muffins to highlight our happiness made me smile, knowing that I had this post already written and scheduled for publication. Isn’t that an amazing coincidence?

Rainbow2(image from Wikimedia Commons)

Maureen, it is hard to express how much I love everything you wrote, and how much energy it gives me to go on with the blog, with my little stories, and my endless search for rainbows, pots of gold, and the perfect bran muffin…   😉

ONE YEAR AGO: Cider-Marinated Pork Kebabs

TWO YEARS AGO: Golden Age Granola

THREE  YEARS AGO: Mushroom Souffle for Two

FOUR YEARS AGO: Stollen

OTTOLENGHI & TAMIMI’S ROAST CHICKEN WITH CLEMENTINES

For someone who only roasts chicken by the “low and slow” method followed by a “high and fast” step, trying this recipe from Jerusalem cookbook was quite a change: the pieces are blasted at 475F from start to finish. They advise to check the state of the skin after 30 minutes, and reduce the temperature slightly in case it’s darkening too fast. I was curious to see how our Supernova handled this challenge. but it cruised through the test! All pieces were nicely and homogeneously browned, the meat cooked to perfection.  This is a super festive dish, perfect for entertaining.

Roast Chicken with Clementines2

Jerusalem is one of the many cookbooks sitting on my bookshelf, but my inspiration to make this dish was a post from “Alexandra’s Kitchen” ,  a blog I love! You can read, and print her version of this recipe (which I followed) by jumping here.

ROAST CHICKEN WITH CLEMENTINES: An outline

This is a simple but unique treatment of chicken pieces. A flavorful marinade is prepared with a mixture of arak (or ouzo), honey, orange, lemon juice and spices.  You can use a whole chicken cut up, or go for chicken thighs as I did.  The main flavor will be fennel and anise. Reading Alexandra’s blog as well as a few other sources in the net, it became clear that if you are not a fond of anise, better modify the recipe.   It turns out that I absolutely despise ouzo (as well as Pastis, which brings a sad tale to my mind that shall be told some other time), so I used dry Vermouth instead. I also added only 1 teaspoon of fennel seed instead of 2 + 1/2  as originally called for.  It turned out perfect for us.

The clementine slices add a lot visually to the dish, but I did not care for their texture, even the ones that cooked protected from direct heat seemed a bit bitter and tough to me.  They release a lot of juice and flavor into the sauce, so even if you don’t eat them in the end, no big deal.

After the chicken is roasted, the sauce is transferred to a saucepan, reduced almost to a glaze, and poured over the meat on the serving dish.  You might be tempted to skip this step. Do not.  It is one of those details that take a dish from great to spectacular, trust me on that…

composite

Additional comments:  Probably one of the reasons this recipe works so well with intense heat from beginning to end, is the fact that the pieces are surrounded by quite a bit of liquid during roasting.  The final texture is perfect, and the sauce tastes amazing, a powerful kick of fennel and the sweetness of clementines pairing with it.  If you like anise flavor, go for Ouzo or, if you can find (and afford it), opt for the more authentic Arak.

I know that most people associate recipes from Jerusalem exclusively with Ottolenghi, so I made a point of including Tamimi on the title of my post.  I don’t think he gets the credit he deserves for  being the co-author of such an amazing cookbook.

This dish was our first dinner in the year 2014, and I thank Alexandra for the inspiration. It was a  perfect meal to launch the New Year!

Roast Chicken with Clementines1Dinner is served!

ONE YEAR AGO: Eight-Ball Zucchini: The Missing Files

TWO YEARS AGO: Grilling Ribbons

THREE YEARS AGO: Peppery Cashew Crunch

FOUR YEARS AGO: Ossobuco Milanese: an Italian Classic

CHEDDAR AND FENNEL SEED CRACKERS

Cheddar Fennel Crackers
These crackers were part of the appetizers we served at a small dinner get-together.  I’ve always wanted to re-visit crackers, as my first experience with them was pretty awesome. But way too long ago, this blog was just a baby back in September 2009.  Fun times. These are completely different creatures, thick and flavorful, they stand by themselves without the need of any spread.  The fact that you can make them ahead of time, then slice & bake is an added bonus. I am all for making my life easier when entertaining. Let me rephrase that. I am all for making my life easier. 😉
.tray.
CHEDDAR AND FENNEL SEED CRACKERS

(adapted from the blog Lemons & Anchovies)
.
¼ pound (1 stick) unsalted butter, room temperature
3 ounces sharp cheddar cheese (grated with a Microplane)
1 tablespoon + 1 teaspoon fennel seeds
1 + ¼ cups all-purpose flour
zest of 1 lemon
Pinch kosher salt
A pinch or two of freshly ground black pepper
.
Using a stand mixer with the paddle attachment, cream the butter for about one minute. With the mixer on low-speed, add the cheese, salt, pepper, lemon zest, and fennel seeds just until combined, scraping the sides of the bowl as necessary.  With the mixer still in low-speed add the flour,  and turn off the mixer once the mixture is in large crumbles, about one minute.
.
Transfer the dough to a lightly floured surface, press into a ball then roll it into a 9-inch log. Wrap it in plastic wrap and chill for at least 30 minutes before slicing and baking.
.
When ready to bake, heat your oven to 350℉. Slice the dough into roughly 3/8-thick rounds and lay them on a baking sheet lined with parchment paper. You can sprinkle more fennel seeds on top of the rounds if you wish.
.
Bake for 20 minutes, rotating the sheet halfway through the cooking time, until very lightly browned. Cool on a wire rack and serve at room temperature. They keep well in an airtight container for a few days.Makes about 24 rounds.
.
ENJOY!
.

to print the recipe, click here
.
composite
.
Comments: 
At first I had some trouble shaping the log of dough, and had to add a little more flour, but finally it all came together smoothly.  These crackers have a shortbread feel, they crumble as you bite into them, and their flavor gets more and more pronounced as you chew them. The lemon zest definitely adds a lot, even though fennel and cheese are strong components in the overall taste.  The basic recipe could be taken in many different directions with different cheeses and spices…  I think that an experiment with a little bit of dried lavender could be quite interesting, but it might be tricky to pick the right cheese to go with it.
.
This was my first time baking this type of cracker. After slicing it would have been nice to smooth out the surface gently with the tip of the finger, particularly the edges.  Something to consider for next time. Bake and learn, my friends, bake and learn…
.
TWO YEARS AGO: My First Award!
.
THREE YEARS AGO: A Message from WordPress
.
FOUR YEARS AGO:
Turkish Chicken Kebabs