THE BEWITCHING KITCHEN TURNS FIVE!

IT’S GIVEAWAY TIME!
UPDATE: time’s up, comments shutdown for this post

It’s been five years and 688 posts. I enjoyed blogging from the beginning, and then it got better as the years passed. Now I’m more relaxed about it, I suppose. Looking back,  I went through a few phases that are maybe not obvious to you. For instance, in the second year I became slightly obsessed with getting special serving dishes, plates and small bowls “for the blog.”   I also flirted with the idea of a fancy camera and photography classes, until I realized that’s not what my blog should be about. I assembled all the extra stuff, donated it, and felt great.  Our life has little to do with perfectly set tables and carefully placed food props.  “…not that there’s anything wrong with that!”   😉

The Bewitching Kitchen revolves around our desire to eat well while working jobs that demand our full attention, even beyond the daily 9-to-5.  So, most stuff I post reflects the need for simple dishes that are reasonably quick to prepare, but flavorful and fun to eat.  I have neither goals nor expectations for the blog, except to keep it going as long as I enjoy it.  If this site can motivate busy people to cook, eat well, and  – I bet you knew this was coming – exercise often, so much the better!

Five years went by so quickly.  This blogging milestone demanded that I face my own cooking demons. I baked a cake!  What’s even more amazing  is that it involved creaming TWO types of sugar with butter.  Can you imagine that? It will take me a while to recover …

Apple Spice Cake1

APPLE SPICE BUNDT CAKE WITH RUM GLAZE
(slightly modified from Alton Brown, Best Thing I Ever Made)

for the cake:
12 ounces unsalted butter, at room temperature, plus extra for the pan
15 1/2 ounces all-purpose flour, plus extra for the pan
1 teaspoon baking soda
1/2 teaspoon salt
2 teaspoons ground grains of paradise
1 teaspoon ground nutmeg
1/2 teaspoon ground ginger
1/4 teaspoon ground allspice
1/4 teaspoon ground cardamom
1/8 teaspoon ground star anise
8 ounces granulated sugar
7 ounces light brown sugar
3 large eggs, at room temperature
1 teaspoon vanilla extract
2 Granny Smith apples, about 8 ounces each, 1/4-inch dice
3 ounces walnuts, chopped
1 1/2 ounces crystallized ginger, finely chopped

 for the glaze:
6 ounces powdered sugar
4 teaspoons dark rum
Turbinado sugar, for sprinkling

Heat the oven to 325 degrees F. Lightly butter a Bundt pan and dust with flour, tapping out the excess.

Whisk the flour, baking soda, salt and spices together in a large bowl.

Combine the butter, granulated sugar and brown sugar in the bowl of a stand mixer and, using the paddle attachment, beat on medium until the mixture is pale and fluffy, about 3 minutes.

Whisk together the eggs and vanilla and slowly add, with the mixer on low-speed, to the butter and sugar. Add the flour one-third at a time and beat on low just until combined after each addition. Stir in the apples, pecans and ginger.

Transfer the batter to the prepared bundt pan; the batter is thick and will almost fill the pan. Bake for 75 minutes, rotating the pan after 30 minutes. The cake is done when it pulls away from the sides of the pan, springs back when pressed and the internal temperature reaches 205 degrees F.

Cool the cake in the pan on a rack for 30 minutes. Invert and remove the cake from the pan. Cool completely on the rack before glazing.

Combine the powdered sugar, rum and 1 tablespoon water in a small mixing bowl and whisk until smooth. Pour the glaze onto the bundt cake and sprinkle with turbinado sugar. Let the glaze set for at least 30 minutes before serving.

ENJOY!

to print the recipe, click here


composite


Comments: This cake was part of the show “Best Thing I Ever Made” on FoodTV Network a few years ago. Ever since I watched that episode and listened to Alton Brown describe his rationale behind the recipe, I wanted to make it. First, I love a cake that goes in the direction of speculoos with all those delicious spices. And this cake had two things that appealed even more to me: the inclusion of grains of paradise, and the omission of cinnamon.  Grains of paradise (shown on the top left of the composite photo) have a very unique flavor, so I was quite intrigued by their use in this cake. And cinnamon is so common when apple cakes are concerned, that NOT having it immediately called my attention.  In fact, Alton made a specific point of not adding cinnamon to the batter, to avoid taking his masterpiece in the direction of apple pie.  Brilliant move!

The whole thing works beautifully together, just as he promised:  chunks of apple permeate the cake, a tender crunch of walnuts (he used pecans, by the way), and the assertive crunch of crystallized ginger.  The delicate shell of the icing with rum (barely noticeable) is perked up by the sprinkle of turbinado sugar, not to be omitted…   For my taste, this cake is close to perfection.  I did not have that many issues to bake it, which is a bit unusual. Ok, later I had to wash some dried up cake batter from my right eyebrow, but that’s nothing compared to what cake baking has done to me in the past. Still, below you see a photo of the state of our kitchen midway through this labor of love.  Trust me, I never make this mess, only when I’m working on a cake. It is absolutely pathetic.  Please notice the place I chose for resting the bowl with all the flour.  Why would I pick the most unstable place ever? Let’s not waste time trying to understand it. It is cake. And it is me. Capisci?

kitchen,jpg

And now…  GIVEAWAY TIME!   I am so thrilled to celebrate my 5th year in the blogosphere that I am offering two gifts. First, a wooden board beautifully crafted by Michael (link to his site), who has been featured on IMK in the recent past.  He was actually quite busy with some trips but managed to make time in his schedule to have this board ready for my giveaway. Thank you, Michael!

board

The second gift, is a copy of the latest cookbook by David Lebovitz,  My Paris Kitchen…. If you are familiar with his style, you’ll know this book is a must-have.  Paris is obviously a place very dear to my heart, it’s where Phil and I met, and where we spent a sabbatical year together later. Visiting often is not possible, but cooking French food is one way to keep the memories alive.  This book is a virtual passport to the city we love.  To enter the giveaway, just leave a comment on this post.

pariskitchen

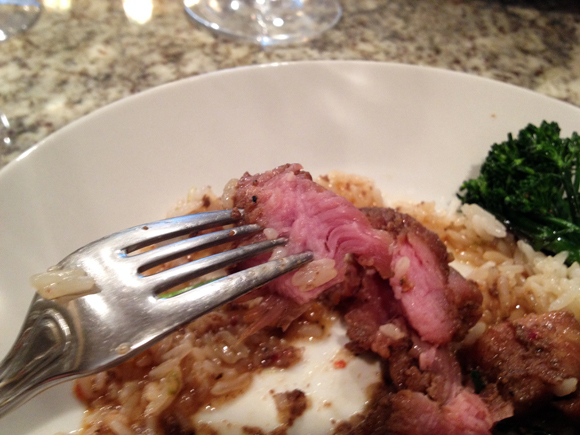
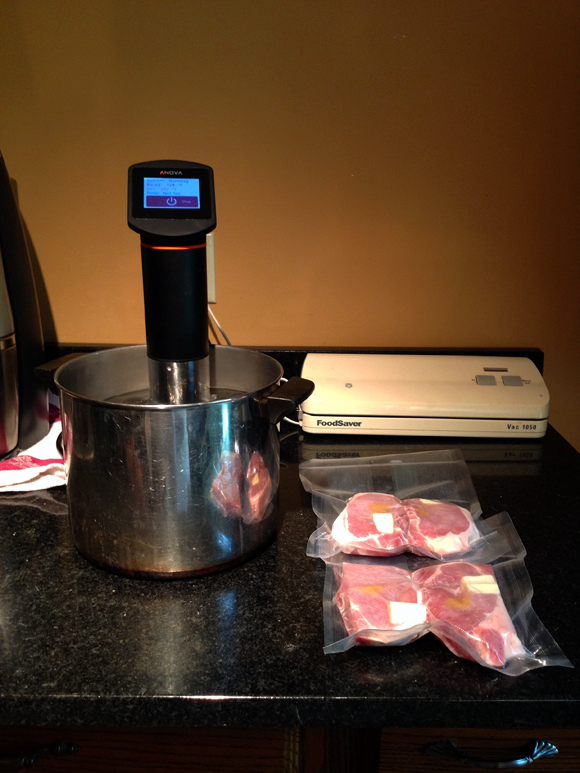
Everyone is welcome to enter, I will draw two names on July 1st, 2014 an announce the winners right then. Entries will close on June 30rd at midnight.  Good luck, and a big thank you for all who make the interactions in comments, private emails, and Facebook so much fun!  I invite you all to join me in the journey of my 6th Bewitching year! There will be bread, sous-vide, and pies. There will be macarons, dog tales, and when the mood strikes, pull-ups, push-ups, and sit-ups.   Maybe this will be the year I get to finally conquer the crane pose that I’ve been working on for as long as I’ve been blogging….

It’s the road that matters, not the destination. I firmly believe that.   😉

sunsetwalk1

ONE YEAR AGO: The Bewitching Kitchen turns Four!

TWO YEARS AGO: The Bewitching Kitchen Turns Three!

THREE YEARS AGO:  The Bewitching Kitchen turns Two!

FOUR YEARS AGO:  Bewitching Birthday!

FIVE YEARS AGO: Welcome to my blog!


PUMPKIN-CHIPOTLE & KALE PIZZA

For the past 8 years I’ve been using the same recipe for our pizza dough, one that I blogged about in the very early days of the Bewitching Kitchen.  But every once in a while, I get tempted by a recipe described as “the best you’ll ever taste“, “a crust that will change your life“, or some other irresistible statement. Case in point: a recipe from Roberta’s, a restaurant in Brooklyn, NYC.  According to the description in the New York Times,  “it provides a delicate, extraordinarily flavorful dough that will last in the refrigerator for up to a week”.  Lots of rave reviews online by many people who tried it.  So, I got the required flour (Italian type 00) to be combined with regular all-purpose, and went to work.  I chose a very unusual topping for this experiment, combining kale and pumpkin, after reading this post by Joanne from Eats Well with Others, one of the food blogs I follow very closely.  She cooks strictly vegetarian dishes, but trust me, with her cooking no one would miss the meat. For her version, she used burrata, but I had to settle for mozzarella. No major harm done, it turned out delicious!

PumpkinKalePizza2

ROBERTA’S PIZZA DOUGH
(published by The New York Times)

** I doubled this recipe and made three pizzas **

153 grams 00 flour (1 cup + 1 tablespoon)
153 grams all-purpose flour (1 cup + 1 tablespoon + 2 teaspoons)
8 grams fine sea salt (1 teaspoon)
2 grams active dry yeast (3/4 teaspoon)
4 grams extra-virgin olive oil (1 teaspoon)

In a large mixing bowl, combine flours and salt.

In a small mixing bowl, stir together 200g lukewarm water (about 1 cup), the yeast and the olive oil, then pour this mixture into the flour.  Knead with your hands a few minutes until well combined, then let the dough rest for 15 minutes.

Knead the dough by hand for 3 minutes. Cut into two equal pieces and shape each into a ball. Place on a floured surface,  cover with a cloth slightly moist with water, and let rise for 3 to 4 hours at room temperature. You can also refrigerate it for 8 to 24 hours (or even several days).  If you work from cold dough, let it sit at room temperature for 45 minutes before shaping it.

Place each dough on a floured board and use your fingers to stretch it.  Top and bake on a very hot oven.

to print the dough recipe, click here
.
Dough


PUMPKIN-CHIPOTLE & KALE PIZZA
(slightly adapted from Eats Well with Others)

1 (15 oz) canned pumpkin puree
28 oz fire-roasted diced tomatoes
2 tsp chipotle chili powder
salt and black pepper, to taste
8 oz mozzarella cheese
1 bunch lacinato kale, destemmed and coarsely chopped
1/4 cup Parmigiano cheese

Heat oven to 500 (or higher). Alternatively, you can use your grill covering the rack with quarry tiles.

In a food processor, process together the pumpkin, fire-roasted tomatoes, chipotle chili powder, and salt and black pepper until pureed. Set aside.

Steam the kale in the microwave until wilted.

Spread enough pumpkin tomato sauce over the dough so that it covers it. You will have plenty of sauce leftover, use it for pasta or new fun experiments with pizza toppings. Sprinkle the kale over the sauce. Top with slices of the mozzarella and a sprinkling of parmesan cheese. Bake for 10 minutes or until done to your liking.

ENJOY!

to print the recipe, click here

composite

Comments: As far as dough goes, I think my default recipe still wins…  This was a nice enough recipe, good texture and crunch, but after making Fine Cooking version countless times, I am so used to it I don’t even have to look at the recipe. Plus, all the variations I make incorporating a little spelt flour here, a little whole wheat there, never disappointed me.  Still, it was fun to try something different.

As to the kale and pumpkin topping: winner!  Incorporating pumpkin in the tomato sauce mellows the natural acidity of the tomato, and of course the chipotle flavor doesn’t hurt either…  Great pizza, too bad we did not find burrata, but any nice melting cheese will work, of course.

We also combined the kale in one pizza with players such as crumbled chorizo & sautéed mushrooms. Super tasty too.  Pizza dinners are always fun and make any evening feel special. Plus, what’s better than leftover pizza next day?

ChorizoKale

 Joanne, thanks for the constant inspiration, whenever I am in the mood for some spectacular take on a vegetarian meal, I know which blog to turn to…  And your macarons have not left my mind, I am still gathering my strength to attempt those…  😉

ONE YEAR AGO: Enchiladas Suizas a la Marcela Valladolid

TWO YEARS AGO: The Little Apple

THREE YEARS AGO: Majestic Sedona

FOUR YEARS AGO: Watermelon-induced Daze

TEN YEARS AGO

We had to say a sudden goodbye to my Dad.  I could not get to Brazil in time for the funeral, which is something that haunted me for a while, but not anymore. Instead, sweet memories of him will be with me forever.

10340170_685783878155408_5452605214857857210_n


For those who can read Portuguese, a text written today by my oldest niece.

Ele foi embora há dez anos, mas está sempre presente na minha vida. Muito do que tenho e dos valores que tenho vieram dele e da minha avó, através da minha mãe. Para mim e para muita gente ele foi um exemplo de vida, de caráter, de honestidade, e de muitas outras coisas. Com certeza não foi perfeito, era um ser humano normal, mas principalmente, e sem sombra de dúvida, gente como ele faz a humanidade melhor.

(comments are shutdown for this post)

BLACK BEAN & PEPPER JACK BURGER

If you’ve been around the Bewitching Kitchen for a while you know that I eat quite a bit of meat, enjoy eggs, dairy, grains, regular pasta, whole-wheat pasta, sushi, oysters, sweets, there’s basically no category of food I refrain from eating.  So, when you see me rave about a veggie burger, rest assured: I rave from the perspective of a content omnivore. I love what tastes great. Period. If you are a vegetarian, you will flip for these. If you are not, be ready to flip too.  These are spectacular.

BlackBeanBurgersServed

BLACK BEAN AND PEPPER JACK BURGERS
(from Fine Cooking Magazine)

1/2 cup rolled oats
1 15.5-oz. can black beans, rinsed and drained
1 large egg
1 tsp. ground cumin
Kosher salt
2 oz. finely grated pepper Jack cheese (1/2 cup)
1 large scallion, minced
2 Tbs. chopped fresh cilantro
1 Tbs. olive oil; more for the plate
4 whole-wheat hamburger buns, toasted
Jarred salsa, for serving
Sliced avocado, for serving

Put the oats in a food processor and pulse three times to roughly chop. Add half of the beans and pulse into a coarse paste, about 6 pulses. Add the egg, cumin, and 1/2 tsp. salt and process to mix well, about 1 minute. Transfer the bean mixture to a large bowl. Stir in the remaining beans, the cheese, scallion, and cilantro.

With wet hands, form the bean mixture into four 1/2-inch-thick patties and transfer to a lightly oiled plate. Refrigerate for 10 to 15 minutes to let the burgers set up.

Heat a large heavy-duty skillet (preferably cast iron) on high heat until very hot; add the oil and swirl the pan to coat the bottom. Cook the burgers until browned, with a good crust, 2 to 3 minutes; then carefully flip and cook, flipping again if necessary, until the burgers feel firm when pressed with a fingertip, another 3 to 5 minutes. Serve the burgers in the buns, topped with the salsa and avocado.

ENJOY!

to print the recipe, click here

composite
I saw this recipe in one of the recent issues of Fine Cooking, but did not think much of it. Then, a member of a cooking forum (Cook’s Talk) raved about them. She said that her husband and son, who would normally twist their noses at any burger made with less than 99% beef,  loved them too.  With that endorsement, I was powerless to resist.

Just remember that the patties need to sit in the fridge for a little while to firm up, other than that, a very simple and weeknight-friendly recipe.   They taste amazing, their texture is obviously more crumbly than that of a meat burger, but I don’t see this type of preparation as a substitute for the real thing, it’s just a fun recipe to open your gastronomic horizons.

Before you ask, I did not make the sweet potato fries, they were frozen entities by the brand Alexis, which we find quite tasty.  However, I did make the hamburger buns: a Wheat Berry Caraway bread that turned out as a great partner for these tasty burgers. Recipe shall be on the blog in the near future.

Seriously: try these black bean cuties soon… you will thank me, I am sure. No matter how much you love sinking your teeth into a medium-rare beef burger…   😉

CloseUP


ONE YEAR AGO: Carrot and Sesame Sandwich Loaf

TWO YEARS AGO: Border Grill Margaritas

THREE YEARS AGO: Goodbye L.A.

FOUR YEARS AGO: Vermont Sourdough

COOKING SOUS-VIDE: SWEET AND SPICY ASIAN PORK LOIN

I am so excited to publish this post!  My first experiment with the Anova sous-vide gadget, actually if I must be completely honest, it was the second experiment, the first shall remain unblogged.  It involved soft-boiled eggs, and a garbage disposal. Pretty sad combination.  But, I did not let that bring me down, next day I rolled up my sleeves, and went to work on a recipe for pork loin that I found on SVKitchen: Sous-vide Recipes and Techniques for the Home Cook.

served

SWEET AND SPICY ASIAN PORK LOIN
(slightly modified from this recipe)

3 pounds boneless pork loin (not pork tenderloin), trimmed of excess fat, cut into 2-inch pieces
2 stalks lemongrass, 3 outer layers and top third removed and discarded, thinly sliced
½ cup soy sauce
⅔ cup packed brown sugar
1 tablespoon Sriracha sauce
2 tablespoons minced fresh ginger
2 teaspoons Chinese five-spice powder
1 teaspoon kosher salt
1 teaspoon freshly ground black pepper
2 scallions, sliced on a diagonal, for garnish

Heat the water bath to 132°F (56°C).

In a bowl large enough to accommodate the pork, combine the lemongrass, soy sauce, brown sugar, chili-garlic sauce, ginger, five-spice, salt, and pepper. Add the pork and toss everything together to coat evenly. Divide the pork between two large zip lock food bags and seal using the water displacement method.

Cook for 6 hours.

Carefully open the food bags and serve the pork over cooked rice garnished with the sliced scallions.

ENJOY!

to print the recipe, click here

Composite1
In this photo, you see the Anova gadget attached to the large pan, and the water heating nicely to the correct temperature.  After mixing the pieces of meat with the marinade, two large Ziplock bags are sealed using the water displacement method.  I lowered the bag in a bowl of warm water (that makes the plastic more pliable and facilitates removing all air bubbles). The last photo shows the two bags sealed and ready to dive into the water-bath.  Easy as pie!

composite2
I set the timer for 6 hours, but due to important commitments such as helping Phil mow the front lawn & folding laundry, time was extended to 6 hours and 45 minutes. I hoped it would not be a problem. It wasn’t. In fact, it confirmed one of the advantages of sous–vide cooking: once the temperature is reached and properly equilibrated through the meat, you can take your time. Within limits, of course, there will be a change in texture if you push it too far. But this too far becomes a matter of hours, not minutes. Sweet!

Pork Sous-vide

Here is a close up of the meat as you bite into it… moist and tender all the way through!

Meat
Final comments:
 SVKitchen is a fantastic source of recipes and tips for sous-vide cooking, I have several recipes already bookmarked. The site is not getting updates anymore which is kind of sad, but you can still find a ton of stuff and they are also very helpful by email.

One of the things I learned right away from sous-vide cooking is: take notes.  Small variations in temperature will change the result of a recipe, and some can be pretty tricky to nail. Soft-boiled eggs are one classic example. Apparently, once you hit the jackpot with the method that pleases you, it will be quite reproducible.  I am not there yet, but slowly improving.  A very informative and fun article dealing exclusively with soft-boiled eggs can be found here.

Another important point in sous-vide is that for the most part the food will not look appetizing once it’s cooked.  The sous-vide obviously doesn’t brown the food and doesn’t reduce a liquid.  Normally you will need to do a final stove-top, oven, or grill step to bring the dish to completion.  Still, the idea that you can prepare your food in advance and wrap it up in minutes at dinner is quite attractive for those who work full days.  But more important than that is the ability to have perfectly cooked seafood, poultry to work with. Goodbye, tough scallops & shrimp… goodbye dried up chicken breasts & pork loin…

So far, I am really having fun with this new toy.  It is compact, can be stored away in a shelf when not in use, and I found an even better spot to put it in action: the countertop in our laundry room, adjacent to the kitchen.  There Anova enjoys the company of the vacuum sealer,  and on the left of the picture we have a sink, so it’s all quite functional.

AnovaSetting

I hope you enjoyed this first post on sous-vide, stay tuned for new adventures on Anova Land…  

ONE YEAR AGO:  Farewell to a Bewitching Kitchen

TWO YEARS AGO: In My Kitchen. June 2012

THREE YEARS AGO: Goodbye L.A.

FOUR YEARS AGO: 7-6-5 Pork Tenderloin