FIFTEEN YEARS!

A few months late, but finally here I am… The month of March brings with it several reasons to celebrate. It signals the end of the winter, in other words, it’s pure joy. But better than that, we got married in March… the 7th to be exact, and four short days later it’s my birthday!  Some people don’t care about celebrating their birthday. I don’t “get” that. I am totally into it. So there you have it, March is a triple joy month. This year was our 15th wedding anniversary, which of course feels special, although at the risk of sounding a bit cheesy, each anniversary is very special to me.

Sculpture

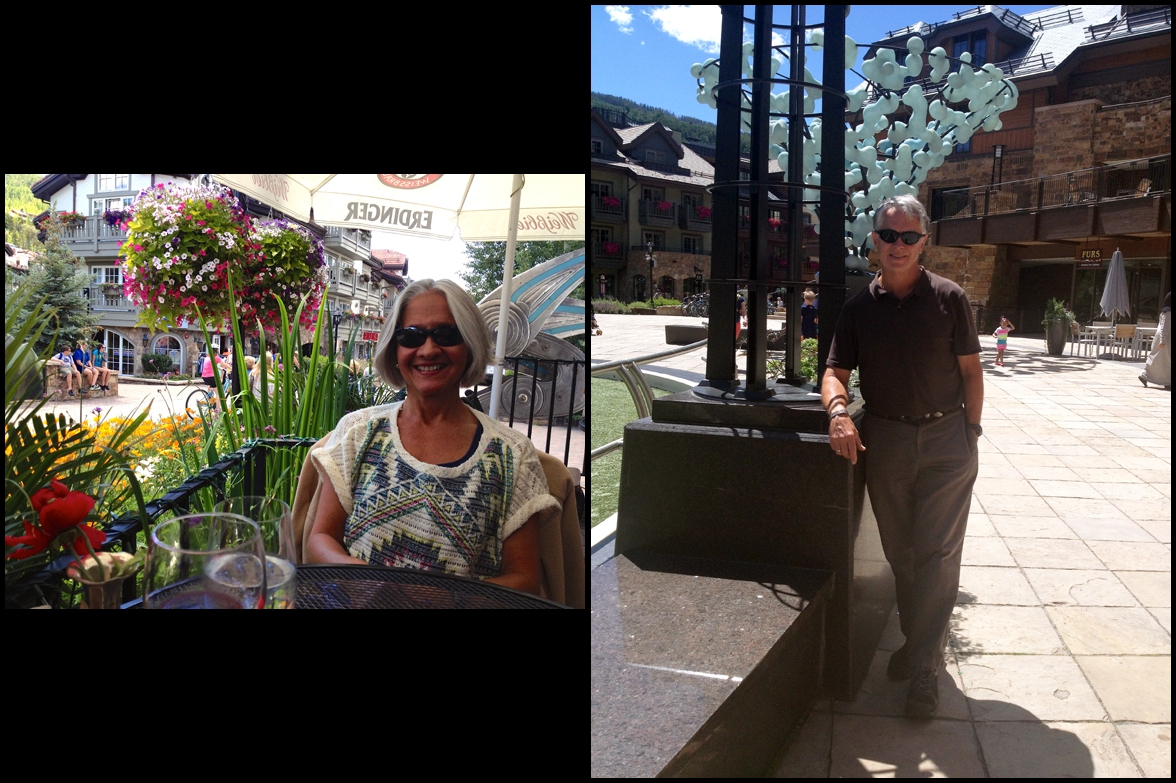
If we both had to pick a place to celebrate life the way we love it, Hawaii would be it. We love everything about it,  the sun, being outside, playing golf in amazing courses, jogging along the coast. The North shore of Oahu is the closest spot to paradise for us. It has none of the commercial, touristic stuff of Waikiki, it’s a more pure and wild experience. So, that’s where we went to celebrate the date. It was a rather short visit, but we savored each moment.

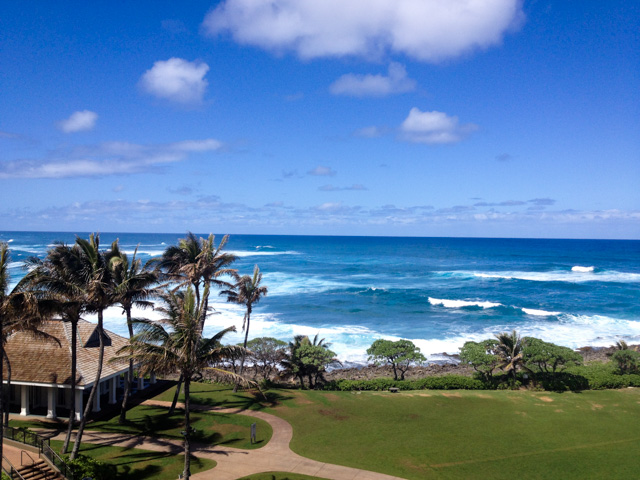
This was the view from our room’s balcony at Turtle Bay…
RoomView

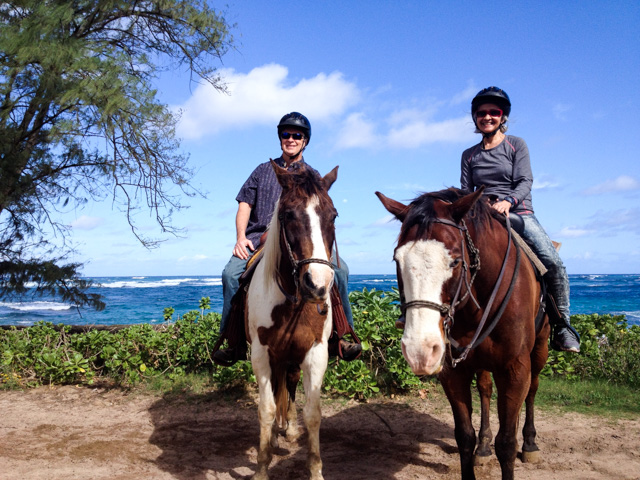
One of the cool things we did was performing a major exorcism. An explanation is obviously needed. When I was 13 years old I went for a trip with my older sister Nyrma and her husband. They arranged a horseback riding session for me (the first of my life), but unfortunately it did not have a happy ending. It was with a group of teenagers from the hotel, most of them quite comfortable riding. To make a long story short, one of the teenage boys, trying to show off, started galloping real fast, and startled my horse.  All I remember is that my horse behaved like the one from Zorro, raised the front legs way up in the air, and took off like a maniac!  Soon we were far away from the group, I was hugging the neck of the horse for dear life, but then my saddle started to slip sideways! At some point I was pretty much hanging to one side, almost parallel to the ground, with my head passing just above the roof of cars parked on the side of the street. Yeah, the horse decided to gallop through town. I heard people on the sideways screaming “somebody help her! that little girl will fall”… Keep in mind that at age 13 I looked more like a 9-year-old… (sigh).  My crazy horse left town again, galloped some more, until he decided he’d had enough and stopped to munch on something by a tree. That’s when I finally fell off.  Let’s say that experience traumatized me quite a bit, and even though I love all animals, horses make me a bit nervous.  But I don’t like to sit on my fears. I’ve always wanted to turn the page and be able to ride a horse again. Thanks to Phil, I managed to finally go for it.

But first things first… I had to keep my composure  while getting close to the horses…. The instructor at the hotel made sure I got a very gentle horse (the thought of “famous last words” crossed my mind).

Horse_Sally

We were a group of 6 riders plus the instructor. I got to ride right behind her, and Phil following behind me. Talk about feeling safe… It was perfect. Midway through the ride,  I was comfortable enough to pose for a photo… The ride was slow, nice, and peaceful. Could not ask for more. Full disclosure: Phil said that when I first climbed on the horse my face was  as white as a Hawaiian cloud. Indeed, I toyed with the idea of jumping off and running back to the safety of our hotel room. But the horse was too tall and I did not want to risk breaking a leg or two. So I stayed up there, pretending all was fine. I’m glad I did. It felt great to overcome a major fear. Page turned. Next time, I want to go for a faster ride. HA!

P_S_Horseback

Another fun part of our trip was paying a visit to the famous Banyan Tree….

Banyan

I had high hopes of seeing Jonny Depp around, but no luck with that. No worries, I had my private George Clooney with me at all times. The tree is nothing short of magnificent. Everything you see in the picture is part of a single tree, it actually covers a huge area!

TheTree1

During the horseback riding, the guide led our group around the tree, but I took the picture the following day, when we went back for a walk around the area. They don’t like to advertise too much the location of the tree to try and protect it from vandalism, but if you find yourself near the North shore of Oahu, make sure to stop by.  Who knows, maybe Jonny Depp will show up and say hello…

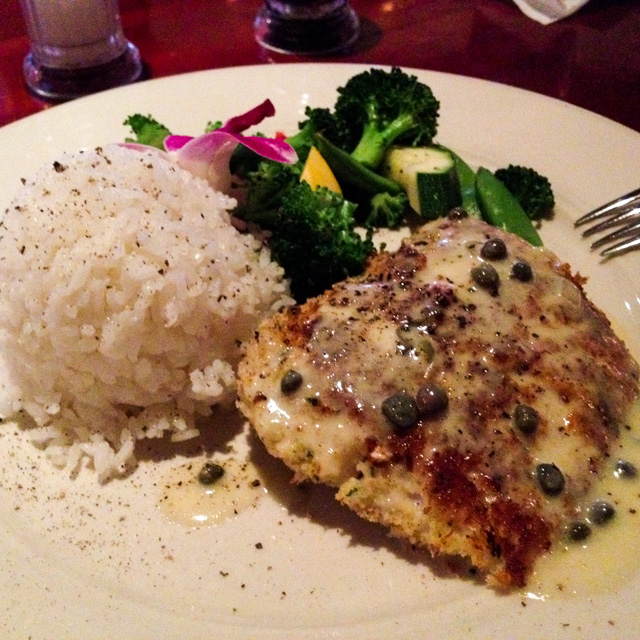
As usual, we enjoyed great meals, mainly seafood in all its glory!

Simple Dinner22SimpleDinnergolfCourse
But, the highlight of the trip was the celebration of our 15th anniversary!  Here is yours truly ready to party…

Ready

Our dinner at Pa’Akai was wonderful!  Sorry, no photos of our plates, it was such a romantic setting, I could not bring myself to break the atmosphere to snap photos. However, we did ask the waiter to take one of us as a souvenir of the special evening…

15th_Dinner

composite2

Until next time, Aloha!

ONE YEAR AGO: Light Brioche Burger Buns

TWO YEARS AGO: Sourdough Blues

THREE  YEARS AGO: Headed to Hawaii

FOUR YEARS AGO: A yummy Brazilian cake: Bolo de Fuba’

FIVE YEARS AGO:  Hidden Treasure

SIX YEARS AGO: Avocado Three Ways

HEADED TO COLORADO!

Well, folks… it is finally time to take a break and enjoy a week off from work.  Summer is one of the busiest times of the year for us. You can ask our poor graduate students who are faced with daily 8am meetings in which we talk about the plans for the day and what was accomplished the day before.  But, as they say, if you work hard, you gotta play hard too.

As this post goes live, we’ll be getting ready to drive to Colorado once again, as we did last year.  We’ll head to cooler temperatures (not something I’m particularly thrilled about), golf, hiking, relaxing, re-charging our batteries for another year of work ahead.

As usual, the blog should go on…  who knows, maybe having some time off I’ll be able to finally share with you a certain trip to Hawaii that happened 5 months ago!  Slowly but surely, I’ll get to it…

Hoping to re-visit some of the fun from last year….

vailsomposite

Lunch at Vail, Colorado – August 2014


(comments are shutdown for this post)


KA’KAT, A MIDDLE EASTERN SNACK BREAD

These are serious contenders for the prize of World’s Cutest Bread… Plump, golden brown, topped with sesame seeds, they are simply irresistible! I found the recipe in Karen’s site, and fell in love at first sight.  I almost made them for the Nobel reception we hosted, but that day was frantic enough without bread baking. In a way, I’m glad I did not push the envelope and tried squeezing in one more culinary project.  But a couple of weeks later, I rolled my sleeves up and went to work.  Not only these are adorable little entities, but they are a ton of fun to make. Surprisingly easy too. I hope I convinced you to bake a batch soon.  You’ll need one exotic ingredient, though. Mahlab. Totally worth searching for, or if you want to make it easy on yourself, click on this link. 

KaKat Snack Bread

KA’KAT BREAD
(from Karen’s Kitchen Stories)

2 T sugar
2 tsp active dry yeast
2 cups warm (105 to 115 degrees F) water
17 to 21 ounces of bread or unbleached all-purpose flour, divided
1 1/2 tsp salt
1/4 tsp ground mahlab
1 large egg, beaten
3 to 4 tsp sesame seeds
.
In the bowl of a stand mixer, whisk the sugar, yeast, and water. Add 12 ounces of the flour, and mix on low with the dough hook for about 3 minutes. Cover the bowl with plastic wrap and let it sit for about 10 minutes.
.
Add the salt and mahlab, mix on low. Gradually add flour until you have a dough that is cohesive (I used all of the flour). Mix on low for about 10 minutes. Let the dough rise in an oiled bowl until doubled, about 60 to 120 minutes.
.
Line two baking sheets with parchment. Divide the dough into 32 equal pieces. Roll each piece into a 6 inch rope. Form the ropes into rings and place them onto the baking sheets. Keep the rings covered with oiled plastic wrap. Cover and let rise for about 30 minutes.
.
Heat the oven to 400 degrees F and place the oven racks in the upper third of the oven. Brush the Ka’kat with the egg wash, and sprinkle with sesame seeds. Bake the Ka’kat for about 20 minutes, until golden. Rotate the pans halfway through.  Let cool on the pans for about 5 minutes before serving warm.
.
Leftovers can be reheated in a hot oven.
.
ENJOY!
to print the recipe, click here
.
composite

.
As you know, I have way too many cookbooks, and quite a few are related to bread baking. Still, I could probably get rid of all of them and be happy baking along Karen’s yeast-steps. Yeap, I made up the word. How’s THAT for taking liberties with a second language? Daring is my middle name! Seriously, though. Karen bakes the most amazing breads, and I find myself bookmarking almost every single one of her posts “to make very soon.” Ka’kat was such a nice baking adventure! The dough is smooth, pliable, the smell of the mahlab giving that subliminal message… this is going to be one tasty bread…

Shaping the rings is very easy, although when the dough rises the central hole may or may not be closed… As Karen, I decided not to even worry about it…

Shaped-2
A nice coating with egg wash followed by sesame seeds sprinkled on top…

ShapedSprinkled

And there you have it, a batch of Ka’Kat ready to be enjoyed, shared with friends, or stored in the freezer for later…

KaKat Platter

I cannot recommend this recipe highly enough, it would be a great project to tackle with kids, they would have fun forming the little dough ropes and then the rings. If you don’t have mahlab, don’t let that stop you from making the bread, but I must say the seeds add a flavor that will leave everybody wondering “what’s in it?”


Karen, thank you once again for inspiring me!  I have so many breads I want to bake from your site, it’s not even funny… but I bet you knew that already…
.

ONE YEAR AGO: Spinach and Chickpea Curry

TWO YEARS AGO: Sautéed Zucchini with Sun-dried Tomatoes and Basil

THREE YEARS AGO: Orzo with Heirloom Tomato Relish

FOUR YEARS AGO:  Headed to Brazil!

FIVE YEARS AGO: The Rhubarb Brouhaha: Revelation Compote

SIX YEARS AGO: Love me tender…

QUINOA SALAD WITH RED GRAPES AND AVOCADO

This salad was based on a recipe by Katie Lee featured on the FoodTV show The Kitchen. It was originally made with green grapes, avocados, cucumbers, and a lime dressing. Obviously,  the idea was to have a sort of monochromatic green salad with bright and sharp flavors.  I changed things around by using red grapes instead. Red grapes are quite a bit sweeter, and added a contrast of color I found particularly pleasing. But, let me tell you, no matter what you decide to add to your quinoa salad, please try the cooking method I describe after the recipe.  It is nothing short of life-changing.  Yeah, you read me correctly. Life-changing. For better.

Quinoa SaladQUINOA SALAD WITH RED GRAPES AND AVOCADO 
(adapted from Food TV Network)

(as written, it makes a lot of salad, I more or less halved this recipe, eyeballing most ingredients. I kept the amount of dressing unchanged)

Zest and juice of 1 lime
3 tablespoons extra-virgin olive oil
Kosher salt and freshly cracked black pepper
4 cups cooked quinoa, cooled
2 cups green grapes, halved
1 1/2 cups diced cucumbers
fresh parsley, roughly chopped (or fresh cilantro)
1 avocado, diced

In a large bowl, whisk together lime zest, lime juice and olive oil. Taste and season with salt and pepper.

Toss the quinoa, grapes, cucumbers, parsley, and avocados together with the dressing. Serve chilled or at room temperature.

ENJOY!

to print the recipe, click here

Now, take a moment to look at the beauty of this  perfectly cooked quinoa.

cooked Quinoa
It is really too bad you cannot taste it through the screen, because the texture turned out sublime. The secret? Cooking the seeds in less water than most recipes recommend, and simmering them for only 6 minutes.  I cannot take credit for it, so here is the link to Elaine’s blog, where I found it.

++++++++++++++++++++++++++++++++++++++++++++++++++++++++

And here is what I did…

For each cup of quinoa, add 1 + 1/3 cup lightly salted water

Bring to a boil in a saucepan…

Reduce heat, simmer for exactly 6 minutes. That is 360 seconds. Do not open the pan. DO NOT. (I will slap your hand if you try to open it… )

Turn the heat off.  Wait 20 minutes with the pan covered. DO NOT PEEK. DO NOT.

Open the pan (finally!), be mesmerized, amazed, awed by the beauty of the perfectly cooked quinoa, fluff the seeds gently with a fork and use them in any preparation you like.

++++++++++++++++++++++++++++++++++++++++++++++++++++++++

For the salad, I simply allowed the cooked quinoa to cool to room temperature, and added all the ingredients plus the simple dressing. The salad keeps well in the fridge for several days and is a great option for a light lunch, if you so desire. Another tip I’d like to share with you: make sure the avocado has a firm texture and only add the pieces when you are about to serve the quinoa.  I did not care for the mushy texture of overly ripe avocados I used the first time I made this dish.  On my second time around, I also added sliced celery.  Turned out delicious, very refreshing. But, you know by now how much we love our celery…

Elaine, thanks so much for sharing your method for perfectly cooked quinoa!  
I won’t be cooking it any other way from now on…  
My life is changed. For better.

🙂

ONE YEAR AGO: Strawberry Coffee Cake

TWO YEARS AGO: Lemon-Poppy Seed Muffins

THREE YEARS AGO: Mascarpone Brownies

FOUR YEARS AGO: Salmon Tacos

FIVE YEARS AGOCinnamon Turban Bread

SIX YEARS AGO: Summertime Gratin

SECRET RECIPE CLUB: STRAWBERRY CHOC CHIP CAKE & A BONUS RECIPE

Strawberry Choc Chip Cake

The Secret Recipe Club strikes again, as it does every last Monday of the month. Each participating food blogger gets assigned a blog in secret, and must publish a post about a chosen recipe from the assignment at the exact same time as everyone else in the group.  This month I hit gold. Pure gold. My blog was Fried Ice and Donut Holes, hosted by Melissa. A special assignment not only because it is one amazing blog, but because a little bird told me that this month marks her last participation with our club. That is sad, of course, but sometimes we need to make choices and set new priorities.  When I read Melissa’s About Me page, I kept smiling all the way through it. For one thing, this whole paragraph could be equally applied to me!

Though I absolutely love my job, cooking and baking are my passions.  During the summer of 2009, I started reading some food blogs and finally, my husband suggested that I start my own.  As a result, I began Fried Ice and Donut Holes in July of 2009 as a hobby and online recipe box, so to speak, for us to keep track of the many great recipes that we try. 

Ok, maybe the baking in my case should be re-phrased to “bread baking”. Although I started reading food blogs long before starting my own, it is true that Phil was a big supporter of me making the move from “reader” to “writer.”  I am sure you are also curious to find out the origin of her blog’s name, so I quote yet another paragraph from her page:

When I was younger, I remember my grandpa always telling us to behave or we’d be having fried ice and donut holes (aka nothing) for dinner.  For some reason, that phrase stuck and now it lives on forever!

Isn’t that super cute?  Melissa started her blog almost at the same time I started mine (6 long years ago), and in another coincidence, she joined The Secret Recipe Club at the same time I did, as well as other old timers such as Dorothy, from Shockingly Delicious.  It is sad to see her go…  She received my blog as her monthly assignment not too long ago and composed a great post about my French Style Rolls, if you’d like to see it, click here.

As you can imagine, someone who’s been blogging for so long will have a ton of great recipes, and it was not easy to pick one to feature today.  Just to tease you with some of those in my final list of possibilities: Tomato Ricotta and Prosciutto Tart, Sriracha Turkey Meatballs (my love for the spicy sauce is hard to ignore…), Eggplant Cannelloni, Bacon & Spinach Souffle, Roasted Cauliflower Risotto (oh, my…), Pretzel RollsBaked Coconut Shrimp, Chocolate Chip Cookie Dough Truffles (yessssss!)…  But in the end I went with her adorable Strawberry Chocolate Chip Cake, which was fun to make and a pleasure to eat!

Strawberry Choc Chip Cake2

STRAWBERRY CHOCOLATE CHIP YOGURT CAKE
(from Fried Ice and Donut Holes)

1 1/2 cups flour
1 1/2 teaspoons baking powder
1/8 teaspoon salt
3 tablespoons butter, softened
3 tablespoons Greek yogurt
1 cup sugar
1 egg
1/2 cup milk
1 teaspoon vanilla extract
1/3 cup chocolate chips, plus more for sprinkling
1 pound strawberries, hulled and quartered

Line the bottom of a 9-inch round springform pan with parchment paper and grease the sides of the pan with butter or cooking spray.

In a large bowl, mix together the flour, baking powder, and salt. In the bowl of a stand mixer, combine the butter, yogurt, and sugar and mix on medium-high speed until light and fluffy, no more than 2 minutes. Reduce the speed to medium and mix in the egg, beating until light and fluffy. Then add the milk and vanilla. Reduce the speed to low and gradually add the flour mixture, mixing just until incorporated. Fold in the chocolate chips.

Pour the batter into the prepared pan. Arrange the strawberries on top of the cake, cut sides down and close together. Sprinkle additional chocolate chips between the berries. Bake at 350 degrees for about 1 hour, or until the top of the cake is golden brown and a toothpick inserted into the center comes out clean. Remove the cake from the oven and cool for about 40 minutes before releasing it from the pan. Dust the top with powdered sugar, if you want.

ENJOY!

to print the recipe, click here

composite

Comments: My only modification of the recipe was to use mini-choc chips because that’s what I had in the pantry and I thought they would work well too.  The cake is absolutely delicious, made our graduate students happy during one of our early meetings, and the small amount leftover was shared with colleagues from the department. Huge baking success!

Since this is the last participation of Melissa in our club, I decided to make an additional recipe from her site as a special farewell. A recipe that I’ve always found pretty intriguing, but stayed as a culinary project for years.  Not anymore. I made a small batch of shakshuka for our Saturday lunch. Have you heard of it?  A flavorful tomato and pepper based sauce that is used as a base to gently cook eggs.  So, so good!

Shashuska1


SHAKSHUKA
(adapted from Fried Ice and Donut Holes)

3/4 teaspoon ground cumin
1/4 cup olive oil
1 shallot, sliced
2 red bell peppers, cut into 3/4 inch strips 
1 tablespoon dark brown sugar
2 bay leaves
6 thyme sprigs, leaves removed and chopped
2 tablespoons cilantro, chopped
1 can (15 ounces) of whole peeled tomatoes with their juices
1/2 teaspoon saffron threads
1/4 teaspoon Aleppo pepper
salt and pepper, to taste
up to 1 cup water
4 eggs (I used only three for the two of us)

In a very large sauté pan, heat the oil over medium-high heat until shimmering. Add the shallot and cumin and sauté for 5 minutes. Add the peppers, brown sugar, and herbs and continue to cook for 10-15 minutes to develop color. Add the tomatoes, saffron, cayenne, salt, and pepper. Reduce teat to low and cook for 15 minutes, adding water 1/4 cup at a time, so that the mix has the consistency of thick pasta sauce. Taste and adjust seasoning so that the mix is potent and flavorful.

Remove the bay leaves. Make wells for the eggs and carefully break eggs into the wells. Sprinkle with salt and pepper and cook on very low heat for about 8 minutes. Cover the pan and cook until the eggs are set, about 1 minute more. Serve right away…

ENJOY!

to print the recipe, click here

sauce1

I am so glad I made this bonus recipe from her site!  I’ve always been intrigued by Shakshuka, had quite a few versions of this recipe saved “to make soon”, but finally this assignment with The Secret Recipe Club gave me the chance to go for it.  It is a perfect dish for a brunch, or light lunch.  It’s important to not over-cook the egg yolks, you want to have the yolk liquid so that it mixes with the very flavorful tomato sauce, with intense saffron flavor. A crusty bread to soak the sauce is a must!

++++++++++++++++++++++++++++++++++++++++++++++++++++++++++++++++++

Melissa, I hope your last assignment with the club gave you as much pleasure as I had cooking from your site!  I wish you good luck on all your future projects!

To my readers, please stop by Melissa’s site to say hello, and if you want to see what my fellow club members shared this month, click on the blue amphibian smiling at you at the bottom of this post.

ONE YEAR AGO: Mini-Chocolate Cheesecake Bites

TWO YEARS AGO: Whole-Wheat Spaghetti with Grated Tomato Sauce

THREE YEARS AGO: A Taste of Yellow to Honor Barbara

FOUR YEARS AGO: Gratin of Beefsteak Tomatoes

FIVE YEARS AGO: Tour de France Final Stage: PARIS

SIX YEARS AGO: Snickerdoodles with a Twist