FESTIVE NIGHT AT CENTRAL

The year is almost coming to an end. And you know what’s really scary about it? In less than 3 months I’ll be adding one more year to my life,  but still have not shared with you the wonderful celebration we had for  my Birthday back in March. In one word: unacceptable. So without further ado let me invite you for a flash-back from that great evening.

Central DIning Room

Dining room at Central Restaurant

I don’t normally blog about dining out. First, I think there are countless sites and food blogs devoted to that already. Second, I am not too fond of taking photos of meals in restaurants. But, I make an exception for places that involve unique dining experiences (like Lasserre and Taillevent), or places we love so much we tend to go back at every opportunity. Exactly the case for Central in Washington, DC.  I’ll start by sharing with you the review Phil left on Open Table the following day:

We’ve now had the pleasure of Central restaurant 3 or 4 times. It is a Parisian bistrot on drugs! French food with a decidedly American (Hollywood) accent. After a LONG day in DC on business, just the thought of Central began to raise my mood. It was also my wife’s birthday. The restaurant is so festive and exciting, literally buzzing with excitement, from the servers to the chefs and the diners. The food is unique and delicious in classic French fashion: simple, yet exquisitely and richly prepared. Our appetizer was gougeres and prosciutto, a perfect combination and generous portions of both. Our plates were coq au vin and miso salmon with glazed turnips. At Central you find yourself saying things like ”….this is the best (your dish here) I’ve ever had”, and tonight was no exception.  At the end of the meal one had to say, WOW! Then, because of the birthday they brought the “Celebration Cake,” complete with a Roman candle. It’s kind of a chocolate encrusted clafoutis, topped with fresh strawberries, blueberries and whipped cream. After eating our meals it looked HUGE, but after a few bites we couldn’t stop ourselves, and we ate it all. My wife commented that it was one of her favorite meals in the past decade.”

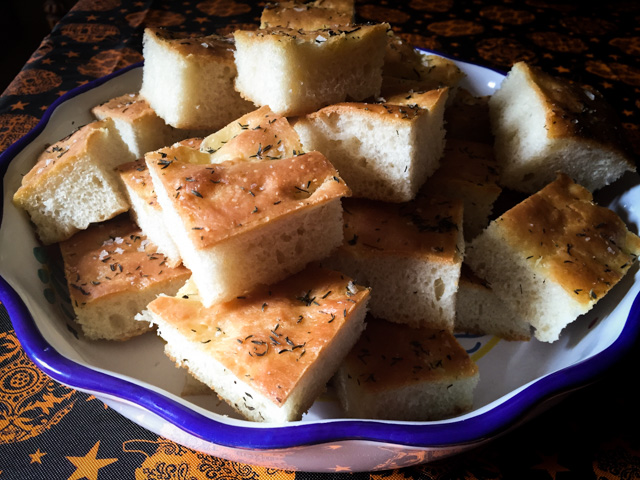
 As Phil  mentioned, we had a kind of a tough day. Let’s say a scientific meeting was involved. And it wasn’t much fun. At all. So of course we were looking forward to exorcising the demons of the day and celebrating the occasion. One of the things I really look forward at Central is the bread basket they bring to you the moment you sit at the table. It is one of the best breads we’ve ever had. Rivals the best Parisian crusty baguettes you can sink your teeth into. Seriously. And, if you finish the basket, they will bring you more, so pace yourself and try to follow the mindful eating path. Yeah, right. Bread can be exquisitely addictive.

BreadCentral
The restaurant has an open kitchen next to the dining room, so you can see all the action like the powerful salamander this guy is using… Crème brûlée, anyone? Onion soup gratinné, perhaps?

Central Kitchen

Michel Richard does a fantastic job, we’ve never had a bad meal in his place.  And I must say his manager Adriane was such a gracious hostess, absolutely perfect! Chatted with us without being too intrusive, making sure we were well taken care of.  Central feels special, slightly upscale, or as Phil likes to put it, “casual but chic.” If you find yourself in Washington DC, make a reservation, and have a blast!

CentralGougeres

Cheese Puffs… Don’t skip these!

Below you see a photo of our meals. The Coq au Vin was luscious, served over pappardelle. And my salmon was exactly what I was hoping it to be: perfectly cooked, just rare in the center, and paired with a reasonably light side dish, that did not steal the show.  Both entrées were spectacular.

centralcomp

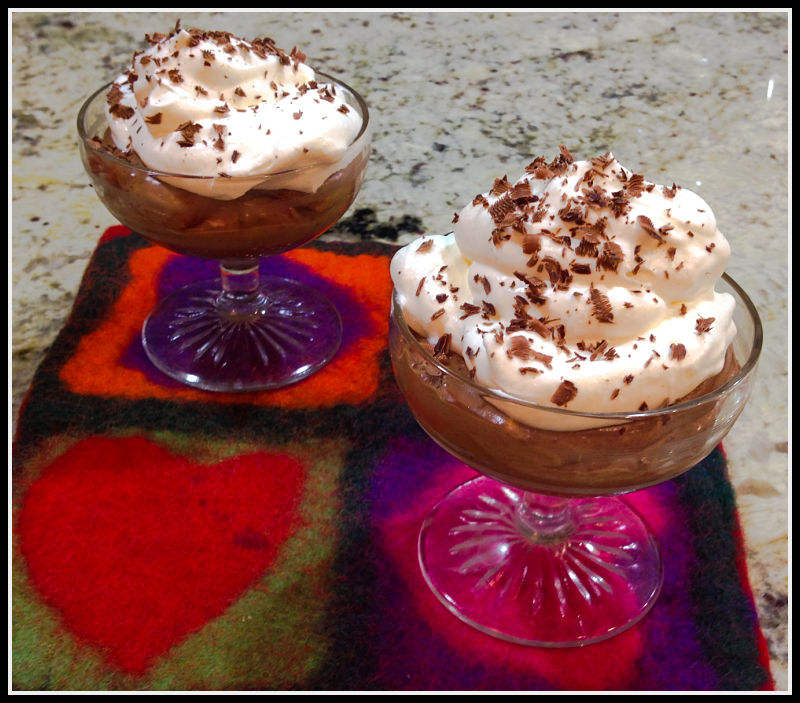
One of the dishes that never leaves their menu is the famous Lobster Burger. I ordered it once for my dinner just out of curiosity, and it was quite decadent. But if you want decadent, nothing beats their “Celebration Cake“, which is pretty much three desserts in one: mousse, cake, a tumble of fruit encased in a crunchy shell of chocolate and topped with a sparkling candle. I still find it hard to believe we polished it off, but that’s exactly what happened.

Celebration Cake1

If that doesn’t say Happy Birthday, nothing will!

Celebration Cake2

I don’t always eat dessert, but when I do I make sure it’s spectacular…


PicMonkey Collage


ONE YEAR AGO:
The Perfect Boiled Egg

TWO YEARS AGO: Light Rye Sourdough with Cumin and Orange

THREE YEARS AGO: Homemade Calziones

FOUR YEARS AGO: Plum-Glazed Duck Breasts

FIVE YEARS AGO: Holiday Double-Decker

SIX YEARS AGO: New York Deli Rye

FAST AND FURIOUS BISON CHILI

Thanks to the wonders of pressure cooking, this chili can be on your table in 20 minutes, and I promise you it will taste as complex as one that simmered on the stove for hours. I used ground bison because we love it and it’s always available in our grocery store, but of course you can use ground beef or a mixture of  beef and pork.  I don’t think turkey will work well without some major adjustments because the meat needs to have some fat to stand the high pressure cooking without drying up.  If you want to make this in a regular pan, simply increase the cooking time, use the method you normally do for chili.  I adapted this recipe from several sources, using tips from cookbooks such as Hip Pressure Cooking and Pressure Cooker Perfection. For those interested, this recipe is Paleo-friendly. Not exactly low-carb due to the amount of tomatoes, but I’d say not that heavy in the carb department either.

Bison Chili

BISON CHILI
(from the Bewitching Kitchen)

2 tablespoons grapeseed oil
1 shallot, diced
salt and pepper
1 to 2 tablespoons chili powder (to taste)
1 teaspoon cumin
1 pound ground bison
1/4 pound Italian sausage, mild
1 can crushed tomatoes (28 ounces)
1 cup water

Heat the oil in a large skillet, saute the shallots seasoned lightly with salt. When they pieces are translucent and fragrant, add the chili powder and cumin, mixing constantly for a minute or so. You can do this initial step in the pressure cooker itself, but I prefer to use a pan with a larger surface.

Add the ground bison and sausage, increasing the heat to high. Cook them until they are no longer pink, but do not let them get brown. Stir the tomatoes and water, transfer everything to the pressure cooker.

Close the pan, bring the pressure up and cook under pressure for 12 minutes. Release the pressure quickly by running the pan under cold water in the sink or using another method available for your pan.  Open the pan, if the chili is too liquid simmer for a few minutes until it reaches the consistency you like. If too thick, add a little more water.   Taste for seasoning and adjust if necessary.

ENJOY!

to print the recipe, click here

Bison Chili served

Comments:  We both loved this recipe, but I decided I loved it more than Phil,  so leftovers were all mine, and enjoyed several days in a row for lunch. I don’t know about you, but we like to have variety at dinner time. We never repeat the same meal two days in a row. But I can have the exact same lunch for five consecutive days and see absolutely nothing wrong or boring with it.  Go figure…

Chili in general is quite  substantial, and this one is no different. I normally serve it with slices of avocado, a little grated cheese and call it a day. But of course, a piece or two of cornbread could go well too.  As usual with chili, you can make it furiously fiery by adding more chili, cayenne, maybe shake some Sriracha on top.  Particularly with meat as flavorful as bison, we prefer to use a lighter hand with the seasoning, and added only one tablespoon of chili powder. It does get better with each passing day, I can vouch for that!

ONE YEAR AGO: In My Kitchen, December 2014

TWO YEARS AGO: Braised Fennel with Saffron and Tomato

THREE YEARS AGO: Revenge of the Two Derelicts

FOUR YEARS AGO: Grilling Ribbons

FIVE YEARS AGO: Peppery Cashew Crunch

SIX YEARS AGO: Baked Shrimp and Feta Pasta


CHOCOLATE ON CHOCOLATE

Did I get your attention?

😉

As those who follow  my blog for a while know quite well, I always have a good number of posts lined up for publication and countless folders in the computer waiting to evolve from a set of photos into complete blog posts.  I don’t stress too much over the accumulation of recipes and ideas for the blog, but when I noticed two recipes by the same chef collecting dust, I had to act. So here you have them: two takes on chocolate deliciousness by a chef I truly admire, Geoffrey Zakarian. A smooth and mild mousse that was part of our Valentine’s dinner back in February (do I get a prize for blogging about it before its first anniversary?). And next, a recipe that brings a more “in-your-face” hit of the dark, luscious cocoa entity in the form of sorbet. I know sorbet days are over for us in the Northern hemisphere (a harsh reality that I take with a stiff upper lip), but my lucky friends headed for the summer will certainly enjoy it…

Chocolate Mousse_opt

DARK CHOCOLATE MOUSSE
(from Geoffrey Zakarian)

1/2 cup chopped chocolate (72 percent)
1 cup heavy cream
4 large egg yolks
1/3 cup sugar
Whipped cream, for serving
Chocolate shavings, for garnish

Melt the chocolate in a bowl over a water bath, making sure the water is not boiling. Set aside. In a separate bowl, whip the heavy cream to soft peaks.

Place the egg yolks in a small bowl and set over a water bath to slightly heat while beating them with a whisk. Add the sugar to the yolks and then transfer the mixture to a stand mixer set up with the whisk attachment. Beat until the sugar is completely dissolved and the yolks double in size, about 5 minutes. Carefully fold the chocolate into the yolks. Lastly, fold in the whipped cream. Divide the mixture among 4 serving bowls or glasses and refrigerate for about 3 hours.

Just before serving, top with some whipped cream and garnish with chocolate shavings.

ENJOY!

to print the recipe, click here

Comments: When I made this recipe I showed the photo to some friends and they were a bit surprised that a dark chocolate mousse would turn out so light in color. It was indeed not only light in color, but also pretty mild in taste. I guess the whipped cream tames the bitter nature of the chocolate. At any rate, we both loved this version, and would make it again for another V-Day celebration or a dinner party with friends.   On the opposite side of the chocolate spectrum, we have…

Chocolate Sorbet_opt-2

CHOCOLATE SORBET: RECIPE OVERVIEW

The detailed recipe can be found at Zakarian’s book “My Perfect Pantry“, which I own and love…

The sorbet is probably one of the simplest recipes ever, just water, sugar, cocoa powder, a bit of espresso powder, barely cooked together and processed into sorbet.

It has a sharp flavor, and surprisingly smooth texture for something that doesn’t contain any cream or custard.

If you’d like the full recipe, follow this link to get the book, although a google search will take you to the pot of gold at the end of the rainbow…

Screen Shot 2015-12-01 at 8.08.11 AM

ONE YEAR AGO: Double Chocolate and Mint Cookies

TWO YEARS AGO: The Story of my first Creme Brulle’

THREE YEARS AGO: Sourdough Mini-rolls

FOUR YEARS AGO: Focaccia with Sun-dried Tomatoes and Gorgonzola

FIVE YEARS AGO: Mediterranean Skewers

SIX YEARS AGO Fettuccine with Shrimp, Swiss Chard, and Tomatoes


ANNE BURRELL’S FOCACCIA

You know you’ve been blogging for too long when you’ve got several focaccia recipes in your site…  Granted, I had no intention of trying a new recipe. Instead, for our Halloween party I was set on using one of my tried and true blogged about not too long ago. However, in typical Sally fashion, I never bothered to check the recipe the day before.  I knew I would be up very early and c’mon, how long can a focaccia dough take?  It turns out that very long. For the recipe I had in mind, the dough goes through a fermentation overnight in the fridge. Bummer.  A quick plan B was set into motion, and a frantic calm and collected google search took me to one of Anne Burrell’s recipes from years ago. Not surprising when Anne is concerned, her focaccia calls for a substantial amount of olive oil, more than any other I’ve ever made.  I actually cut the amount a little and it was still delicious and with a crust that left our guests going back for seconds. And thirds. A very simple recipe to put together even if you decide to bake focaccia on a whim.

Anne Burrell Focaccia

ANNE BURRELL’S FOCACCIA
(slightly modified from Food TV Network)

1 3/4 cups warm water
1 package active dry yeast
1 tablespoon sugar
5 cups all-purpose flour, plus additional for kneading
1 tablespoon kosher salt, plus coarse sea salt, for sprinkling
2 tsp Herbes de Provence
3/4  cup extra-virgin olive oil, divided (1/2 cup + 1/4 cup)
a little more olive oil for a final drizzle on top

Combine the warm water, yeast and sugar in a small bowl. Put the bowl in a warm, not hot or cool, place until the yeast is bubbling and aromatic, at least 15 minutes.

In the bowl of a mixer fitted with a dough hook, combine the flour, 1 tablespoon of kosher salt, 1/2 cup olive oil and the yeast mixture on low-speed. Once the dough has come together, continue to knead for 5 to 6 minutes on a medium speed until it becomes smooth and soft. Give it a sprinkle of flour if the dough is really sticky and tacky.

Transfer the dough to a clean, lightly floured surface, then knead it by hand 1 or 2 times. Again, give it another sprinkle of flour if the dough is really sticky and tacky.

Coat the inside of the mixer bowl lightly with olive oil and return the dough to the bowl. Cover it with plastic wrap and put it in a warm place until the dough has doubled in size, at least 1 hour.

Coat a jelly roll pan with the remaining 1/4  cup olive oil. Put the dough onto the jelly roll pan and begin pressing it out to fit the size of the pan. Turn the dough over to coat the other side with the olive oil. Continue to stretch the dough to fit the pan. As you are doing so, spread your fingers out and make finger holes all the way through the dough.

Put the dough in the warm place until it has doubled in size, about 1 hour. While the dough is rising a second time, preheat the oven to 425 degrees F.

Liberally sprinkle the top of the focaccia with some coarse sea salt and Herbes de Provence, then lightly drizzle a little oil on top. Bake the dough until the top of the loaf is golden brown, about 25 to 30 minutes. Remove the focaccia from the oven and let it cool before cutting and serving.

ENJOY!

to print the recipe, click here

composite1

Comments: Anne Burrell’s original version calls for a full cup of olive oil, half of it for the dough and half poured on the baking sheet. I simply could not bring myself to use so much oil, so I wrote the recipe with 3/4 cup total, but it could have been just a little less than that.  It was still decadent. You know how a good croissant leaves your fingers a bit coated with butter?  This focaccia will do the same. As Anne likes to say… accept it and move on.  Also, my personal advice for the move on part: increase your running distance a little bit next day, or add a few more push-ups and bicep curls to your routine…

DISCLAIMER

This recipe is not:

Paleo-friendly

Low-carb 

Low-fat

Gluten-free

Atkins-approved

Dukan-compliant

South-Beach friendly

Ketogenic


However, it is MIGHTY TASTY! 

😉

Anne Burrell Focaccia2

ONE YEAR AGO: Double Chocolate and Mint Cookies

TWO YEARS AGO: Cappuccino Panna Cotta

THREE YEARS AGO: Chicken Parmigiana, the Thriller

FOUR YEARS AGO: Wild Mushroom Risotto

FIVE YEARS AGO: Tartine Bread:  Basic Country Loaf 

SIX YEARS AGO:  Pugliese Bread

TWO TAKES ON RASPBERRIES

HAPPY THANKSGIVING TO ALL MY AMERICAN READERS!

Berries in general (except for strawberries) were not part of childhood. They were either impossible to find in Brazil or terribly, terribly expensive.  It took me a while to warm up to them once I moved to the US. At first I did not care for fresh blueberries, and found raspberries impossibly tart. Maybe aging changed my taste buds, or maybe it’s the result of my gastronomic stubbornness: if I don’t care for something the first time I try, I go back at it a few months later, with an open mind.  Whatever the case, I now adore all berries, including the uniquely tart raspberries, or as they are called in Portuguese framboesas. Cute name, almost as cute as the French framboises. Obviously, it’s almost impossible to beat the charm of the French language. N’est-ce pas?

Today I share with you two recipes showcasing these cute berries, both from food blogs I follow and love. The first recipe comes from Gayle’s site, and in a nice coincidence exactly one year ago I reviewed her book The Global Pastry Table. Her recipe calls for raspberry jam (I used store-bought, but you can go the virtuous route and make your own). The second recipe, from  Lynda’s blog, calls for a mixture of preserves and fresh fruit. In another nice coincidence, I also reviewed her book in a not too distant past. Both recipes turned out delicious, and will be perfect for the holiday season coming up…

Pecan Raspberry Thumbprint Cookies-3

PECAN-RASPBERRY THUMBPRINT COOKIES
(from Pastry Studio)

(Makes about 60 cookies)

14 1/4 oz (3 cups + 2 tablespoons) flour
6 oz (1 1/2 cups) pecans, toasted
3 oz (1 cup) powdered sugar
1/2 teaspoon salt
12 oz (3 sticks) cold unsalted butter
2 teaspoons vanilla
1/2 cup – 3/4 cup raspberry jam

Heat oven to 350 degrees F.   Line baking sheets with parchment or silpats.

Place the flour, pecans, powdered sugar and salt in the bowl of a food processor.  Process until the nuts are finely ground.  Cut the butter into 1/2” pieces and add along with the vanilla.  Process until the dough begins to form clumps around the blade.

Roll the dough into 1 1/4” balls and set them about 2 inches apart on the cookie sheets.  Press your thumb gently into the middle of each ball to make a well for the jam.  Stir the jam to loosen it and then spoon about 1/2 teaspoon into the wells.

Bake until the cookies are golden brown, about 17 – 20 minutes. Place the pans on a wire rack to cool.

ENJOY!

to print the recipe, click here

compositethumb

Comments: These cookies were a lot of fun to make, but of course I think there is room for improvement. By the way, I halved the recipe and got about 32 cookies. Next time I want to make them a little more uniform in size, and also smooth out the surface a little better. But, this time I went with a rustic look. When in doubt, apply “rustic” to the title of your productions and everyone will be impressed…  Let this be our little secret. And one more secret for you… do you know when I made these cookies? Six months ago!  I’m not kidding you when I say I’ve got way too many things waiting in line to go public.  Which also explains why I’m giving you two recipes in one single post, after all I don’t want you to wait six more months to enjoy these amazingly delicious raspberry squares that I made just a couple of weeks ago. See? I don’t always blog at a snail pace.

Raspberry squares

RASPBERRY ALMOND STREUSEL BARS
(slightly modified from Taste Food)

for the crust and topping:
½ cup whole wheat flour
½ cup all-purpose flour
½ cup almond flour
½ cup old-fashioned oats
½ cup dark brown sugar
¼ cup granulated sugar
1 teaspoon ground cinnamon
½ teaspoon salt
¾ cup chilled unsalted butter, cut into ½-inch cubes
1 teaspoon vanilla extract
½ teaspoon almond extract

for the filling:
3/4  cup raspberry preserves
1/4 cup apricot jam
6 ounces fresh raspberries
1/4 cup sliced or slivered almonds, coarsely chopped

Heat the oven to 375°F. Butter an 8 by 8-inch baking pan. Line the bottom with parchment leaving a 2-inch overhang on 2 opposite sides. Butter the parchment.

Combine the flours, almond meal, sugars, cinnamon, and salt in a food processor. Pulse to combine. Add the butter and extracts. Pulse until mixture is coarsely blended, 10 to 12 times. Transfer 1/2 cup  of the mixture to a bowl to reserve for the topping. Press the remaining mixture firmly and evenly into the pan. Bake until golden brown, about 15 minutes.

Place the preserves, jam, and raspberries in a bowl. Mix with a fork to combine, lightly mashing the whole raspberries but leaving large pieces intact. Spread the mixture over the crust. Add the almonds to the reserved topping, then sprinkle the topping over the filling.

Bake until the filling is bubbling and the topping is golden brown, about 25 minutes. Cool completely in the pan on a wire rack. Remove from pan and cut in small squares. Serve at room temperature or cover and refrigerate for up to 2 days.

ENJOY!

to print the recipe, click here

barscollage

Comments: It goes without saying that the combination of raspberries and almonds is a classic. In these bars, the cinnamon component will also be quite prominent. The three flavors together form a superb trinity! I think the almond extract could be omitted if you don’t have some hanging around in your pantry, but I must say it adds a lot to the crust and topping. Make sure you let the whole thing cool completely before slicing, or it will crumble on you. I actually placed the whole baking dish lightly covered with aluminum foil in the fridge and sliced it several hours later. I cut the squares a little smaller than Lynda did, ending up with 25 squares instead of 16. Since I take these treats to the department, I like to maximize the number of servings so that more people can profit from a little sweetness on a busy morning.

I hope you enjoyed this double feature with a raspberry theme. I find that desserts and cookies made with raspberries are never overly sweet, the tartness of the berries cuts through the sugar and brightens up everything. Plus, how can anyone resist that intense red color they offer? So gorgeous!

ONE YEAR AGO: Spice Cake with Blackberry Puree & The Global Pastry Review

TWO YEARS AGO: Own Your Kitchen with Cappuccino Panna Cotta

THREE YEARS AGO: Chicken Parmigiana, the Thriller

FOUR YEARS AGO: Wild Mushroom Risotto

FIVE YEARS AGO: Tartine Bread:  Basic Country Loaf 

SIX YEARS AGO:  Pugliese Bread