ON A HALLOWEEN ROLL

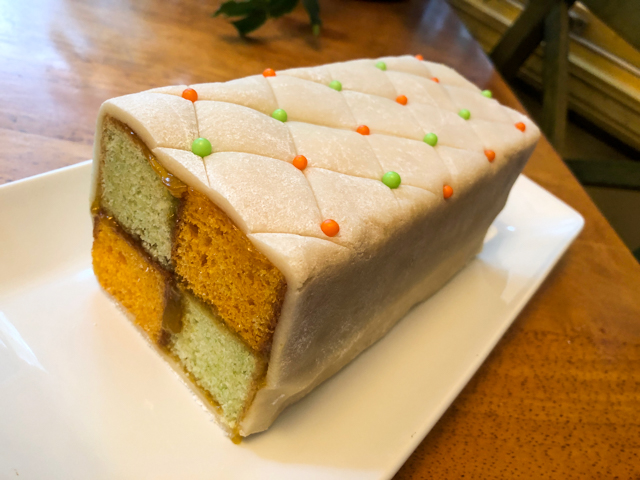
It’s the season of pumpkin and warm spices, of sweaters and scarves. This pumpkin cake roll would shine in any Halloween party, perhaps with a side of appropriately decorated macarons

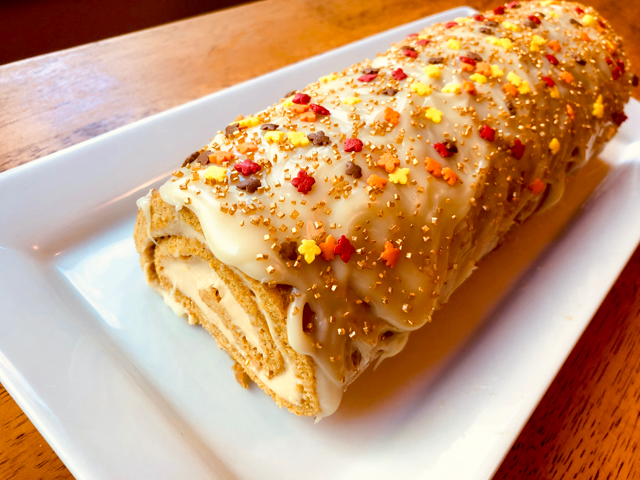
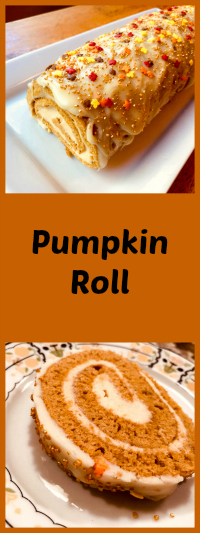
PUMPKIN ROLL WITH HONEY CREAM CHEESE FILLING

Full recipe is available at Bluprint.

My modifications:

I used 1.5 teaspoons of a Speculoos spice mix (awesome stuff!) in place of cinnamon, ginger, and nutmeg.

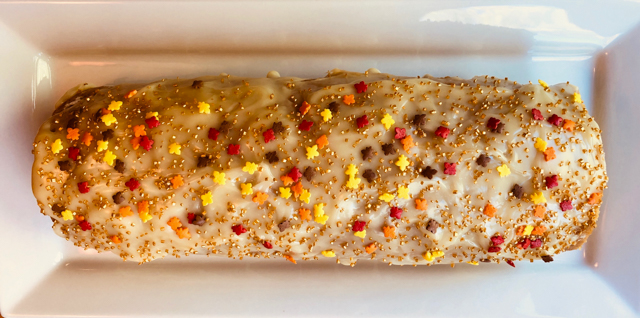
I omitted the nuts on the topping, and just added colorful sprinkles.

To print the recipe, visit Bluprint.


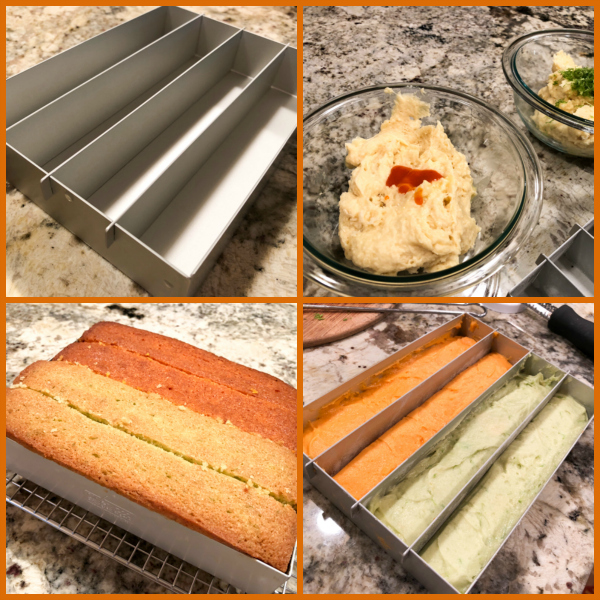
Comments: This recipe was brilliantly demonstrated by Abby Dodge in her Craftsy class called “Beyond Grandma’s Cake Roll: One Pan, Six New Cakes.”  I loved it, and want to make every single concoction she shared, including pretty cool “wrapped cakes.”  Clever idea with very adorable results.  I know I sound like a broken record, but I am always happy with Craftsy baking classes, every single one has superb, often unexpected gems of wisdom.  In this particular case, Abby’s method to roll, unroll, and fill the cake is outstanding, I feel totally confident I can pull it (or maybe I should say roll it) without fear from now on. Of course, I shall regret these very words in the near future (sigh). Baking has this amazing way to throw you some curve balls.

I used speculoos spice mix, something I impulse-bought a while ago and cannot live without, the smell is amazing, it’s just that perfect combination of spices found in my very favorite cookie in the known universe. Yes, I know I could make my own mix, but there’s something sexy about that bottle, ready and waiting for me.

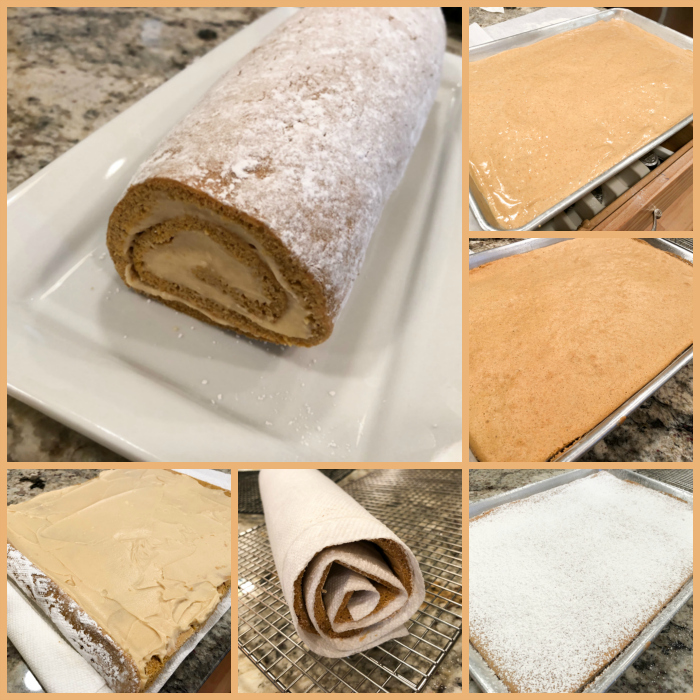
You can roll the cake in two different ways, from the long end you will end up with more slices and less roll. Perfect if you need to feed a crowd. But, if you are going for the most harmonious look when sliced, roll from the short end. Smaller cake, more roll.

The filling, a honey-cream cheese mixture, is absolutely delicious, goes perfectly well with the flavor of the cake. The icing is a white chocolate ganache, but you could serve the cake just with a light coating of powdered sugar, for a more austere look (and considerably less calories). It’s your kitchen, it’s your call… Roll the way you see fit (somebody stop me now).

Pumpkin Macarons

ONE YEAR AGO: Pumpkin Macarons

TWO YEARS AGO: Zucchini, Lemon & Walnut Cake

THREE YEARS AGO: Paleo Energy Bars

FOUR YEARS AGO: Pecan-Crusted Chicken with Honey Mustard Dressing

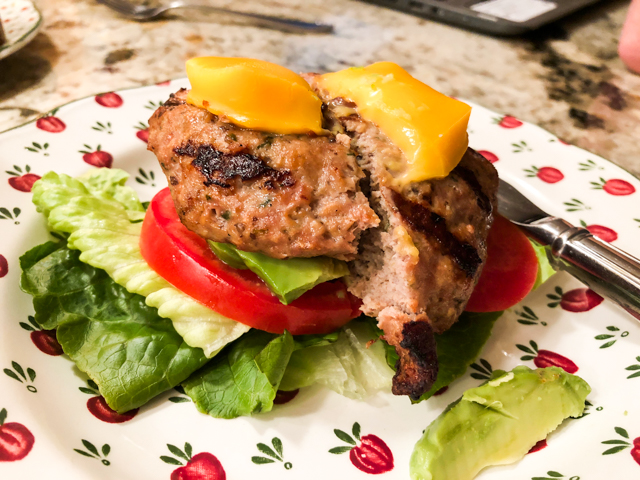
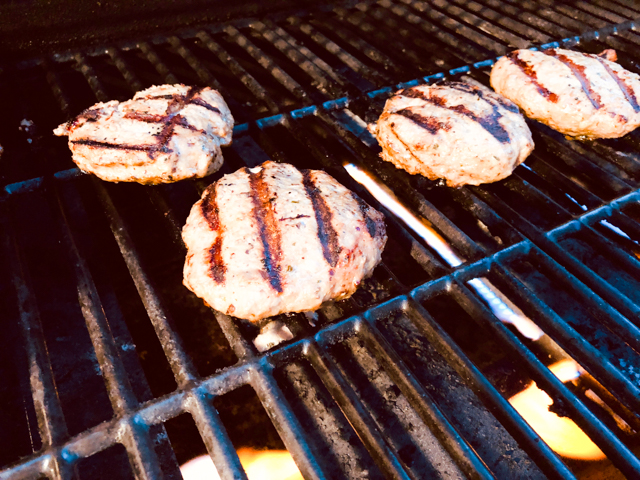
FIVE YEARS AGO: Mozzarella Stuffed Turkey Burgers

SIX YEARS AGO:  Cashew Chicken Lettuce Wraps

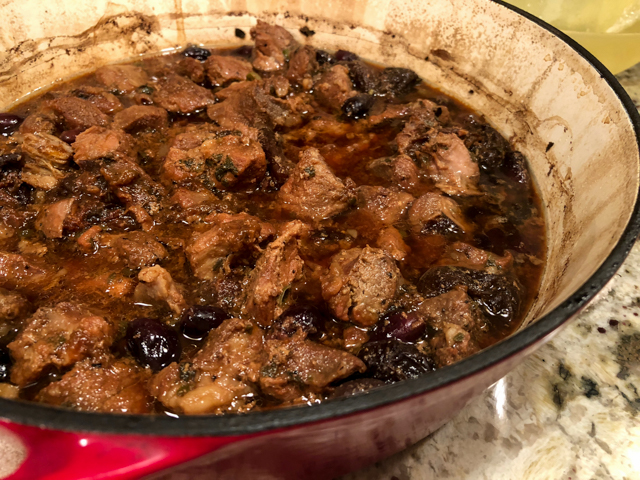
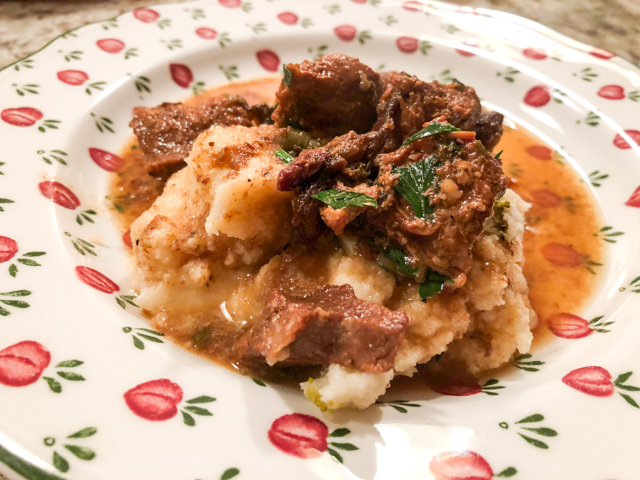
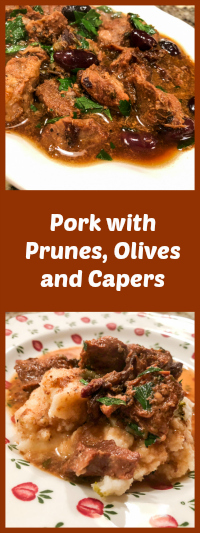
SEVEN YEARS AGO: Clay-pot Pork Roast

EIGHT YEARS AGO: Panmarino

NINE YEARS AGO: A Classic Roast Chicken


TURKEY BURGER, JAPANESE-STYLE

If you are a food blogger, you know how it goes. Even a great recipe is made once, perhaps twice, then left behind, living exclusively as a blog post that you read and say to yourself “I must make that again, it was so good!”  But then, some recipes somehow materialize as regular appearances. Usually they hit a magical trilogy: simple to prepare, great flavor, and all the people you cook for happen to love it too. From my reasonably recent blogging past, two dishes hit this jackpot and show up all the time: Eggplant Parmigiana (version from Jeff Mauro), and Turkey Portobello Burgers. The eggplant turned into a once-per-week deal, actually, and I have simplified the preparation even more. I should edit that post to reflect my changes. As to the turkey burgers I can probably make them with one hand tied behind my back. Today I share with you a new version that incorporates Japanese ingredients.  The ticket is a mixture of shiitake mushrooms and red miso. If you are new to miso, maybe you should start with the milder, white version, but if you are a seasoned miso-eater (apologies for lousy pun), go big and go red.


JAPANESE-STYLE TURKEY BURGER
(from The Bewitching Kitchen)

1 pound ground turkey
1 tablespoon red miso
5 ounces fresh shiitake mushroom caps
1 tablespoon olive oil
½ teaspoon sansho pepper (or pepper of your choice)
1/4 tsp salt
fresh cilantro leaves to taste

Place the mushrooms, miso, olive oil, sansho pepper, salt and cilantro leaves in a food processor and process until it all forms a paste.

To prepare the burgers, mix all ingredients together in a large bowl.  Knead the meat until it becomes sticky and binds together; divide the mixture into 4 equal parts, forming a burger patty with each fourth of the mixture. Place in the fridge to set for about 30 minutes (or longer, but then cover lightly with plastic wrap.

Grill to your liking, about 5 minutes per side.

ENJOY!

to print the recipe, click here

Comments: I have a thing for grill marks. In my mind, without them, grilled food won’t taste good. It is obvious I eat with my eyes first. For that reason, I am always adding a touch of honey or maple syrup to all my marinades, and often add some in a turkey burger mixture. In this recipe, miso does the job nicely, look at the beauty of those grill marks!

The other interesting bit of this recipe is that, contrary to ground beef, you don’t need to use a light hand forming the patties. The type of muscle fiber and fat content of turkey meat makes it behave in a totally different way. In fact, if you massage it well, and get the meat to be more fully compacted, the texture will be better. This tip was mentioned in America’s Test Kitchen during a show on turkey meatballs, and in a great book called The Japanese Grill (I told you I am in a Japanese-obsessive mood, didn’t I?). I proved it to myself with these burgers – massaged the living bejesus out of the meat. It ended up with perfect texture.

We rarely have bread with our burgers, and in fact, according to The Japanese Grill cookbook, a turkey burger must be served only with a little sauce, as if it’s a steak. Bread is considered a big no-no. Of course, if they see I added Velveeta on top of mine, they would prevent my entry into the country. I really want to go some day, so let that be our dirty secret…

ONE YEAR AGO: Pumpkin Macarons

TWO YEARS AGO: Slow-Cooked Whole Chicken

THREE YEARS AGO: Chocolate Zucchini Cake with Chocolate Frosting

FOUR YEARS AGO: Pecan-Crusted Chicken with Honey-Mustard Dressing

FIVE YEARS AGO: Bewitching Kitchen on Fire!

SIX YEARS AGO: Cashew Chicken Lettuce Wraps

SEVEN YEARS AGO: Chiarello’s Chicken Cacciatore

EIGHT YEARS AGO: Donna Hay’s Thai-Inspired Dinner

NINE YEARS AGO: Panettone


PORK WITH PRUNES, OLIVES AND CAPERS

Time for comfort food. This is great on the day it is prepared, but even better a couple of days later, so it is one of those perfect dishes for entertaining. I went the extra mile and cut the pieces of meat myself, from a large bone-in pork shoulder. I suspect if you buy pork stew meat it will work nicely too, and save you quite a bit of work. Zen work, but… sometimes even that seems a bit much. There is a ton of flavor, so you don’t need to brown the meat, just marinate it overnight and it will be perfect.

PORK WITH PRUNES, OLIVES AND CAPERS
(adapted from Nigella Lawson)

1.5kg pork shoulder – diced into pieces
375 ml dry white wine
200g pitted prunes
75g pitted black olives
2 Tbsp capers
2 tbsp Herbes de Provence
2½ tsp sea salt flakes
freshly ground black pepper
250ml water
lemon juice to taste
fresh parsley leaves to serve (optional)

In a large freezer bag add the diced pork, wine, prunes, olives, capers, Herbes de Provence, salt and pepper. Seal the bag and marinade overnight in the fridge.

Before cooking it, take out of the fridge a couple of hours before it goes in the oven to bring it to room temperature.

Heat the oven to 300 F.

Put the marinated pork into a large casserole dish, then add water.  Stir together, put the lid on cook in the oven for 2.5 to 3 hours. The pork will be soft and tender. Sprinkle with fresh parsley if so desired, and a nice squeeze of lemon juice.  

ENJOY!

to print the recipe, click here

Comments: Perfect meal to prepare during the weekend, although it could also be marinated early in the morning, stay full day in the fridge, and cook in the evening. Then it can go back to the fridge for a fantastic dinner next evening, absolutely effortless.  If you don’t care for capers or briny flavors, this might not be for you, it’s really the most prominent flavor. I happen to love it.

We enjoyed it with cauliflower puree, but obviously it would be a nice match for other side dishes, from mashed potatoes, sweet potatoes, or even a hearty pasta too.

ONE YEAR AGO: Kansas Corn Chowder

TWO YEARS AGO: Impossibly Cute Bacon and Egg Cups

THREE YEARS AGO: Pulling Under Pressure

FOUR YEARS AGO: Cooking Sous-vide: Two takes on Chicken Thighs

FIVE YEARS AGO: Miso Soup: A Japanese Classic

SIX YEARS AGO: On my desk

SEVEN YEARS AGO: A must-make veggie puree

EIGHT YEARS AGO: Vegetarian Lasagna

NINE YEARS AGO:  Brazilian Pão de Queijo

WORLD BREAD DAY 2018

I am a bit of a loner as far as blogging is concerned, rarely taking part of group events. But World Bread Day is special, and whenever I have a chance, I like to join the party started in 2006 by Zorra.  This year (my third time participating) I share a sourdough loaf made with my friend Elaine’s starter, Star. It flew all the way from England and now lives quite comfortably in its new home in our kitchen in Kansas. A well-traveled starter! A few details made this bake quite special for me. Read on…

SOURDOUGH BATARD
(from the Bewitching Kitchen)

50 g active starter (at 100% hydration)
375 g water, room temperature
400 g bread flour
100 g whole-wheat flour
10 g salt

Mix all ingredients for the bread in a large bowl, making a shaggy mass. Let it sit at room temperature for 30 minutes. Mix gently folding the dough a few times until smooth.

Allow it to ferment for 4 hours at room temperature, folding the dough 3 times during the four hours, no need to be precise about the spacing of folding cycles. Just make sure you fold it a few times.  At the end of four hours, shape it either as a round ball or a batard.

Transfer to a well floured banneton, seam-side up, and place in the fridge overnight, 8 to 12 hours, longer if needed.

Next morning, heat the oven to 450 F. Invert the shaped loaf, still cold from the fridge over parchment paper. Dust the surface with a little flour (I added just a touch of cocoa powder to make it darker, but it’s not necessary).  Score with a brand new razor blade.

Place in a cold Dutch oven, cover, and stick in the hot oven for 30 minutes with the lid on, and 15 more minutes with the lid off.  Allow it to cool completely before slicing.

ENJOY!

to print the recipe, click here

Comments: With this bake, I finally felt I managed to shape a batard reasonably well. Most of my attempts in the past were epic failures. I also had never tried a more artistic scoring on a batard-shaped loaf. The central slashing perhaps a tad too enthusiastic, so the dough exploded more than expected.

First special thing about this bake: no discard of starter whatsoever. I followed Elaine’s method, and I must say it’s pretty amazing how well it works. I had about 60 g of starter in the fridge, sleeping in there for a full week. The morning of the bake, I took it straight from the fridge and added 40 g water + 40 g flour to it. Let it come to life at room temperature, by mid-afternoon it was bubble party in the container. So I just removed 50g needed for the bake and placed the rest back in the fridge.  I’ve used this approach three weeks in a row, without refreshing the starter for two or three days and discarding most of it every time. The oven spring is impressive, and the bread does not taste more sour than usual. If you are concerned with waste this method is for you.  Give it a go. I haven’t tried to keep the starter longer than 1 week in the fridge before using it, but it’s definitely worth experimenting with it.

Second special thing about the bake: shaped dough was placed in a COLD baking container. I cannot tell you how much I love this! I am so tired of juggling the super hot pot and lid, often burning my arm in the process. No more. When the oven is hot, you place the cold pot with the shaped bread inside, no need to add a bit of water for steam, nothing. It simply works, even with bread straight from the fridge. Excellent oven spring, as I mentioned before, and excellent crust texture.  Elaine has been playing with cold pot, cold dough, in a cold oven that she turns on when she places the pot inside it. I doubt it would work for me, as my oven heats very slowly, but she’s been baking amazing loaves using this method. Stop by her site to learn more about her experiments.

I hope you have a chance to celebrate World’s Bread Day, either bay baking or enjoying a great loaf of bread. Zorra, thank your for organizing the event, I look forward to seeing the contributions coming from all over the world…

Grab a pin!

ONE YEAR AGO: Slow-Roasted Tomatoes

TWO YEARS AGO: Spicy Cotija and Black Olive Sourdough

THREE YEARS AGO: Apple Cinnamon Oatmeal Cake

FOUR YEARS AGO: Sourdough Rye Bread with Flaxseeds and Oats

FIVE YEARS AGO: PCR and a Dance in the Mind Field

SIX YEARS AGO: October 16: World Bread Day

SEVEN YEARS AGO: The US Listeria Outbreak 2011

EIGHT YEARS AGO: 36 Hour Sourdough Baguettes

NINE YEARS AGO: October 16 is World Bread Day

THE BRAZILIAN BATTENBERG

Triple culinary fusion, the cake is originally from UK, and was designed to honor the marriage of Princess Victoria to Prince Louis of Battenberg from Germany, back in 1884.  In my version, a little tropical flair was added to the party, even if 134 years late. Better late than never.

LIME AND MANGO BATTENBERG
(from the Bewitching Kitchen)

175 g butter
175 g sugar
3 eggs, lightly beaten
175 g all-purpose flour
2 + 3/4 tsp baking powder
pinch of salt
zest of two limes
2 tsp Amoretti mango emulsion flavor
350 g marzipan

Heat oven to 350 F. Grease and flour Battenberg pan, including the inserts.

Cream butter and sugar until light and creamy.  Gradually add the beaten eggs.  Sift the flour, baking powder and salt so that they are evenly mixed. Fold it in the butter-egg mixture.

Divide the cake batter into two equal parts.  Add the lime zest and a drop of green gel food dye to it. Mix gently. Add the mango flavor and a drop of orange food dye to the second portion of the batter.  Spoon the green mixture into two sections of the pan, spoon the orange batter on the two remaining sections.  Bake for 30 to 35 minutes.

Allow the cake to cool in the pan. When completely cold, remove from the pan and trim if needed. Brush the mango jam onto the long sides of the cakes and join one plain and one pink slice together and then one pink and one plain on top, creating a checkered pattern. Now brush the jam over all the sides. The jam is what glues the marzipan to the cake, so make sure you have a  thin coating all over the surfaces, and also in between the  four individual parts.

Roll out the marzipan on some sugar, making a rectangle approximately 8 x 12 inches. Place the cake on to the marzipan so that one edge is lined up to the edge of the marzipan (see my composite photo below). Trim away any surplus marzipan and both ends of the cake with a sharp knife. Decorate the top, if you so desire.

ENJOY!

to print the recipe, click here

Comments: I first saw this cake on the Great British Baking Show, and was mesmerized by it. Of course, they made the poor contestants improvise a pan using folded parchment paper, and then go into heavy hyperventilation as the two-colored batters baked in that iffy environment. I followed a safer route and got the right tool for the job. Shocking, I know…

If you browse the internet and cookbooks, you’ll see countless variations on Battenberg, many will have not four, but 9 blocks of two-color bakes. In that case the easiest way is to bake two large cakes and cut blocks from them, assembling them in alternating colors. The traditional version has a single flavor, almond, and half the batter gets food coloring, usually pink.

I used the recipe that came with the pan as a starting point, as I reasoned it would generate the perfect amount of batter. The recipe called for British self-raising flour which is different from that sold in the US.  I made the British version from scratch (it is essentially 2 tsp baking powder per cup of all-purpose flour).  To take the cake into a more tropical atmosphere, I chose lime and mango in the form of lime zest (inspired by this cake from Philip), and Amoretti mango flavoring. Great product, by the way. I highly recommend it .

The cake was a perfect project for a rainy Sunday…

This was my second time working with marzipan (first time was for the Fraisier Cake), but in the Battenberg the marzipan plays a much more prominent role. You need to make sure it is rolled with uniform thickness (not too thin so it won’t crack as you fold it), and that you have enough marzipan to cover the whole cake. So, measure twice and roll away. Any imperfections on the edge of the cake and marzipan layer will disappear once you trim it. As the baker, you are allowed to nibble on the trimmings, but it is absolutely mandatory to share with any four-legged creatures in your home. Which explains that I barely had any, magnanimous soul that I am. Buck and Oscar were in absolute heaven, BogeyQT™ inhaled it all so fast, I doubt his taste buds had a chance to fire. Not much I can do about it. Such is the life of a 75-pound dalmatian.

If Battenberg Cake appeals to you, I urge you to visit Philip’s blog,
he has many versions, one better than the other.
Check them out with a click here.

The cake turned out wonderful, both flavors complemented each other well… and what’s even better, it was highly appreciated by our colleagues next day!

Now I want to pick new pairings of flavor… chocolate and orange, coconut and lime, white chocolate and strawberries… the possibilities are endless!

ONE YEAR AGO: Salzburg Sourdough

TWO YEARS AGO: If I had One Hour

THREE YEARS AGO: Apple Cinnamon Oatmeal Cake

FOUR YEARS AGO: Sourdough Rye Bread with Flaxseeds and Oats

FIVE YEARS AGO: Apricot-Raspberry Sorbet: A farewell to Summer

SIX YEARS AGO: Marcela’s Salpicon

SEVEN YEARS AGO: Pork Kebabs

EIGHT YEARS AGO: Fondant au Chocolat

NINE YEARS AGOGot Spinach? Have a salad!