STIR-FRIED CHICKEN IN SESAME-ORANGE SAUCE

This type of preparation profits from the additional step of velveting the meat. In this version, instead of velveting, I opted to cook the chicken sous-vide, then slice it and incorporate in the sauce. It worked very well, in fact I’ve done that with beef also, but never blogged about it, not sure why.  Those pictures are still sitting in a folder from 2016, if you can believe it…  But back to what matters. This turned out so delicious, the husband made me promise it will be a regular in our rotation. Number one fear of a food blogger’s partner: once a recipe is tried, it will be gone forever!  No such risk with this one.  If you don’t have a sous-vide gadget, simply slice the chicken very thinly, use the velveting method I showed before (click here), and proceed with the recipe as described.

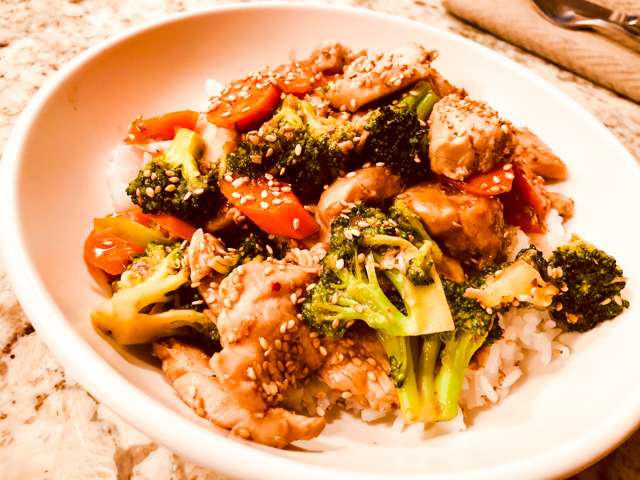
STIR-FRIED CHICKEN WITH VEGGIES IN SESAME-ORANGE SAUCE
(adapted from several sources)

for the sous-vide:
1 pound boneless, skinless chicken breasts
2 tsp olive oil
grated ginger and salt to taste
for the sauce:

¼ cup ponzu sauce
1 tablespoons toasted sesame oil
1 teaspoon fish sauce
1 ½ teaspoons tapioca flour
grated zest of 1/2 orange plus 1/3 cup juice
for the stir-fry:
1 tablespoon olive oil (or other oil of your choice)
Chicken cooked sous-vide, sliced thin
1 pound broccoli florets, cut into 1-inch pieces
4 carrots, peeled and sliced ¼ inch thick
salt and red pepper flakes to taste
lemon juice to taste
toasted sesame seeds (optional)

Place the chicken breast rubbed with the olive oil and seasoned with ginger and salt inside a food-safe plastic bag. No need to seal with vacuum, but you can if you prefer. Place chicken in sous-vide at 150F and cook for 3 to 4 hours. Time is flexible, you can leave it longer if needed, but don’t let it go past 6 hours at that temperature.

Whisk all ingredients for the sauce in a small bowl, and reserve.

Heat the olive oil in a wok or large non-stick skillet (12 inch) over very high heat until almost smoking. Add the broccoli and carrots, season with salt and red pepper flakes, stir-fry for a couple of minutes. When the veggies start to get some browned spots, pour 1/3 cup water in the pan and cover with a lid. Cook for 2 to 3 minutes more, open the lid and check that the veggies are tender. If there is any liquid in the pan, let it evaporate.

Add the chicken slices previously cooked, move the pieces around to warm them through. Add the reserved sauce, and simmer everything together until the sauce is slightly thickened.  Squirt some lemon juice right before serving, and sprinkle with sesame seeds, if so desired.

ENJOY!

to print the recipe, click here

Comments: Funny little tangent. Probably because of all the baking I’ve been doing, I am now really adamant about mis-en-place. As I was preparing this meal, I had all my ingredients prepped, super proud of myself.  I took the picture above and then proceeded to gather the ingredients for the sauce. Added everything to a nice yellow bowl, and had this self-complimenting thought “you are really dominating this mis-en-place thing.”  Right after my neurons formulated the thought, I dropped the orange in the beautiful yellow bowl with all ingredients so carefully measured and ready to go. Bowl flipped on the counter top, spilling everything right before my adrenaline-dilated pupils. Lesson in humility taken. End of story.

But, despite the drama, this was one tasty meal, reasonably low in carbs and fat, and the chicken had perfect texture, none of that stringy quality so common in stir-fries. The sous-vide is a nice option. You could conceivably make it the day before even, keep still in the bag in the fridge, bring to room temperature as you get your ingredients ready.  We’ll definitely incorporate this recipe in our regular rotation from now on. Just need to work on that “mis-en-place” thing.

ONE YEAR AGO: Monday Blues

TWO YEARS AGO: A New Way to Roast Veggies

THREE YEARS AGO: Two Takes on Raspberries

FOUR YEARS AGO: Spice Cake with Blackberry Puree

FIVE YEARS AGO: Own Your Kitchen with Cappuccino Panna Cotta

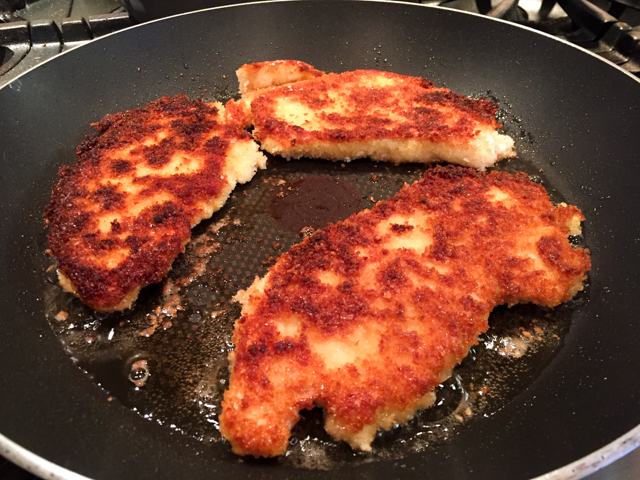
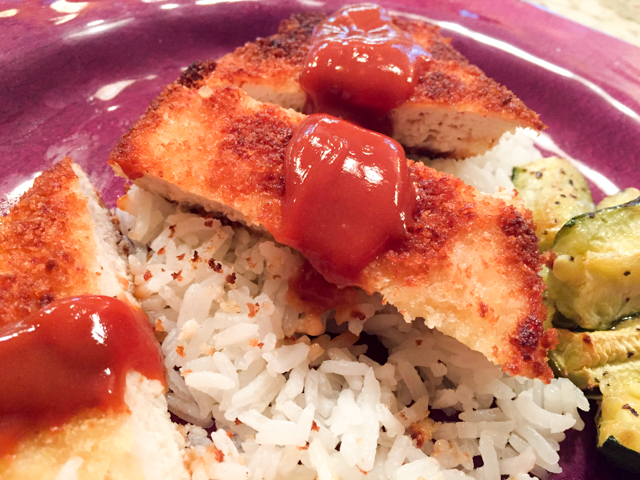
SIX YEARS AGO: Chicken Parmigiana, the Thriller

SEVEN YEARS AGO: Wild Mushroom Risotto

EIGHT YEARS AGO: Tartine Bread:  Basic Country Loaf 

NINE YEARS AGO:  Pugliese Bread

TURKEY CHILI UNDER PRESSURE

Yes, my pressure cooker has been working hard these days. Only last week I shared a recipe for chicken thighs, and now a very nice chili made in 30 minutes. Thanks to the power of pressure, it delivered the same luscious flavor of one left on the stove top for hours, simmering away.  I was not too fond of beans in chili, in fact it’s the first time I made it this way. It won’t be the last. Surprising how well the flavors mingle, with the beans giving a nice creamy feel to the chili without any addition of extra fat.

TURKEY CHILI IN THE PRESSURE COOKER
(adapted from The Great Big Pressure Cooker Book)

1 T olive oil
1.5 pounds ground turkey (I used 93% lean)
1/2 onion, diced (optional, I omitted)
2 ribs of celery, diced
1.5 teaspoons salt
black pepper
1 tablespoon chili
1 tsp smoked paprika
1/2 tsp ground cumin
1 can stewed tomatoes (about 14 oz)
1 can fire-roasted diced tomatoes (about 14 oz, I used Muir Glen)
1 can white kidney beans, well-rinsed
1/2 cup water (if needed)
garnishes of your choice

Heat the olive oil in the pressure cooker, add the onion and celery, season lightly with salt and pepper. Sautee until translucent and fragrant. Add the ground turkey and cook in high heat until well-seared. Add the salt, pepper, chili powder, paprika and cumin.  Mix well.

Add the tomatoes, kidney beans, and enough water to almost cover the meat, if needed.  Close the pressure cooker, let it come up to full pressure, and cook for 20 minutes.

Release the pressure quickly, and if needed, reduce the liquid by simmering for a few minutes with the lid open.

Serve with the garnishes of your choice.

ENJOY!

to print the recipe, click here

Comments: Some recipes for turkey chili call for a huge amount of fat in the form of sour cream and cheese. I’ve seen recipes very similar to this one, except for the fact that before serving 3/4 cup of sour cream and 1 cup of shredded cheese would be added, and simmered for a few minutes. Honestly, I don’t see the need. The white beans provide all the creamy feeling we might crave. We enjoyed it quite simply with some diced avocados. This was a comforting chili that did not leave us prostrated on the sofa for a couple of hours. Perfect. The picture above was taken when I re-heated the meal for serving. I had prepared it in the morning for our Sunday dinner. As it is always the case for this type of concoction, it gets better next day. You can do it in the Instant Pot, and you can do it in a regular pan, just cook until super tender, probably 90 minutes or so would be ideal. Come to think of it, the crock pot might come in handy too…

Note to self: try to always keep some parsley or cilantro in the fridge!

ONE YEAR AGO: Tiramisu Macarons

TWO YEARS AGO: Cider Mini-Cheesecakes with Caramel Sauce

THREE YEARS AGO: Rustic Ciabatta and Mini-Meatloaves

FOUR YEARS AGO: Green Rice

FIVE YEARS AGO: Potato-Crusted Italian Mini-Quiches

SIX YEARS AGO: Beetroot Sourdough for the Holidays

SEVEN YEARS AGO: Cod Filet with Mustard Tarragon Crust

EIGHT YEARS AGO: Soba Noodles: Light and Healthy

NINE YEARS AGO: Potato-Rosemary Bread


CREAMY CHICKEN THIGHS WITH SUN-DRIED TOMATOES

This recipe, made in the pressure cooker (or Instant-Pot) brings chicken thighs to the table in less than 30 minutes, but they will give that impression of comfort food that your Mom (or Grandma) cooked for you slowly and lovingly for hours. Since the skin suffers some abuse in the pressure cooker environment, I go through the extra step of crisping up the skin under the broiler, just a few minutes of added work, for a big pay-off. Six chicken thighs fit nicely in our pressure cooker and provide dinner with benefits (aka leftovers).

CREAMY CHICKEN THIGHS WITH SUN-DRIED TOMATOES
(inspired by Rasa Malaysia)

6 chicken thighs, bone-in, skin-on
salt and pepper to taste
2 T grape seed oil
2 celery stalks, diced
1/2 onion, diced (optional)
1/2 cup chicken broth
1/3 cup heavy cream
1/3 cup sun-dried tomatoes in oil, minced
Herbes de Provence to taste

Season chicken pieces with salt and pepper. Add oil to the pressure cooker, heat until almost smoking, add the chicken, skin side down, and saute until golden. Flip the pieces and saute on the other side for a couple of minutes. If necessary, do it in two batches so that the chicken will fry, not steam. Reserve the chicken in a platter, covered with aluminum foil.
.
Discard the extra fat accumulated, keeping about one tablespoon in the pan. Sautee celery and onion (if using), seasoning lightly with salt and pepper. When they get translucent and fragrant, add the chicken stock, whipping cream, sun-dried tomatoes, herbes de Provence, and a little more salt. Whisk, making sure the stuff glued to the bottom of the pan gets incorporated in the liquid.

.
Add the chicken pieces back into the pan, trying to leave the skin poking over the liquid. Close the pressure cooker and bring to maximal pressure. Cook for 25 minutes, release pressure, open the pan.  Remove the chicken and run the pieces under the broiler. If you like, reduce the sauce by simmering on the top of the stove as the chicken broils.  Serve the chicken with the sauce around it.
.
ENJOY!

to print the recipe, click here

.

Comments:
If you want to make the sauce smoother, simply transfer to a food processor and get all those bits of sun-dried tomato incorporated in it. I would probably do that if serving it for guests, but for a weeknight dinner, rustic is perfect. I love the texture of chicken thighs cooked under pressure, and by crisping up the skin I get the best of both worlds.
.

A little rice, my favorite quick broccoli dish, and dinner is taken care of!
.
.
EIGHT YEARS AGO: Ciabatta, a Classic Italian Bread
.
NINE YEARS AGO: Magical Lamb Stew

TURKEY BURGER, JAPANESE-STYLE

If you are a food blogger, you know how it goes. Even a great recipe is made once, perhaps twice, then left behind, living exclusively as a blog post that you read and say to yourself “I must make that again, it was so good!”  But then, some recipes somehow materialize as regular appearances. Usually they hit a magical trilogy: simple to prepare, great flavor, and all the people you cook for happen to love it too. From my reasonably recent blogging past, two dishes hit this jackpot and show up all the time: Eggplant Parmigiana (version from Jeff Mauro), and Turkey Portobello Burgers. The eggplant turned into a once-per-week deal, actually, and I have simplified the preparation even more. I should edit that post to reflect my changes. As to the turkey burgers I can probably make them with one hand tied behind my back. Today I share with you a new version that incorporates Japanese ingredients.  The ticket is a mixture of shiitake mushrooms and red miso. If you are new to miso, maybe you should start with the milder, white version, but if you are a seasoned miso-eater (apologies for lousy pun), go big and go red.


JAPANESE-STYLE TURKEY BURGER
(from The Bewitching Kitchen)

1 pound ground turkey
1 tablespoon red miso
5 ounces fresh shiitake mushroom caps
1 tablespoon olive oil
½ teaspoon sansho pepper (or pepper of your choice)
1/4 tsp salt
fresh cilantro leaves to taste

Place the mushrooms, miso, olive oil, sansho pepper, salt and cilantro leaves in a food processor and process until it all forms a paste.

To prepare the burgers, mix all ingredients together in a large bowl.  Knead the meat until it becomes sticky and binds together; divide the mixture into 4 equal parts, forming a burger patty with each fourth of the mixture. Place in the fridge to set for about 30 minutes (or longer, but then cover lightly with plastic wrap.

Grill to your liking, about 5 minutes per side.

ENJOY!

to print the recipe, click here

Comments: I have a thing for grill marks. In my mind, without them, grilled food won’t taste good. It is obvious I eat with my eyes first. For that reason, I am always adding a touch of honey or maple syrup to all my marinades, and often add some in a turkey burger mixture. In this recipe, miso does the job nicely, look at the beauty of those grill marks!

The other interesting bit of this recipe is that, contrary to ground beef, you don’t need to use a light hand forming the patties. The type of muscle fiber and fat content of turkey meat makes it behave in a totally different way. In fact, if you massage it well, and get the meat to be more fully compacted, the texture will be better. This tip was mentioned in America’s Test Kitchen during a show on turkey meatballs, and in a great book called The Japanese Grill (I told you I am in a Japanese-obsessive mood, didn’t I?). I proved it to myself with these burgers – massaged the living bejesus out of the meat. It ended up with perfect texture.

We rarely have bread with our burgers, and in fact, according to The Japanese Grill cookbook, a turkey burger must be served only with a little sauce, as if it’s a steak. Bread is considered a big no-no. Of course, if they see I added Velveeta on top of mine, they would prevent my entry into the country. I really want to go some day, so let that be our dirty secret…

ONE YEAR AGO: Pumpkin Macarons

TWO YEARS AGO: Slow-Cooked Whole Chicken

THREE YEARS AGO: Chocolate Zucchini Cake with Chocolate Frosting

FOUR YEARS AGO: Pecan-Crusted Chicken with Honey-Mustard Dressing

FIVE YEARS AGO: Bewitching Kitchen on Fire!

SIX YEARS AGO: Cashew Chicken Lettuce Wraps

SEVEN YEARS AGO: Chiarello’s Chicken Cacciatore

EIGHT YEARS AGO: Donna Hay’s Thai-Inspired Dinner

NINE YEARS AGO: Panettone


CHICKEN KATSU

For something so simple to put together, it is amazing how this recipe delivers everything you’d need for a weeknight dinner. Hard to believe I had never tried to make it, as we love breaded and fried chicken breast, usually either plain or taken to the limit of the gastronomic naughtiness: Chicken Parmigiana. But, better late than never, this will definitely become part of our regular rotation.

CHICKEN KATSU
(from the Bewitching Kitchen, inspired by several sources)

2 chicken breast filets
2 eggs, beaten with 1/2 tsp salt
Panko bread crumbs, a cup or so
grapeseed oil or other mild tasting oil
for sauce:
1/4 cup ketchup
1 T soy sauce
1 tsp oyster sauce
1 tsp Worcestershire sauce
1 tsp Dijon mustard

Make sauce mixing all ingredients and reserve.

Cut the chicken breasts in half lengthwise, and pound each half to have it thin and uniform in size. It needs to be thin because you will cook it exclusively in the frying pan, a few minutes per side.

Season each slice lightly with salt, dip into the egg and coat with Panko.  Heat the oil in a large skillet and fry until golden brown on each side and the meat is cooked through. Set on a piece of kitchen paper to drain excess oil. If you need to fry in batches, make sure to clean the skillet of burned up pieces of Panko, and add new oil for the second batch.

Serve over white rice, with the sauce drizzled on top.

ENJOY!

to print the recipe, click here

Comments: What a delicious meal this was! Phil is not that much into sauces, and was ready to enjoy his chicken plain. But he ended up trying a bite from my plate, and next thing I know, he was adding sauce to his too. It does add a lot to the chicken, that sweetness cuts through the fat, makes the whole thing more satisfying. I served with rice, as traditional, but also quickly sautéed zucchini, which went very well with the whole thing too.


I highly recommend you give this recipe a try!


ONE YEAR AGO: Whole-Lemon Marinade: Long Overdue

TWO YEARS AGO: Tomato and Cucumber Salad with Almond Vinaigrette

THREE YEARS AGO: Eggplant Tomato Stacks

FOUR YEARS AGO: The Couscous that Wasn’t

FIVE YEARS AGO: Apple-Cinnamon Bread

SIX YEARS AGO: Blueberry Galette

SEVEN YEARS AGO: In My Kitchen, August 2011

EIGHT YEARS AGO: Journey to a New Home

NINE YEARS AGO: Friday Night Dinner