BAKE IT BETTER WITH A FRIEND

Time flies. No other expression is more accurate. More than four long years passed since I met the contestants of the Great American Baking Show, Season 5, in the lobby of a hotel in London, not too far from Heathrow Airport. We were all exhausted, and not just for the long trip. For several weeks prior, we had been through the toughest baking marathon one could ever imagine, and even though we were aware that a few other people in the US were going through that exact same ordeal, only then we got to meet in person. Most of our group has kept in touch virtually over these years. But only now Tanya and I got to meet again in person. We spent a weekend together, the four of us, bakers and respective husbands. We baked, we talked, we laughed, and we baked some more. I screwed up a sourdough bread that turned out as one of the worst loaves I’ve made in the past couple of years… But Tanya and I were both in a certain tent, so we know too well that things can go wrong when we really hope them not to… Today I share our best adventure of the weekend, the making of a fantastic dessert from Matt Adlard’s book Bake it Better. Chocolate Souffles… To die for!

When Tanya and Jamie came to visit us, she brought her copy of Bake it Better, as I own the Kindle version and it is easier to use in the kitchen a real book, especially if you are cooking with friends. We had settled on the soufflés for our dessert after a meal of grilled salmon, quick tahdig rice and asparagus. The recipe is actually available online, and you can find it here. It makes a little more than 4 individual portions, I would say 6 or 7 using the ramekins he calls for.

We had no issues with the recipe, worked great, gave the exact lift that we expected and that Matt showed in his beautiful pictures in the book, which, by the way I highly recommend you get. Click here for the amazon link.

Main conclusion from the weekend?

BAKING IS BETTER WITH A FRIEND!


And the excitement was definitely shared by the pups, here is their recollection of the weekend….


We had THE BEST WEEKEND EVER! Imagine this, our Kingdom received the visit of two brand new Peasants, and we had a total blast teaching them how to properly play, and how to share their food and shoes. We were certain Zenless (aka our Mom) and The Dad would be proud of our way to make them feel welcome, but then here we are, getting our ears full. Apparently, Star did a big no-no by French kissing the man – repeatedly – and the fact that I got all excited and decided to hump her while she was all affectionate with our guest, only made matters worse. We were told we generated chaos and embarrassment. Squeaking the toy loudly at 5:50am on a Sunday was also a big no-no, and invading the privacy of the bathroom when the nice lady was trying to be there in peace goes into the list of capital doggie sins. Life can be very tricky at times. Can you put a good word for us and tell the New Peasants to come back? We miss them!

ONE YEAR AGO: Bison a la Mode de Bourgogne

TWO YEARS AGO: Masala Mashed Potatoes

THREE YEARS AGO: Lessons from Tanya: Sugar Cookie Silhouettes

FOUR YEARS AGO: Cherry-Chipotle Chicken Thighs

FIVE YEARS AGO: White Chocolate Mini-Mousse with Sugared Cranberries

SIX YEARS AGO: You Say Ebelskiver, I say Falafel

SEVEN YEARS AGO: Happy Thanksgiving!

EIGHT YEARS AGO: Two Takes on Raspberries

NINE YEARS AGO: Spice Cake with Blackberry Puree & The Global Pastry Review

TEN YEARS AGO: Own Your Kitchen with Cappuccino Panna Cotta

ELEVEN YEARS AGO: Chicken Parmigiana, the Thriller

TWELVE YEARS AGO: Wild Mushroom Risotto

THIRTEEN YEARS AGO: Tartine Bread:  Basic Country Loaf 

FOURTEEN YEARS AGO:  Pugliese Bread

HOME BAKERS COLLECTIVE: JULY PROJECT

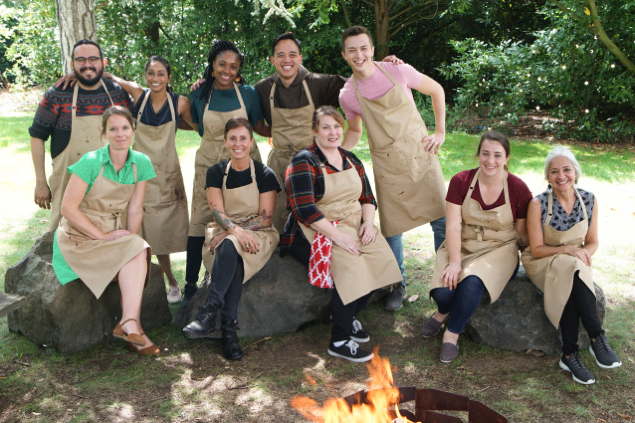
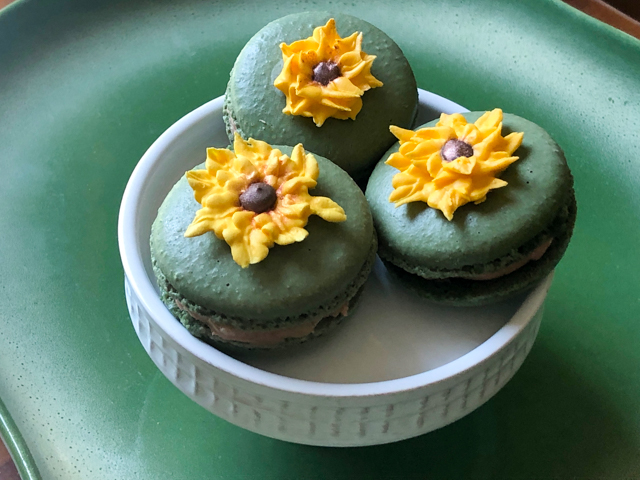
Every month me and several of my friends who shared the amazing experience of baking “in a certain tent” face a little group challenge. This month our challenge was set up by Marissa, a finalist in the Great American Baking Show. Her brief could not be simpler: BAKE YOUR STATE. We could do pretty much anything in all areas of baking, but the theme would be the state we grew up or live in. I coupled the state where I live with my usual state of mind. And the outcome was obvious: Macarons!  Kansas is The Sunflower State, so a bit of sunflower seed “flour” went into the shells. And black walnuts grow wild here, so the filling was a black walnut buttercream. A little dressing up, and here’s my contribution for this month:

KANSAS SUNFLOWER SEED AND BLACK WALNUT MACARONS
(from The Bewitching Kitchen)

For the shells:
200g Icing/powdered sugar
100 g almond flour
15 g sunflower seeds, ground to a fine powder
115 g egg whites at room temperature (approx. 4 eggs)
1/8 tsp of cream of tartar
100 g granulated sugar
1/4 tsp vanilla paste or extract
green food color (I used green, brown and black to get a forest type green)

for the filling:
4 ounces cream cheese (half a regular package), softened
1/2 stick (1/4 cup) butter, room temperature
1/4 teaspoon black walnut extract (or vanilla)
225 g powdered sugar
1/3 cup ground Black Walnuts

to decorate:
2 cups (about 1/2 pound) powdered sugar
2 tablespoons warm water
1 + 1/2 tablespoons meringue powder

Make the decorations, the day before. Beat all ingredients with a KitchenAid type mixer and the paddle attachment for about 7 minutes. Let the icing rest for 10 minutes, adjust consistency if needed. For piping rosettes, it must be thick but soft enough to squeeze through a small piping tip.

Color most of the icing yellow, color a small amount brown.  Use a small leaf tip to make the petals. Add the center with a small icing tip. Pipe your shapes over parchment paper and allow to dry. If desired, brush some of the petals with bronze dust.

Make the shells:
Line 3 heavy baking sheets with parchment/baking paper or Silpat mats. Layer the powdered sugar, and ground almonds in a food processor. Pulse until the mixture looks like fine meal, about 12 pulses. Pass through a sieve and transfer to a small bowl or to a sheet of parchment/baking paper. Set aside.

Place the egg whites and cream of tartar in the bowl of a stand mixer fitted with the whisk attachment. Make sure that the bowl and the whisk are impeccably clean. Starting on medium speed, whip the whites with the cream of tartar until they look like light foam. The whites should not appear liquid. The foam will be light and should not have any structure.

Slowly rain in the granulated sugar in five additions, trying to aim the stream between the whisk and the side of the bowl. Turn the speed up to high. Continue to whip the meringue until it is soft and shiny. It should look like marshmallow creme (marshmallow fluff). Add the vanilla and the food color. Whip the egg whites until the mixture begins to dull and the lines of the whisk are visible on the surface of the meringue. Check the peak. It should be firm. Transfer the whites to a medium bowl.

Fold in the ground almond/almond meal mixture in two increments. Paint the mixture halfway up the side of the bowl, using the flat side of a spatula. Scrape the mixture down to the center of the bowl. Repeat two or three times, then check to see if the mixture slides slowly down the side of the bowl. Put the mixture in a piping bag fitted with your choice of piping tip. Pipe shells, I like to count numbers in my head and use the same count for each shell so they end up similar in size.

Slam each sheet hard four to six times on the counter/worktop. Let the unbaked macarons dry until they look dull but not overly dry. Drying time depends on humidity. In a dry climate, the macarons can dry in 15 to 20 minutes; in a humid climate, it can take 35 to 40 minutes.

While the macarons are drying, heat the oven to 300 F. Bake one sheet at a time on the middle rack. Check in 11 minutes. If the tops slide or move (independently of the ‘feet’ when you gently twist the top), then bake for 2 to 3 more minutes. Check one or two. If they move when gently touched, put them back in the oven for 1 to 2 more minutes until they don’t move when touched. Let the macaroons cool for 10 minutes before removing from the pan. The macarons should release without sticking.

For the black walnut buttercream: Add the cream cheese, butter and vanilla to the bowl of a KitchenAid type mixer and beat until very smooth. Slowly add powdered sugar,  whisk until smooth and fluffy, then fold in the black walnuts.

Assemble the macarons: match two shells similar in size and add buttercream to the bottom of one of them. Place another shell on top and gently squeeze to take the filling all the way to the edge.

To decorate the macarons, add the Royal icing flowers on top using melted Candy melts or royal icing. Store the macs in the fridge for 24 hours for perfect texture.

ENJOY!

to print the recipe, click here

Comments:  I tried using exclusively sunflower seed as the component of the shell but it did not work. So I went with Plan B: added a small proportion to my regular recipe. It does bring a very interesting and noticeable flavor, I liked it a lot. As to the filling, black walnuts can be a bit of an acquired taste. They almost have a perfume quality to them. I am not too wild about extracts, but this one from Beanilla had nice reviews and worked well in the buttercream. If you cannot find or do not like black walnuts, use regular ones, slightly toasted.

The decorations were a lot of fun to make, although I realize the sunflower “look” is quite elusive. I used a very small leaf icing tip (this one) to pipe the petals, and a small icing tip (Ateco #2) for the center. It would be very hard to make the flowers without a little gadget to hold and rotate as you pipe. I made a template with parchment paper, clear acetate over it, and then glued squares of parchment on top with double-stick tape. Make a bunch of squares and have them ready, so you can pipe many flowers and then choose the best ones. Some will look like cabbages after a rabbit attack. Those you don’t use.


I find that the hardest part is getting the consistency of the Royal Icing right. It needs to be thick, but soft enough to flow smoothly without breaking, so it might take a few trials. Be patient. Once you get it all going, it’s quite mesmerizing to see each flower shaping up.

Marissa, thanks for choosing such a cool theme!  Amazing that we are publishing this on the 1st year anniversary of each of us stepping on a plane to the UK to start that incredible journey…

For my readers, make sure to stop by the Home Bakers Collective, to see what my friends baked for their states of choice… If the link is not yet published, try again a little later in the day.

ONE YEAR AGO: Curry Turmeric Sourdough

TWO YEARS AGO: Black Olive Tapenade and Deviled Eggs

THREE YEARS AGO: Blueberry Crumble Coffee Cake

FOUR YEARS AGO: Fresh Strawberry Yogurt Bundt Cake

FIVE YEAR AGO: Quinoa Salad with Red Grapes and Avocado

SIX YEARS AGO: Strawberry Coffee Cake

SEVEN YEARS AGO: Lemon-Poppy Seed Muffins

EIGHT YEARS AGO: Mascarpone Brownies

NINE YEARS AGO: Salmon Tacos

TEN YEARS AGOCinnamon Turban Bread

ELEVEN YEARS AGO: Summertime Gratin

HOME BAKERS COLLECTIVE: JUNE PROJECT

We just passed Summer solstice. It always makes me sad, knowing that days will be getting shorter and my beloved sun will stay around less and less time each day. Covid-19 is showing its ugly face again, adding more uncertainty to a year that has been full of it from the beginning. But for every yin there is always a yang, and the month of June also brought another group challenge by the tent bakers. This time Alex Tent Baker Extraordinaire came up with the theme, and he was quite straightforward with it. Laminate something. That was his  brief. A brief brief. I loved it! I had quite a few options dancing in my mind, but quickly settled on a Brioche Feuilletée, because it is all about the lamination, no distractions from it. So, without further ado, my assignment is here for you.

BRIOCHE FEUILLETÉE
(recipe from Matt Adlard’s Bake it Better)

for the dough:
415g all-purpose flour
8g salt
50g sugar
85g eggs
153g whole milk
42g soft, unsalted butter
9g instant yeast

for the butter block:
250g unsalted butter

OVERVIEW OF THE RECIPE 
(simplified version, original recipe is copyrighted)

The dough is prepared using all the ingredients and allowed to proof for one hour. It is next transferred to the fridge overnight. At that time, the butter block is made with dimensions of approximately 7 x 8 inches and also placed in the fridge.

Next day the butter block is enclosed in the dough and three folds are performed. First a double fold, the other two single folds. The dough is rolled out and cut into four strips, about 2.5 inches in width. Each strip is rolled and placed inside a loaf pan for a final proofing of 2 to 2 and a half hours.

Bake in a 325F oven for 45 minutes to 1 hour, until deep golden. Remove from the pan and allow it to cool completely.

ENJOY!

to print the recipe overview, click here

Comments: If you want to know all the details and tips that make this recipe easier to follow, you will have to join Matt Adlard’s site. It would not be fair to publish his detailed instructions here, plus his video is a great help. I’ve been a member of his online group for a few months and highly recommend it for those interested in all areas of patisserie. I will write a full blog post about it in the near future. Not only you learn a lot, but you get to interact with a lot of cool, baking-fanatic folks. See what they bake, follow their progress, share failures and victories.


Matt bakes it in a slightly different way. He adds a baking sheet and a heavy weight to the top of the pan, so that as the dough rises during baking, it gets squished on top, ending in a cool rectangular shape, laminated on all sides, but flat. I did not have a pan with the appropriate dimensions to achieve that effect, so I went with the regular baking in which it all freely explodes upwards.


No matter how you bake it, the result will be the same: layers of buttery goodness that you roll out and enjoy. Nothing else is needed, as the bread is quite rich and indulgent as it is, but if you want to spread it with jam, more butter, clotted cream, you will not hurt my feelings. And I bet Matt will not mind a bit either.

Alex, thanks for a great challenge this month… It is hard to believe that one year ago   we were all frantically practicing for the show in our own homes, wondering  who were the other bakers, how would we get along…  Good times.

For my readers, make sure to stop by the Home Bakers Collective, to see what my friends laminated this month… If the link is not yet published, try again a little later in the day.

ONE YEAR AGO: In My Kitchen, June 2019

TWO YEARS AGO: In My Kitchen – July 2018

THREE YEARS AGO: In My Kitchen, July 2017

FOUR YEARS AGO: Secret Recipe Club: Falafel and a Bonus Recipe

FIVE YEARS AGO: Chocolate Toffee Banana Bread

SIX YEARS AGO: In My Kitchen, June 2014

SEVEN YEARS AGO:  Strawberry Frozen Yogurt

EIGHT YEARS AGO: Baked Coconut and “The Brazilian Kitchen”

NINE YEARS AGO: Honey-Glazed Chicken Legs

TEN YEARS AGO: French-Style Rolls

ELEVEN YEARS AGO: Chicken Breasts, Coffee, and Serendipity

THE HOME BAKERS COLLECTIVE: MAY PROJECT

Another month in this crazy year is coming to its end. For May, the Bakers Collective challenge was set up by Bianca (check her site with a click here). I love how she shook things up a bit. We had to bake something savory but not using yeast. It’s a nice change from sweets, and getting yeast out of the equation makes it a tad more challenging. I settled on my choice almost immediately, because I’ve been flirting with soda bread for a long time. Perfect opportunity to give it a go.

PANCH PHORAN SODA BREAD 
(from Nadiya Hussain)

for Panch Phoran mix (all as whole seeds):
1 tsp fenugreek
1 tsp nigella
1 tsp cumin
1 tsp black mustard
1 tsp fennel seeds

for bread:
250g whole-wheat flour
250g bread flour
1 tsp fine salt
1 tsp baking soda
1 tbsp panch phoran (made from mixture above)
400ml buttermilk

Heat the oven to 400F.

Mix all seeds in a small bowl (you will have mixture leftover).

Put the flours, salt, baking soda and 1 tablespoon of five-spice mixture into a large bowl and mix well. Make a well in the center and add a little over half the buttermilk. Bring the dough together by hand, adding more of the buttermilk if needed (I used the full amount).

As soon as all the flour is absorbed and the dough comes together, lightly flour the work surface, tip the dough onto it and roll into a neat ball. Place on the baking tray. Using a sharp knife, make a cross cut almost all the way down to the bottom of the bread, but do not separate the pieces.

Bake on the middle shelf for 30 minutes, until the bread is golden and sounds hollow when tapped on the base. Allow it to cool completely before slicing.

ENJOY!

to print the recipe, click here


Comments: Soda Bread does not get high marks in the beauty department, I admit. It takes rustic to unprecedented levels, but I promise you Nadiya’s version is very tasty. That mixture of spices is perfect. You can buy packages of the mixture, but it’s really quite simple to prepare it yourself, and I happened to have all those seeds already in my pantry. I had fun browsing amazon and reading the comments from people who bought the mix. Some were furious because “it does not have nearly enough fenugreek.” So if you want to make sure to use the authentic “five spice mixture”, make it yourself. I actually loved so much the flavor of this bread, that I intend to make a sourdough version using those spices. Stay tuned.

Although quick breads leavened with baking powder and with little fat in theory do not stay good for more than a day or so, I was surprised by how good the bread tasted after FOUR days once toasted. We froze half of it because with just the two of us there is a limit to how much bread we can consume. But I know I will be making this and other versions in the near future.

Bianca, thanks for such a cool challenge that made me bake something I had never baked before. I am no longer a Soda Bread Virgin!

To see what my tent-baker friends came up for their challenge, visit the Home Bakers Collective site…. (post might take a few hours to show up, so keep that in mind)

ONE YEAR AGO: Purple Star Macarons

TWO YEAR AGO: Smoked Salmon, Fait Maison

THREE YEARS AGO: Kouign-Amann, Fighting Fire with Fire

FOUR YEARS AGO: In My Kitchen, Yin and Yang

FIVE YEARS AGO: Chocolate Toffee Banana Bread

SIX YEARS AGO: In My Kitchen, June 2014

SEVEN YEARS AGO:  Strawberry Frozen Yogurt

EIGHT YEARS AGO: Baked Coconut and “The Brazilian Kitchen”

NINE YEARS AGO: Honey-Glazed Chicken Legs

TEN YEARS AGO: French-Style Rolls

WANNA BE A TENT-BAKER?


For the past year or so I’ve been part of a closed Facebook group for fans of The Great British Bake Off. It is a very nice online community (almost 20 thousand participants) that at the present time is not accepting new members. Recently Christine, the moderator, asked me to make a video with advice for people interested in submitting an application.  I decided to share it here also, one never knows if some of my readers have been flirting with the idea of baking in the tent. Remember, it all starts with a little thought in the back of your mind… what if? why not?

For the application online, click here

In case you missed my write-ups about all episodes of Season 5…  here they are

Episode 1…

Episode 2…

Episode 3…

Episode 4…

Episode 5… 

Episode 6…

Semi-Final…

Final