RED VELVET LAYERED CAKE FOR SEVEN YEARS OF BLOGGING!

closeup
Better late than never, I can finally share a little cake to celebrate my 7th year of  food blogging. I knew I wanted to make a layered cake this time and also knew it had to be from a new cookbook I fell in “love at first page.”  Granted, I have quite a few books dedicated to cake baking, but Layered might be my favorite now. Not only Tessa Huff’s explanations are detailed enough to give confidence to a cake-challenged person, but  many of her cakes have enticing, unexpected flavors. Sure, you will find a chocolate cake, a shortbread strawberry, a Boston cream pie, but she will also awe you with combinations that bring together Raspberry and Stout.Lavender and Olive Oil... Butterscotch and Bourbon...   Pink Peppercorn and Cherry… Those are included in a wonderful chapter called “Adventurous Cakes.”  I have The Cake Bible from Rose Beranbaum and love it too, but I’d say that about 1/4 of the recipes of that book appeal to me, whereas I would gladly try more than 80% of the recipes from Layered.  Funny thing is that I almost did not buy it because I’m not too fond of naked layered cakes, and that’s what I saw on the cover of the book. Clearly I am part of a minority, as they are very popular these days.  But reading the many great comments on amazon made me change my mind.  So, it’s now officially confirmed the wisdom of:  “Don’t judge a book by its cover.”  HA!

Red Velvet Cake

RECIPE OVERVIEW

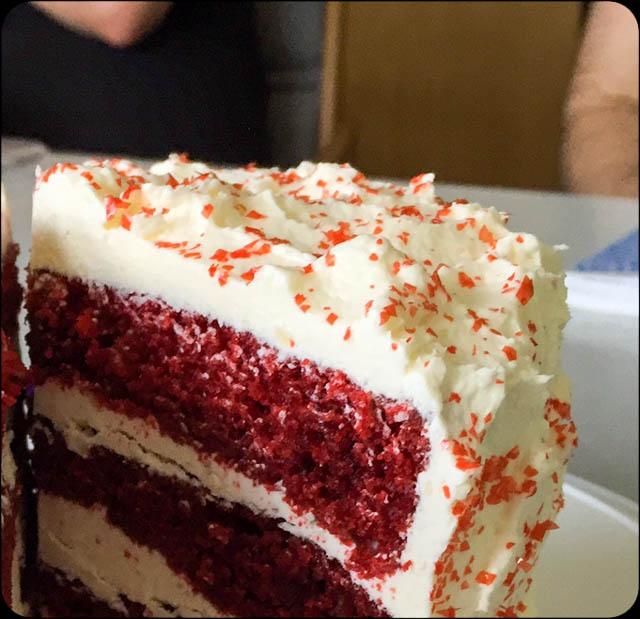
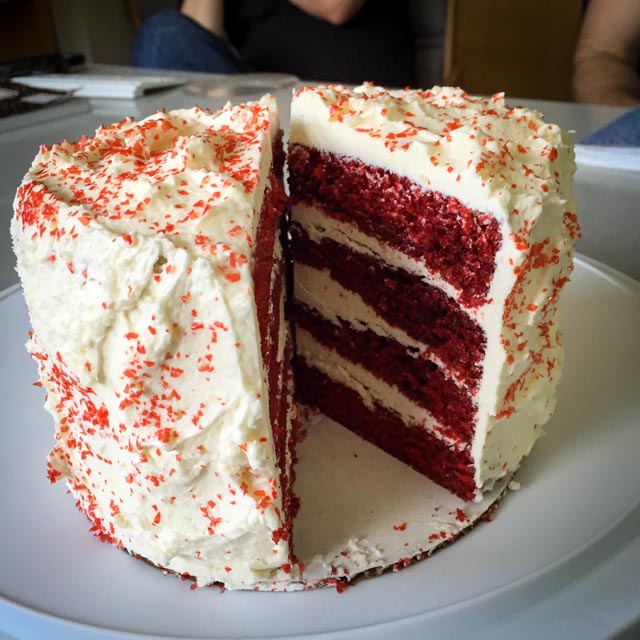
Red Velvet Cake with Heritage Frosting, from Layered: Baking, Building and Styling Spectacular Cakes.

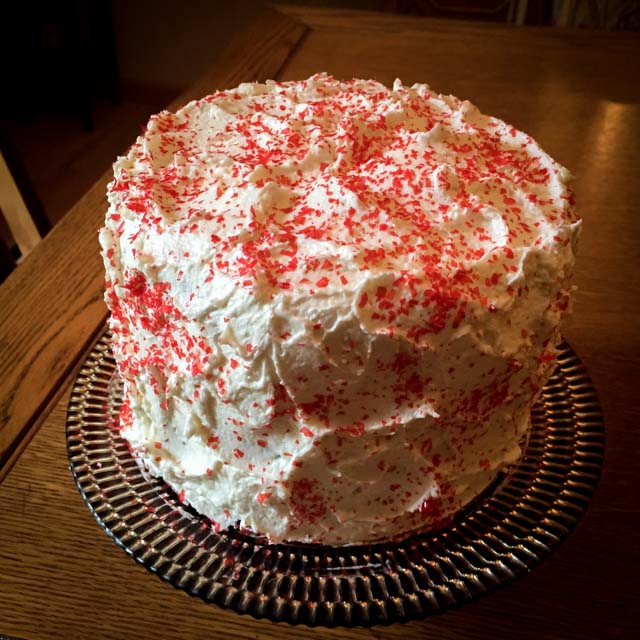
Originally this cake is supposed to have 6 layers, so you’ll make 3 red velvet cakes and slice each one crosswise in half. I baked three cakes, but as I started the assembly next day, I thought it was tall enough using only two of them. Plus, probably due to my inexperience and very limited skills, the amount of frosting I ended up with would not be enough to fill and cover a higher cake. Gravity plays tricks on me on a regular basis, perhaps it’s due to my last name. But, independent of the amount of available frosting, I liked the way it turned out as a 4-layer production, easier to slice and serve.

The cake component…  The cake batter uses grapeseed oil and sugar beaten together. To that, some eggs and red food coloring (preferably gel) are added and incorporated. Then, flour, cocoa powder, baking powder, a touch of salt are sifted and added to the oil mixture in batches, together with buttermilk. Once the batter is smooth, a bit of baking soda dissolved in vinegar gets into the mixer.  The batter is divided equally into three 6-inch cake pans, and baked until a toothpick comes out clean.

compositecake

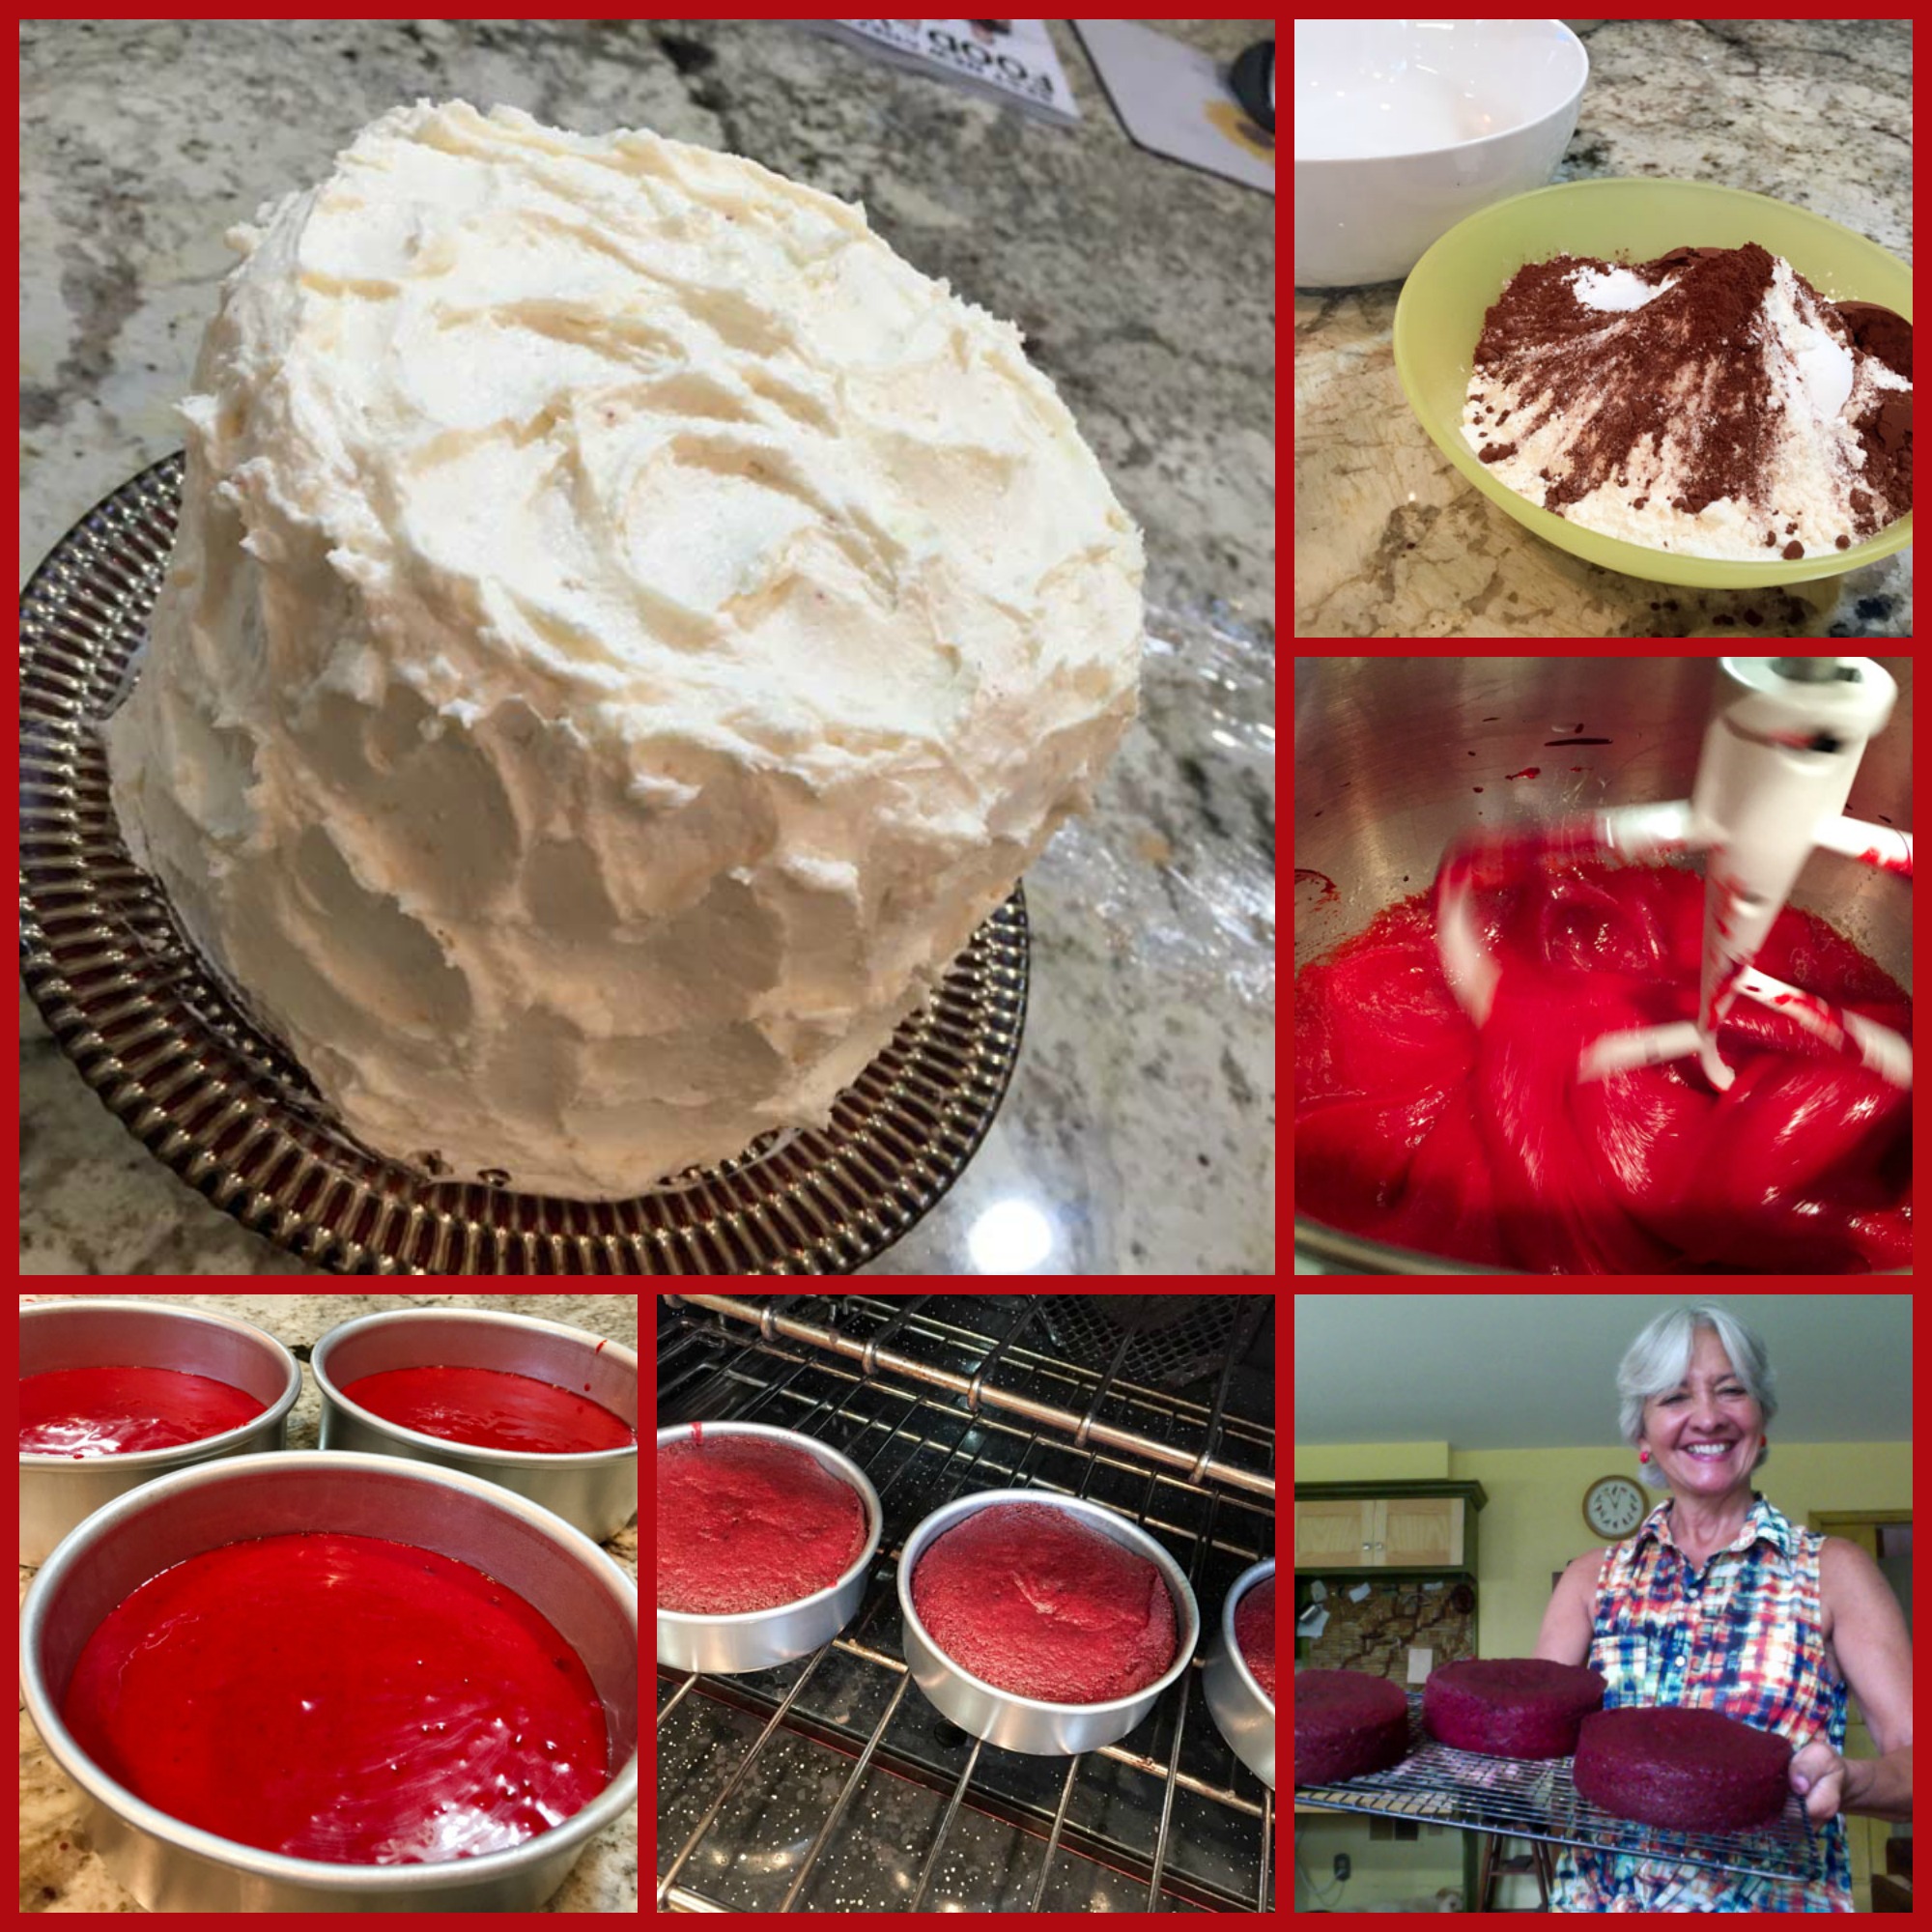
The frosting… contrary to most Red Velvet Cakes, this frosting is not based on cream cheese. It is an old-fashioned recipe called “Heritage Frosting” that starts with a thick cooked paste made with milk and flour. That gets incorporated into butter and sugar creamed together with a touch of vanilla. Very unusual, I had never heard of this type of frosting but it was reasonably easy to work with.

compositefrosting
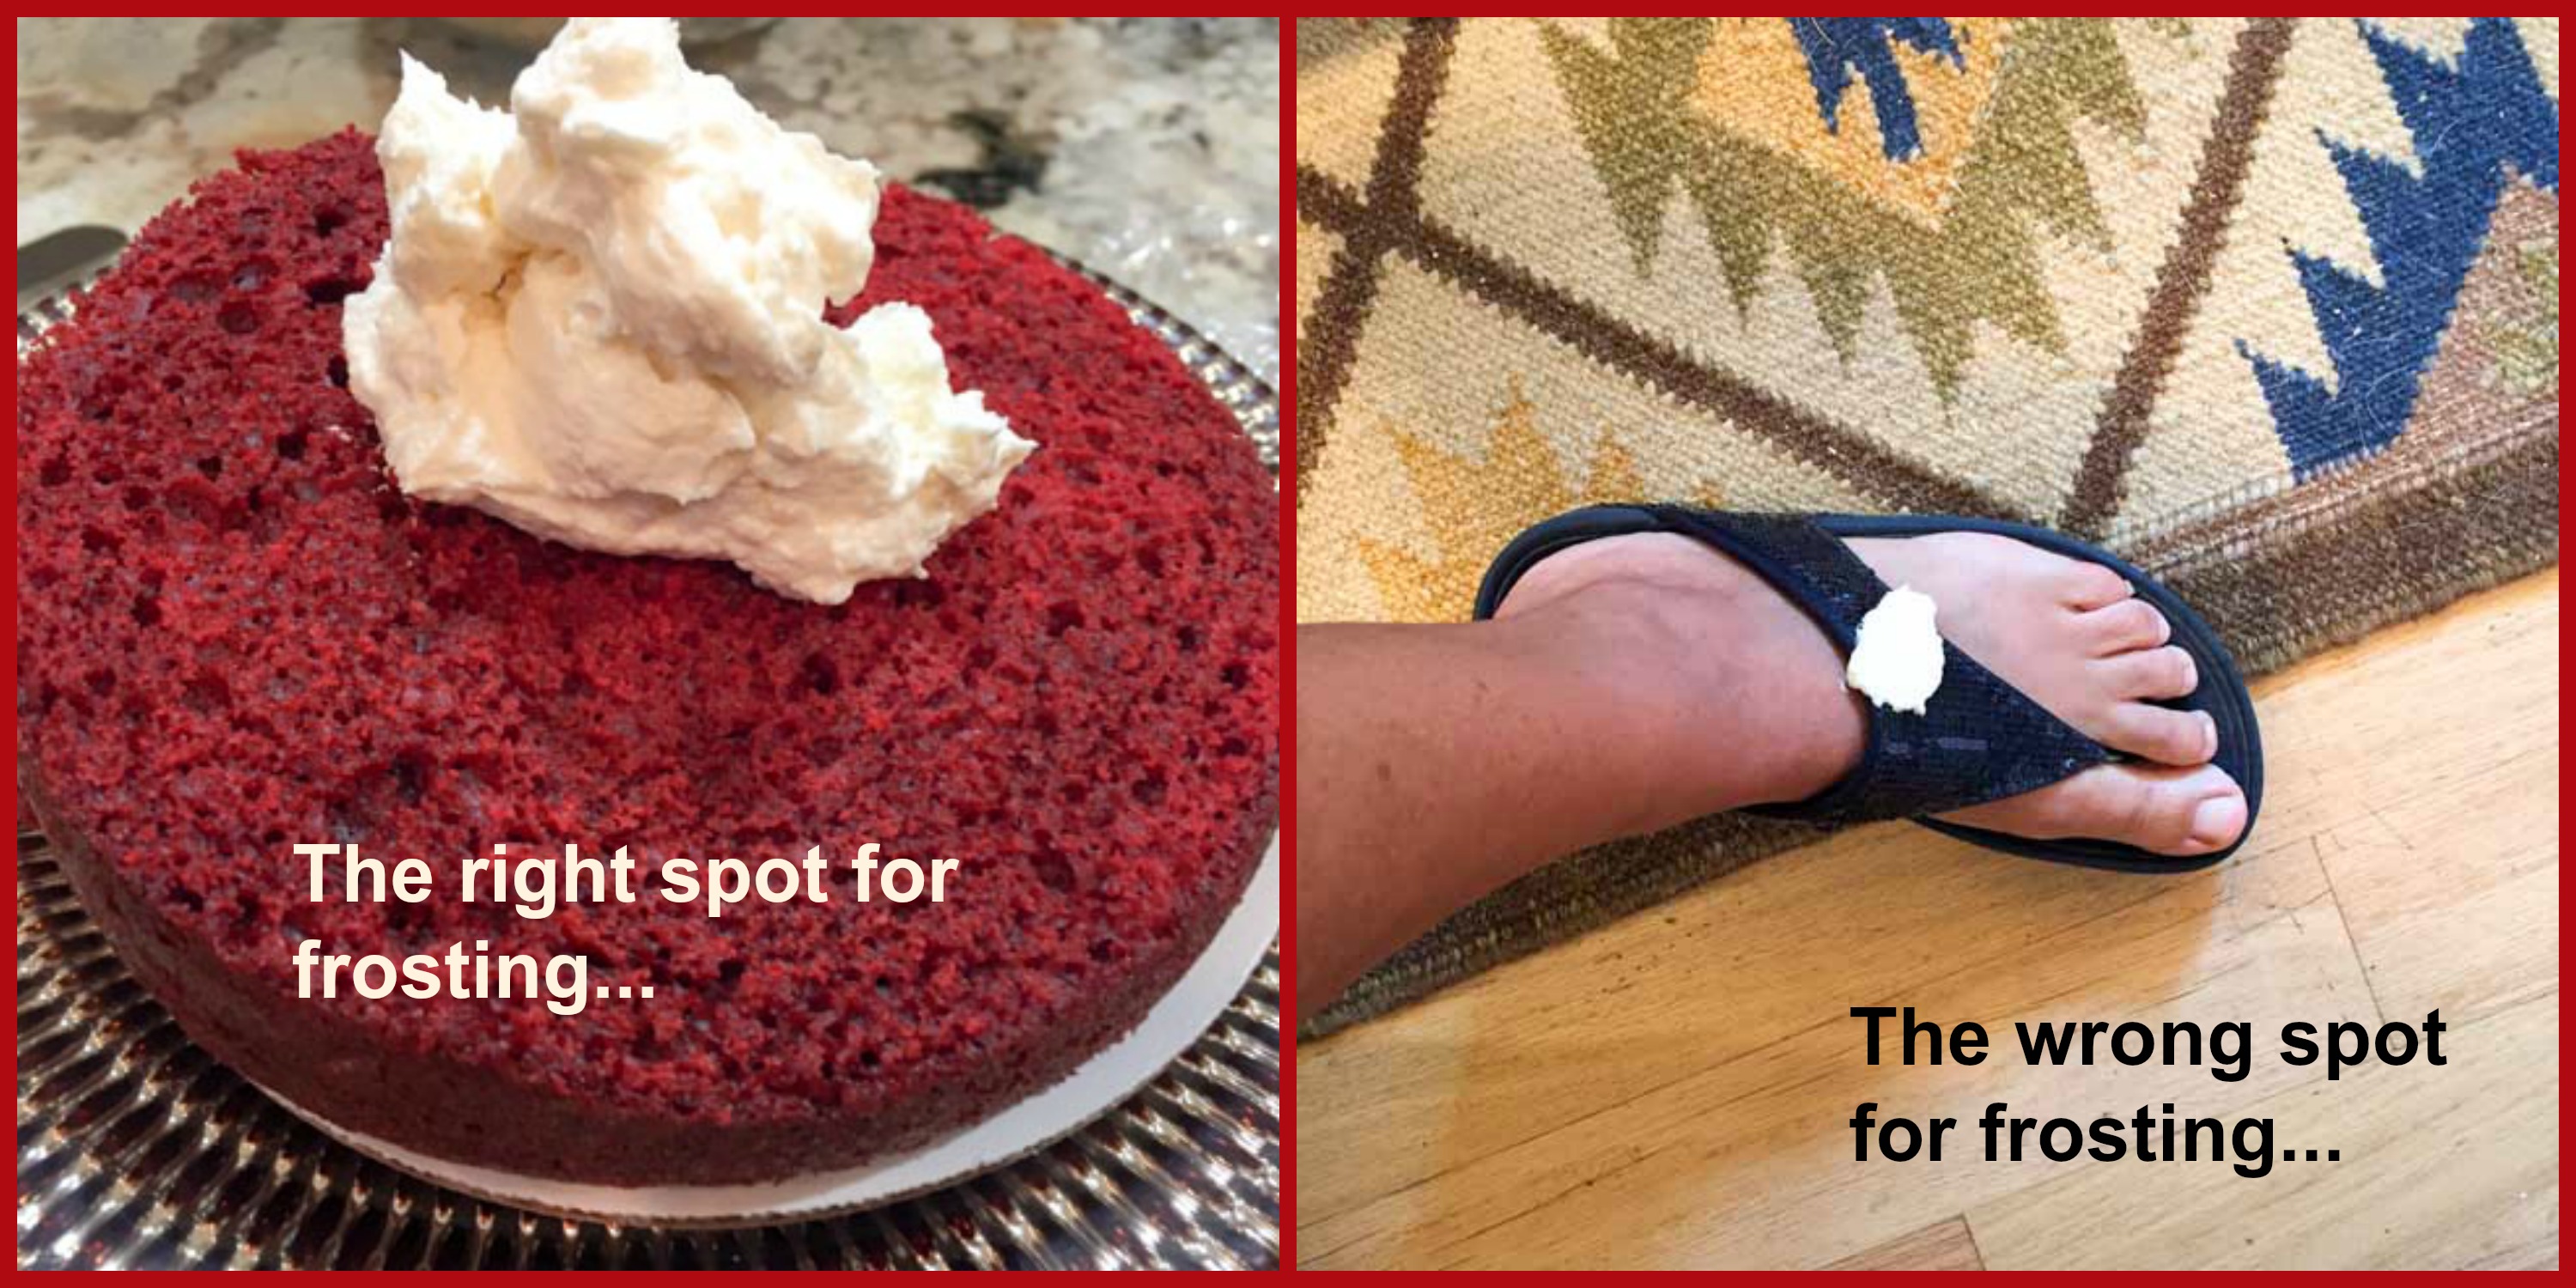
Normally, Buck would be right by my foot and ready to take care of any potential messes. However, having learned painful lessons in the past, I decided that red food coloring and a Jack Russell could be too fiery a match.  Both him and Oscar stayed outside for the duration of my baking adventure. However, they both developed a fascination with my sandal even long after I washed it. Scent of a Frosting. It has movie potential…

Well, for once I will say this cake baking experience was “almost painless.”  At least the cake itself. No problems. A little hyperventilation here, another there, but overall fine. The frosting is another story. Every time I try to frost a cake, I feel this intense respect for those who do it for a living.  I opted for a rustic look, because hell would have to freeze over twice before I could apply a smooth layer of frosting to the top of a cake, let alone its sides…   But even if there is room for improvement in my technique, I think this was one tasty cake!

sliced

Here’s what Phil had to say about it:

Quite often the frosting overpowers the taste of a cake, but this was not the case. The cake is flavorful, it has a very nice texture.  It’s substantial without being too heavy. Slices very well with a sharp knife without crumbling all over the place. The frosting is very creamy but stands well on the cake. It is much less sweet than buttercream or double-boiled white icing.  Enthusiastically approved!

Well, after getting enthusiastic approval from the resident cake critic, I enthusiastically invite you  to join me on my 8th year in the blogosphere… 

ONE YEAR AGO: Lemon-Lavender Bars

TWO YEARS AGO: Quinoa Fried Rice

THREE YEARS AGO: Carrot Flan with Greens and Lemon Vinaigrette

FOUR YEARS AGO: The Secret Recipe Club: Granola Bars

FIVE YEARS AGO:  Awesome Broccolini

SIX YEARS AGO:  A Twist on Pesto

SEVEN YEARS AGO: Ciabatta: Judging a bread by its holes

SECRET RECIPE CLUB: BUCKLE UP FOR RASPBERRIES

First Monday of the month, it’s time to share with my readers one more post as part of The Secret Recipe Club. If you don’t know what it’s all about, the club joins two food bloggers in secret, one is the stalker, the other the stalkee… When Reveal Day comes, everyone blogs about a chosen recipe at the exact same time. A virtual thrill like no other, right?  The blog I was assigned to this month was Things I Make (for Dinner), hosted by Sarah from Ontario. I’ve only been to Canada once and fell in love with it and its people, although the snowstorm in the middle of the summer trip was a bit uncalled for. I am sure I told this story before, but for newcomers, here we go with the short and sweet of it: the late June snowstorm caught me wearing shorts and a tank top. My mood dropped to what in temperature would be approaching zero Kelvin. Anyway, I digress. Sarah has a great sense of humor, her posts are a delight to read. I found myself smiling and nodding my head all the way through the lengthy stalking process. Keep in mind she’s been blogging since 2007, so there’s a ton of stuff to choose from in her fun site. Obviously, I had a hard time settling on a recipe.  Take a look at my “short” list: Chicken Tikka Kebabs, Soft Pretzels (I cannot believe I still haven’t try to make those, they’ve been on my to make soon list for a decade!), Spicy Chicken Skewers, Thai-Style Steak Salad,  Lemon Bonbon Cookies (I actually bought all ingredients for it), Blueberry Cheesecake, Nutella Ice Cream (triple sigh of pure desire), Upside Down Black Forest Cake (yes, you read that right). So, what do I have for you? A Raspberry Buckle. Love the name.  Buckle is a dessert that has been around for centuries, very popular in New England. It refers to a coffee cake in which fresh fruit is mixed with a yellow cake batter. Very easy to make and I tell you it was a huge success in one of the several receptions we hosted last month. Believe it or not, I made it after arriving home from work, still had time to clean up the kitchen and serve it for the reception at 8pm. I felt like Super Woman after a successful mission. And, that – quoting Martha Stewart – is a good thing.

Raspberry Buckle1

RASPBERRY BUCKLE
(from Things I Make for Dinner)

1/2 cup butter
1 cup sugar
3 eggs
1 cup flour
1/2 tsp salt
1/2 tsp baking powder
1 pint fresh raspberries
Heat oven to 350F. Grease a 9″ square baking pan. Clean raspberries. Stir together flour, salt and baking powder in a small bowl and set aside.

Cream butter and sugar with an electric mixer. Add eggs, one at a time, until well incorporated. Gradually add flour mixture, being careful not to over mix. Spread in prepared pan, and scatter raspberries over the surface. Bake at 350 for 35 minutes, or until golden brown and a tester comes out clean.

Cool 20 minutes, sprinkle with icing sugar and serve with whipped cream, if so desired.

ENJOY!

to print the recipe, click here

bucklecomposite

Comments: Life has been busier than ever for us. For those who do not know, when we moved from OU to KSU four years ago, Phil became the Head of the Department of Biochemistry and Molecular Biophysics. With that, commitments and challenges intensified more than we anticipated. Not only he has our research lab to consider in his professional life, but all the other things associated with running a department, from budget problems to teaching issues, from hiring new faculty to personnel evaluations. The list is huge, and the deadlines and pressure just keep building up. It is challenging for both of us, but I must say we enjoy it all.  The underlying feeling that we are trying to accomplish something on several fronts pump us up, keeps us on our toes. Recently he went through an intense process to hire a director for a particular center at KSU. Every candidate’s visit involved a reception in our home. I wanted to prepare something special for each of the three candidates, and this Raspberry Buckle was my best choice ever. If you need something simple and delicious, look no further. Sweet, tart, melt-in-your-mouth good…

Sarah, thanks for a great recipe that pleased all the guests who had a chance to try it. Nothing was left next morning to take to the department, which is a huge compliment to your Raspberry Buckle!

baked2

As usual, I invite my readers to click on the smily blue frog at the end of this post. She will direct you to a list of blog posts published by my virtual friends at The Secret Recipe Club.  Enjoy the ride!

Raspberry Buckle


ONE YEAR AGO: Seafood Gratin for a Special Dinner

TWO YEARS AGO: Cooking Sous-Vide: Sweet and Spicy Asian Pork Loin

THREE YEARS AGO:  Farewell to a Bewitching Kitchen

FOUR YEARS AGO: In My Kitchen. June 2012

FIVE YEARS AGO: Goodbye L.A.

SIX YEARS AGO: 7-6-5 Pork Tenderloin


PLAYING WITH PECTINASE

I subscribe to a site called Chefsteps.com that deals with stuff going from molecular gastronomy to sous-vide, but also covers more mundane topics, like making the most of your mandoline or brewing that perfect cup of coffee. A few weeks ago they featured the use of pectinase to turn clementine segments into the sweetest gems similar to those you can buy canned, but are extensively processed to taste so great. The method couldn’t be simpler: you peel the fruit, separate the segments and place them in a bowl with water containing a few drops of pectinase. What is pectinase? First, a very brief lesson in biochemistry. All enzymes are proteins with a specific activity on a component referred to as its “substrate.” They usually follow a nomenclature with the suffix “ase” to indicate which substrate the enzyme acts upon. Proteases degrade proteins and are of course part of our digestive system. DNase destroys DNA, and it is a nightmare for those working in molecular biology. We need to be always protecting the DNA we work with from being degraded. Pectinase destroys pectin which is the main component that forms that white pith around citric fruit segments. The pith is not only harsh in texture, but also in taste, quite bitter.  By allowing pectinase to work, that outside layer is removed, and you’ll end up with perfectly smooth pieces of fruit that will taste considerably sweeter. Even though pectinase is not toxic, once you get the fruit the way you want it, simply rinse the water containing pectinase out, blot the pieces dry and enjoy them.

clementines

Aren’t we awfully cute?

Pectinase is sold – like almost everything you can dream of – by amazon.com, and it’s pretty affordable, plus a little bit goes a loooong way. One of the interesting things about enzymes is that they are not consumed in the reaction, so like the Energizer Bunny, they just keep going and going. Adding five drops works, but adding one works too, it will simply take a little longer. I added about 4 drops to the bowl and left the fruit at room temperature for a couple of hours, then stuck it in the fridge for 6 more hours until we were ready to use them. You can leave the fruit in water longer, for a day or so, no problems.

pectinasecomposite
Pectinase, like most enzymes, will work faster in warmer temperatures, so it is conceivable to use sous-vide (or even a simple water-bath) to speed up the reaction without cooking the fruit in the process. Think anything around 100F for 30 minutes to one hour.

The clementines were delicious to nibble on while binge-watching “How I met your mother” late at night, but when added to this favorite salad of our recent past, it made for a LEGEND… wait for it… LEGEND… wait for it… LEGENDARY MEAL!


salad

Use this recipe, but substitute clementines for grape tomatoes…


ONE YEAR AGO: Poached White Asparagus with Lemon and Pistachios

TWO YEARS AGO: Dan Lepard’s Saffron Bloomer

THREE YEARS AGO: Fesenjan & The New Persian Kitchen

FOUR YEARS AGO: Quinoa Salad with Roasted Beets

FIVE YEARS AGO: Pasta Puttanesca

SIX YEARS AGO: Miche Point-a-Calliere


SECRET RECIPE CLUB: CHOC-ORANGE MINI CAKES & A BONUS RECIPE

13082596_1327954120553739_3054889855668038106_n(Reprinted with permission from Adrienne Hedger)

And here we are landing firmly in the month of May. This year is flying by, if you ask me… First Monday of the month means fun. It is Reveal Day for The Secret Recipe Club, that event in which bloggers are paired in secret and cook a recipe from their assigned site.  This month I got a food blog that was new to me: Chit Chat Chomp, hosted by Leigh, who blogs from Melbourne, a place I would love to visit one day. Leigh’s site is a thing of beauty, very stylish, elegant, amazing photos, and great prose. Basically, a must-read food blog!  She summarizes her approach to cooking in a delightful way:

Recipes inspired by my travels through France, adapted for everyday simplicity and filled to the brim with nutrition.  Mostly gluten and refined sugar-free, my recipes lean towards food that inspires, heals and nourishes, but above all else, it’s fresh, organic and simple.

Recipes inspired by my travels through France… She’s got my full attention!  In fact, she describes herself as a lover of all things French. You can imagine the smile I opened when I read that line, right?  I spent quite a bit of time stalking her blog, but jumped on a recipe right away for a reason I will classify as “The Swedish Effect.” Small parenthesis is needed.  We have an undergraduate student from Sweden in our lab called Olivia. She happened to mention that April 15th was her “name day” back home.  I was puzzled, but then learned that in Sweden each day of the year is associated with a particular name, as you can see in this site. April 15th is the name day for Olivia (girls) and Oliver (boys). Olivia said that her Grandma always gave her a nice card on that day to celebrate the occasion. So, I thought it would be cool to bake something starting with the letter O and bring to the lab on that day. Orange-Chocolate mini-cakes seemed perfect! Obviously, I jumped on the recipe with no hesitation whatsoever. But, my decision had a small problem associated with it, which led me to make a second recipe for today’s reveal. Read on…

Choc Orange Mini Cakes
ORANGE-CHOC MINI CAKES
(from Chit Chat Chomp)

Makes 6 mini-cakes

1 orange
1 cup almond meal
1 tsp baking powder
2 large eggs
1 Tbsp raw cacao powder
1 Tbsp rice malt syrup or raw honey
handful of raw cacao nibs
handful of sunflower seeds (I omitted for lack of sunflower seeds)

Heat oven to 320 F and line a mini cupcake pan with 8 cupcake papers

Place the orange in a pot and cover with water. Bring to the boil then reduce the heat to low and simmer for 1 hour. Allow to cool.

Chop the cooked orange into chunks and place in a blender and blitz until smooth. Add all other ingredients (except cacao nibs and sunflower seeds) to the blender and pulse until combined.

Divide the batter between your cupcake papers, filling close to the top as they will not rise by much, and top with the cacao nibs and sunflower seeds. Pop into the oven for approximately 30 to 40 minutes, or until a skewer comes out clean when inserted in the middle.

ENJOY!

to print the mini-cake recipe, click here

orangecakecomp
Comments: As Leigh mentioned, the only tricky part of this recipe is to boil the orange. Tricky in the sense that you need to dedicate one hour for that step. Essentially hands-free, though. The smell in the kitchen as the orange simmers…. wonderful!  Once the orange is ready and cooled down, the batter will be ready in minutes. Now, let’s talk about the “small problem.”  The recipe made six cupcakes, enough for each of our lab members to enjoy, but Phil and I could not have any. In short, I made a recipe for The Secret Recipe Club, but never got to taste it. I had only one way to restore my dignity as a blogger: choose a second recipe from Chit Chat Chomp, and make it too… and that’s what I did, so today you get two recipes instead of one. How’s that for problem solving?

Without further ado… my bonus recipe from Leigh’s great blog:

Veggie Bread

VEGGIE BREAD
(from Chit Chat Chomp)

1 + 1/2 cup almond meal
3/4 cups arrowroot flour
1/2 teaspoon sea salt
1/2 teaspoon baking soda
5 eggs
1 + 1/2 teaspoon apple cider vinegar
1 large zucchini, grated
1 large carrot, grated
1/2 cup finely grated Parmesan cheese
2 tablespoons pepitas.

Heat the oven to 325 F and line a standard loaf pan with parchment paper.

In a large bowl, mix together the almond meal, arrowroot, salt and baking soda. In a separate bowl whisk the eggs lightly with the apple cider vinegar. Add zucchini, carrot and cheese and mix well.

Add the egg mix to the dry ingredients. Mix to combine. Pour the dough into the prepared loaf tin and sprinkle with pepitas.

Bake for 35-40 minutes or until the top starts turning golden and a skewer comes out clean. Remove from the oven and transfer to a wire rack. Allow to cool for five minutes before cutting into slices.

ENJOY!

to print the Veggie Bread recipe, click here

veggiecomposite

Comments: We loved this bread! It is obviously gluten-free, no regular flour, but the texture reminded me of quick breads, except that this had considerable more moisture. Not too dense like some gluten-free breads turn out.  Leigh said it freezes well, but we did not get to test that, in three days it was gone. I enjoyed a slice at lunchtime, and was surprised that Phil did that too, he prefers his bread to be loaded with gluten. This one had so much flavor that the lack of wheat flour was not a big deal.  Once it sits in the fridge for a while, the best way to bring it back to life is toasting it…  paired with juicy tomatoes, it was out of this world delicious!

toasted

I wanted to try to make croutons out of it.  Not sautéed because I am afraid they would crumble, it is a very delicate bread. But maybe spraying the croutons with coconut or olive oil then toasting them in the oven. I bet they would turn out amazing on a kicked-up version of Caesar salad, or over a massaged kale concoction. Definitely a bread to play with.

I must say it was not easy to decide on which recipe to make as the bonus.  I really wanted to make her Savoury Muffins, not only because the recipe enticed me, but for the write-up about it. You gotta go and read it… it has to do with France…   And, if the weather was a little more appropriate, I would love a bowl of her luscious Carrot Soup… Another heavy contender was the Zucchini Noodle with Kale Pesto, which is pretty much my favorite type of meal these days.

Leigh, I loved getting your blog as my assignment this month, and feel sorry I could not taste those cute mini-cupcakes… Thinking back, I should have made a double batch, but I only thought about it after they were all baked and I had no time to boil another orange and start over. It was getting close to bedtime then… oh, well. Such is life!

Please make sure to click on the blue frog sitting patiently at the end of this post, so you can marvel at the posts that my virtual friends from Group A made for their assignments.

Adrienne, thank you again for allowing me to share your cartoon on the blog!
I love your work!

ONE YEAR AGO: In My Kitchen, May 2015

TWO YEARS AGO: P90X3, a Review of Tony Horton’s Latest Fitness Program 

THREE YEARS AGO: Pasta and Mussels in Saffron Broth

FOUR YEARS AGO: Triple Chocolate Brownies

FIVE YEARS AGO: Shanghai Soup Dumplings

SIX YEARS AGO: Bite-sized Chocolate Pleasure

A RETRO DESSERT

A couple of days before Easter we still had no idea what to make for our dinner, all we knew is that we would be cooking something together. We ended up with two recipes that are already in the blog: a rack of lamb with cranberry reduction sauce, and a mushroom soufflé.  We rarely make dessert for just the two of us, so at first we considered skipping it altogether. Then Phil mentioned that there was one particular dessert he had only enjoyed a few times, always in restaurants and maybe I could try and make it for us. He added “it may be a bit involved, though.”  Visions of a six-layer coconut cake flashed in my  imagination, but he definitely had something quite unexpected in mind: Baked Alaska!  My gosh, the last time I had it I was a teenager in Brazil, so that’s a little more than five years ago (wink, wink)…  We had this conversation 24 hours before Easter dinner, so I felt a rush of adrenaline pumping in my veins, and went to work. By work I mean “furiously googling.” I found the perfect recipe in a blog called “Dessert for Two.” How appropriate! It’s a great blog, by the way, make sure to visit… It goes without saying that Baked Alaska doesn’t keep very well, so making a small batch just for the occasion was a must. This was super fun to make and I must say one of the most delicious sweets made in our kitchen. You could of course double or triple the recipe, keeping the amount of meringue unchanged (it made more than needed for two small servings).

Baked Alaska2

INDIVIDUAL BAKED ALASKAS
(from Dessert for Two)

for the cake base:
2 tablespoons + 1 1/2 teaspoons all-purpose flour
1/4 teaspoon baking powder
1/4 teaspoon cornstarch
2 tablespoons + 1 1/2 teaspoons granulated sugar
1 large egg, at room temperature
1 tablespoon + 1 1/2 teaspoons milk
1 1/2 tablespoons unsalted butter
1/4 teaspoon almond extract

for assembling the Alaskas:
1 pint ice cream of your choice
3 egg whites
1/3 cup granulated sugar

Heat the oven to 350 F.

Use a 9 x 5″ metal bread loaf pan for this recipe; it needs to have sharp corners. Do not use ceramic bakeware with rounded corners. Line the bottom of the pan with parchment paper. Trim it very well to fit perfectly. Do not grease the pan in any way.

In a medium bowl, sift together the flour, baking powder, and cornstarch twice.

In a separate bowl, combine the granulated sugar and egg. Beat on high-speed until it reaches the consistency of soft whipped cream. This can take anywhere from 5-8 minutes. It will be fluffy and pale yellow with soft, floppy peaks. Melt the butter and milk together in the microwave. Stir in the almond extract

Fold one-third of the flour mixture into the eggs. Take your time and do this carefully until all of the flour mixture is incorporated, adding 1/3 of the flour mixture at a time. Finally, stir in the hot milk and butter mixture all at once and fold in well. Pour the batter into the pan, and bake for 10-12 minutes, or until a toothpick inserted in the center comes out clean.

Remove the pan from the oven, and let cool for 10 minutes. Then, run a knife along the edges of the pan and invert the cake carefully onto a cooling rack. Gently peel the parchment paper off, but if any more than a thin layer of cake sticks to it, let it cool completely before pulling it off. You can make the sponge cake the day before.

Scoop two perfect spheres of the sorbet by using an ice cream scoop. Level off the surface of the sorbet with the scoop to make a flat bottom.  Move the sorbet scoops to cupcake liners (or parchment paper) and freeze until very firm.

To assemble, use the edges of your ice cream scoop to cut out perfect-sized rounds of sponge cake. Top each cake round with one of the sorbet scoops. Place back in the freezer. Next, whip the egg whites in a medium bowl on high-speed until soft peaks start to form. Stream in the sugar and beat until combined. Don’t beat the egg whites past the point of soft peaks.  When ready to serve, pipe the egg whites (or use a spoon) over the sorbet mounds. Use a fork to make ridges in the egg whites.

Using a culinary torch, brûlée the egg whites and serve the dessert immediately.

ENJOY!

to print the recipe, click here

compositealaska

Comments:  I never imagined I would re-visit a cake that is pretty much like a genoise, my nemesis. And, to make matters worse, this one was baked in a tiny loaf pan. But, I must say it all went flawlessly, which worries me a little. Next time I bake a cake, I will pay my dues to the universe, obviously.  I wish I had more pictures of the whole process, including the drawing of circles in parchment paper to cut the base, but things were a bit frantic as they always are when I’m around cake batter.

When I make these again (and I definitely will), I might omit or reduce the almond extract because I felt it was too prominent in the final cake. However it is quite possible that the smell of the extract was too vivid in my mind. It is so potent! Phil did not feel the same way at all, he thought the cake was perfect. Still, I would like to try a little bit of Fiori di Sicilia instead of almond just for a change. As to the ice cream component, I went with two different flavors that we shared: the first Alaska made with Dulce de Leche because to me that is the flavor numero uno in the known universe. And the second one was White Chocolate-Raspberry-Truffle. I know. Your knees just got a bit weak, right? Mine too…

closeup
The contrast of slightly warm and toasted meringue, cold ice cream, with the base of the cake is a complete feast, perfect way to end a romantic meal, if you ask me.  Plus, it is a reasonably small portion that will not make you sit down at the sofa, tilt your head back and start snoring, possibly drooling. Nope.  The rest of your evening will be safe…

Baked Alaska

ONE YEAR AGO: Cauliflower Tortillas: Going low-carb and loving it!

TWO YEARS AGO: Clementines in Cinnamon Syrup

THREE YEARS AGO: In My Kitchen, April 2013 

FOUR YEARS AGO: Thrilling Moments (CROISSANTS!)

FIVE YEARS AGO: Maple-Oatmeal Sourdough Bread

SIX YEARS AGO: Pork Trinity: coffee, mushrooms, and curry