PANMARINO

For reasons that escape me,  that might just justify seeking professional help, I bought another cookbook.   Worse yet, it was another bread book.  Considering that my present situation is far from optimal for bread baking, I wonder if even the best therapists are good enough to help me.  However, in my defense,   Carol Field’s  “The Italian Baker” is wonderful!   It covers breads from all over the country, always with some background information on their origins and detailed instructions on their preparation, using manual kneading, a mixer, or the food processor.   The book doesn’t have photos, just simple drawings.  In another cookbook this approach might bother me, but in this case I don’t mind being without pictures, because the richness of the text compensates for their absence. Carol’s descriptions make me want to bake every recipe in her book – which includes almost 100 breads!

PANMARINO (ROSEMARY BREAD)
(adapted from Carol Field)

2 tsp active dry yeast
1/2 cup warm water
1/2 cup milk, at room temperature
4.5 T olive oil
1.5 to 2 T fresh rosemary leaves, chopped fine (or 3/4 T dried)
10 g salt
450 g all purpose flour
1 tsp coarse sea salt for sprinkling over the bread

Mix the warm water with the yeast in a large bowl, wait for a few minutes until it gets bubbly. Stir the milk and oil with the paddle blade. Add the rosemary leaves, flour, and salt to the bowl. Mix gently until the flour is moistened, change to the dough hook and knead on low speed for 5 minutes. Remove the dough and knead by hand for a couple of minutes.

Place the dough inside an oiled bowl, cover, and let it rise at room temperature until doubled, about 1.5 hours. Carefully remove from the bowl, shape into a ball, and let it rise for 45 to 55 minutes, but don’t allow it to double in size.

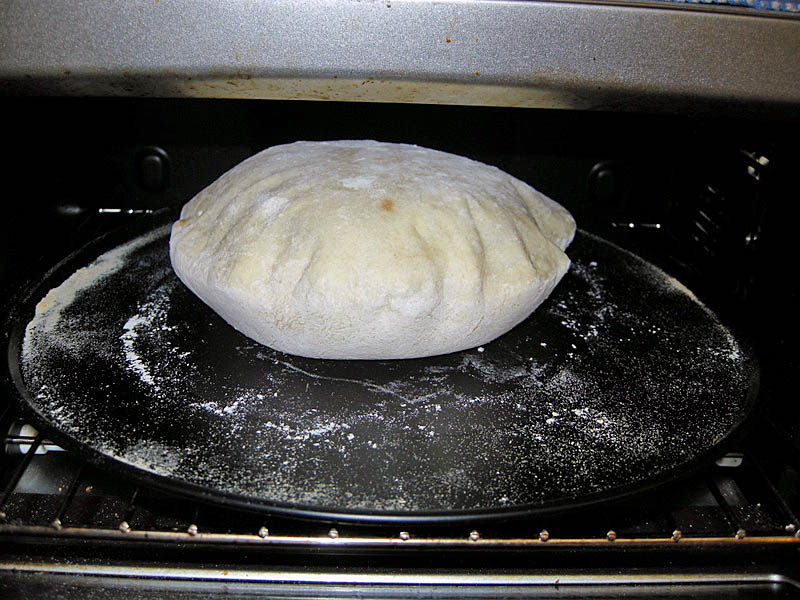
As you wait for the final rise, heat the oven to 450F. Slash the bread with a razor blade forming an asterisk on top, then sprinkle coarse salt inside the cuts. Bake 10 minutes with steam, reduce the oven temperature to 400F and bake for 35 minutes more. Remove the bread to a rack to cool, and don’t cut it for at least one hour.

ENJOY!

to print the recipe, click here

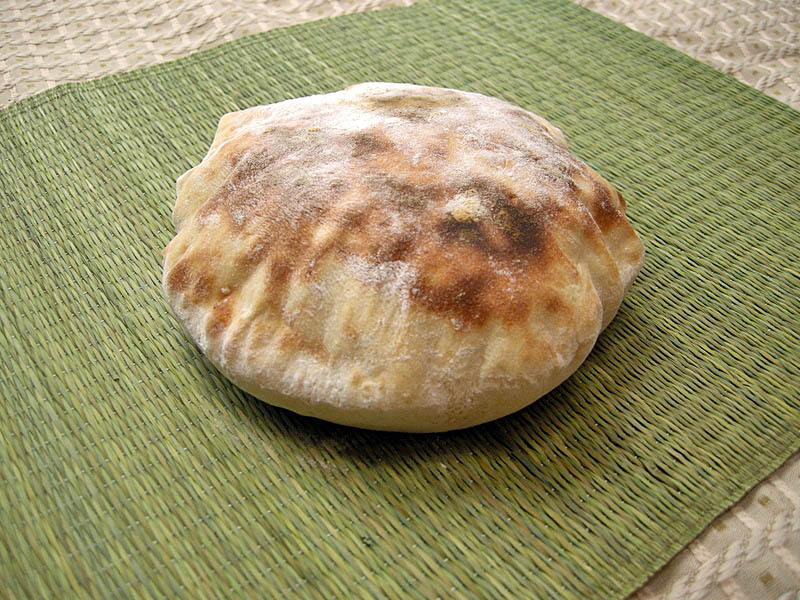
Comments: Carol says this is one of her favorite breads because its simple preparation allows her to have it at the table almost at the spur of the moment.  Although you could make it with dry rosemary, I urge you to use fresh, and go for the maximum amount recommended.  The flavor is not at all overpowering, and the pleasant hint of rosemary  makes this bread a good match for many types of sandwiches.  We enjoyed it in sandwiches of thinly sliced flank steak, grilled medium rare, and didn’t even add any cheese.   But of course, a little burrata on top and a quick run under the broiler will satisfy your most hedonistic inclinations.

The detail of sprinkling coarse salt in the slashes is pure genius!  Every once in a while you get this extra punch of  flavor, as the salt enhances the herbal tone of the bread.  Perfect.

I am submitting this post to Susan’s Yeastspotting event…

ONE YEAR AGO: A Classic Roast Chicken (the most popular post in the Bewitching Kitchen, recipe from Ad Hoc)

Add to FacebookAdd to DiggAdd to Del.icio.usAdd to StumbleuponAdd to RedditAdd to BlinklistAdd to TwitterAdd to TechnoratiAdd to Yahoo BuzzAdd to Newsvine

36 HOUR SOURDOUGH BAGUETTES

Over the past two and a half years I became comfortable baking rustic breads  using wild yeast.  The baguette, however, gave me lesson after lesson in humility. Baguettes are deceptively simple to prepare, but if you seek a bread with Parisian quality, then each step of preparation must be flawless: bulk fermentation, shaping, final proofing, and baking.  I’ve tried many recipes, but they never quite matched the superb baguettes of the 7th Arrondisement, where we used to live.

That all changed during our recent trip home.  I was looking forward to baking a  sourdough bread in our own kitchen, and decided on sourdough baguettes.  I followed the detailed instructions of TxFarmer, one of the most accomplished bakers of The Fresh Loaf Forum, and voila‘,  the baguettes from my own oven were just the way I’d hoped for…


TxFARMER’s 36 HOUR SOURDOUGH BAGUETTES

(recipe found at The Fresh Loaf forum)

150 g very active sourdough starter (at 100% hydration)
425g all purpose flour
300g cold water
10g salt

Mix water and flour into a lumpy mass, cover and place in the fridge for 12 hours.

Remove from the fridge, add the starter and salt to the dough, and mix until distributed. The dough will be very sticky, but you should resist the temptation to add more flour. Allow it to rise at room temperature for 2 to 3 hours, kneading by the “stretch and fold method” every 30 minutes. The dough may rise about 30% of its total volume. Place the dough covered in the fridge for 24 hours.

Remove the dough from the fridge and let it warm up for 1 to 2 hours – you want it to rise but not get overly bubbly, because that will make shaping very tricky later. Divide the dough in four pieces, taking care not to deflate it too much. Place each piece over floured parchment paper, and let it relax for 40 minutes.

Shape each one as a baguette (for a nice tutorial, click here), proof for 30 to 50 minutes, and bake with initial steam at 460 F for 25 minutes.

Let it completely cool before slicing.

ENJOY!

to print the recipe, click here

Comments: When Txfarmer described this recipe as “everything I know in one bread,”  she meant it. She baked multiple batches to perfect it, and made it clear that you need a good “feel” for the dough to get good results. That’s why the initial stretch and fold cycle varies from 2 to 3 hours, depending on the ‘strength” (gluten development) of your dough. The final rise at room temperature will also change depending on the temperature of your kitchen, and how much “lift” the starter provided during the 24 hour fermentation in the fridge. If you are new to bread baking, particularly using wild yeast, all these variables are intimidating. But if you’ve baked your share of sourdough breads, then consider making a batch of these baguettes, which taste incredibly good! The crumb is open, the taste surprisingly mellow, with an almost “sweet” component, hard to imagine in a sourdough.

You may have noticed that my individual baguettes ended with different types of crusts. The difference lies in how I generated steam during baking. Two baguettes were baked with an inverted roasting pan (sightly wet) on top: they developed a nice, shiny crust, with a “caramel” color. The other two baguettes were baked in a perforated pan, with steam coming from water poured in a cast iron pan placed at the bottom of the oven. Their crust is less shiny, but they had more oven spring. My favorite method is the inverted roasting pan, but it has a major drawback: I can only bake one baguette at a time.

If you dream of perfecting baguettes at home, you MUST try TxFarmer’s recipe. Many bakers already did, and raved about it (check the discussion at The Fresh Loaf Forum by clicking here).

I am submitting this post to Susan’s Yeastspotting event…

This slideshow requires JavaScript.

ONE YEAR AGO: Potato and Leek Braise

Add to FacebookAdd to DiggAdd to Del.icio.usAdd to StumbleuponAdd to RedditAdd to BlinklistAdd to TwitterAdd to TechnoratiAdd to Yahoo BuzzAdd to Newsvine

receita em portugues na proxima pagina

ROASTED POTATO and OLIVE FOCACCIA

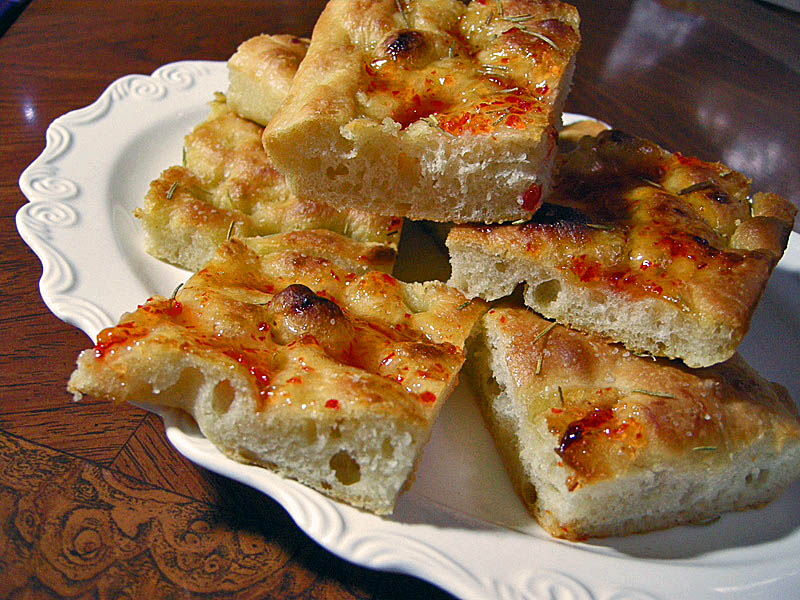
I am all for avoiding excesses, but every once in a while I will throw caution to the wind and indulge. A bread studded with chunks of roasted potatoes will not make you feel light as a feather, no matter how carefully you go through the “portion control” route. We are talking a fair amount of calories here, but those are very tasty calories, therefore, worth consuming. Just don’t bake it every week! 😉

This is another recipe designed by Dan Lepard, published on The Guardian website – you can shape it as a loaf, but I opted for a thick and rustic focaccia.  My electric oven handles flat breads a lot better than loaves, and it’s been a while since I made a focaccia anyway. The clock was ticking….

ROASTED POTATO AND OLIVE BREAD
(Dan Lepard)

450 g yellow, thin-skinned potatoes
a little olive oil to coat potatoes
375 g (ml) water
1 tsp instant dry yeast
100 g yogurt
50 g honey
175 g pitted green olives, coarsely chopped
1 small bunch dill, chopped (I substituted thyme)
2 tsp sea salt
625 g Italian 00 flour (I substituted bread flour)
Olive oil and salt flakes

The potatoes are briefly roasted and incorporated with all other ingredients to make a very sticky dough. Using Dan’s minimal kneading method, the dough rises for several hours, until patted in a baking dish as a focaccia or shaped as a loaf.

For a full, detailed recipe, please follow this link to Dan’s site.

ENJOY!

This slideshow requires JavaScript.

Comments: Part of the charm of this bread is the inclusion of potatoes and olives in large chunks, don’t cut them in small pieces. Next time I intend to roast the potatoes just a little bit longer, to make the flavor more prominent in the bread. Some pieces of potato will tend to fall off as you knead, don’t worry, just stick them back into the dough,  which, with each kneading cycle will be smoother and smoother.

I am sending this hearty focaccia to Susan’s  Yeastspotting event….

ONE YEAR AGO: SALMON CURRY (one of my favorite recipes ever!)

Add to FacebookAdd to DiggAdd to Del.icio.usAdd to StumbleuponAdd to RedditAdd to BlinklistAdd to TwitterAdd to TechnoratiAdd to Yahoo BuzzAdd to Newsvine

POLENTA-CRUST TOMATO LOAF

Another recipe designed by Dan Lepard, courtesy of the Guardian website. In terms of time and overall process, it is very similar to the semolina barbecue buns I blogged about last week, but it results in a bread with  a much more assertive flavor – thanks to the tomato and rosemary – and gorgeous crumb color. Even if you are new to bread baking, this recipe will not cause you any grievance – I promise… 😉


POLENTA-CRUST TOMATO LOAF

(Dan Lepard)
receita em portugues na pagina seguinte

100 g yogurt  (3.5 ounces)
25 g tomato paste (1 ounce)
25 ml olive oil (1 + 1/2 Tbs)
125 ml warm water (3.7 oz)
150 g sundried tomatoes in oil, roughly chopped (5 oz)
1 sprig rosemary, leaves picked
400 g bread flour (14 oz)
1½ tsp salt
1 tsp instant dry yeast
Polenta or coarse cornmeal, for shaping

Mix together the yogurt, tomato paste and oil, add the warm water and stir in the tomatoes and rosemary. Put the flour, salt and yeast in a mixing bowl, pour in the tomato mixture and work to a soft dough. Leave resting for 10 minutes, lightly knead on an oiled surface for 10 seconds, and return to the bowl. Repeat this minimal, quick kneading cycle twice more at 10-minute intervals, then leave the dough covered at room temperature for one hour.

Pat the dough into an oval, roll it tightly like a scroll, then roll it back and forth on the worktop, pressing down the ends so they taper slightly. Brush with water and roll in polenta or coarse cornmeal. Place seam-side down on a tray lined with nonstick paper, cover with a cloth and leave for an hour. Slash down the center and bake at 425 F (220 C) for 45 minutes. Allow it to completely cool before slicing.

ENJOY!

to print the recipe, click here

Comments: My favorite type of bread is a sourdough, made with a mixture of white and rye flours, sometimes a little whole wheat flour added in the formula.  Open crumb, hearty crust, a great match for any type of meal.  Having said that, I agree with Dan Lepard: this loaf has its place in the world, bread snobs should not be twisting their noses at it.  It smells terrific while it’s baking, almost as if you are making pizza.   Enjoy it with smoked ham or prosciutto, and for a more mellow alternative try a ricotta-based spread (ricotta, lemon zest, salt and pepper: simple, understated, but delicious).

I am submitting this red-tinted loaf to Susan’s Yeastspotting

ONE YEAR AGO: Light Whole Wheat Bread

Add to FacebookAdd to DiggAdd to Del.icio.usAdd to StumbleuponAdd to RedditAdd to BlinklistAdd to TwitterAdd to TechnoratiAdd to Yahoo BuzzAdd to Newsvine

receita em portugues na proxima pagina

SEMOLINA BARBECUE BUNS

Before we left on our journey to L.A., I had this bread in my “to bake soon” list.  Life got impossibly busy, but I didn’t worry too much, because I knew it would be a perfect bread for the nano-kitchen: minimal kneading, and doable in our toaster oven.  Several of my virtual friends made this bread and raved about it, but that’s a no-brainer: Dan Lepard is the man behind the formula.  😉

SEMOLINA BARBECUE BANS
(from Dan Lepard – The Guardian website)

75g semolina or cornmeal, plus more to finish (I used fine cornmeal)
150 ml boiling water + 200 ml warm water
25g unsalted butter
1 tsp honey (I used agave nectar)
1 Tbs yogurt
1 + 1/2 tsp salt
1 tsp instant yeast
450 g bread flour
(olive oil for kneading)

Spoon the semolina into a mixing bowl, pour 150ml of boiling water over it, stir well and leave for 10 minutes. Use a fork to mash the butter, honey, yogurt and salt into the mixture, then slowly work in 200ml of warm water, breaking up any lumps with your fingers. Stir in the yeast and flour, work to a smooth, soft dough and leave for 10 minutes.

Give the dough three 10-second kneads on an oiled surface over 30 minutes, then leave, covered, for an hour. Roll the dough to about 25cm x 35cm on a floured surface, lay on a baking tray lined with parchment paper and leave covered for 20 minutes. Cut the dough into eight flat rectangular “rolls”  but do not separate them, just make a deep incision all the way down the baking sheet. Leave, covered, until risen by half (I cut into six rectangles, and allowed them to rise for 25 minutes).

Heat the oven to 465F.  Brush the tops of the buns with water, sprinkle with semolina and score a deep crisscross on top with a knife. Bake for about 20 minutes, until brown on top.  Let it cool for at least one hour on a rack before amazing yourself at how delicious the rolls taste.

ENJOY!

to print the recipe, click here

Comments: This bread is so simple to prepare that I am still a bit shocked by how good it turned out.  If you haven’t yet been sold to the idea that minimal kneading makes excellent bread, this recipe will convince you.  I didn’t roll the dough, just stretched it lightly to preserve as much as possible the airy texture acquired in the hour long rise.

Dan made this recipe with pulled pork sandwiches in mind, and the combination would deserve to go into the Sandwich Hall of Fame.  Unfortunately, we don’t have any pulled pork at the moment, but the rolls still tasted awesome with ham, cheese and a slice of juicy tomato.

I am submitting this post to Susan’s Yeastspotting… the second bread from our Bewitching-Nano-Kitchen.

ONE YEAR AGO: Lavash Crackers

Add to FacebookAdd to DiggAdd to Del.icio.usAdd to StumbleuponAdd to RedditAdd to BlinklistAdd to TwitterAdd to TechnoratiAdd to Yahoo BuzzAdd to Newsvine