A DUTCH TIGER

Back in the 70’s, bakers in Netherlands realized that by coating bread dough with a thick paste made of rice flour, sugar, oil, and yeast, a crust would form during baking and develop cracks, giving each bread a unique pattern, akin to a tiger’s coat.  Tiger Bread, also known in the US as Dutch Crumb,  is a lot of fun to make and actually very easy, no wild yeast, no intense kneading.  A perfect recipe to make with kids, as they will have a blast with the changes in the bread as it bakes.  For my tiger rolls, I used the Vienna bread recipe made earlier during the  Bread Bakers’ Apprentice Challenge.   Peter Reinhart gives the option of the Dutch crumb at the end of that chapter, but not until folks at The Fresh Loaf forum raved about it I decided to re-visit it.

VIENNA BREAD WITH DUTCH CRUMB
(adapted from The Bread Bakers Apprentice)

Pate fermentee (made the day before)
140 g bread flour
2.5 g salt
1/2 teaspoon instant yeast and
100 g water at room temperature

Mix all ingredients, knead briefly and let it rise at room temperature for 1 to 2 hours. Place the mixture in the fridge overnight, remove from the fridge one hour before making the bread.

Dough:
185g  pate fermentee (you won’t use the full amount made)
170g unbleached bread flour
7g sugar
4.5g salt
2g instant yeast (3/4 tsp)
1/2 egg, slightly beaten
7g  unsalted butter, melted and slightly cooled
85-100 ml water, lukewarm (90 – 100 F)

Dutch Crumb Paste:
1 Tbs bread flour
3/4 cup rice flour
3/4 tsp. instant yeast
2 tsp. sugar
1/4 tsp. salt
2 tsp oil
8 tbsp water (or a little more) to make a thick paste.

Remove the pate fermentee from the refrigerator, cut it into 5-6 small pieces, cover and let it at room temperature for about 1 hour.

Stir together the flour, sugar, salt, and yeast in a large bowl. Add the pate fermentee pieces, the beaten half egg, butter, and 85 ml of the water.  Stir together with a large metal spoon, or with your hands, until the ingredients form a ball.  If too dry, add the rest of the water (I did). Let it rest for 20 minutes.

Knead by folding 3 times at 20 minutes intervals.  At the end of the third cycle of folding (at 1 hour fermentation), leave the dough covered, undisturbed, for another hour. Cut the dough into 6 equal pieces, pre-shape them as balls.  Let them rest for 15 minutes.

Make the topping layer by mixing all the ingredients for the Dutch crumb to form a thick paste. Shape each bread as rolls, being careful not to deflate the dough too much.  Place them on a floured surface without touching, apply a thick coating of crumb paste on the surface using a silicone brush or your fingers.  Let them rise for 60-90 minutes (they should not double in size).

Place the rolls (covered) in a 450F oven, turning the temperature down to 400F as soon as you start baking.  Remove the cover after 20 minutes, and continue baking them for a total of 30 to 35 minutes, until golden brown. Cool the rolls on a rack for one hour before eating.

ENJOY!

to print the recipe, click here

Comments: I made this bread twice on consecutive weekends, the first time I shaped it as a single loaf, but had some trouble to  fit it in my toaster oven.   This time I made small rolls and baked then in a tray of large muffins, covered with an improvised lid of heavy duty aluminum foil.  This was the only way I could bake them all at the same time in my small oven.  After 20 minutes baking, I removed the aluminum foil, quickly (and carefully) dumped the breads out of the muffin tin, and allowed them to continue baking sitting on the oven’s rack.

The crust is visually appealing, but what’s even better is its taste.   I actually had to control myself not to peel it off  leaving the naked roll behind.  😉  It is sweet and salty at the same time, crunchy, deliciously addictive.
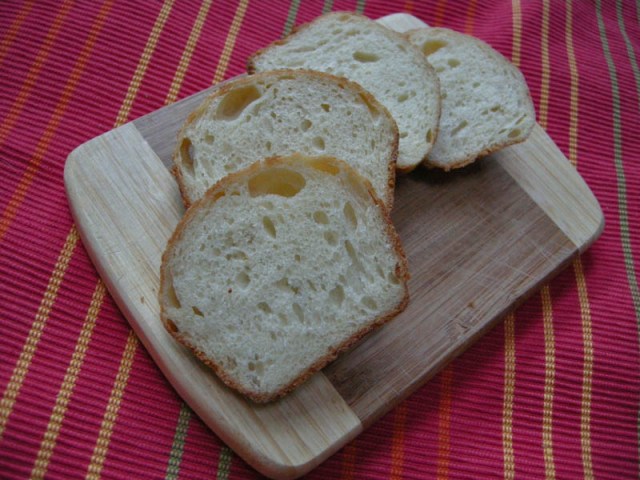
The crumb is delicate, and the bread, thinly sliced, a perfect accompaniment to a bowl of soup, a simple salad, or a slice of Iberico cheese (one of our latest addictions).

I am submitting this post to Susan’s Yeastspotting

ONE YEAR AGO: Banana Bread (something I’ve been craving lately….)

Add to FacebookAdd to DiggAdd to Del.icio.usAdd to StumbleuponAdd to RedditAdd to BlinklistAdd to TwitterAdd to TechnoratiAdd to Yahoo BuzzAdd to Newsvine

FESTIVUS DINNER ROLLS

A post dedicated to all the Seinfeld fans…  😉

Sometimes in a meal a bread grabs the spotlight.  Think about the glory of a rustic sourdough boule beside a bowl of lentil soup, or a slice of pain Poilane beneath a golden cheesy layer of Croque Monsieur.  But during a Thanksgiving or Christmas dinner feast the breads accept a more humble place.  Small rolls, soft and unpretentious, are the best choice. This recipe was published in Fine Cooking magazine in 2001, with Abigail Johnson Dodge behind it, which means it is flawless. You can make and shape the dough a day beforehand, place it in the fridge, and bake it while entertaining your guests on even a very busy cooking day.

CLASSIC DINNER ROLLS
(Abigail Johnson Dodge, Fine Cooking 2001)

18 oz. (4 cups) all-purpose flour
1 package (2-1/4 tsp.) rapid-rise yeast
1/3 cup sugar
1 tsp. salt
1 cup milk
4 oz. (8 Tbs.) unsalted butter
3 large egg yolks

Place the flour, yeast, sugar and salt in the bowl of your KitchenAid type mixer, mix to combine. Put the bowl in the mixer stand and fit it with the dough hook.

Heat the milk and butter in a small saucepan, stirring gently until the butter melts, and the temperature reaches 115F to 125F. Pour the mixture over the dry ingredients in the bowl, add the egg yolks, and mix with the dough hook in low speed until everything forms a shaggy mass. Increase the speed to medium high and mix/knead for about 8 minutes.

Remove the dough from the bowl, shape it into a ball, grease the bowl lightly with oil, and place the dough back inside, covering with plastic wrap. Let it rise until doubled in size (45 minutes if using rapid-rise yeast, a little longer for other types of yeast).

Lightly grease a 9×13-inch baking dish. Turn the dough onto a clean work surface (no need to flour; the dough is soft but not sticky) and gently press to deflate. Divide the dough into 16 equal pieces, form each into a ball, and place in the pan, with the seam side down.

Cover the pan with plastic and let the dough rise until almost doubled, about 30 min. Meanwhile, heat the oven to 375°F. Remove the plastic and bake the rolls until they’re puffed and browned, about 20 min. Serve warm.

ENJOY!

to print the recipe, click here

Comments: To make  this recipe in advance, cover the rolls with plastic wrap right after shaping and place them in the fridge.  Next day  remove the dish from the fridge, let it sit at room temperature for 2 hours, and then bake the rolls at 375 F.

I brushed the rolls right before baking with an egg wash (1 egg beaten with a couple of teaspoons of water), because I like the shiny look it gives to the bread.  However, you can also bake them without it, as the original recipe suggests.

Warm from the oven, these rolls are perfect to soak up that last bit of gravy on your plate. And they can return the next day sliced in half, for mini-turkey or prime-rib sandwiches, a holiday tradition in many American homes!

If you are hosting a big Christmas or New Year’s Eve dinner, these rolls will be a nice addition to your menu. They are very easy to make – even if you are a rookie bread baker – and absolutely delicious.

I am submitting this post to Yeastspotting.

ONE YEAR AGO: Lebanese Baked Kibbe (one of my favorite recipes ever!)

Add to FacebookAdd to DiggAdd to Del.icio.usAdd to StumbleuponAdd to RedditAdd to BlinklistAdd to TwitterAdd to TechnoratiAdd to Yahoo BuzzAdd to Newsvine

SEMOLINA BARBECUE BUNS

Before we left on our journey to L.A., I had this bread in my “to bake soon” list.  Life got impossibly busy, but I didn’t worry too much, because I knew it would be a perfect bread for the nano-kitchen: minimal kneading, and doable in our toaster oven.  Several of my virtual friends made this bread and raved about it, but that’s a no-brainer: Dan Lepard is the man behind the formula.  😉

SEMOLINA BARBECUE BANS
(from Dan Lepard – The Guardian website)

75g semolina or cornmeal, plus more to finish (I used fine cornmeal)
150 ml boiling water + 200 ml warm water
25g unsalted butter
1 tsp honey (I used agave nectar)
1 Tbs yogurt
1 + 1/2 tsp salt
1 tsp instant yeast
450 g bread flour
(olive oil for kneading)

Spoon the semolina into a mixing bowl, pour 150ml of boiling water over it, stir well and leave for 10 minutes. Use a fork to mash the butter, honey, yogurt and salt into the mixture, then slowly work in 200ml of warm water, breaking up any lumps with your fingers. Stir in the yeast and flour, work to a smooth, soft dough and leave for 10 minutes.

Give the dough three 10-second kneads on an oiled surface over 30 minutes, then leave, covered, for an hour. Roll the dough to about 25cm x 35cm on a floured surface, lay on a baking tray lined with parchment paper and leave covered for 20 minutes. Cut the dough into eight flat rectangular “rolls”  but do not separate them, just make a deep incision all the way down the baking sheet. Leave, covered, until risen by half (I cut into six rectangles, and allowed them to rise for 25 minutes).

Heat the oven to 465F.  Brush the tops of the buns with water, sprinkle with semolina and score a deep crisscross on top with a knife. Bake for about 20 minutes, until brown on top.  Let it cool for at least one hour on a rack before amazing yourself at how delicious the rolls taste.

ENJOY!

to print the recipe, click here

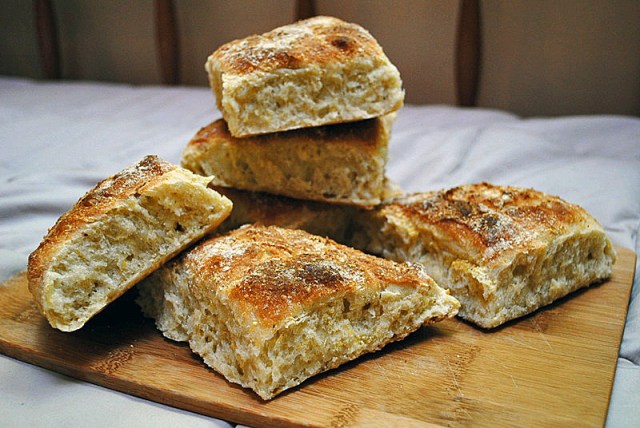
Comments: This bread is so simple to prepare that I am still a bit shocked by how good it turned out.  If you haven’t yet been sold to the idea that minimal kneading makes excellent bread, this recipe will convince you.  I didn’t roll the dough, just stretched it lightly to preserve as much as possible the airy texture acquired in the hour long rise.

Dan made this recipe with pulled pork sandwiches in mind, and the combination would deserve to go into the Sandwich Hall of Fame.  Unfortunately, we don’t have any pulled pork at the moment, but the rolls still tasted awesome with ham, cheese and a slice of juicy tomato.

I am submitting this post to Susan’s Yeastspotting… the second bread from our Bewitching-Nano-Kitchen.

ONE YEAR AGO: Lavash Crackers

Add to FacebookAdd to DiggAdd to Del.icio.usAdd to StumbleuponAdd to RedditAdd to BlinklistAdd to TwitterAdd to TechnoratiAdd to Yahoo BuzzAdd to Newsvine