SATURDAY MORNING SCONES

Scones and bran muffins have something in common: they often make a bad first impression.  Indeed, my first scone experience was over 10 years ago, and I’ve avoided them ever since.  I had no intention of ever baking a batch, but a series of events made me reconsider.  First, I saw this post at Lisa’s blog, which peaked my interest.  Then, a few days later some friends raved about banana scones from the latest Fine Cooking.  Any hope of removing scones from my mind were shattered when I asked Phil what I should make for our Saturday post-run breakfast?   “How about some blueberry scones?” …was his response. The path of least resistance was beckoning, and I veered that way.

LEMON-GLAZED BANANA-BERRY SCONES
(adapted from Fine Cooking)

9 oz. (2 cups) all-purpose flour
1/4 cup granulated sugar
2-1/4 tsp. aluminum-free  baking powder
zest of 1 Meyer lemon
3/8 tsp. table salt
5-1/2 Tbs cold unsalted butter, cut into pieces
1 small ripe  banana, cut into 1/4-inch dice (1/2 cup)
1/2 to 3/4  cup dried blueberries and cranberries
3/4 cup plus 2 Tbs. heavy cream; more for brushing
For the glaze
3 oz. (3/4 cup) confectioners’ sugar
1-1/2 Tbs. fresh Meyer lemon juice
1 Tbs. unsalted butter, softened
pinch of salt

Heat the oven to 375°F.

In a large bowl, whisk the flour, sugar, baking powder, lemon zest, and salt. Rub the pieces of butter into the flour mixture using your fingers until a few pea-size lumps remain. Stir in the banana and the dried fruits. Add the cream and stir the mixture with a fork until it comes together.

Turn the dough onto a lightly floured surface and pat gently into a 7-inch circle about 1 inch high. Cut the dough into 8 wedges. Transfer to a baking sheet lines with parchment paper, allowing 1 inch of space between the scones.  Brush the tops with heavy cream and bake until the tops are golden and they feel firm to the touch – 20 to 25 minutes.  Cool slightly on a wire rack before glazing.

To make the glaze, mix the confectioner’s sugar, lemon juice, butter, and salt, stirring until completely smooth.  Drizzle the warm scones and serve them warm or at room temperature.

ENJOY!

to print the recipe, click here
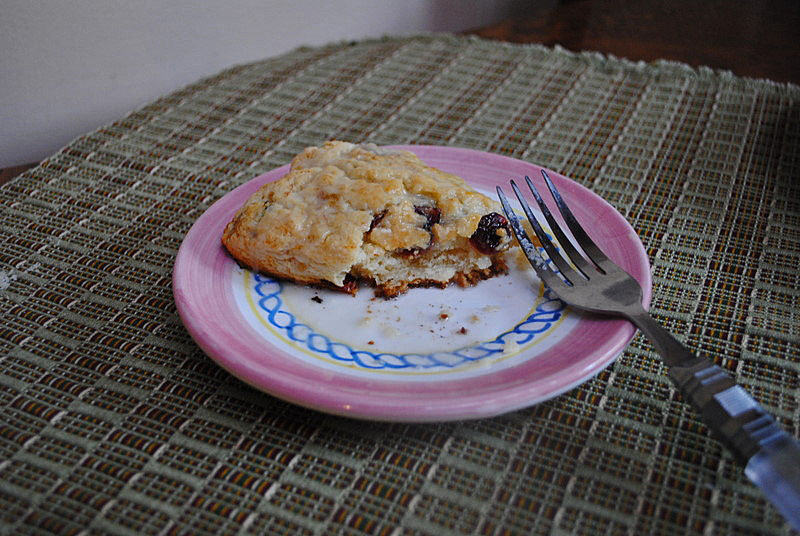
Comments: The original recipe called for bananas and crystallized ginger. I’m   insecure about changing baking recipes, especially the first time making them.  However, being married to an incorrigible optimist helps a lot. ” Just skip the ginger and add the blueberries, it will be fine.” As I was preparing the ingredients he dug out a bag of dried cranberries and handed it to me: “…here, add these babies too, they’ll be some awesome scones”!

Well, he was right.  The scones were delicious!  Moist, flavorful, with a delicate banana flavor that although not pronounced,  was definitely noticeable.  The lemon glaze pumped them up another notch, so don’t skip it [yet another delicious use for those Meyer lemons.  ;-)]

ONE YEAR AGO: Pain de mie au levain

Add to FacebookAdd to DiggAdd to Del.icio.usAdd to StumbleuponAdd to RedditAdd to BlinklistAdd to TwitterAdd to TechnoratiAdd to Yahoo BuzzAdd to Newsvine

WHEN LIFE GIVES YOU (MEYER) LEMONS

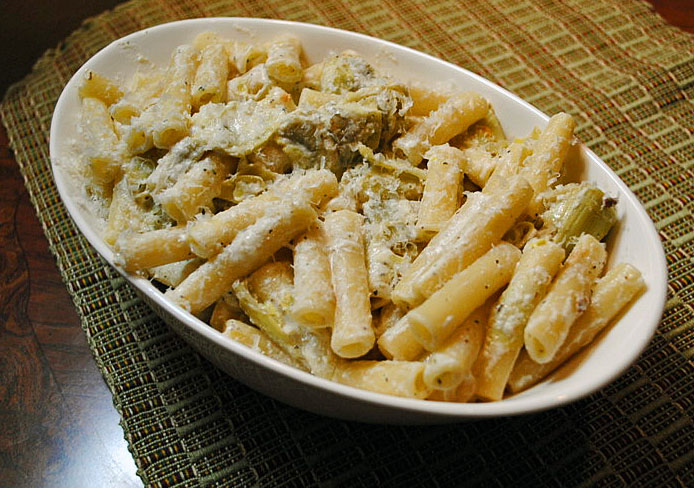
Hundreds of years ago the Chinese developed a new fruit by crossing a lemon and either a mandarin or an orange tree, no one knows for sure. PCR and DNA sequencing could definitely solve this  puzzle, but as far as I know, this research hasn’t materialized yet. The fruit, introduced in the USA in 1908, is the Meyer lemon, and once you try it, you understand why people go crazy when they show up  in farmers’ markets and grocery stores. I’ve been using them often these days, absolutely in love with their flavor, which is often described (quite accurately) as floral.   This pasta came together quickly for a delicious weeknight dinner.  My inspiration was a recipe published in a recent Fine Cooking issue (number 108, the one with the beautiful croquembuche on the cover).

ZITI WITH ARTICHOKES AND MEYER LEMON SAUCE
(loosely adapted from Fine Cooking #108)

10 ounces ziti
1 Tbs olive oil
1/2 Tbs butter
1 small size leek, white and light green part only, diced
8 ounces frozen artichoke hearts, cut in large chunks
1/4 tsp red pepper flakes
salt and pepper
zest and juice of 1 Meyer lemon (will be used separately)
1 cube of Dorot frozen basil (or 2 Tbs fresh leaves, minced)
1/2 cup ricotta cheese
1/4 cup mascarpone cheese
freshly grated Parmiggiano

Heat the olive oil and the butter in a large skillet in medium heat.  Add the minced leeks, cook until softened, season lightly with salt and pepper.  Increase the heat to high and add the artichoke pieces (no need to defrost if frozen), and the red pepper flakes. Cook without moving them too often, so that a nice golden brown color develops.  Remove from the heat, add the lemon zest and reserve.

In a small bowl, mix the ricotta, mascarpone cheese, the basil, and the lemon juice.  Season lightly with salt and pepper.

Cook the pasta in plenty of salted boiling water, reserve 1/4 cup of the cooking liquid, drain the pasta and place back in the pan.  Add the ricotta mixture, stir very well to combine.  If too thick, add some of the pasta water.  Finally, gently incorporate the artichokes, and serve, with Parmiggiano cheese grated on top.

ENJOY!

to print the recipe, click here

Comments: The original recipe called for 4 different types of cheese and several herbs.  I wanted a dish a little lighter and simpler, so that the Meyer lemon had a better chance to shine.  It worked quite well, I am already a bit sad that their season won’t last forever.  Carpe diem, my friends.  Carpe diem.

ONE YEAR AGO: Blasted Broccoli, Stove-top version

Add to FacebookAdd to DiggAdd to Del.icio.usAdd to StumbleuponAdd to RedditAdd to BlinklistAdd to TwitterAdd to TechnoratiAdd to Yahoo BuzzAdd to Newsvine

TIDY SOURDOUGH

This bread closes a personal saga with a long-awaited happy ending.   Since we moved to LA I’ve been searching for a way to bake the bread we enjoy the most:  the rustic sourdough boule.  When you only have a small electric (toaster) oven, baking this bread becomes tricky,  to say the least.  After 11 unsuccessful attempts, I finally conquered my virtual Mt.Everest and stuck my flag  in the summit!

BREVILLE SOURDOUGH
(from the Bewitching Kitchen, adapted from several sources)

235 g active sourdough starter  (75% hydration)
275 ml water at room temperature
400 g bread flour
65 g whole wheat flour
10 g salt

Pour the water into a bowl, add the sourdough starter and dissolve it.  Add the flours and the salt, then roughly mix all the ingredients together to form a shaggy mass.  No need to incorporate it as a smooth dough at this point.  Cover the bowl and let it stand for 20 minutes at room temperature.  Remove the dough from the bowl and place it on a smooth surface rubbed with a small amount of vegetable oil.    Quickly knead the dough for 20-30 seconds, incorporating all the dried bits of flour that are clinging to it .   Wash the bowl or transfer to another, clean bowl, cover with a plastic wrap and leave at room temperature for 45 minutes.

Remove the dough from the bowl, add to the kneading surface (slightly coated with oil if needed), knead for 20 seconds (second kneading cycle).  Place the dough back in the bowl, leave it resting for 45 minutes more.  Proceed with a third kneading cycle, place the dough in the bowl for 1 hour.

Remove the dough from the bowl, shape roughly into a ball, let it rest 15 minutes, and form it into the final shape, making sure to generate good surface tension.  Place the ball, seam side up, in a well floured round basket and let it rise at room temperature for 3 hours.  Forty-five minutes before baking,  heat your oven to 450F with a round pizza stone inside.

Invert the dough over a piece of parchment paper on a peel or cookie sheet, slash the top with a razor blade, and place in the oven. Position a Dutch oven inverted on top of it (fill it with very hot water, then dump the water and use it to cover your bread).  Bake covered for 35 minutes, then CAREFULLY uncover the bread and bake for 25 to 30 minutes more (or until internal temperature is over 200F).  If the top browns too much lower the temperature to 425F, and cover the surface with aluminum foil.

Cool for at least one hour before slicing and…

ENJOY!

to print the full recipe, click here

to see my timetable for this bread, click here

to print your own timetable for future use, click here

Comments: I’ve baked many breads in the past 3 years, but none gave me the thrill of this one, because it was my very last attempt! I was ready to throw in the towel and conclude that a rustic sourdough cannot be done in the nano-kitchen. What made it possible was creating the correct enclosure to bake the bread for the first 30 minutes.  For our Breville, a round pizza stone and a Le Creuset-wannabe (found at a Ross store  a couple of months ago) served the purpose quite well.

Normally I’d add a small amount of rye flour to the dough, but I couldn’t  find it last weekend, so I used only regular whole-wheat.  This is probably the largest bread you can bake in a Breville, and I intend to try a slightly smaller version in the near future.  I used regular kneading for this bread, but made a second loaf a couple of days later folding the dough instead, with similar results.  You can use whatever technique you feel most comfortable with.

Variation: Follow this recipe to the point of the final shaping as a “boule,” then retard it in the fridge overnight.  Next day, bring it to room temperature 2 hours before baking.

I am excited to send this post to Susan’s Yeastspotting

ONE YEAR AGOVienna Bread

Add to FacebookAdd to DiggAdd to Del.icio.usAdd to StumbleuponAdd to RedditAdd to BlinklistAdd to TwitterAdd to TechnoratiAdd to Yahoo BuzzAdd to Newsvine

MOGO MOJO

A few weeks ago a reader left a comment on my post about “mandioca frita.” He told me about “mogo,” a common dish in Indian restaurants in the UK, that also starts from cooked manioc root, but instead of frying, the root is seasoned with a mixture of spices and roasted.   I was intrigued, and put google to work, searching for an authentic recipe.  Very quickly I realized there is no consensus about it.   The only common denominator in mogo recipes is that you start with cooked roots, prepared as I described in this post.  After that, some recipes call for roasting, some for frying  then roasting, others for gently cooking on the stove.   Some recipes use tomatoes, some only peppers, others add coconut milk.  Spices also vary a lot.   With all that complexity facing me,  I shutdown my computer and improvised.  So, here is my version of mogo, a delicious, hearty dish that will be showing up at our table on a regular basis.  Well, as regularly as I can find manioc root at the store…  😉

MOGO
(from the Bewitching Kitchen)

10-12 pieces of cooked manioc root
1 Tbs olive oil
1 shallot, finely diced
1 garlic clove, minced
1/4 tsp red pepper flakes (or more)
1/2 tsp curry powder
salt and black pepper
1 can diced tomatoes with their juices (14.5 oz, about 1 + 3/4 cups)
1/2 cup coconut milk
chopped cilantro leaves

Cook the manioc root until tender. Cut in serving pieces and reserve (cooked manioc can sit in the fridge for a few days, or be frozen for months).

Heat the oil in a saute pan, add the shallots, cook until soft and starting to develop some color.  Add the minced garlic and the red pepper flakes, cooking for a minute or two. Season with salt and pepper, add the tomato with the juices, cook on gentle heat for 5 minutes, stirring a few times.  Add the coconut milk, curry powder, cook for a couple of minutes, add the cilantro leaves, taste the seasoning and adjust to your taste.  You can add some hot pepper sauce if you like it really hot.

Spread the cooked manioc on a baking dish, pour the tomato-coconut sauce on top, cover with aluminum foil and bake at 375 F for 45 minutes.  Remove the foil, and serve or, if you prefer less sauce and some browning on the cassava root, increase the heat to 400 F to finish roasting.

ENJOY!

to print the recipe, click here

Comments: I will be forever in debt with Jack for the heads up about this recipe.  We enjoyed it with roast chicken, but next day it was a meal in itself re-heated in the microwave and served over Israeli couscous.  Wonderful!   Change this basic recipe around by adding roasted bell peppers to the sauce, increasing the heat level with a hot sauce, maybe some smoked hot paprika.

I hope my Brazilian readers will give mogo a try, as they have access to excellent quality manioc root in farmers markets and grocery stores everywhere. Manioc root is not a very popular item in the US, but hopefully that will soon change!   😉

ONE YEAR AGO: Slow-roasted chicken thighs

Add to FacebookAdd to DiggAdd to Del.icio.usAdd to StumbleuponAdd to RedditAdd to BlinklistAdd to TwitterAdd to TechnoratiAdd to Yahoo BuzzAdd to Newsvine

BRAN MUFFINS: NOT JUST FOR HIPPIES

Ever since I started dating Phil he spoke fondly about a bran muffin that he enjoyed on a regular basis at Hans’ Danish Bakery in Berkeley (it closed years ago), during his grad student, “hippie days.”  At that time (while living in Brazil and not quite a teenager) I watched the hippie movement from afar, too young to embrace or fully understand it.  Never in a gazzilion years could I imagine that one of those long-haired, tie-dyed,  war-protesting, head-banded hippies would become my husband.   We didn’t meet until decades later, but the passion for peace and love,  tie-dyes, and hippie ideals are still in-force around our home, and that includes a fondness for  bran muffins!   No sense quitting what makes us happy. 😉

Nevertheless, my attempts to recreate the famous bran muffin from Berkeley were stuck on a road paved with failure and frustration, until this past weekend my luck began to change. I went to Dan Lepard’s collection of recipes at The Guardian in search of his take on the elusive bran muffin, and adapted his recipe to suit my favorite hippie’s finicky taste.

BLUEBERRY-WALNUT BRAN MUFFINS
(adapted from Dan Lepard’s original recipe)

75g wheat bran
100g dark brown sugar
200ml milk (3/4 cup)
1 Tbs molasses
zest of 1 orange
150ml vegetable oil (1/2 + 1/8 cup)
2 large eggs
200g all purpose flour
3 tsp baking powder
75g sugar
pinch of salt
1/2 cup fresh blueberries
1/2 cup dried raisins and dried blueberries
1/2 cup walnuts, lightly toasted and chopped

Heat the oven to 400F (200C)  and line the cups of 6 large muffin tins with paper.

Place the wheat bran and the brown sugar in a mixing bowl.  Bring the milk almost to a boiling point, and pour it over the bran. Mix to incorporate, and allow it to sit for 5 minutes.  Beat in the molasses, orange zest, oil and eggs until very smooth.

Sift the flour, baking powder, sugar, and salt, then gently mix this through the bran mixture trying not to over-mix.  Fold in the blueberries, raisins, dried blueberries, and walnuts.  Spoon the mixture into the prepared muffin tin, and bake for about half an hour, until they get a dark brown color on top and feel firm to the touch.  Tip the muffins slightly off the pan to cool them without steaming the bottom.

ENJOY!

to print the recipe, click here

Comments:  Because some people find them too dense or dry, almost austere, bran muffins are not everyone’s favorite.  But, these muffins are different, starting with their nice texture, and finishing with a great balance of whole grain flavor and sweetness. I dare saying that they will please even a hard core anti-bran person.   They received a nod of approval from the resident muffin-connoisseur, who said the main difference between these and those in his memory was the orange flavor, which is pronounced in Dan’s recipe.  Not that there’s anything wrong with that… 😉  But my next batch will  omit the orange zest.

I already smell the fireworks…

ONE YEAR AGO: Flourless Chocolate Cake (a chocolate lover’s dream come true)

Add to FacebookAdd to DiggAdd to Del.icio.usAdd to StumbleuponAdd to RedditAdd to BlinklistAdd to TwitterAdd to TechnoratiAdd to Yahoo BuzzAdd to Newsvine