PISTACHIO-WALNUT SOURDOUGH BREAD

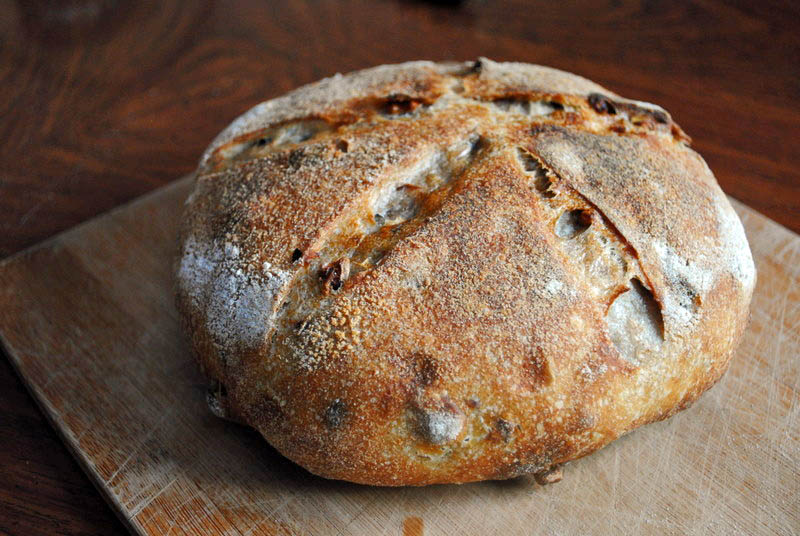
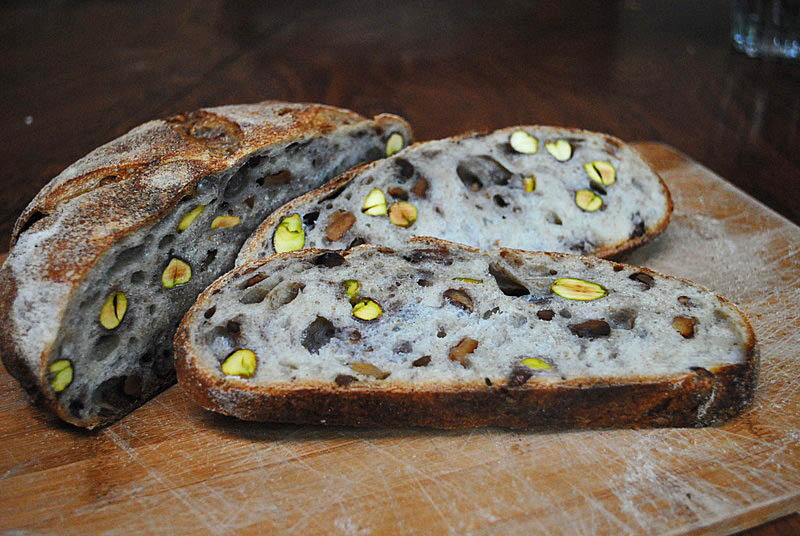
The goal: to make a sourdough bread loaded – and I mean loaded – with nuts, a crumb not as open as my usual loaves, to enjoy with an assortment of cheeses, from  French Brie to Italian Gorgonzola, passing by Spain with its awesome Manchego.  My starting point was a recipe from Maggie Glezer’s Artisan Baking, adapted to include whole pistachios, and small pieces of walnuts.  I wanted the pistachios to be the main textural component in the bread, and the walnuts to impart mainly their flavor throughout the crumb.  According to my dear husband, I hit the jackpot with this bread, he absolutely loved it. It reminded us of a bread we used to buy in a street market in Paris on Saturdays, except for the fact that the French version included a lot of sunflower seeds. Now, that’s an interesting idea for a future baking adventure… ๐Ÿ˜‰

PISTACHIO-WALNUT SOURDOUGH BREAD
(from the Bewitching Kitchen)

Levain (you will use only half of it):
1 Tbs firm sourdough starter
45 g  warm water
75 g  bread flour

Dough:
300 g  bread flour
25 g  rye flour
25 g whole wheat flour
228 g  warm water
8 g salt
80 g walnuts, lightly toasted, in small dice
50 g whole pistachios, roasted

Make the levain by mixing all the ingredients and kneading lightly to form a smooth dough.  Keep at room temperature for about 12 hours (it should at least triple in size).

Make the dough by combining the three types of flour with the water.  Cover and let the mixture rest for 30 minutes. Add the salt and the levain (half of it only!) and knead a few times until it forms a shaggy mass.  Add the nuts and knead briefly to incorporate them.  Let it rest for 30 minutes, knead for about 10-20 seconds, and let the dough rest for another 30 minutes.  Knead (or fold) a few times, and let the dough rest for 1 hour.  Knead (or fold)  a few times, and let it rise undisturbed for 2 hours.

Pre-shape the dough as a round ball, let it rest for 15 minutes, then shape it in its final form, placing it in a banetton or another appropriate, well floured container, with the seam side up.   Cover and let it rise for 3 hours. Invert the dough on parchment paper, slash the surface, place on a baking stone on a 425 F oven, covered for 30 minutes, then uncover and bake for 15 minutes more, until dark brown and the internal temperature is at least 205 F.

Let the loaf cool over a rack  before cutting.

ENJOY!

to print the recipe, click here

Comments:  Making this bread was a labor of love, because I shelled the pistachios myself. My finger tips had quite a workout, so next time I will buy shelled pistachios to make life a little easier, and I advise you to do the same. At any rate, this bread is a nut-lover’s paradise.  The pistachios shine like little jewels, and the walnuts become almost sweet during baking.  I could not be happier with it, as it turned out exactly as I hoped.  Plus, it was another  successful performance by our Breville toaster oven!

Who could resist having a second slice?  ๐Ÿ˜‰

I am submitting this post to Yeastspotting

Add to FacebookAdd to DiggAdd to Del.icio.usAdd to StumbleuponAdd to RedditAdd to BlinklistAdd to TwitterAdd to TechnoratiAdd to Yahoo BuzzAdd to Newsvine

THE ODD COUPLE

Every morning when we are preparing to leave the house, the dogs get quite excited. They go out through the front door, and circle around us, being all cute and lovey-dovey, with the expectation (I suppose) that all that display of affection would make us change our minds and go back inside. However, on one recent morning we found both dogs with a completely different demeanor: they sat down, frozen as statues, in the spot farthest away from us, and simply watched as we left.

To understand such odd canine behavior we need to review events that took place a little earlier. While taking my shower, Oscar stole the left foot of one of my favorite pairs of shoes – grey Skechers’ bikers – took it to his bed and chewed it up. Once defrosted from my paralyzed state of disbelief, I went into a full ballistic-mode. Chief, although innocent of all wrong-doing, decided it was best to stay by his brother, just in case some of the uncontrollable rage would spill over.

That, my friends, is how you get a morning shot of two dogs, sitting side by side, without moving a single muscle. I bet they were barely breathing.

ONE YEAR AGO: Cottage Loaf and Yeasty Dogs

Add to FacebookAdd to DiggAdd to Del.icio.usAdd to StumbleuponAdd to RedditAdd to BlinklistAdd to TwitterAdd to TechnoratiAdd to Yahoo BuzzAdd to Newsvine

DOUBLE ASPARAGUS DELIGHT

Here’s a clever approach that Michel Richard published in his cookbook “Happy in the Kitchen” :ย  asparagus spears paired with an asparagus “vinaigrette.”ย ย  If you love green vegetables, as I do, you will delight in this recipe.ย  It’s a model of simplicity because it involves so few ingredients, but you must pay attention to the details, and above all, avoid overcooking the spears.ย  I can’t imagine a better way to welcome Spring!

ASPARAGUS ON ASPARAGUS
(from Happy in the Kitchen)

24 large asparagus
2 Tbs extra virgin olive oil
1 tsp Dijon mustard
1 Tbs fresh lemon juice (I used Meyer lemons)
pinch ofย  sugar
pinch of salt

Set aside 4 whole spears for the dressing. Cut off the tough bottom ends of all asparagus spears and set those aside for the as well. With a vegetable peeler, peel the remaining asparagus starting about one inch below the tip.

Have a bowl with ice cold water ready.ย  Steam the asparagus spears for 5 to 6 minutes only, until they are just tender when gently pierced with the tip of a knife.ย  knife. When the asparagus is cooked, lift the spears with a pair of tongs and plunge them in the ice bath to cool, then remove and dry on kitchen paper or a towel.

Make the asparagus sauce: cut the 4 reserved spears into 1-inch pieces. Place them in a small saucepan with the trimmed asparagus bottoms and add ยผ cup water and the olive oil. Bring it to a simmer, cover, and gently cook for 8 to 10 minutes, or until the asparagus is completely softened. The water should have evaporated, leaving the asparagusย  stewing in only the oil.

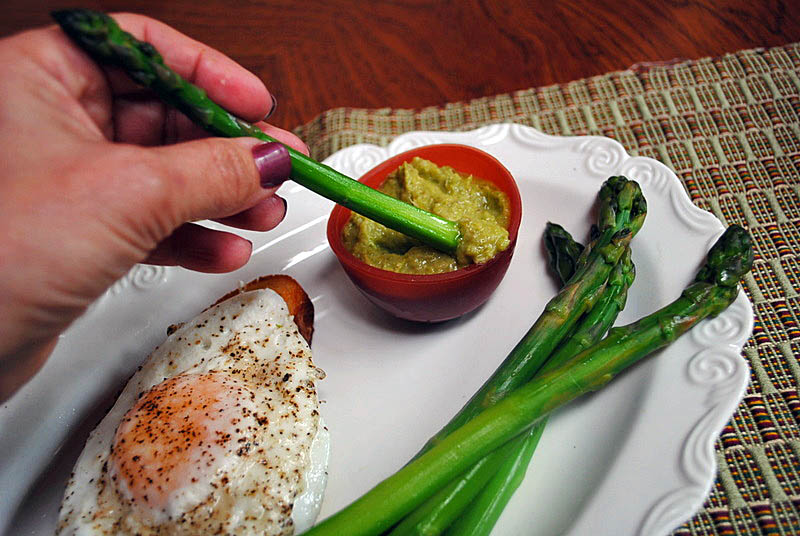
Transfer the asparagus to a blender or food processor and puree it until completely smooth. Transfer the puree to a small bowl and whisk in the mustard, lemon juice, salt, and pepper. Serve the asparagus on a platter, with the vinaigrette in a small dish or ramekin on the side for dipping or dousing the spears.

ENJOY!

to print the recipe, click here

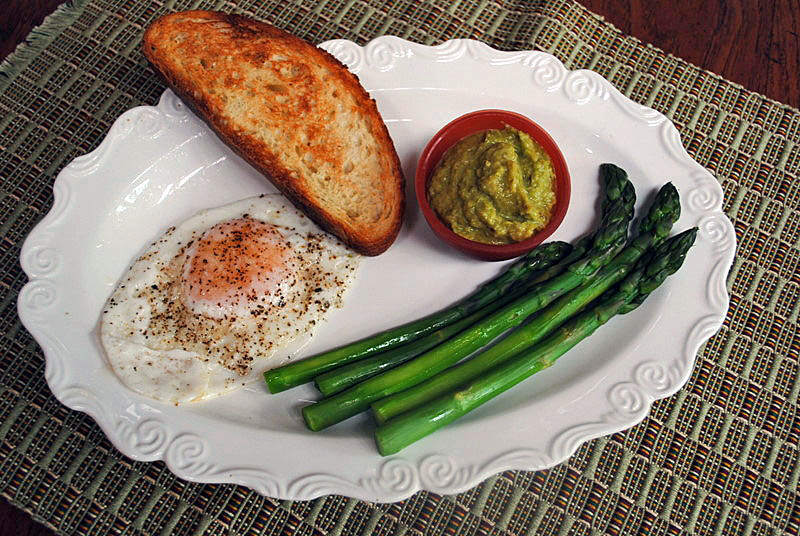
Comments:ย  Peeling the asparagus may seem like work, but don’t skip it.ย ย  Use large asparagus for this dish, and the peeling will ensure a wonderful texture and even cooking.ย  I enjoyed them as a light lunch with homemade bread and a sunny-side egg, but the dish is also a perfect option as an appetizer at a dinner party.ย  The asparagus lovers among your guests will never forget it!

The sauce or dressing is an excellent adaptation for the tough ends of the spears, so consider making some whenever you cook asparagus.ย  I imagine that it will also complement other dishes, like grilled salmon, with a sprinkle of fresh dill on top.ย  Must try that soon.

The beginning of asparagus season always makes us happy!

ONE YEAR AGO:ย  Sundried Tomato and Feta Cheese Torte

Add to FacebookAdd to DiggAdd to Del.icio.usAdd to StumbleuponAdd to RedditAdd to BlinklistAdd to TwitterAdd to TechnoratiAdd to Yahoo BuzzAdd to Newsvine

ALMOND BUTTER CAKE

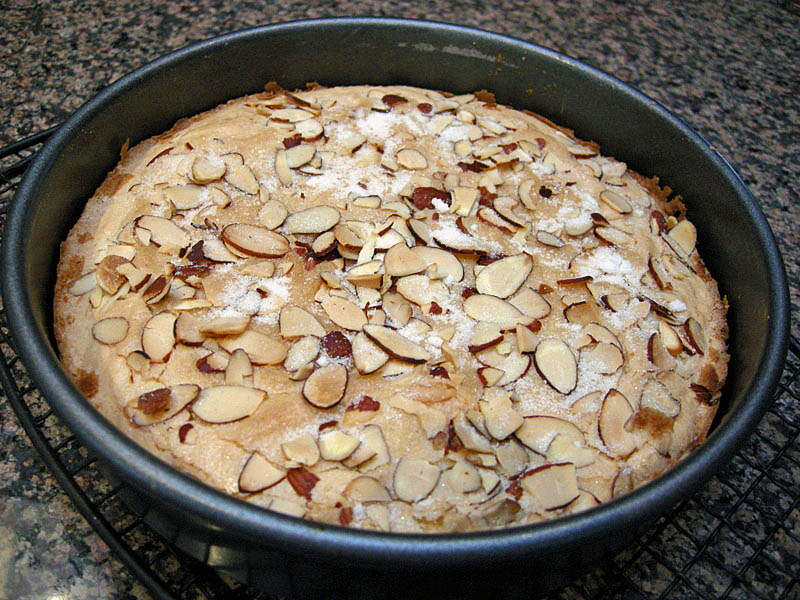
My dear friend and baker extraordinaire Heather wrote me an email a couple of weeks ago saying that she baked a delicious cake and thought I should give it a try because it was simple (in other words: Sally-proof) but quite flavorful.  What is simple for Heather, is not necessarily simple for me, but when I read the recipe, I noticed that it did not have that scary “cream sugar with butter”  step.  Cautiously optimistic, I gave it a try. Indeed, this was one of the easiest cakes I’ve ever made, and each bite seemed to taste better than the previous one.   Heather adapted the  recipe  from the winning entry in a C&H Sugar Baking Contest years ago.

ALMOND BUTTER CAKE
(from Heather’s kitchen)

ยฝ C butter, melted
1 + ยฝ C sugar
2 eggs
1 tsp almond extract
1 + ยฝ tsp vanilla
ยผ tsp salt
1 + ยฝ C flour
ยผ C sliced almonds, lightly toasted
1 tablespoon sugar

Preheat oven to 350. Butter and flour a 9โ€ round pan.

Beat sugar and melted butter together, add eggs and flavorings and beat well. Add salt and flour and mix just until blended.  Spread in pan, sprinkle with sugar and almond slices.

Bake 30 to 35 minutes – it is better not to over-bake, so use a toothpick to test it, and as soon as it comes out almost clean, the cake will be ready.  Cool on a rack for 15 minutes before unmolding it.

ENJOY!

to print the recipe, click here

Comments: I served this cake next to strawberries and blueberries macerated with a small amount of sugar, and a dusting of powdered sugar on top, as suggested by Phil. Perfect indeed, the fruit went very well with the almond flavor and the tenderness of the cake. Sorry, no pictures of the sliced cake, often when we have guests I don’t feel like grabbing a camera and taking photos. Even served plain, this cake would shine next to a cup of tea on a sunny afternoon.

ONE YEAR AGO: Taillevent (a meal that shall never be forgotten…)

Add to FacebookAdd to DiggAdd to Del.icio.usAdd to StumbleuponAdd to RedditAdd to BlinklistAdd to TwitterAdd to TechnoratiAdd to Yahoo BuzzAdd to Newsvine

MING TSAI UNDER PRESSURE

A few years ago, when Ming Tsai was a contestant on Iron Chef, he prepared his family recipe for pork shoulder in a Chinese style known as “red cooking.” ย  Red cooking usually refers to a braise that’s intensely flavored with soy sauce, sugar, peppers and spices. ย  The snag is that pork shoulder requires hours of cooking – a luxury he didn’t have in the hour-long show. Ming adapted the recipe to use a pressure cooker, with great success. If you like pork that’s fork-tender, with a delicious oriental flavor, then this recipe will knock your socks off. ย  Even without a pressure cooker you can still prepare it on the stove or in the oven, but make sure to cook the meat long enough (with gentle heat) to tenderize it.


ASIAN-GLAZED PORK SHOULDER

(from Ming Tsai, recipe published in Food and Wine magazine)

3 cups soy sauce
1 + 1/2 cups dry red wine
1 + 1/2 cups water
3/4 cup balsamic vinegar
1 pound dark brown sugar
6 scallions, white and light green parts cut into 2-inch lengths
3 small, dried red Thai chiles
One 4-inch piece of fresh ginger, thinly sliced
1 head of garlic, halved crosswise (I used 4 cloves only)
1 medium orange, quartered
One 4-inch cinnamon stick
One 4-pound piece of boneless pork shoulder, cut in large chunks
Freshly ground pepper

In an 8-quart pressure cooker, combine the soy sauce, wine, water, vinegar, sugar, scallions, pepper, ginger, garlic, orange and cinnamon stick. Cook over high heat, stirring, until the sugar is fully dissolved. Season the pork with pepper and add it to the pressure cooker. Close and lock the cooker and bring to full pressure over high heat. Adjust the heat to maintain pressure and cook for 1 hour or until the pork is very tender. Slowly release the pressure and open the cooker. Transfer the pork to a cutting board and cover with foil.

Strain 1 cup of the cooking liquid into a small saucepan; discard the remaining liquid. Boil over high heat until the liquid is reduced by two-thirds and thick, about 5 minutes. Brush a light coating of the sauce over each piece of pork to glaze it. Thinly slice the pork and serve.

to print the recipe, click here

Comments: I’ve made this dish several times and it’s a favorite,ย  because we use the meat in different types of meals: over white rice, as a fajita filling (with a shameless, Tex-Mex-Chinese twist), and over mashed potatoes or pasta.ย  It freezes so well that when I make it for the two of us I save small portions that go straight into storage for easy dinners later.ย ย  My pressure cooker is a little smaller than 8 quarts, so I proportionally reduce the amount of liquid to leave enough empty space in the pan.ย  Sometimes I also reduce the soy sauce and balsamic vinegar, but the sauce remainsย  flavorful.ย  Depending on the quality of the meat, 1 hour of cooking may not be enough.ย  In that case simply close the pressure cooker and bring it to full pressure for 15 minutes more.

This was a perfect recipe for us last week when we were back home in Oklahoma. Our poor pressure cooker was feeling neglected, left behind with the crockpot, the mixer, the juicer, and a few other appliances that couldn’t make the trip.ย ย  When your ride is a pickup truck and your destination is the nano-kitchen, difficult choices must be made!ย  ๐Ÿ˜‰

ONE YEAR AGO: Paris, je t’aime

Add to FacebookAdd to DiggAdd to Del.icio.usAdd to StumbleuponAdd to RedditAdd to BlinklistAdd to TwitterAdd to TechnoratiAdd to Yahoo BuzzAdd to Newsvine