CHIPOTLE-HONEY CAULIFLOWER WITH MANGO SALSA

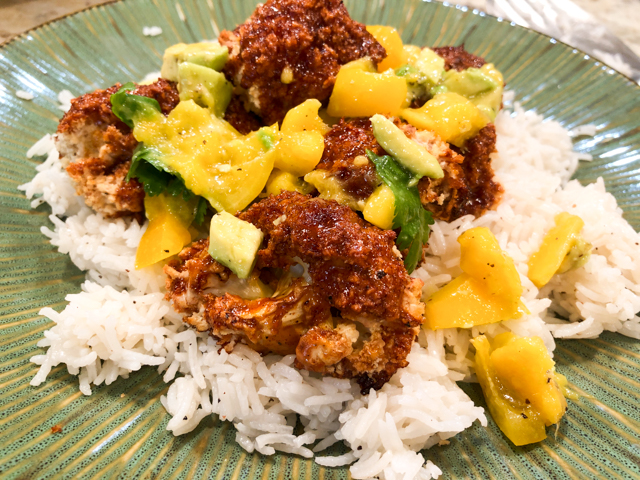
Cauliflower is a unique wild card in the kitchen. When you want to low-carb anything, it is the first option that comes to mind. Well, here we have an exception, this is no low-carb, low-calorie recipe. This is cauliflower for the brave. When we finished our meal, the husband said “this may very well be the best cauliflower I’ve ever had.” I would like to bow and get a crown or at least a nice tiara, but all credit must go to Joanne. She raved about it, and when she raves, I cook.

CHIPOTLE-HONEY CAULIFLOWER WITH MANGO SALSA
(slightly modified from Joanne Eats Well with Others)

for the chipotle honey sauce:
1 can chipotle chiles in adobo (about 7 oz)
1 cup barbecue sauce (homemade or store-bought)
1/4 cup packed brown sugar
1/8 cup bourbon
juice of 1 lime

for the cauliflower:
1 large head of cauliflower
1 cup flour
3 tbsp cornstarch
1 cup milk
1/4 tsp kosher salt
1/4 tsp black pepper
1/2 tsp garlic powder
2 cups panko breadcrumbs

for the mango salsa:
3 ripe mangoes, diced
1 large avocado, diced
¼ cup cilantro, minced
1 jalapeno, seeded and minced
juice of 1 lime
salt, to taste

Combine the chipotles, barbecue sauce, brown sugar, bourbon, and lime juice in the bowl of a food processor. Process until completely smooth.

Heat oven to 450F. Line a baking sheet with parchment paper and set aside. Break the cauliflower into larger florets. In a medium bowl, whisk together the flour, cornstarch, milk, salt, black pepper, and garlic powder until thick and completely smooth. Pour the panko into a separate bowl.

Toss the cauliflower florets into the wet batter in batches, making sure they are completely coated. Next, transfer them to the panko bowl and coat them completely in the panko. Place on the prepared baking sheet in a single layer.

Place in the oven and bake for 25-30 minutes. Remove from the oven and brush with the chipotle honey bbq sauce. Place back in the oven for another 5 minutes to allow the sauce to set and soak into the florets.

Make the salsa. Combine the mangoes, avocado, cilantro, and jalapeno in a medium bowl. Season with lime juice and salt, to taste.

Serve the cauliflower over rice with the salsa on top.

ENJOY!

to print the recipe, click here
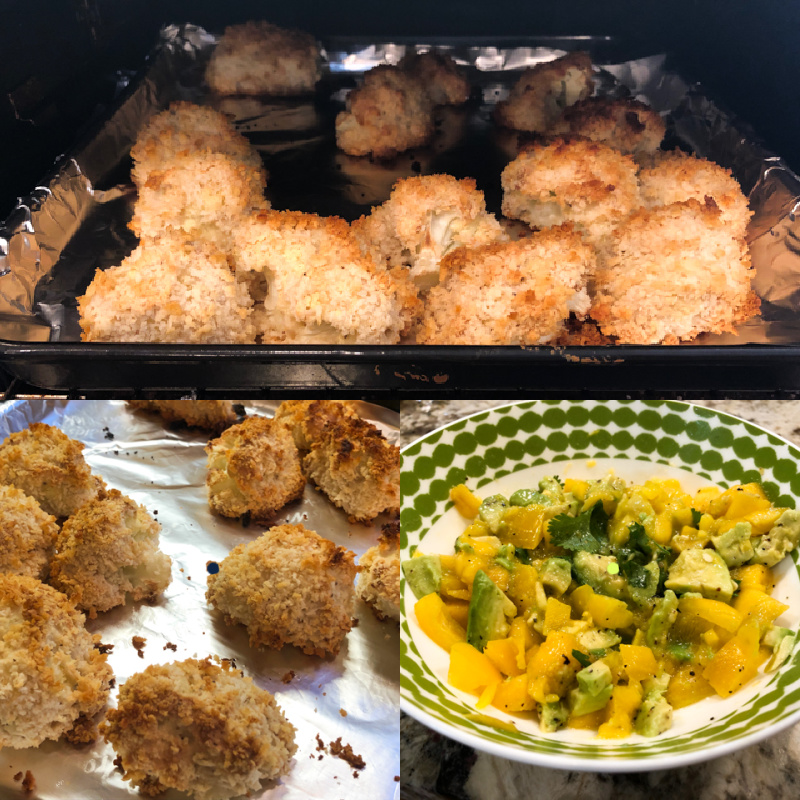
Comments: Moderation is key, but tricky. Something about the crispy texture of the panko coating joined with the spicy sweetness of the barbecue sauce turns this into dangerous stuff. The mango salsa does a perfect job cooling things down, which in turn makes that moderation advice even harder to listen to. You’ve been warned. This was majorly amazing. Sorry for the superlatives. It is all Joanne’s fault.

ONE YEAR AGO: Kansas Sunflower Seed and Black Walnut Macarons

TWO YEARS AGO: Curry Turmeric Sourdough

THREE YEARS AGO: Black Olive Tapenade and Deviled Eggs

FOUR YEARS AGO: Blueberry Crumble Coffee Cake

FIVE YEARS AGO: Fresh Strawberry Yogurt Bundt Cake

SIX YEAR AGO: Quinoa Salad with Red Grapes and Avocado

SEVEN YEARS AGO: Strawberry Coffee Cake

EIGHT YEARS AGO: Lemon-Poppy Seed Muffins

NINE YEARS AGO: Mascarpone Brownies

TEN YEARS AGO: Salmon Tacos

ELEVEN YEARS AGOCinnamon Turban Bread

TWELVE YEARS AGO: Summertime Gratin

TURKEY MEATLOAF

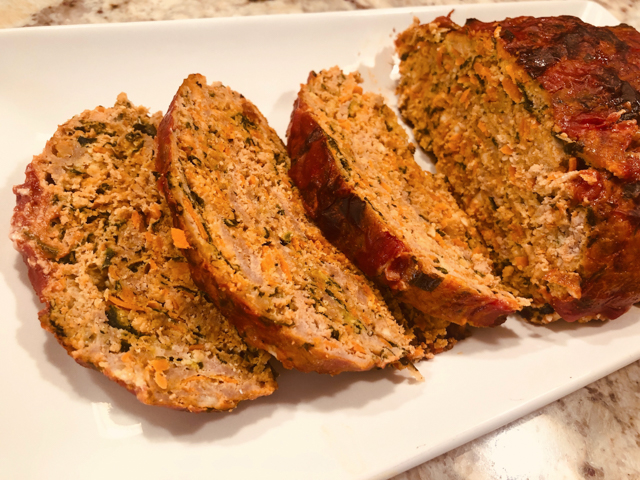
Here I am to share another recipe that tasted wonderful but would not be invited to participate in a Beauty Contest. Meatloaf is not easy on the eyes but this one in particular was a showstopper for the taste buds. Lower in carbs than most versions, because it relies on almond flour instead of breadcrumbs. Quite loaded with veggies. We both gave enthusiastic thumbs up, so ignore the looks. They are skin-deep, after all…

TURKEY MEATLOAF
(inspired by Life is But a Dish)

1 pound ground turkey
1/2 cup almond flour
1 cup shredded carrots (about 2 large carrots)
1/2 cup chopped fresh spinach (not baby spinach)
1/3 cup feta cheese, crumbled
1/4 cup ketchup
1/4 cup chopped parsley
1 egg
1 tablespoon Worcestershire sauce
1 teaspoon salt
1/2 teaspoon chipotle pepper, ground

for glaze:
1/4 cup ketchup
2 tablespoons brown sugar
1 tablespoon Worcestershire sauce

Heat oven to 350 degrees. Add all the ingredients into a large bowl (minus the ingredients for the glaze). Using a fork or clean hands, mix until everything is fully incorporated.

Mix ingredients for the glaze in a small bowl and reserve.

Line a sheet pan with parchment paper and pour meat onto pan. Use your hands to form into a loaf shape, trying to keep it level so it cooks evenly. Bake for 25 minutes, then remove and brush glaze all over. Place back in the oven for another 25 to 30 minutes, or until internal temperature reaches 165 degrees.

Remove and let cool for 10 minutes before serving.

ENJOY!

to print the recipe, click here

Comments: What do tomatoes and avocados have to do with the meatloaf? They were the side dish, and I absolutely must share the picture because the tomatoes came from our own backyard, thanks to the gardening efforts of the husband… Aren’t they gorgeous?

The meatloaf has a very delicate texture, and cooked perfectly in our small Breville oven, so there was no need to even heat the kitchen up. Leftovers were around for a couple of days and tasted as good if not better than the first time. I made it again the following week, and you know how it goes: for a food blogger, repeating a recipe right away is a huge endorsement. It goes to our regular rotation, a nice change from our default turkey burgers.

ONE YEAR AGO: Prue Leith’s Smoked Salmon and Beetroot Blinis

TWO YEARS AGO: Mandioca Frita 101

THREE YEARS AGO: White Chocolate Raspberry Dome Cake

FOUR YEARS AGO: Blueberry Crumble Coffee Cake

FIVE YEARS AGO: Pickled Red Onions

SIX YEARS AGO: Strawberry Chocolate Chip Cake

SEVEN YEARS AGO: Mini-Chocolate Cheesecake Bites

EIGHT YEARS AGO: Whole-Wheat Spaghetti with Grated Tomato Sauce

NINE YEARS AGO: A Taste of Yellow to Honor Barbara

TEN YEARS AGO: Gratin of Beefsteak Tomatoes

ELEVEN YEARS AGO: Tour de France Final Stage: PARIS

TWELVE YEARS AGO: Snickerdoodles with a Twist

BROWNIE CUPCAKES WITH FONDANT TOPPING

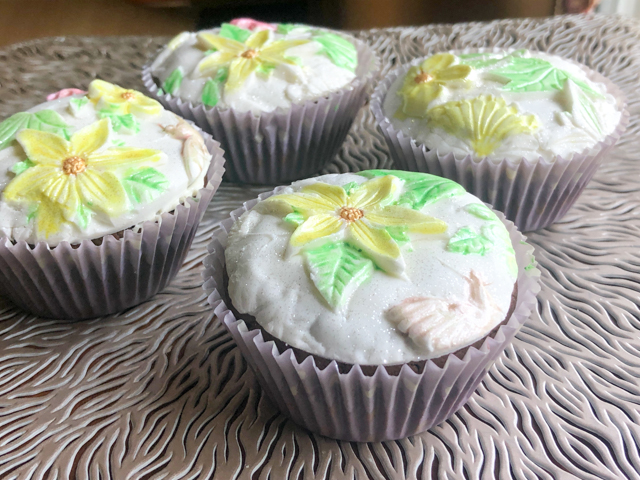
Not too long ago I shared a series of brownie cupcakes with a light milk glaze that you can take in many different directions depending on what you use to flavor the milk. In this post the same simple cupcakes were topped with fondant textured with a silicone mat. You will need a very small amount of buttercream spread on the top to serve as a glue for the fondant. I had some leftover from macarons, but you need so little that I would not mind if you grabbed a store-bought version. Perhaps a Wilton cream cheese frosting, which is not too sweet. It won’t be as good as home-made, but you will barely taste it in this case. Recipe for the cupcakes found here.

HEARTS AND GOLD BROWNIE CUPCAKE

Maybe my favorite of the trio, made using this mini-fondant mat. I used Sugarprism red to paint the hearts, and Egyptian gold luster + everclear to highlight the details. A little shower with Champagne glitter dust from TheSugarArt sealed the deal for me.

SPRINGTIME BROWNIE CUPCAKE

For this cupcake, I used one of my favorite little mats, which I bought a couple of years ago. You can find it here. After it dried a little bit, I painted using vodka + luster powder yellow, green, pink and the center of the flower with Egyptian gold. I could not help but finish them with some White Diamond Dust, again from TheSugarArt.

PINK SWIRLS BROWNIE CUPCAKE

For this cupcake I used this large silicone mat, and selected the region I wanted to top the cupcake by placing the round cookie cutter over it. Once the fondant dried for a few minutes, I brushed the surface with a glaze made with TrueColor Air-brush Shine Pink. The small detail in the center of the flower was added with Sugarprism red.

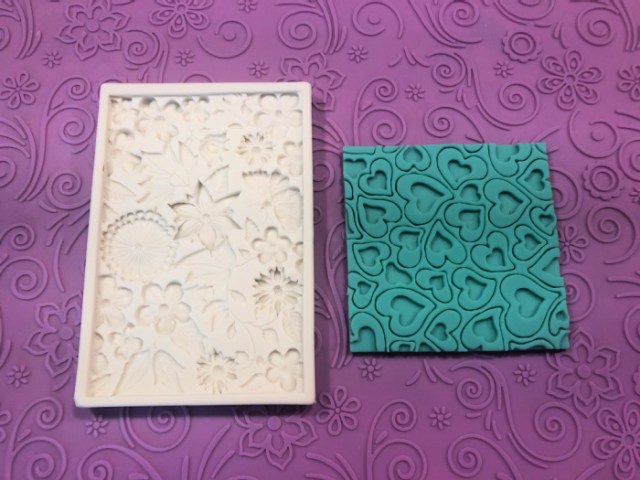
These are the three mats used in this set of brownie cupcakes…

Fondant mats are great little tools to play with, and work equally well with marzipan and even modeling chocolate. Some mats work better than others, and it does take some trial and error to get the impression perfect in the whole extension. With fondant, a bit of cornstarch helps. The advantage of cupcakes is their small area, a lot more forgiving to get it right.

Speaking of marzipan…

In these lemon cupcakes made a couple of years ago and for some reason never blogged (!!!!). The same white mat of the picture was used with rolled marzipan and dusted with dry luster powder in yellow and pink. Amazing what I find in forgotten folders in my computer. Sad thing is that I don’t even remember which recipe I used for them… I might have to re-visit this important issue!

ONE YEAR AGO: Brown Sugar Cookies with Buttercream Icing

TWO YEARS AGO: Mandioca Frita 101 

THREE YEARS AGO: Raspberry Puffs

FOUR YEARS AGO: Vietnamese-ish Chicken

FIVE YEARS AGO: Rutabagas Anna

SIX YEARS AGO: The Ultimate Raspberry Sorbet

SEVEN YEARS AGO: Crispy Cornmeal Sweet Potato Fries

EIGHT YEARS AGO: Pan-grilled Tilapia with Smoked Paprika & Avocado Cream

NINE YEARS AGO: Golden Saffron and Fennel Loaf

TEN YEARS AGO: In My Kitchen, July 2011

ELEVEN YEARS AGO: Heavenly Homemade Fromage Blanc

TWELVE YEARS AGOA Perfect Sunday Dinner

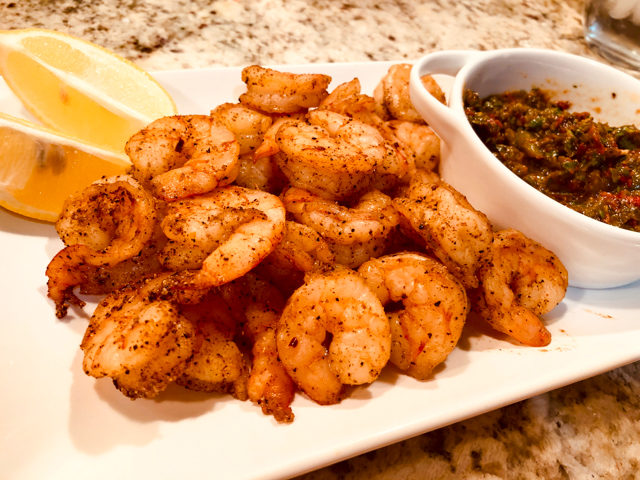
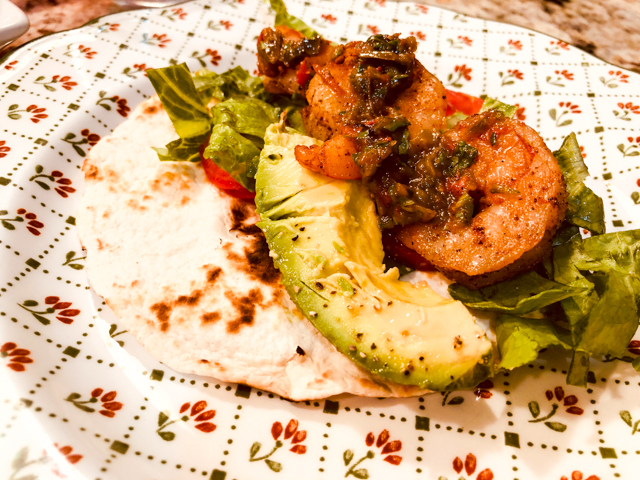
SMOKED SHRIMP TACOS WITH ROASTED JALAPENO SALSA

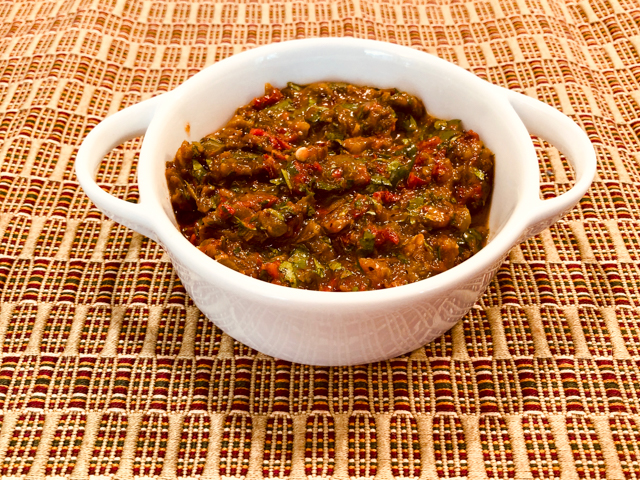
To make this simple recipe, you’ll need a smoker. If you don’t have one, use the same rub on the shrimp and grill it. I am not too wild about liquid smoke, and would rather omit that component than include it in the rub, but if you have a brand you are fond of and know how much to use, go for it. The Roasted Jalapeno Salsa was published last week on Mimi’s blog, and I made it on the same day I read it. I just knew we would love it. Beware, it is spicy!

SMOKED SHRIMP TACOS WITH ROASTED JALAPENO SALSA
(from The Bewitching Kitchen and Mimi’s blog)

for the dry rub:
1/4 cup granulated sugar
1/8 cup firmly packed brown sugar
2 tsp hot chili powder
2 tsp salt
1 teaspoon ground coriander
1 teaspoons ground black pepper
1/2 teaspoon ground ginger

1 pound jumbo shrimp, peeled, deveined, and tails removed

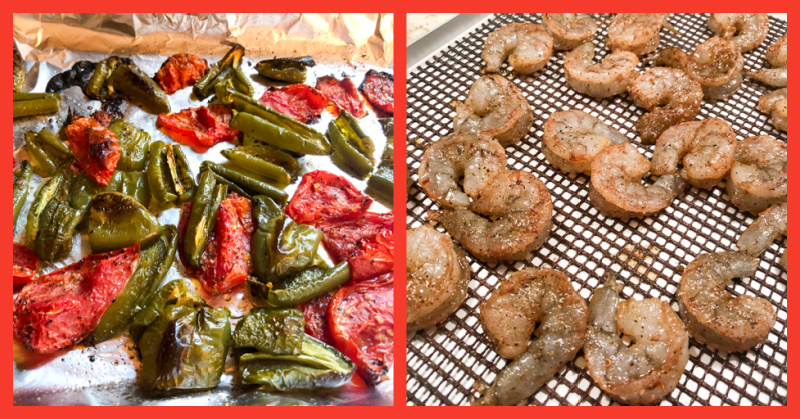
Heat the smoker to 200F with mesquite, oak, or pecan wood.

In a small bowl, mix together all the ingredients for the dry rub. Pour the rub over the shrimp and make sure everything is well coated. Add the shrimp to the smoker and smoke for 15 to 20 minutes. Serve with the salsa, and your favorite toppings.

ROASTED JALAPENO SALSA
(slightly modified from Chef Mimi)

6 large jalapeños
4 Roma tomatoes
2 tablespoons olive oil
1/2 teaspoon salt
1 generous bunch cilantro, chopped
Juice of 1/2 lemon
1 teaspoons honey
2 tablespoons olive oil
1/2 teaspoon salt
Pepper, to taste

Heat the oven to 400 degrees F.

Start by preparing the jalapeños. Remove the stems, then slice them vertically around the core of seeds. Discard the seeds and stems. Roughly chop the jalapeño slices and place them in a medium-sized bowl. Chop the tomatoes into quarters and remove the seeds, then place them in with the jalapeños. Toss the mixture with the oil and salt, then place it in a baking/roasting dish. Roast until vegetables are caramelized, about 30 minutes.Place the roasted jalapeno-tomato mixture with the cilantro and other ingredients in a food processor and pulse, until the desired texture.

ENJOY!

to print the recipes, click here

Comments: I made the salsa around lunch time, kept it in the fridge and brought to room temperature as I prepared the shrimp. Everything was ready then in less than 30 minutes, perfect weeknight meal. The shrimp turned out juicy and tender, with a nice flavor from the dry rub. And the roasted jalapeno salsa went perfectly with it. But if you are not into spicy food, this is definitely not for you. My Dad, the pepper-addict, would be proud of me! The shrimp is actually quite mildly flavored, so consider just serving it with a store-bough mild salsa if you prefer.

ONE YEAR AGO: Corn Fritters

TWO YEARS AGO: Minnie Macarons

THREE YEARS AGO: Air-Fried Mexican Meatloaf

FOUR YEARS AGO: Mimi’s Sticky Chicken, a Call from my Past

FIVE YEARS AGO: Perfect Soy-Grilled Steak

SIX YEARS AGO: The Devil’s Bread

SEVEN YEARS AGO: Heart of Palm Salad Skewers

EIGHT YEARS AGO: Potluck Frittata and Lavoisier

NINE YEARS AGO: Home-made Corn Tortillas

TEN YEARS AGO: Whole-Wheat Spaghetti with Peanut Sauce

ELEVEN YEARS AGO: Brigadeiros: A Brazilian Party!

TWELVE YEARS AGO: Lemony Asparagus

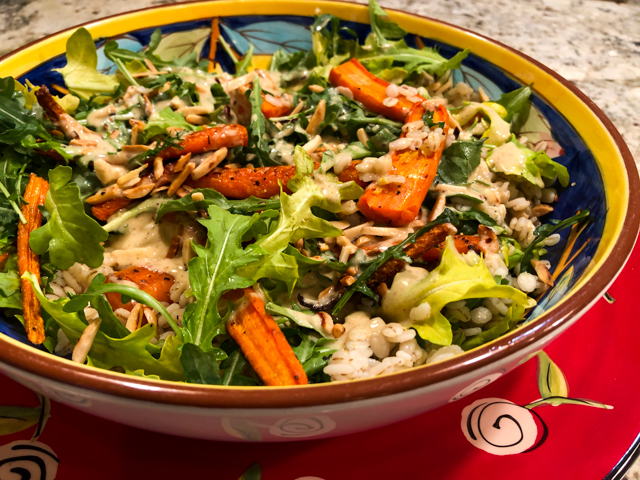
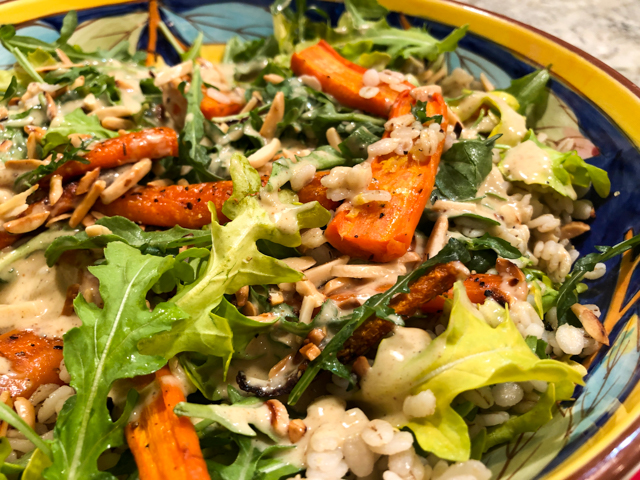
ROASTED CARROT AND BARLEY SALAD

Another recipe that was highly recommended by editors of the food section in The New York Times. We will be paying close attention to those reviews from now on, because so far everything we’ve tried has been a total winner. I made a few modifications to adapt to our taste, so I share my version with you. Barley is definitely under-appreciated.

ROASTED CARROT AND BARLEY SALAD
(adapted from The New York Times)

1 cup pearled barley
Kosher salt and black pepper
2 pounds carrots, washed, trimmed and cut into long pieces
2 tablespoons extra-virgin olive oil
2 teaspoons honey
zest of 1 lemon
2 cups arugula
A handful of cilantro
¼ cup toasted sliced almonds

for the spiced tahini:
¼ cup tahini
juice of 1/2 lemon
1 teaspoon Ras-el-hanout
water to adjust consistency

Heat oven to 425 degrees and place a rack on the lowest shelf. In a medium saucepan, combine barley with 4 cups water; season with 1/2 teaspoon salt. Bring to a boil over medium-high heat. Reduce heat to low and simmer until tender, about 20 to 25 minutes. Drain excess water if still some remains.

Meanwhile, place the carrots on a sheet pan, drizzle with the olive oil and toss to coat, spreading into an even layer. Season with salt and pepper. Place on the bottom oven rack and roast until tender and starting to turn golden, about 25 minutes.

While the carrots roast, make the dressing: In a medium bowl, whisk together the tahini, lemon juice, Ras-el-hanout, and 1/2 teaspoon salt. Add 3 to 4 tablespoons water, 1 tablespoon at a time, until it is smooth and has a pourable consistency.

When the carrots are ready, remove them from the oven, drizzle with honey and sprinkle with lemon zest. Season with a pinch of salt and toss to coat.

In a serving bowl, combine the carrots with the barley, arugula and parsley. Drizzle with the spiced tahini and sprinkle with almonds. Try not to over-eat…

ENJOY!

to print the recipe, click here

Comments: This was one of the best side dishes of the year of 2021 that showed up at our table. I do have a very special place in my heart for tahini, so maybe that explains my love for this recipe. You can cook the barley and roast the carrots in advance. In that case, just warm the carrots briefly in the microwave – I mean for 20 seconds tops – because it’s nice to have the contrast of warm carrots with the cold salad. If you are not too fond of arugula, spinach will work too, but there’s something about the slightly bitter nature of arugula that works well here.

ONE YEAR AGO: Ode to Halva

TWO YEARS AGO: Brazilian Pao de Queijo (re-blogged)

THREE YEARS AGO: Apricot Linzer Torte

FOUR YEAR AGO: A Trio of Air-Fried Goodies

FIVE YEARS AGO: Focaccia with Grapes, Roquefort and Truffled Honey

SIX YEARS AGO: Moroccan Carrot Dip Over Cucumber Slices 

SEVEN YEARS AGO: White Chocolate Macadamia Nut Cookies

EIGHT YEARS AGO: Cilantro-Jalapeno “Hummus”

NINE YEARS AGO:A Moving Odyssey

TEN YEARS AGO:
Hoegaarden Beer Bread

ELEVEN YEARS AGO:
 Ancho-Chile Marinade: Pleased to Meat you!


TWELVE YEARS AGO:
 Shrimp Moqueca