ROASTED BUTTERNUT SQUASH WITH WALNUTS AND TAHINI SAUCE

I never imagined I would call a butternut squash dish “festive”, but it’s the word that came to my mind as I savored it. I blame it on the addition of pomegranate seeds. They turn any dish into a celebration, little jewels of the gastronomic world. Plus their slightly sharp taste complements sweets, complements veggies, meats, hard to imagine something that cannot be paired with these red beauties. Remember Fesenjan? Anyway, in this preparation, I roasted butternut squash as I’ve done many times, in coconut oil with paprika. To me, it’s a trio made in heaven. And no, I do not use smoked paprika for this anymore, I now prefer a milder flavor with the squash. Of course, do as your taste buds instruct you to.

ROASTED BUTTERNUT SQUASH WITH WALNUTS AND TAHINI SAUCE
(inspired by several sources)

1 medium butternut squash, peeled and cut in large cubes
1 Tbsp coconut oil, melted
1/2 tsp paprika
1/2 tsp salt (or to taste)
walnut halves or large pieces
1/4 cup tahini
2 tsp freshly squeezed lemon juice
pepper to taste
water if needed to thin sauce
fresh pomegranate seeds
light drizzle of pomegranate molasses for serving (optional)

Heat the oven to 400 F.

Place the pieces of butternut squash in a large bowl, drizzle with the coconut oil, mixing it very quickly because it solidifies fast. Season with paprika, salt, and a little pepper. Transfer the squash to a baking dish that holds the pieces in a single layer. Roast for 20 minutes, then add walnuts, mixing gently with the squash. Roast for about 10 minutes more, until the squash is golden, with edges turning slightly brown.

Meanwhile, prepare the tahini sauce mixing tahini, lemon juice pepper and pepper. If it seems too thick, add water until you reach a nice fluid consistency.

When the squash and walnuts are roasted, transfer to a serving dish, drizzle the tahini sauce all over, and top with fresh pomegranate seeds. If you have pomegranate molasses, consider drizzling a little bit on top, a nice additional contrast of color and flavor.

ENJOY!

to print the recipe, click here

Comments: This could be a great side dish for Thanksgiving, for those trying to move away from the classics, or perhaps in need to increase the variety of vegetarian-friendly sides. Of course, it’s odd to mention Thanksgiving in December, but the color-scheme of this dish makes it hard not to. Come to think of it, roasted sweet potatoes would work wonders too replacing the squash. And dried cranberries could play the role of pomegranate. The tahini dressing is perfect to tie the whole thing together in a very luscious way. We enjoyed this hearty side dish with store-bought roast chicken. Admittedly, this could be considered a sin in the home of a food blogger, but we love the convenience of it, and our store does a pretty decent job preparing it. So, we make our life easy and often bring one home for our dinner.

Plan ahead and reserve some tahini sauce (as well as extra pomegranate seeds) in case you want to call it lunch next day… I did, and it was absolutely delicious, love the contrast of a cool sauce with the warm squash.

ONE YEAR AGO: The Complicit Conspiracy of Alcohol

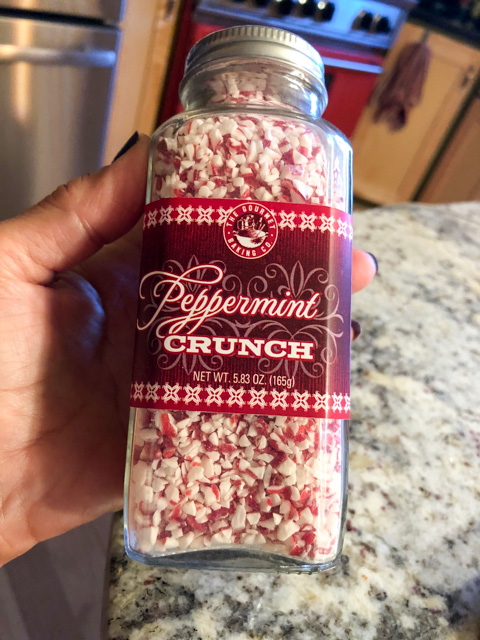
TWO YEARS AGO: Candy Cane Cookies

THREE YEARS AGO: Macarons: Much better with a friend

FOUR YEARS AGO: Our Mexican Holiday Dinner 

FIVE YEARS AGO: The Ultimate Cranberry Sauce

SIX YEARS AGO: Edamame Dip

SEVEN YEARS AGO: Gougeres

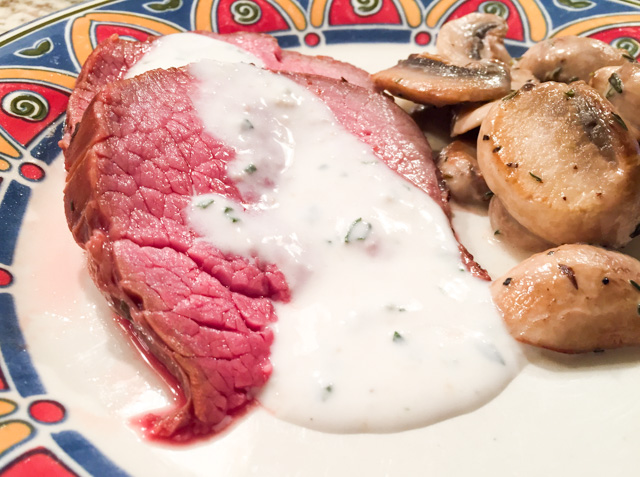
EIGHT YEARS AGO: Beef Wellington on a Special Night


SaveSave

SaveSave

SaveSave

SaveSave

SaveSave

SaveSave

SaveSave

SaveSave

SaveSave

SaveSave

SLOW-ROASTED EYE OF THE ROUND BEEF

Eye of the round is a tricky cut of meat to cook. It can get stringy and, if over-cooked, pretty dry and lacking taste. My Mom was a master at preparing it. It was her favorite cut for what back home we call “carne assada.”  Her recipe was made on the stove, and always resulted in tender slices of meat swimming in a dark brown sauce with a flavor to die for. I know exactly how she made it, but never ever managed to replicate it myself.  Oh, well. Slow cooking in a moist environment is definitely a great choice. You can also shred the meat and use it in fajitas or “roupa velha” – the Brazilian version of “ropa vieja.”  See a version here.

A while ago I stumbled on recipes that use this very cut of meat in a totally unexpected way: in place of roast beef tenderloin. Can you imagine that? One of the cheapest and most looked-down cuts of beef posing as The King? It would be like me taking the stage in place of Annie Lennox. Scary thought. Anyway, the method intrigued me. Finally tried it and was quite pleased with the outcome. The timing can be a bit tricky, so at least the first time you make it, don’t plan on serving it for guests – do it when you have a flexible schedule. Take notes, and when the dinner party is on, buy a similar size of meat and prepare to shine as a hostess…

SLOW-ROASTED EYE OF THE ROUND BEEF
(inspired by several sources)

for the roast beef:
1 piece of eye-of-the round roast (3 to 5 pounds)
salt and pepper to taste (use a heavy hand on spices in this preparation)
olive oil spray

for the sauce:
1/2 cup creme fraiche (or sour cream)
1 to 2 tablespoons prepared horseradish
2 tsp fresh lemon juice
1 tsp minced fresh chives
salt and black pepper to taste

Season the piece of beef heavily with salt and pepper. Cover with plastic wrap and let it sit in the fridge overnight, or for an hour minimum.

Heat the oven to 225 F. Spray the beef with a light coating of olive oil and sear on a heavy skillet over high heat on all sides. Transfer roast to a rack over a baking sheet and place in the oven. If you have a probe thermometer, stick it inside the meat and set your gadget to let you know when the meat reaches 115 F (for rare), or 125 F for medium-rare. In this preparation, you do not want the meat cooked past medium. It will take anywhere from 75 minutes for rare, to a little over 2 hours for medium-rare.

Turn oven off; leave roast in oven, without opening door, until meat-probe thermometer or instant-read thermometer inserted into center of roast registers 130 to 140 degrees, depending on your preference. This will take another 30 minutes or so.

Transfer roast to carving board and let rest for 15 to 20 minutes. Slice meat crosswise as thinly as possible and serve with horseradish sauce, if so desired.

ENJOY!

to print the recipe, click here

Comments: You know that instruction that says “allow the meat to rest for 20 minutes?”  That’s the one I did not follow, and paid a price with some excessive leaking of meat juices when I sliced it. Oh, well. Do as I say and not as I do. I was too anxious to slice and see if the meat was cooked the way I expected. Which indeed it was. The probe thermometer works like a charm, it beeps when the desired temperature is reached, so no need to even open the door of the oven from time to time. Since for this method the oven is kept at a reasonably low temperature, the less you open the door, the better.

If you are not into the sharpness of horseradish, omit the sauce, serve it with sautéed mushrooms, maybe make a reduction of red wine to go with it. I have to say that I was very pleased with the match meat/horseradish, and intend to keep it as a classic pair in our kitchen from now on. So easy to put together! Plus, we always have prepared horseradish in the fridge because we regularly buy fresh oysters and serve them with chili-horseradish sauce. Nice to have one more use for this ingredient. If you have fresh horseradish available, you can use it grated with the creme fraiche. I would eye-ball it and taste as you go. That stuff is potent.

Dinner is served! Roast beef, horseradish sauce, and sautéed mushrooms…
Heaven on a plate…

The other day I was reading a cookbook by Gordon Ramsay, and apart from nice recipes, he offers quite a bit of culinary wisdom. One observation in particular might be worth sharing. It is easy to make spectacular meals with expensive items. Filet mignon, top of the notch sea bass, sea scallops. But coming up with great recipes using humble ingredients? That can be a challenge, but one that he as a chef faces with enthusiasm. This take on roast beef is a good example making the best of a less than stellar cut.

ONE YEAR AGO: Steam-Roasted Indian-Spiced Cauliflower

TWO YEARS AGO: Creamy Zucchini-Mushroom Soup

THREE YEARS AGO: Ken Forkish’s Pain au Bacon

FOUR YEARS AGO: Carrot and Cumin Hamburger Buns

FIVE YEARS AGO: Potato Galettes a l’Alsacienne & Book Review

SIX YEARS AGO: Caramelized Carrot Soup

SEVEN YEARS AGO: Miso-Grilled Shrimp

EIGHT YEARS AGO: Pain Poilane

SaveSave

SaveSave

SaveSave

SaveSave

SaveSave

SaveSave

SaveSave

SaveSave

SaveSave

SaveSave

SaveSave

SaveSave

SaveSave

SaveSave

SaveSave

WHITE CHOCOLATE PEPPERMINT MACARONS


Peppermint is the flavor of the season, no doubt about it. Remember my peppermint candy cookies? So very festive… These macarons dance to the same beat, a bright red color, the delicate flavor of mint perfuming the white chocolate, and some green and white sprinkles to boot. They scream Christmas, and New Year celebrations. All macarons I’ve made so far used a French meringue. This was my first batch going for the – slightly more finicky – Italian meringue. I’ve been meaning to re-visit it for a long time, actually. Had one epic failure in the past attempting a recipe from Pierre Hermé, which traumatized me enough to keep Italian meringue at a safe distance. But finally, the light in the end of the macaron tunnel.

WHITE CHOCOLATE PEPPERMINT MACARONS
(inspired by several sources)

for the shells:
150g almond flour (I used fine ground from Bob Mill’s)
150g powdered sugar
110g egg whites, divided (55g + 55g)
red food gel color (I used Americolor)
pinch of salt
150g granulated sugar
40 mL water  (a little over 2 +1/2 tablespoons)

for the filling:
200g white chocolate (I used Lindt)
68g heavy whipping cream
1 to 2 tsp peppermint crunch (to taste)

for decoration:
green and white sprinkles (I used nonpareils)

Prepare white chocolate ganache filling. Place chocolate cut in small pieces in a large Pyrex measuring cup. Heat the cream to almost boiling and pour over the chocolate. Let it sit for a couple of minutes, then gently stir. When totally dissolved, add the peppermint crunch, tasting as you go.  Reserve, cooling at room temperature for a couple of hours or sticking in the fridge for 30 minutes.

Make the shells. Heat the oven to 300 F. Line two baking sheets with Silpat or parchment paper, and prepare a pastry bag with a plain tip with 1/2 inch opening, or slightly smaller.

Grind together the powdered sugar and almond powder, using a food processor, to obtain a fine powder. Sift through a sieve into large bowl. Mix the first portion (55g) egg whites with red food color, then add it to the sieved mixture of almond and sugar. It will form a paste, a bit thick. Try to incorporate the color homogeneously, keep in mind it will be lighter when you add the meringue to it, so make sure you have a very nice red tone.

Make the Italian meringue. Take a deep breath first so you are relaxed (very important). Place the other 55g egg whites and pinch of salt into the bowl of a Kitchen Aid type mixer.  Set aside while you prepare the sugar syrup. In a small saucepan combine granulated sugar with water and place on medium heat. Using a candy thermometer measure syrup temperature. When it reaches 230 F start whipping the egg whites. When the syrup reaches 244 F pour it over the whipped egg whites while mixing continuously. Continue beating until the bowl has cooled slightly, and glossy peaks have formed (see my composite photo).

Add the whipped whites over the almonds mixture and using a rubber or silicone spatula gently fold in until combined and smooth. Make sure to “paint” the mixture on the walls of the bowl so that you get a smooth, lava-like consistency. Transfer the mixture to the piping bag fitted with a 1/2 inch (1 cm) plain tip. Pipe the batter to make macarons the size you like. Rap the baking sheet a few times firmly on the counter top to flatten the macarons and to remove air bubbles. Add sprinkles on top, if using. Let them sit at room temperature until a skin forms, about 30 minutes.

Bake for 18 to 20 minutes. They are ready when the top doesn’t move freely when you hold them and twist gently. Let cool slightly before removing from baking sheet. Marry two by two of similar size, add the filling and place in the fridge overnight. Serve them at room temperature next day.  They freeze well too.

ENJOY!

to print the recipe, click here

Comments: It all started with an impulse buy. A bottle of peppermint crunch that I found at Marshall’s. That store has amazing gems waiting for a loving kitchen. I had no idea what to do with it, but decided that once in the comfort of our home, I would find a way to make it shine. I thought about sprinkling some on top of the shells before the skin formed, and actually ran a test on a few. The crunch kind of melted in the oven and it didn’t look very good. But adding it to white chocolate ganache? That worked very very well. I more or less eye-balled it, and tried a tiny bit to see if the texture and flavor were the way I wanted. I definitely did not want to have macarons tasting like toothpaste! So if you make it, either with white or dark chocolate ganache, taste as you go and stop when you hit the jackpot.


The amount I used did not even make a dent in the huge bottle… see the problem I have now? Find other uses for my beloved peppermint crunch… There are much more serious problems in life, I’ll tackle this one with a smile. And a bite of macaron, because….

A final comment: French or Italian meringue for macarons? I think the French does a perfect job with a lot less hassle. However, if you live in a very humid climate, the added stability of the Italian meringue might be better for you. At any rate, I feel that mastering the technique of the Italian meringue will come in handy in plenty of recipes. So I’m happy I gave it a try.

Enjoy the holiday season, and grab a pin, because sharing is caring!

ONE YEAR AGO: Shrubs, a fun alternative to alcoholic drinks

TWO YEARS AGO: Date Truffles 

THREE YEARS AGO: Mascarpone Mousse from Baking Chez Moi

FOUR YEARS AGO: Pumpkin Brigadeiros

FIVE YEARS AGO: Pumpkin Espresso Loaf

SIX YEARS AGO: Caramelized Carrot Soup

SEVEN YEARS AGO: Miso-Grilled Shrimp

EIGHT YEARS AGO: A Special Holiday Fruitcake

SaveSave

SaveSave

SaveSave

SaveSave

SaveSave

SaveSave

SaveSave

SaveSave

SaveSave

SaveSave

SaveSave

SaveSave

COCKTAIL SPICED NUTS


Beware. These are addictive. They seem quite innocent, sitting there with their unpretentious looks, but once you grab a few, you’ll be back for more. Perhaps more than you thought you would. Most recipes call for way too much sugar, I used just enough to give a hint of sweetness. They are more about spice. Not too much, though. Honestly, I think they are close to perfection, but feel free to change the proportion of spices, add different ones, and if that’s what rocks your boat, add more sugar. Just make sure to include the egg whites, they offer a natural “glue” for the spice mixture to adhere to the nuts, and a very delicate texture after baking. These keep well at room temperature, so they could turn into excellent gifts for the holidays inside a nice plastic bag with a cute bow. If you are into that sort of thing.

COCKTAIL SPICED NUTS
(adapted from several sources)

3 cups nuts of your choice (I used walnuts, cashews, and almonds)
1 Tablespoon water
1 egg white
1 teaspoon salt
1/4 cup sugar
1 teaspoon ground ginger
1 teaspoon ground cinnamon
1 teaspoon hot curry

Heat oven to 250 F. Lightly coat a baking sheet with oil spray.

Combine all spices in a small bowl. Reserve.

In a large bowl, whisk egg white with water until frothy, season with the teaspoon of salt and mix well. Add the nuts to the bowl, and combine everything well, mixing gently but thoroughly.  Try to coat the nuts evenly with the egg white.

Add the sugary and spice mixture. Spread over the prepared baking sheet and bake for about 45 to 60 minutes, moving it around every 15 minutes or so, until fragrant and starting to get golden brown.

Remove from oven, let it cool completely, and break the pieces to serve.  I like to transfer it to another baking sheet covered with paper towels so that it cools a bit faster and any excess fat is absorbed by the paper.

ENJOY!

to print the recipe, click here

Comments: I made two batches of these nuts over the past few weeks. Once in a regular oven, once in the crock pot. Yes, you read that right, in the crock pot. The advantage is simply saving space in the regular oven, which was at a premium over Thanksgiving. So I opted to bake them in the slow-cooker, and there they sat, low and slow. You need to watch them a bit carefully after 45 minutes, because the sugar might start to stick at the bottom and get too dark. Just move them around and it will be fine. If using the crock pot, cook them on high for one hour, reduce to low and cook for another 60 to 90 minutes although they might be ready sooner, depending on the power of your gadget.  Once they are ready, spread them on a baking sheet and let them cool completely. That is it. Nice and easy.  I am inclined to say I preferred the texture when they cooked in the crock pot, but both methods ended up very similar.

During the holidays, meals tend towards heavy and rich, so I rather skip appetizers like a cheese platter or goodies that involve bread and crackers. These nuts are a good option. A little serving of olives next to them and you are all set. They are so tasty that I notice some guests nibbling on them after dessert on Thanksgiving dinner…  If that’s not a great endorsement, I don’t know what would be…

ONE YEAR AGO: How the Mighty Have Fallen

TWO YEARS AGO: Festive Night at Central

THREE YEARS AGO: The Perfect Boiled Egg

FOUR YEARS AGO: Light Rye Sourdough with Cumin and Orange

FIVE YEARS AGO: Homemade Calziones

SIX YEARS AGO: Plum-Glazed Duck Breasts

SEVEN YEARS AGO: Holiday Double-Decker

EIGHT YEARS AGO: New York Deli Rye


SaveSave

SaveSave

SaveSave

SaveSave

SaveSave

SaveSave