QUINOA SALAD WITH RED GRAPES AND AVOCADO

This salad was based on a recipe by Katie Lee featured on the FoodTV show The Kitchen. It was originally made with green grapes, avocados, cucumbers, and a lime dressing. Obviously,  the idea was to have a sort of monochromatic green salad with bright and sharp flavors.  I changed things around by using red grapes instead. Red grapes are quite a bit sweeter, and added a contrast of color I found particularly pleasing. But, let me tell you, no matter what you decide to add to your quinoa salad, please try the cooking method I describe after the recipe.  It is nothing short of life-changing.  Yeah, you read me correctly. Life-changing. For better.

Quinoa SaladQUINOA SALAD WITH RED GRAPES AND AVOCADO 
(adapted from Food TV Network)

(as written, it makes a lot of salad, I more or less halved this recipe, eyeballing most ingredients. I kept the amount of dressing unchanged)

Zest and juice of 1 lime
3 tablespoons extra-virgin olive oil
Kosher salt and freshly cracked black pepper
4 cups cooked quinoa, cooled
2 cups green grapes, halved
1 1/2 cups diced cucumbers
fresh parsley, roughly chopped (or fresh cilantro)
1 avocado, diced

In a large bowl, whisk together lime zest, lime juice and olive oil. Taste and season with salt and pepper.

Toss the quinoa, grapes, cucumbers, parsley, and avocados together with the dressing. Serve chilled or at room temperature.

ENJOY!

to print the recipe, click here

Now, take a moment to look at the beauty of this  perfectly cooked quinoa.

cooked Quinoa
It is really too bad you cannot taste it through the screen, because the texture turned out sublime. The secret? Cooking the seeds in less water than most recipes recommend, and simmering them for only 6 minutes.  I cannot take credit for it, so here is the link to Elaine’s blog, where I found it.

++++++++++++++++++++++++++++++++++++++++++++++++++++++++

And here is what I did…

For each cup of quinoa, add 1 + 1/3 cup lightly salted water

Bring to a boil in a saucepan…

Reduce heat, simmer for exactly 6 minutes. That is 360 seconds. Do not open the pan. DO NOT. (I will slap your hand if you try to open it… )

Turn the heat off.  Wait 20 minutes with the pan covered. DO NOT PEEK. DO NOT.

Open the pan (finally!), be mesmerized, amazed, awed by the beauty of the perfectly cooked quinoa, fluff the seeds gently with a fork and use them in any preparation you like.

++++++++++++++++++++++++++++++++++++++++++++++++++++++++

For the salad, I simply allowed the cooked quinoa to cool to room temperature, and added all the ingredients plus the simple dressing. The salad keeps well in the fridge for several days and is a great option for a light lunch, if you so desire. Another tip I’d like to share with you: make sure the avocado has a firm texture and only add the pieces when you are about to serve the quinoa.  I did not care for the mushy texture of overly ripe avocados I used the first time I made this dish.  On my second time around, I also added sliced celery.  Turned out delicious, very refreshing. But, you know by now how much we love our celery…

Elaine, thanks so much for sharing your method for perfectly cooked quinoa!  
I won’t be cooking it any other way from now on…  
My life is changed. For better.

🙂

ONE YEAR AGO: Strawberry Coffee Cake

TWO YEARS AGO: Lemon-Poppy Seed Muffins

THREE YEARS AGO: Mascarpone Brownies

FOUR YEARS AGO: Salmon Tacos

FIVE YEARS AGOCinnamon Turban Bread

SIX YEARS AGO: Summertime Gratin

SECRET RECIPE CLUB: STRAWBERRY CHOC CHIP CAKE & A BONUS RECIPE

Strawberry Choc Chip Cake

The Secret Recipe Club strikes again, as it does every last Monday of the month. Each participating food blogger gets assigned a blog in secret, and must publish a post about a chosen recipe from the assignment at the exact same time as everyone else in the group.  This month I hit gold. Pure gold. My blog was Fried Ice and Donut Holes, hosted by Melissa. A special assignment not only because it is one amazing blog, but because a little bird told me that this month marks her last participation with our club. That is sad, of course, but sometimes we need to make choices and set new priorities.  When I read Melissa’s About Me page, I kept smiling all the way through it. For one thing, this whole paragraph could be equally applied to me!

Though I absolutely love my job, cooking and baking are my passions.  During the summer of 2009, I started reading some food blogs and finally, my husband suggested that I start my own.  As a result, I began Fried Ice and Donut Holes in July of 2009 as a hobby and online recipe box, so to speak, for us to keep track of the many great recipes that we try. 

Ok, maybe the baking in my case should be re-phrased to “bread baking”. Although I started reading food blogs long before starting my own, it is true that Phil was a big supporter of me making the move from “reader” to “writer.”  I am sure you are also curious to find out the origin of her blog’s name, so I quote yet another paragraph from her page:

When I was younger, I remember my grandpa always telling us to behave or we’d be having fried ice and donut holes (aka nothing) for dinner.  For some reason, that phrase stuck and now it lives on forever!

Isn’t that super cute?  Melissa started her blog almost at the same time I started mine (6 long years ago), and in another coincidence, she joined The Secret Recipe Club at the same time I did, as well as other old timers such as Dorothy, from Shockingly Delicious.  It is sad to see her go…  She received my blog as her monthly assignment not too long ago and composed a great post about my French Style Rolls, if you’d like to see it, click here.

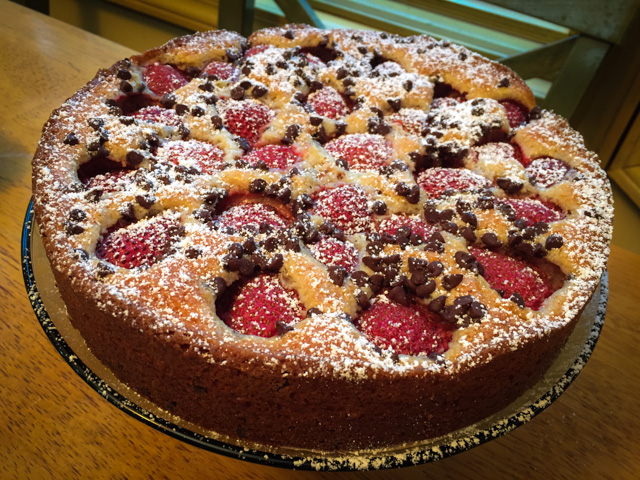
As you can imagine, someone who’s been blogging for so long will have a ton of great recipes, and it was not easy to pick one to feature today.  Just to tease you with some of those in my final list of possibilities: Tomato Ricotta and Prosciutto Tart, Sriracha Turkey Meatballs (my love for the spicy sauce is hard to ignore…), Eggplant Cannelloni, Bacon & Spinach Souffle, Roasted Cauliflower Risotto (oh, my…), Pretzel RollsBaked Coconut Shrimp, Chocolate Chip Cookie Dough Truffles (yessssss!)…  But in the end I went with her adorable Strawberry Chocolate Chip Cake, which was fun to make and a pleasure to eat!

Strawberry Choc Chip Cake2

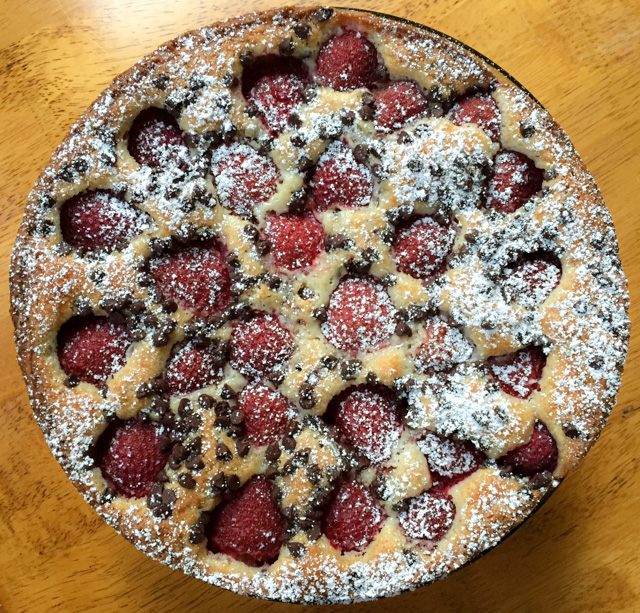
STRAWBERRY CHOCOLATE CHIP YOGURT CAKE
(from Fried Ice and Donut Holes)

1 1/2 cups flour
1 1/2 teaspoons baking powder
1/8 teaspoon salt
3 tablespoons butter, softened
3 tablespoons Greek yogurt
1 cup sugar
1 egg
1/2 cup milk
1 teaspoon vanilla extract
1/3 cup chocolate chips, plus more for sprinkling
1 pound strawberries, hulled and quartered

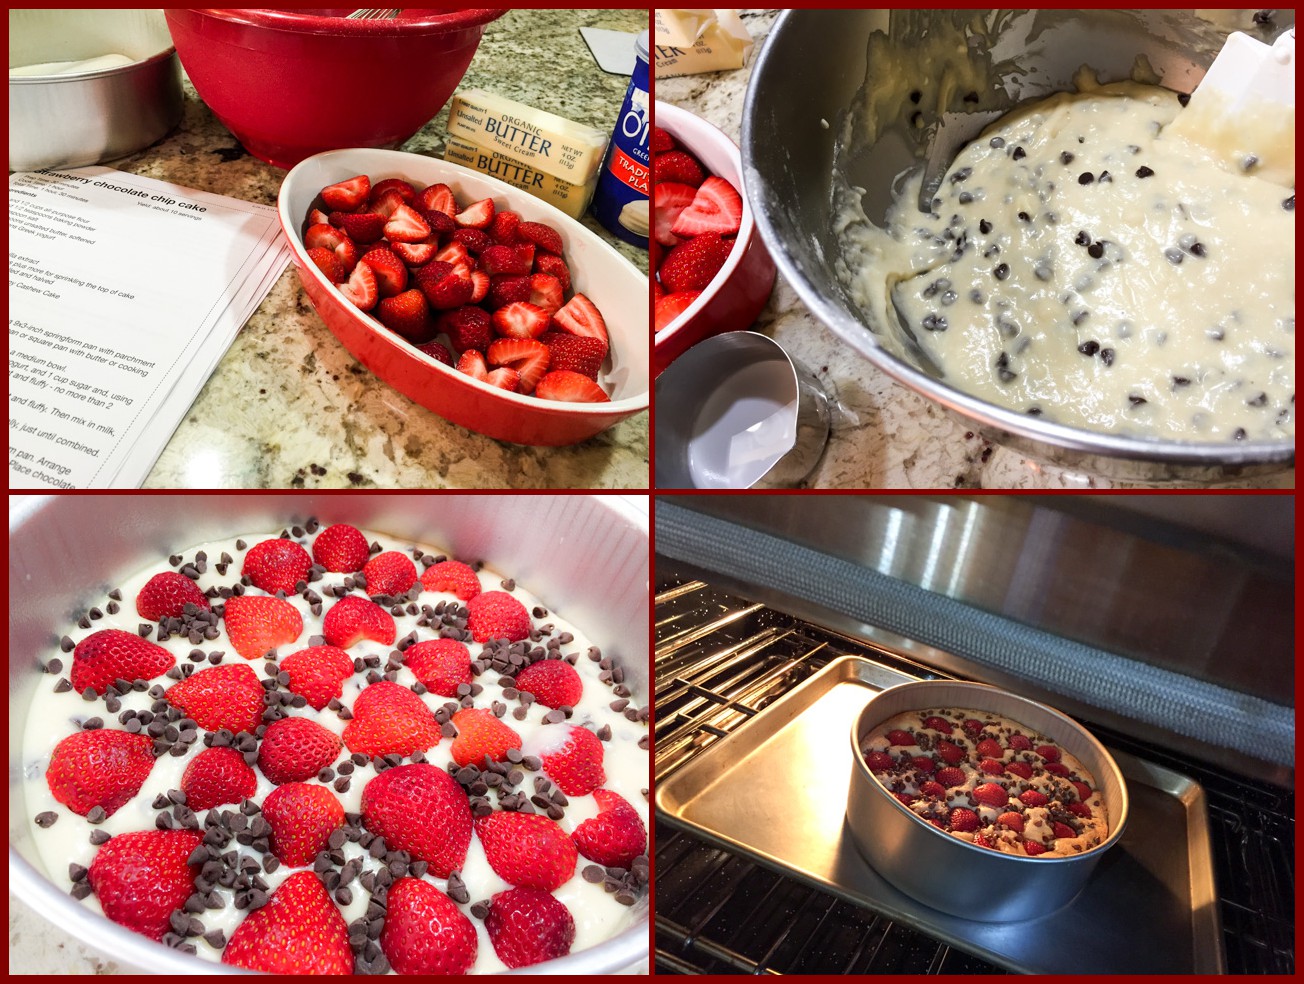
Line the bottom of a 9-inch round springform pan with parchment paper and grease the sides of the pan with butter or cooking spray.

In a large bowl, mix together the flour, baking powder, and salt. In the bowl of a stand mixer, combine the butter, yogurt, and sugar and mix on medium-high speed until light and fluffy, no more than 2 minutes. Reduce the speed to medium and mix in the egg, beating until light and fluffy. Then add the milk and vanilla. Reduce the speed to low and gradually add the flour mixture, mixing just until incorporated. Fold in the chocolate chips.

Pour the batter into the prepared pan. Arrange the strawberries on top of the cake, cut sides down and close together. Sprinkle additional chocolate chips between the berries. Bake at 350 degrees for about 1 hour, or until the top of the cake is golden brown and a toothpick inserted into the center comes out clean. Remove the cake from the oven and cool for about 40 minutes before releasing it from the pan. Dust the top with powdered sugar, if you want.

ENJOY!

to print the recipe, click here

composite

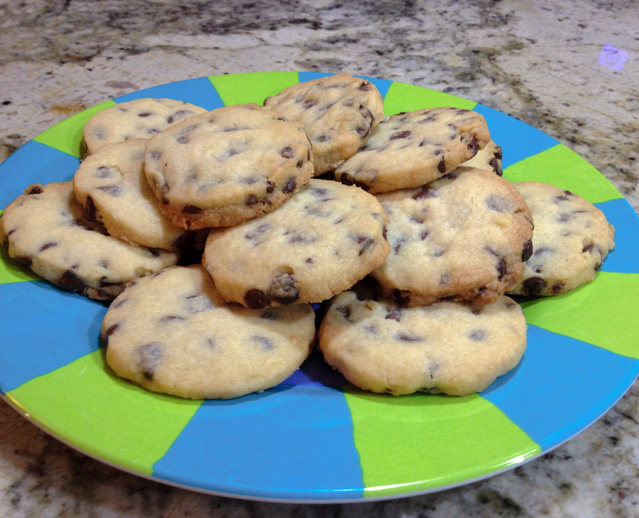
Comments: My only modification of the recipe was to use mini-choc chips because that’s what I had in the pantry and I thought they would work well too.  The cake is absolutely delicious, made our graduate students happy during one of our early meetings, and the small amount leftover was shared with colleagues from the department. Huge baking success!

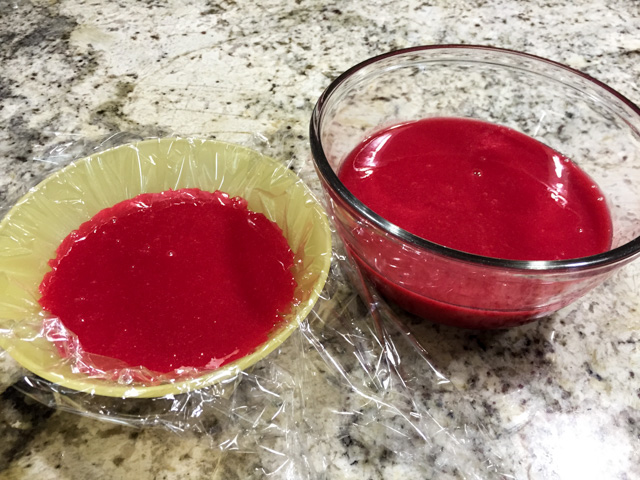
Since this is the last participation of Melissa in our club, I decided to make an additional recipe from her site as a special farewell. A recipe that I’ve always found pretty intriguing, but stayed as a culinary project for years.  Not anymore. I made a small batch of shakshuka for our Saturday lunch. Have you heard of it?  A flavorful tomato and pepper based sauce that is used as a base to gently cook eggs.  So, so good!
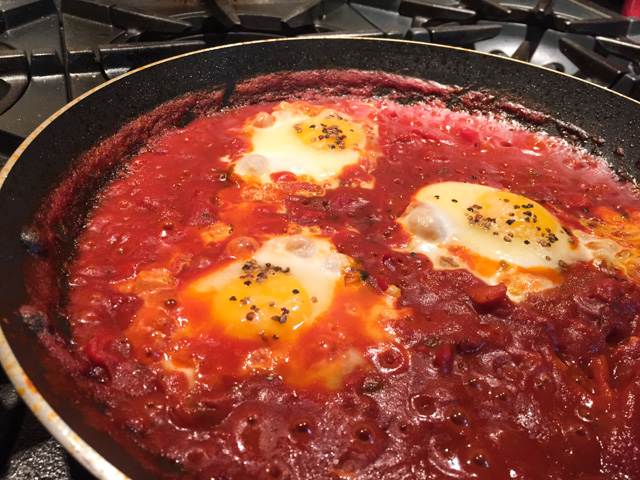
Shashuska1


SHAKSHUKA
(adapted from Fried Ice and Donut Holes)

3/4 teaspoon ground cumin
1/4 cup olive oil
1 shallot, sliced
2 red bell peppers, cut into 3/4 inch strips 
1 tablespoon dark brown sugar
2 bay leaves
6 thyme sprigs, leaves removed and chopped
2 tablespoons cilantro, chopped
1 can (15 ounces) of whole peeled tomatoes with their juices
1/2 teaspoon saffron threads
1/4 teaspoon Aleppo pepper
salt and pepper, to taste
up to 1 cup water
4 eggs (I used only three for the two of us)

In a very large sauté pan, heat the oil over medium-high heat until shimmering. Add the shallot and cumin and sauté for 5 minutes. Add the peppers, brown sugar, and herbs and continue to cook for 10-15 minutes to develop color. Add the tomatoes, saffron, cayenne, salt, and pepper. Reduce teat to low and cook for 15 minutes, adding water 1/4 cup at a time, so that the mix has the consistency of thick pasta sauce. Taste and adjust seasoning so that the mix is potent and flavorful.

Remove the bay leaves. Make wells for the eggs and carefully break eggs into the wells. Sprinkle with salt and pepper and cook on very low heat for about 8 minutes. Cover the pan and cook until the eggs are set, about 1 minute more. Serve right away…

ENJOY!

to print the recipe, click here

sauce1

I am so glad I made this bonus recipe from her site!  I’ve always been intrigued by Shakshuka, had quite a few versions of this recipe saved “to make soon”, but finally this assignment with The Secret Recipe Club gave me the chance to go for it.  It is a perfect dish for a brunch, or light lunch.  It’s important to not over-cook the egg yolks, you want to have the yolk liquid so that it mixes with the very flavorful tomato sauce, with intense saffron flavor. A crusty bread to soak the sauce is a must!

++++++++++++++++++++++++++++++++++++++++++++++++++++++++++++++++++

Melissa, I hope your last assignment with the club gave you as much pleasure as I had cooking from your site!  I wish you good luck on all your future projects!

To my readers, please stop by Melissa’s site to say hello, and if you want to see what my fellow club members shared this month, click on the blue amphibian smiling at you at the bottom of this post.

ONE YEAR AGO: Mini-Chocolate Cheesecake Bites

TWO YEARS AGO: Whole-Wheat Spaghetti with Grated Tomato Sauce

THREE YEARS AGO: A Taste of Yellow to Honor Barbara

FOUR YEARS AGO: Gratin of Beefsteak Tomatoes

FIVE YEARS AGO: Tour de France Final Stage: PARIS

SIX YEARS AGO: Snickerdoodles with a Twist


THE ULTIMATE RASPBERRY SORBET

My latest obsession is America’s Test Kitchen. The TV series, the books, the website, I simply cannot get enough of it. Which is kind of odd, because until recently I was…. how should I put it… a bit “cold” about Christopher Kimball. The convoluted nature of their recipes used to irritated me, as they go on and on about every single variable tested in their kitchen until the elusive best recipe is found.  But our friend Steve (my certified saffron-provider) recommended the show, and knowing him, I had to give it a try. Long story short, I am slightly addicted.  The recipes always work, which is saying a lot. Chances are that for many recipes you will dirty every single pot you own, but…  you won’t be disappointed. First one I tried: raspberry sorbet. Their goal was to come up with a sorbet with excellent texture, just the right amount of sweetness, and one that would not freeze rock solid.  The recipe is a bit involved (what else is new, ATK?), but once I tried my first spoonful, I was in raspberry bliss… And you can be there too!

Raspberry Sorbet ATK
THE ULTIMATE RASPBERRY SORBET

Recipe Overview:  To keep the formation of ice crystals to a minimum, their trick is making the sorbet base and dividing it in two unequal parts.  A small amount of the base is placed in the freezer, and later churned together with the very cold liquid part reserved in the fridge.  A little bit of no-sugar pectin is also added to improve texture.  The result is mind-blowing good!

For the full recipe, please visit this link at America’s Test Kitchen.  You might have to register with the site to see their recipes, but it is a small price to pay for the opportunity to surf through their huge collection.

************************************************************************

VitamixIsn’t the color of the raspberry mixture intoxicatingly beautiful? And matching the color of our Vitamix was a happy coincidence…

composite1This recipe forced me to do something that a couple of years ago I said “never ever again for as long as I live“. Oh, well.  I can change my mind as easily as I change my nail polish. I said before but it’s worth repeating: pushing raspberry puree through a sieve is not for sissies.

doubleBase
The base divided in two portions, one ready for the freezer…

last bit
Great to the last spoonful….

************************************************************************

ONE YEAR AGO: Crispy Cornmeal Sweet Potato Fries

TWO YEARS AGO: Pan-grilled Tilapia with Smoked Paprika & Avocado Cream

THREE YEARS AGO: Golden Saffron and Fennel Loaf

FOUR YEARS AGO: In My Kitchen, July 2011

FIVE YEARS AGO: Heavenly Homemade Fromage Blanc

SIX YEARS AGOA Perfect Sunday Dinner

CHOCOLATE CHIP SHORTBREAD COOKIES

It’s hard to make a case for one more chocolate chip cookie recipe, but this one is worth talking about…   What makes this recipe special is its shortbread nature. No eggs in the dough. As Sue described in her original post, shortbread cookies were probably the first versions “invented” by bakers. Think flour, butter and sugar. Beautify it with your favorite additions. And that’s pretty much it. The texture is completely different from a regular cookie. I think I slightly over-baked this batch, as the edges turned just a tad too dark compared to hers.  It did not compromise the deliciousness of the final product, though.  Trust me.

Shortbread Cookies1

MILK CHOCOLATE CHIP SHORTBREAD COOKIES
(from The View from Great Island)

1 cup unsalted butter, at room temperature
1/2 cup sugar
1 tsp vanilla extract
2 + 1/4 cups all-purpose flour
1 cup milk chocolate chips

Heat the oven to 350F.

Cream the butter and the sugar together. Beat in the vanilla extract.
Add the flour, a little at a time, until the dough comes together. Fold in the chips just before it all comes into one mass. Turn the dough out onto a floured board and bring it all together with your hands. Form it into a plump disk and then roll it out, flouring your rolling-pin as necessary, to about 1/3 to 1/2 inch thick.

Cut cookies with a 3″ cookie cutter, pressing down firmly to cut through the chocolate chips. Reform the dough as needed to use it all up. Arrange the cookies on a cookie sheet and then cover with plastic wrap and refrigerate the whole tray for at least an hour.

Bake the cookies for about 20 minutes. You want them to be every so slightly golden just around the edges, and be slightly firm to the touch.  Let them cool for a few minutes on the tray and then transfer to a rack to finish cooling.

ENJOY!

to print the recipe, click here

cutting1

Such a nice dough to work with!  It rolls smoothly, each cookie hiding the perfect amount of chocolate chip goodness… I rolled mine straight on the countertop, nice and easy.compositeThese cookies don’t spread much, so cut them in the size you’d like to enjoy them.  You might be surprised to see milk chocolate instead of dark, but I think the extra sweetness is perfect in the shortbread environment. Of course, you can use this basic recipe to make many variations.  Think white chocolate and dried cranberries, toffee bits and dark chocolate would be awesome too.  Not to mention macadamia nuts, a little lemon zest…  Ok, I’ll stop here, but you don’t have to, put your imagination to work…

I’d never had a shortbread cookie before. With the first bite, I asked myself “do I like it?”… one more bite….  “Hummmmm, I think I do like it!“…..  After two cookies disappeared in lightning speed, I realized they won me over, big time! If you’ve only had “regular” cookies until now, open your baking horizons with a batch of these.

Sue, as usual it took me quite a while to blog on this recipe… I checked my files and noticed I baked these cookies back in January, can you believe it?  But better late than never to say thank you for the inspiration!

😉

ONE YEAR AGO: Chicken in Green Pipian Sauce, Sous-vide Style

TWO YEARS AGO: Classic Shrimp Gobernador Tacos

THREE YEARS AGO: A Walk Towards the Sunset

FOUR YEARS AGO: In My Kitchen

FIVE YEARS AGO:  Heavenly Home-made Fromage Blanc

SIX YEARS AGO:  A Perfect Sunday Dinner

THE DEVIL’S BREAD

For those who like it really hot…

Diablo Bread

It’s been a while since I blogged about bread, in fact I have a nice bread post waiting patiently in a long line to show up here, but last weekend I stumbled upon a very interesting recipe, and made it right away. I  simply could not wait to share because it’s so unusual and intriguing. A very simple no-knead dough using instant yeast, but here is the devilish twist: the dough is flavored with red pepper flakes and…. ready for this? Sriracha sauce!  Can you imagine it? Now, I am a certified Sriracha-cheerleader, but never imagined adding it to bread. Apparently no one had, until DeKay did a search in google for Sriracha and no-knead bread, and came up empty-handed. He took matters into his own hands (sorry, lousy pun), and made this version.  I could not wait to try it. It turned out awesome, and I think any Sriracha lover will fall in love with the devil after trying a piece.  Ok, if not with the devil himself, definitely with his bread..  But, before I give you the recipe, let me share a cartoon that cracked me up the other day. Perfect!

(Photo credit: Benjamin Schwartz/The New Yorker Collection/The Cartoon Bank)

Conde Nast TagID: cncartoons031905/Photo via Conde Nast

Conde Nast TagID: cncartoons031905/Photo via Conde Nast

THE DIABLO BREAD
(adapted from The Mad Scientist Labs)

400 grams unbleached all-purpose flour
7 grams table salt
1/2 teaspoon instant dry yeast
1 tablespoon crushed red pepper flakes
260 grams cool water (55 – 65 °F)
60 grams (4 tablespoons) Sriracha sauce (go for it!)
Wheat bran for dusting

Mix the flour. salt, yeast, and pepper flakes together in a medium-sized bowl. Add in the water and Sriracha sauce. Mix using a wooden spoon or your hand until all of the flour is incorporated and the dough is sticky. This should only take 30 seconds or so. Add more water if the dough seems too dry.

Transfer the dough to another bowl lightly oiled or sprayed with cooking spray. Leave one hour at room temperature, remove the dough to a lightly flour surface and knead it 8 to 10 times.  Place it back in  the bowl, cover with oiled plastic wrap and leave it at room temperature for 3 more hours.  Place it in the refrigerator overnight (about 12 hours).   Remove the dough from the fridge,  dump it into a lightly floured surface, and shape it as a ball.  Place it in a banneton or another appropriate container seam side up, dusted with wheat bran for its final proofing, two hours at room temperature.

Heat the oven to 450 F.  After the shaped bread proofed for 2 hours, invert it on a sheet of parchment paper, so that the seam side is now down. Slash the surface with a serrated knife, and place it in the oven, using your favorite method to generate steam (I bake my bread inside a large Dutch oven, and cover it with a wet lid).

After 30 minutes, open the lid and allow the bread to brown for 10 to 15 minutes longer.  You can lower the oven to 425 F in case it is browning too fast.

Once the loaf is a nice dark brown, take it out of the pan and set it on a wire rack to cool for at least an hour.

ENJOY!

to print the recipe, click here

composite11

Be honest with me. Have you ever seen a more awe-inducing color of a bread dough in your whole life? I know, you can hardly continue reading, you want to run away and call your family and close friends over, then your neighbors, and anyone else wandering the streets.  It is pure Sriracha beauty. My dear friend Denise saw this photo and said “you expect to see a flamingo flying out of the dough any minute”. I could not have said it better myself.

My basic change to the recipe was to take it from “no-knead” to “minimal knead.”  I’ve made enough no-knead breads to realize that just one small cycle of minimal kneading or folding does wonders to improve the texture of the crumb.  It is almost as though with no kneading whatsoever you’ll get a slightly harsher crumb, not very well structured.  One cycle of kneading gives the dough a little extra body that pays off in the final product.  Of course, you can skip it and go for a completely knead-free production, you won’t hurt my feelings…

The smell as this bread baked was something!  Sriracha on opioids. I fully agree with  DeKay on the taste, though. It is not overly spicy, baking seems to mellow some of its peppery nature, but make no mistake, it is hot. If you don’t like Sriracha, this bread is not for you. As to the red pepper flakes, I think I like the amount I added, not more.  Every once in a while you bite into a flake and get that hush of heat that lasts just a second or two.  Perfect.   I think this bread would be great paired with a bowl of chili in the winter, but if you toast it lightly and add some tomatoes, mozzarella cheese and run it under the broiler for a minute it is sinful.  Sinful. But then again, what else could you expect from The Bread of the Devil

 😉

Crumb1If you’ve been naughty enough, you can have several slices….

ONE YEAR AGO: Heart of Palm Salad Skewers

TWO YEARS AGO: Potluck Frittata and Lavoisier

THREE YEARS AGO: Home-made Corn Tortillas

FOUR YEARS AGO: Whole-Wheat Spaghetti with Peanut Sauce

FIVE YEARS AGO: Brigadeiros: A Brazilian Party!

SIX YEARS AGO: Lemony Asparagus