
Time running out to enter the Bewitching giveaway… click HERE to join the fun!
 Mom and her kids…
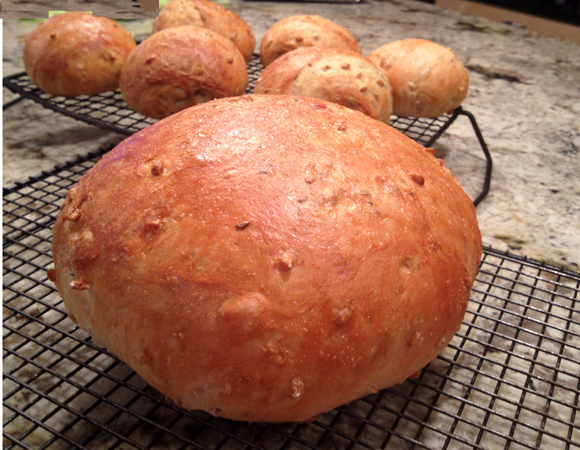
This bread was featured by the bloggers at Bread Baking Babes. I do not participate of this group event, but Ilva – from Lucullian Delights – does and when she blogged about this recipe, I made it on the following weekend, no time wasted. The original recipe from Peter Reinhart called for wild rice and onions, but she decided to use barley and caraway. I went with a modified version of her modified recipe, keeping the caraway but replacing the barley with wheat berries. A soft crumb, permeated with just enough crunch with the wheat berries, and that great flavor given by caraway seeds. You would almost think about rye bread as you savor this bread, since caraway is so often used in European rye concoctions. But it is definitely different. A wonderful dough to work with, rose like a balloon…. what a great sight this is for a bread baker, whether or not she is a babe… 😉

WHEAT BERRY AND CARAWAY BREAD
(adapted from Ilva’s recipe)
6 cups (765 g) bread flour
2 + 1/4 teaspoons (17 g) salt
2 tablespoons (19 g) instant yeast
1 cup (170 g) cooked wheat berries
1/4 cup (56.5 g) brown sugar
1+1/2 cups (340 g) lukewarm water
1/2 cup (113 g) lukewarm buttermilk
1 Tablespoon caraway seeds
1 egg white, for egg wash (optional)
1 tablespoon water, for egg wash (optional)
The day before baking:
Combine all of the ingredients, except the egg wash, in a mixing bowl. If using a mixer, use the paddle attachment and mix on the lowest speed for 1 minute. If mixing by hand, use a large spoon and stir for 1 minute. The dough should be sticky, coarse, and shaggy. Let the dough rest for 5 minutes. Switch to the dough hook and mix on medium-low speed, or continue mixing by hand, for 4 minutes, adjusting with flour or water as needed to keep the dough ball together. The dough should be soft, supple, and slightly sticky.
Transfer the dough to a lightly floured work surface. Knead the dough for 2 to 3 minutes, adding more flour as needed to prevent sticking. The dough will still be soft and slightly sticky but will hold together to form a soft, supple ball. Place the dough in a clean, lightly oiled bowl, cover the bowl tightly with plastic wrap, and immediately refrigerate overnight or for up to 4 days.
On Baking Day:
Remove the dough from the refrigerator about 2 hours before you plan to bake. Shape the dough into one or more loaves, in any shape you like, free form or in a loaf pan (if using a 5 by 9 inch pan, use 1kg of dough). For sandwich loaves, proof the dough in greased loaf pans. For freestanding loaves and rolls, line a sheet pan with parchment paper or a silicone mat and proof the dough on the pan.
Mist the top of the dough with spray oil and cover loosely with plastic wrap. Let the dough rise at room temperature for 1.5 to 2 hours, until increased to about 1.5 times its original size. In loaf pans, the dough should dome at least 1 inch above the rim. If you’d like to make the rolls more shiny, whisk the egg white and water together, brush the tops of the rolls with the egg wash just before they’re ready to bake.
Heat the oven to 350°F and bake the loaves for 10 to 15 minutes, then rotate the pan. Total baking time is 45 to 55 minutes for loaves, and only 20 to 25 minutes for rolls. The bread is done when it has a rich golden color, the loaf sounds hollow when thumped on the bottom, and the internal temperature is above 185°F in the center.
Cool on a wire rack for at least 20 minutes for rolls or 1 hour for loaves before slicing.
ENJOY!
to print the recipe, click here
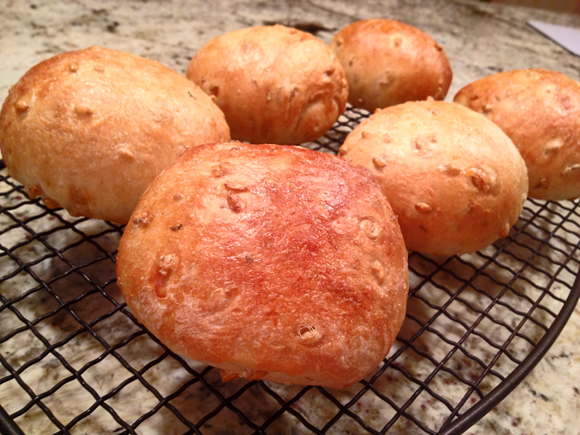
Comments: This recipe makes A LOT of dough… Peter recommended using only 2 ounces (around 57g) dough per small roll. My rolls were definitely bigger than that. Normally I do not weigh dough when shaping. For this recipe I more or less cut the dough in half, shaped one as a large ball, and divided the remaining dough in 6 pieces, eyeballing the process. For hamburger-type sandwich, they were the perfect size.

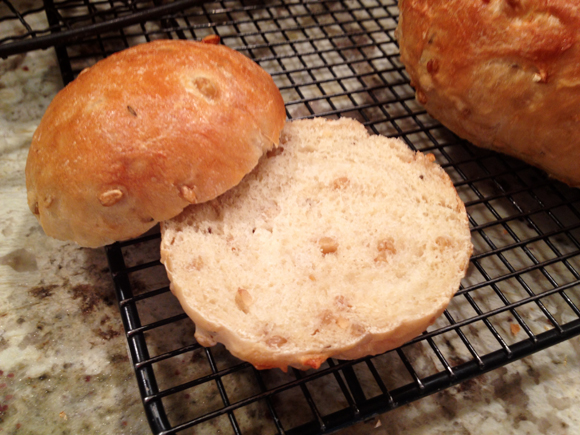
The crumb is super soft, and since I used a reasonably small amount of caraway seeds, the flavor was not overpowering. I love caraway, but in breads I like it to be a mild presence. This bread was perfect with our Black Bean Burgers of a recent past…
FINAL REMARK: Remember that this bread takes TWO days to prepare. On the first day you will mix the dough, and place it in the fridge. Next day you resume shaping and baking. The fact that the dough can be kept in the fridge for a few days will make it easy to have freshly baked bread on a whim. Or almost on a whim…
I thank Ilva for the inspiration, and Susan for her Yeastspotting venue so I can share this bread with other bread baking “babes’…
ONE YEAR AGO: Mexican Focaccia
TWO YEARS AGO: Sunny Kamut Salad with Roasted Lemon Vinaigrette
THREE YEARS AGO: Pane de Casa & Crostini
FOUR YEARS AGO: Down-home Dig-in Chili
FIVE YEARS AGO: Cinnamon Rolls
