FESENJAN & THE NEW PERSIAN KITCHEN

newpekMany, many years ago, when I lived in California with my first husband, we would often go to a Persian restaurant located in Palo Alto. The food was simply outstanding, and the atmosphere perfect.  A quiet place, beautifully decorated, and with a menu full of dishes that sounded magical to us, two Brazilians with no experience in that type of food.   We would usually ask the waiter to pick something for us. One day he served us a braised lamb over rice with fava beans that completely awed our taste buds.  I remember the fresh dill sprinkled all over it. And I also remember that I hated fava beans, but would gladly spend each day of my life enjoying that rice.  Persian cooking can perform miracles.  In those days, I had no way of knowing that the man I would marry many years later was also under the spell of Persian food.  Phil had a friend from Iran who often invited him for dinner and prepared tahdig, best described as “rice with a crust”.  Like my lamb dish with fava beans, that rice stayed forever in Phil’s memory as one of the best things he’s ever had!  With all that in mind, when I read this review on Louisa Shafia’s book it took me 95 seconds to order it.

plated

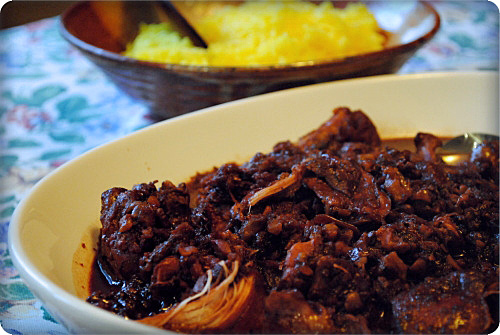
FESENJAN (WALNUT POMEGRANATE STEW)
(reprinted with permission from Louisa Shafia – The New Persian Kitchen)

1 tablespoon grapeseed oil
2 pounds skinless chicken legs or breasts
2 teaspoons salt, plus more, to taste
2 yellow onions, finely diced
1 cup walnuts, coarsely ground
½ cup pomegranate molasses
2 cups chicken stock, vegetable stock, or water
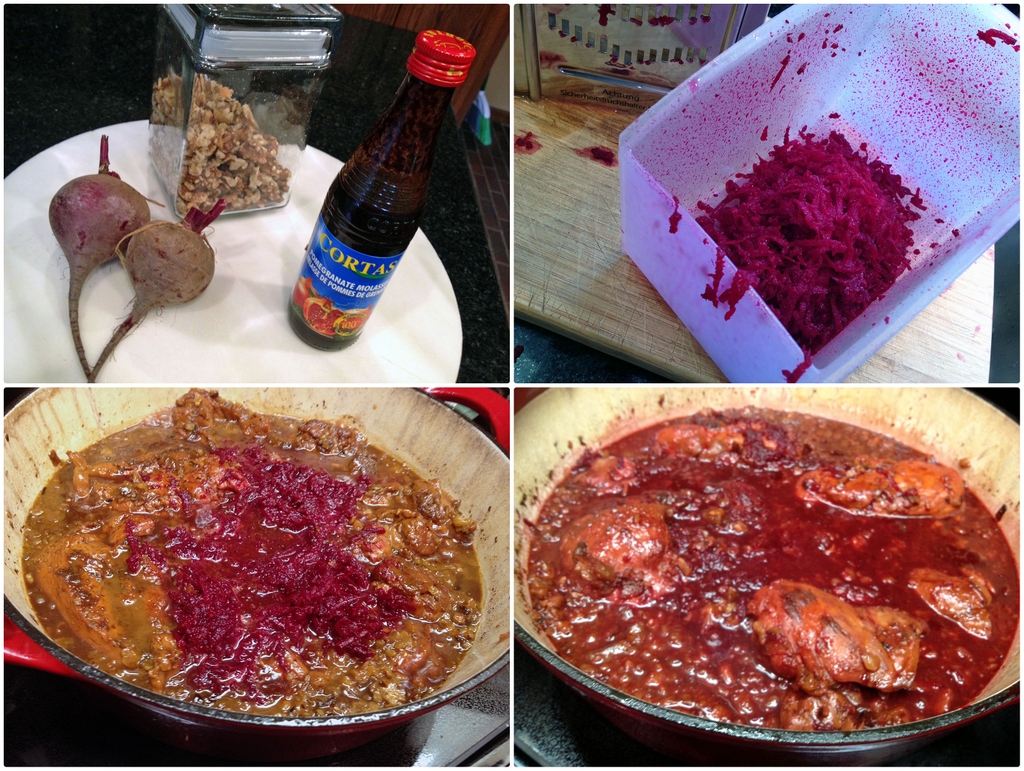
1 cup peeled and grated red beets
Pomegranate seeds and fresh mint leaves for garnish

.
Heat a large, deep skillet over medium-high heat and add oil. Lightly season chicken with salt and sear until well browned, 6-7 minutes per side, then transfer to a plate.

In the same skillet, sauté onions over medium heat for about 15 minutes, until lightly browned. Add walnuts, pomegranate molasses and 2 teaspoons salt. Stir to coat the onions. Add stock and bring to a boil. Reduce heat to a simmer and return chicken to stew. Cover and cook 25 minutes.

Stir in beets and cook, uncovered, until stew is thick and beets are tender, 15-20 minutes. Adjust salt to taste.  Pull out chicken pieces with tongs and cut into halves or thirds, if you like. Put a few pieces of chicken on each plate, along with plenty of sauce. Garnish with pomegranate seeds and mint.

ENJOY!

to print the recipe, click here

composite-001It was not easy to choose a recipe to highlight this great cookbook. You’d think I would pick either that magical lamb or a tahdig from our past, but I could not find fava beans, and tahdig is a bit intimidating for a first timer.  Indeed, according to Louisa herself, tahdig is the type of dish that requires practice. Your first won’t be your best. So, I opted for this amazing chicken concoction. Once you make it, you’ll realize why it is usually reserved for special occasions.  The intensity of flavors is hard to describe – it is sweet, sour, the walnuts give it body and texture, and the beets offer the most gorgeous color ever!   Don’t even think about omitting the beets, by the way. First, you won’t detect their taste. Second, remember that Persian cooking perform miracles…  😉  I could not find fresh pomegranate seeds to sprinkle on top, but the dish was festive enough without it.

bookcoverTo order, click here

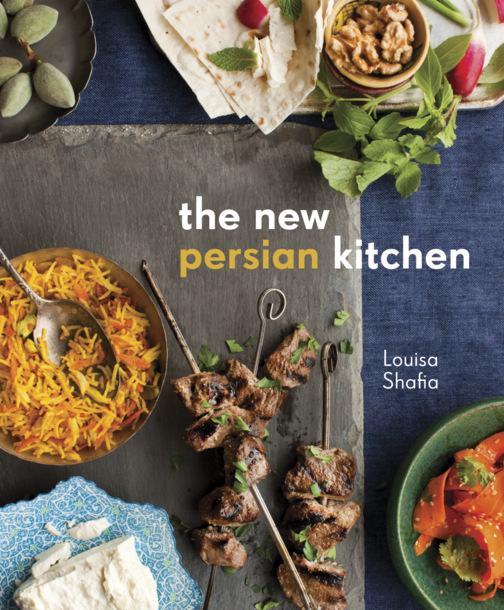
A little review of Louisa Shafia’s book.  Some cookbooks capture you from the moment you open the first page.  I started reading it late at night, and could not put it down for a couple of hours.  Louisa starts the book answering the simple question “What exactly is Persian food?” – and from there she takes the readers through a beautiful journey that covers not only its exotic flavors (sour cherries, rose petals, pomegranate molasses, dried limes, sumac, tamarind) but also the history of a fascinating region of the world and how it influenced the gastronomy of other places.  You will learn a lot more than cooking through Louisa’s words. Even Persian poetry will be there for you…

Reading her book, I learned the correct way to deal with saffron (so now I am on a quest to find a small mortar made of brass ;-)), and also opened my horizons to using dried mint. Louisa states that dried mint in many instances is better than the fresh herb, and recommends searching for Egyptian mint. I followed her advice, and she is right, it delivers great flavor.

The book has 80 recipes, divided in courses.  I will list a couple of recipes I found particularly tempting from each course just to give you an idea of what to expect.

Starters and Snacks:  Winter Squash Fritters with Rose Petals & Turkish Roasted Tomato and Red Pepper Dip

Soups: Saffron Corn Soup & Oat and Mushroom Soup (her description of this soup made me dream…)

Salads: Shaved Celery Root and Pomegranate Salad & Vinegar Carrots with Toasted Sesame Seeds

Vegetable and Egg Entrees:  Herb Frittata with Walnuts and Rose Petals  & Sweet and Smoky Beet Burgers (click here for Louisa’s own blog post about it)

Meat and Fish Entrees: Grilled Shrimp with Lime Powder and Parsley-Olive Oil Sauce & Turmeric Chicken with Sumac and Lime (both of these dishes plus Fesenjan were my final contenders to cook for this post)

Main Dish Stews and Casseroles:  Fesenjan (the featured recipe) & Persian Gulf-Style Spicy Tamarind Fish Stew

Rice and Grains:  Jeweled Brown Basmati Rice and Quinoa (hard to resist this one…) & Rice with Favas and Dill (the rice of my past…)  Several of her rice recipes can be turned into tahdig, and she does a great job advertising this spectacular take on rice.

Sweets: Rhubarb and Rose Water Sorbet with Rice Noodles (I simply HAVE to try this at some point) & Nutty Chocolate Bark with Cardamon and Coffee.

Beverages: Salty Mint Yogurt Soda & Watermelon, Mint, and Cider Vinegar Tonic

Pickles and Preserves: Fig Mustard (wow!) & Sour Cherry and Rose Preserves

You probably noticed that Louisa is one of those chefs who is in top shape, and that definitely influences her cooking style.  She always offers variations that make a classic dish lighter and better for you. If you are particularly interested in cooking with whole grains and healthy oils and sweeteners, this book covers it all. Her chapter on ingredients closes with a wonderful list of grains and gluten-free flours and tips on how to cook with them.  Can you tell I love her book?

Louisa, thank you for allowing me to publish a recipe from “The New Persian Kitchen”. I intend to cook a lot from it, and that includes tahdig…  😉

ONE YEAR AGO: Quinoa Salad with Roasted Beets

TWO YEARS AGO: Pasta Puttanesca

THREE YEARS AGO: Miche Point-a-Calliere

RIDICULOUSLY GOOD COCONUT BRIGADEIROS

A note to subscribers: Google Reader will shutdown on July 1st, 2013. If you have a subscription to this blog through Google Reader, please sign up for email notifications, or switch to another reader. I recommend Feedly or Bloglovin. They will automatically retrieve all your Google reader subscriptions.

platter1Originally, this post would have a simple and straightforward title:  “Coconut Brigadeiros”.  I made them late on a Sunday evening to take to our department next day.  Phil tried one, and was silent for a while. Then, he said “Sally, these are ridiculously good”.  And that, my friends, is how a new title for my post was born.  I could not let that one pass… 😉

Those of you who do not know what is a “brigadeiro” are invited to jump here and read a post I made a couple of years ago.  It explains everything you need to know about the most traditional sweet served at Brazilians parties and kids’  birthdays (particularly kids younger than 91 years old).   Coconut brigadeiros are simply a variation on a classic, but wow… they ARE ridiculously good.   Make a batch. And you will be hooked.

closeup

COCONUT BRIGADEIROS
(adapted from Fine Cooking magazine, original recipe from Leticia Moreinos Schwartz)

1 can sweetened condensed milk (14 oz)
1/2 cup coconut milk
2 tablespoons unsalted butter
2 teaspoons light corn syrup
2 cups shredded unsweetened coconut (divided)

Add the condensed milk, coconut milk, unsalted butter, corn syrup, and 1/2 cup of shredded coconut to a heavy saucepan and bring to a boil over medium heat. Turn the heat down to medium low and cook, stirring constantly with a wooden spoon, until the mixture thickens.  Depending on your stove, it should take 15 minutes or a little more.  If the mixture boils too furiously, lower the heat.   Keep stirring at all times or you might end up with brigadeiros that are not totally smooth. The mixture is ready when you can see the bottom of the saucepan as you stir.   Slide the mixture out into a bowl, avoid scraping the stuff that glued to the pan. Let the mixture cool completely or until it is cool enough to handle.

Spread the remaining 1 + 1/2 cups of the shredded coconut out onto a rimmed baking sheet and toast in a 350 degree oven for 10-15 minutes, stirring every 5 minutes to ensure even browning. Remove from the oven when most of the coconut is golden brown. Place into a bowl and let cool.

Scoop the coconut mixture with a small spoon (it helps to wet the palm of your hand with cold water) and roll into 3/4″ diameter balls. Drop each ball into the shredded coconut and toss gently to coat.  Serve right away at room temperature, or chill until ready to serve.

This recipe will make 26 to 36 brigadeiros. I tend to like them a little bigger, so I normally end with less than 30.  The recipe can be doubled.   For a different take, roll the coconut brigadeiros in chocolate sprinkles.

ENJOY!

to print the recipe, click here

toasted

Comments:  A friend of mine from Brazil goes to the extent of sautéing the shredded coconut in butter for the coating.  I think toasting in the oven is good enough.  Sometimes you can find shredded coconut in smaller pieces than the ones I used. It will work fine too.

Brigadeiros can be served at room temperature, or straight from the fridge. They will have a different texture, some people (me included) prefer the soft, room temperature version.  While we were in Brazil a couple of months ago, my niece Raquel  served us a variation on brigadeiros that might very well be my favorite: brigadeiros de cupuaçú.

Now, I don’t expect too many Americans (or Europeans for the matter) to know what I’m talking about.  Cupuaçú is a fruit native of the North of Brazil, the same region where açaí grows and where my Dad was born back in 1920.  He absolutely loved both fruits! It has a very unique taste, sweet and sour at the same time. In São Paulo you can easily find cupuaçú pulp  in frozen form, which is what Raquel used for her  brigadeiros.  One of the best things I’ve ever had!  Here in the US I settle for coconut, so you can make it too…   😉

Love Brazilian cooking?  Consider getting Leticia Schwartz book, The Brazilian Kitchen.  For my review of her book, click here.

ONE YEAR AGO:  A bewitching move ahead… (from OK to KS!)

TWO YEARS AGO: Double-hydration focaccia

THREE YEARS AGO: Pierre Nury’s Rustic Light Rye: Bougnat

BEST THING I EVER MADE SERIES: MUSHROOM STROGANOFF

As I mentioned before, one of the few shows I still enjoy in the FoodTV Network is the series “Best Thing I Ever Made“.  The list of dishes I’d like to make from that show is shamelessly long,  but I keep tuning in and making the list longer.  This meatless take on stroganoff is another great recipe by Alton Brown, featured in the episode “Updated Classics“.   Heads up: the fact that it is meatless does not make it a light meal!  The sauce is very rich with cream and goat cheese, the Portobello mushrooms play the meat part better than I expected.

served

MUSHROOM STROGANOFF WITH GOAT CHEESE
(from Alton Brown, Best Thing I Ever Made)

12 ounces extra-wide egg noodles
3 tablespoons unsalted butter
5 Portobello mushrooms, stems removed and sliced
1 teaspoon kosher salt
1 bunch green onions, sliced and white bottoms and green tops separated
1 tablespoon all-purpose flour
14 ounces beef broth
8 ounces sour cream
4 ounces fresh goat cheese
1/2 teaspoon ground black pepper
fresh parsley leaves, minced, to taste
.
Cook the noodles al dente, according to package instructions. Melt the butter in a 12-inch straight-sided saute pan set over medium-high heat. Increase the heat to high, add the mushrooms and sprinkle with salt. Saute until they darken in color, soften and give off their liquid, 5 to 6 minutes. Add the white parts of the green onions and saute 2 to 3 minutes.Sprinkle in the flour and stir to combine. Cook until the flour disappears and the fond on the bottom of the pan turns dark brown, about 1 minute.
Deglaze with the beef broth. Bring to a simmer and decrease the heat to medium-low. Cook for 10 to 12 minutes, and then add the sour cream, goat cheese and black pepper. Stir to combine, and then partially cover and bring to a simmer to warm through, 2 to 4 minutes.Drain the noodles, add to the pan and stir to combine. Garnish with the parsley. Serve immediately.
.
ENJOY!
.
to print the recipe, click here
.

cooking

Comments:  I had no idea that one could find some episodes of FoodTV on the net, without interruption for commercials. If you want to see Alton in action, click here.   He used an interesting method to cook the pasta, starting it in COLD water. I wanted to try it, but completely forgot about it and cooked my noodles the normal way.   Check the link for the recipe in the FoodTV site for his version, or watch the episode in which he explains the rationale for doing it this way.

This was a very substantial and filling pasta. It could be a vegetarian-friendly entrée if you skipped the beef broth and used a veggie broth instead, but I don’t think it would be nearly as good.  I used home-made beef broth from our freezer. I actually like to call it “liquid gold”.  It’s labor-intensive to prepare, but it does shine in a recipe like this one.   It gave amazing depth of flavor to the Portobello mushrooms.   This would be a wonderful dish for a dinner party, by the way.  The sauce can be made in advance, all you have to do is cook the noodles and awe your guests…   😉

ONE YEAR AGO: Tomato Sourdough

TWO YEARS AGO: Gamberetti con rucola e pomodori

THREE YEARS AGO: Flirting with Orzo

QUINOA WITH CIDER-GLAZED CARROTS

A note to subscribers:  Google Reader will shutdown on July 1st, 2013. If you have a subscription to this blog through Google Reader, please sign up for email notifications, or switch to another reader. I recommend Feedly or Bloglovin.  They will automatically retrieve all your Google reader subscriptions. 

I’ ve had plenty of versions of quinoa in the past, but this one takes the number one spot. The carrots added a sweet-sour note, the thinly sliced almonds a delicious crunch, and the quinoa married them together with its light and refreshing nature. Cannot praise this dish enough. I was inspired by this recipe from Bon Appetit, and decided to come up with a version to be served hot instead of cold, but with similar flavors. If you are searching for a recipe to please vegetarians or a perfect side dish for pork, poultry,  perhaps a thick slab of grilled salmon, look no further. This is perfect!

served22

QUINOA WITH CIDER-GLAZED CARROTS AND ALMONDS
(from the Bewitching Kitchen, inspired by Bon Appetit)

1 cup quinoa, very well rinsed and drained
salt
3 medium carrots, thinly sliced at an angle
2 Tbsp apple cider
2 Tbsp agave nectar
1/4 cup sliced almonds
2 Tbsp olive oil, divided
1 Tbsp cider vinegar
2 Tbsp lemon juice
zest of 1 lemon

Heat oven to 450°. Bring quinoa and 4 cups lightly salted water to a boil in a medium saucepan. Cover, reduce heat, and simmer until quinoa is tender, 10-15 minutes. Drain; return quinoa mixture to saucepan, cover, and let sit for 10 minutes. Fluff with a fork and transfer to a large bowl; let cool.

Meanwhile, lightly coat a large rimmed baking sheet with oil (or cover it with parchment paper). Whisk cider and honey in a large bowl to blend; season with salt and pepper. Add carrots and toss to coat. Transfer to prepared baking sheet and roast until tender, 15-20 minutes. Let cool.

Heat 1 tablespoon of olive oil in a small skillet. Add the almonds and cook over low heat until fragrant.  Set aside, keeping it warm.

Whisk vinegar, lemon zest, lemon juice, and remaining tablespoon of olive oil in a small bowl.  Season with salt and pepper.

Add carrots and almonds to quinoa mixture and toss to coat. Drizzle the vinegar & lemon mixture and mix well tp combine all ingredients.  Adjust seasoning if needed.

ENJOY!

to print the recipe, click here

Comments: If you are new to cooking the seeds of Chenopodium quinoa, please remember to rinse them extensively.  The seeds  have a natural coating of saponins that taste very bitter.  Processing the seeds for sale includes pre-washing, but you will notice that the water still foams slightly once you soak the seeds.  A couple of years ago, I read somewhere that quinoa goes rancid very easily, so the advice given was to store it for  no more than 6 months (or freeze it).   I tried to find a source for this information,  but now I find plenty of sites stating that it lasts for several years in the pantry.  Oh, well. I guess one can always open the bag and do a sniff test.

Cooked quinoa freezes very well, so you can prepare a full bag and portion it in the freezer for later. I actually cooked it on a Saturday and made this recipe for our dinner on Tuesday.  Pork tenderloin kebabs completed the meal, but the truth is we both raved about the quinoa a lot more.  Bonus:  we got our intake of carrots all taken care of!  😉

ONE YEAR AGO: Celebrate Wednesday: Heirloom Tomatoes Steal the Show

TWO YEARS AGO: Pain de Provence

THREE YEARS AGO: Golspie Loaf, from the Scottish Highlands

CELEBRATE WEDNESDAY WITH PASTA AND MUSSELS IN SAFFRON BROTH

For some reason I had “issues” about cooking mussels at home. Maybe that whole de-bearding thing sounded too wild for my delicate self.  😉  But we love mussels and it’s  sad to only have them in restaurants, or even worse, only when we go to Paris and visit one of those widespread “Leon de Bruxelles” places.  Anyway, our grocery store in the Little Apple carries farmed mussels. They have no beard to worry about. Therefore, most of the cleaning process is done. They cook quickly, and certainly make a humble plate of pasta (and a rainy Wednesday evening) shine…

served1

PASTA WITH MUSSELS IN SAFFRON SAUCE
(adapted from Food and Wine magazine)

2 cups dry white wine
4 bay leaves
4 pounds small mussels, scrubbed and de-bearded
Pinch of saffron threads
1 tablespoon unsalted butter, melted
1 tablespoon olive oil
1 garlic clove, thinly sliced
1/2 teaspoon crushed red pepper
2 tablespoons fresh lemon juice
linguine
Salt and freshly ground pepper
minced parsley, to taste

In a large pot, combine the wine with the bay leaves and bring to a boil. Add the mussels, cover and cook over high heat, shaking the pan a few times, until the mussels open, about 5 minutes. Drain the mussels in a colander set over a medium bowl. Pour the mussel broth into a glass measure. Crumble the saffron into the hot mussel broth. Reserve.

Discard any unopened mussels. Remove the mussels from their shells and place in a separate bowl. Pour the melted butter over the mussels and toss to coat. Cover with plastic wrap.

Heat the olive oil in a large skillet. Add the thinly sliced garlic and cook over low heat just it gets some color. If you prefer, remove the garlic, if not, leave it in, and add the crushed red pepper, cooking together for one minute.   Slowly pour in the reserved mussel broth, stopping when you reach the grit at the bottom of the glass measure. Add the lemon juice and simmer over moderately high heat until the sauce is reduced to about 1 cup, about 8 minutes.

In a large pot of boiling, salted water, cook the pasta just until al dente. Drain the pasta well. Add the buttered mussels and the hot spaghetti to the mussel sauce and toss over low heat until the pasta is uniformly coated. Season with salt and pepper. Sprinkle with parsley and serve.

ENJOY!

to print the recipe, click here

composite1

Comments:  Glad to inform my fear of mussels is a thing of the past.  I probably discarded more mussels than needed,  as I rather be safe than sorry, and was a bit insecure preparing them for the first time.  This is a delicious pasta! Of course, having great quality saffron adds a lot to it…  😉   Now that I am not afraid of cooking mussels, we will have them at our dinner table on a regular basis,  brightening up our Wednesdays, as we slowly move towards the weekend.

ONE YEAR AGO: Triple Chocolate Brownies

TWO YEARS AGO: Shanghai Soup Dumplings

THREE YEARS AGO: Bite-sized Chocolate Pleasure