ON THE FLIP SIDE OF FOOD: P90X

When I married Phil, an avid runner, I started running too, and I got hooked on it.  Back in 2006  we both ran a marathon (my first, his second).   I felt like a million bucks and I hoped to do it again and again… and again.   But, my left knee had a different opinion, and after a few fights with it I had to accept that my days of long distance running were over.  What a bummer.

Sometimes, though, one door closes and another opens.  While struggling with my running blues,  I heard a grad student in our lab talking about this ultra-fitness program called P90X.  I though it could be something fun to try for a change.   Two years and 3 months later its become my main weapon to keep in shape, and to be able to enjoy all the food I like to cook, particularly the breads.  😉   So, if you’ve seen and wondered about the infomercials of Beachbody.com featuring Tony Horton, the guru behind P90X (Power-90 days-Extreme),  I invite you to join me  for a virtual walk through the system.

First of all,  is the system appropriate for anyone?
I’ll say upfront that P90X is not suited for those who haven’t exercised in a long time.  From my experience,  to go for it you should be able to jog for 20 minutes, to be capable of at least 20  sit-ups, and to reach the average number of push-ups for your age and gender (consult this table for  the general idea).  It will also help to have some flexibility, but it’s not essential.  I had none to speak of when I started.

P90X comes as 13 DVDs,  a couple of booklets describing the full nutrition program, and a transcript of each video. The exercises progress through Phases I, II, and III, each lasting 4 weeks.  They differ in the nutrition aspect,  and also  the exercises.  I’ll review the exercises of Phase I, which covers the basics;  phase 2 involves heavier weight training and more complex push-ups and pull-ups.  If you are interested then the first thing you must decide is which of the three programs to follow.   I went with the  “Classic”, geared for people who are not necessarily looking to lose weight, only get stronger.  Alternatives are the  “Lean” routine (less emphasis on weight training),  and “Doubles” (with two exercise sessions daily).   Doubles is obviously for those endowed with supernatural powers.

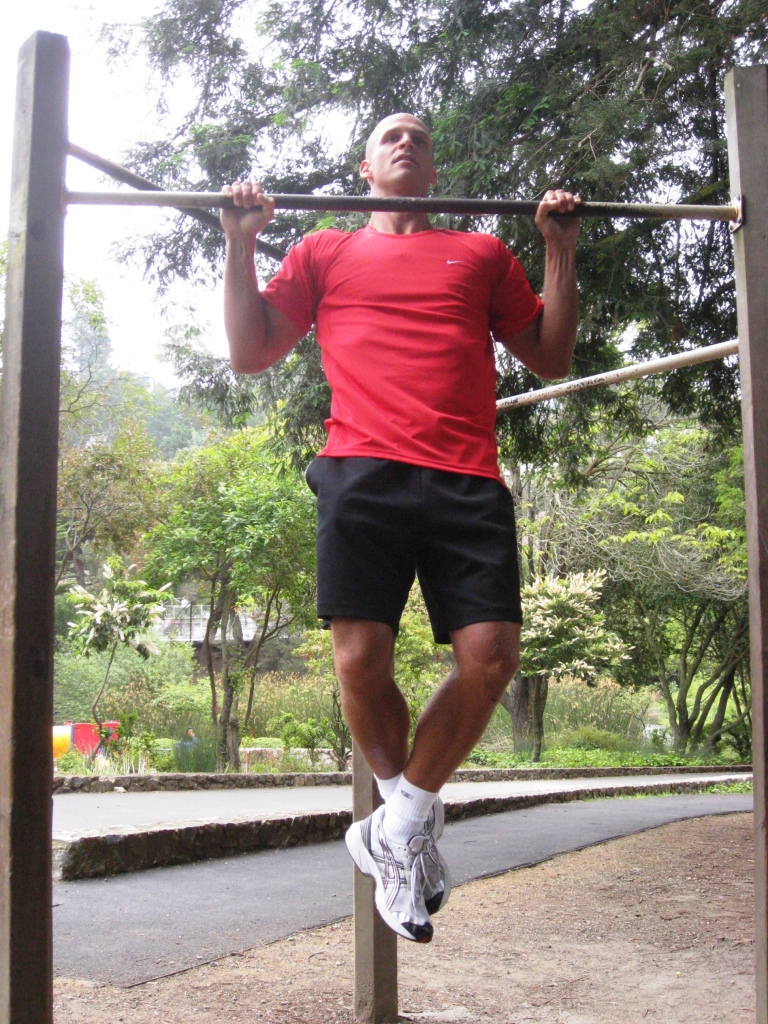
DAY ONE:  CHEST AND BACK
(58 minutes + 15 min Ab-Ripper)
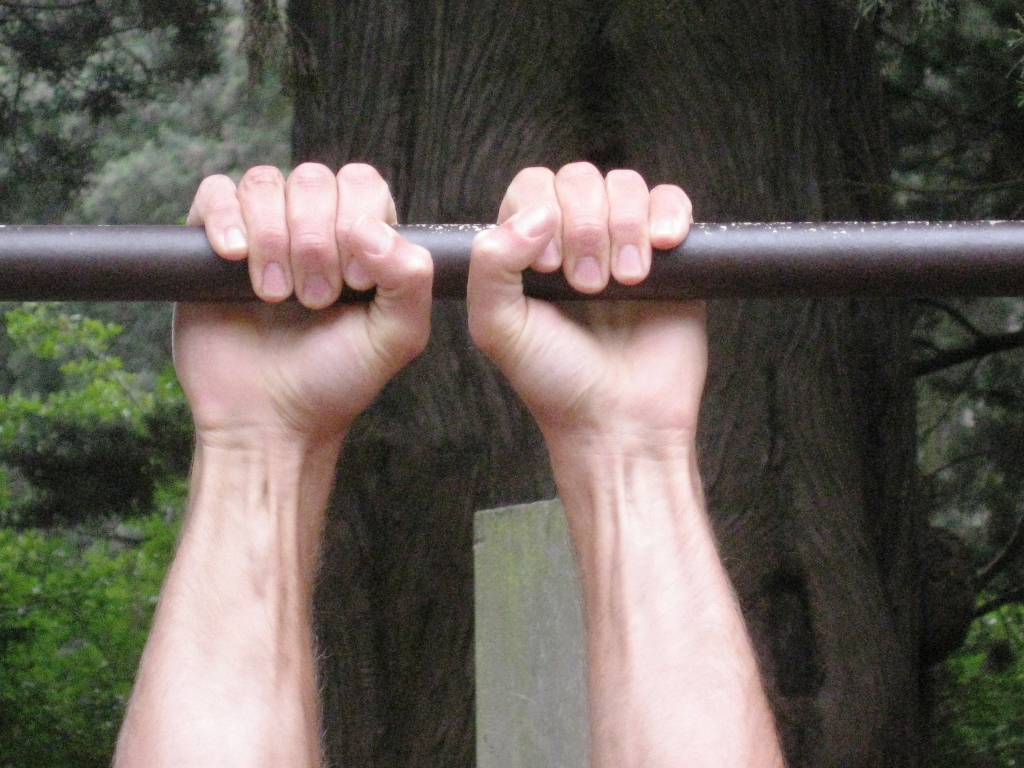
This is a great routine:  a balanced mixture of push-ups, pull-ups and exercises with weights. A pull-up bar is not essential, you can use elastic bands instead, but I tell you that nothing beats pulling up the whole weight of your body, so consider investing in a bar as you improve your fitness level.  Women can do pull-ups by pushing off the back of a chair with one foot to help support the body until they (I mean… we!) develop enough strength to do a few without.

“Don’t say “I cannot do pull-ups…”
say  “I presently struggle with

(Tony Horton, in Chest and Back)

You’ll be doing several  styles of push-ups, including diamonds (my personal favorite!), and dive-bombers (hard but fun).  In between them you go to the pull-up bar and do what you can, using different grips, which targets different muscles on your back, shoulders and arms (chin-ups, wide front pull-ups, closed-grip pull-ups).  When the 58 minutes are over the DVD takes you straight to the abdominal routine, Ab-Ripper X (discussed at  the end of my review).

DAY TWO: PLYOMETRICS
Plyometrics is jump training.  This workout took me by surprise, because as a runner I thought that any other aerobic exercise would be cake.  Instead, some of the moves  (jumping knee-tucks, guitar jumps, just to name a couple)  left me begging for mercy.  The exercises are grouped in sets of 4;  the first three you do for 30 seconds, the fourth exercise is one-minute long.  Each sequence of 4 exercises is repeated once right away, then comes a little break to collect your lungs from the floor, and a new 4-move routine starts, for a total of 5 different sets.

You can do ANYTHING for 30 seconds, right?
(Tony Horton, in Plyometrics)

Children jump all the time  as they play, but as we get older, we stop jumping.  We might walk fast, jog, even run, but jumping is one activity that disappears from our repertoire.   With plyometrics, you slowly bring that skill back, and your level of fitness will increase quite a bit from doing it.  Plyo is quite a strenuous routine for the back, knees, and ankles, so if you have back or leg problems, then consider modifying all the moves to a lower impact version, demonstrated in the video by the beautiful Pam.  A great review of all exercises  in plyometrics can be found here.

DAY 3: SHOULDERS, BICEPS, TRICEPS
(59 minutes + 15 min Ab-Ripper)
This is the easiest of all the series.  My advice for the ladies: don’t be afraid of using a heavy weight.  Women are in no risk of bulking up, we don’t have enough testosterone to turn into a She-Hulk.   Get a weight that makes the 3 last repetitions really hard to complete.  And once you get comfortable with those dumbells, move to heavier ones.

The exercises are varied, fun, and challenging if you use the right weight.  At the end of this routine, you move to Ab-Ripper, for 15 minutes of final bliss… 😉

DAY 4: YOGA
(1 h 32 min)
P90X yoga  kicked my butt, shoved my face in the mud and made me feel miserable.  I vividly remember the beginning, when I had to stop and just stare at the screen, shaking my head in disbelief that those people could bring their bodies into those positions and hold them for 30 seconds or longer.   I had little flexibility, and not enough core strength and balance to face any of the moves after the 30 minute mark.  I intensely hated it. Hard to believe it became one of my favorites!

This is not a competition: do your best, and forget the rest!
(Tony Horton, in YogaX)

If you are into “real yoga,”   you may not like the P90 version of it, because Tony takes a few liberties with the concept.  I do it for the physical challenge, and I don’t let the absence of meditation and relaxation components bother me.  It helped me tremendously in overall strength, flexibility, and balance.

DAY 5:  LEGS AND BACK
(52 min + 15 min Ab-Ripper)
Three words: Not for sissies.  😉 Tony brings back the pull-ups, and you’ll do four different kinds, together with many hard exercises for the legs: lunges, balance lunges, “sneaky lunges” (performed on the tip of your toes for what seems to last an eternity), wall sits (regular and the cruel single-legged variation), and a few aerobic moves similar to those from plyometrics. Next day you won’t be able to take Mr. Horton off your mind. His words will still be burning your ears, but not nearly as much as the burning in your leg muscles, I’m afraid…

As if that wasn’t enough, Ab-Ripper closes the deal. When I do this complete routine I start with the Ab-Ripper because it’s just too hard to do it following Legs & Back.  Keep that in mind, maybe this small adaptation will help you out too.

DAY 6: KENPO
(58 min)
Kenpo is kickboxing.  The more I did it, the more I liked it! Apart from a long warm up that I skip without even feeling guilty, I love everything about it. Kenpo starts with simple moves involving the upper body, four different kinds of hits, performed 25 times with each arm, but the whole body is engaged at some level, as you are supposed to hit with your hips too. Next come the kicks, in several directions and speeds, and other moves mixing upper and lower body.   When you do Kenpo with enthusiasm – and it’s hard not to, with the music to pump you up –  you’ll experience a full body workout that is fun, intense, and will leave you pleasantly sore next day.

No rest with Kenpo. The five sets of moves are separated by a “break” that is anything but:  you’ll jog in place, jump rope, and do jumping jacks to loosen up before the next group of exercises.

AB-RIPPER X
(15 minutes)
I don’t have enough adjectives to praise this one!  I am addicted to the Ab-ripper, having tried many ab-programs before.   In my opinion, no other routine is equally  effective. Tony planned 11 exercises, each performed 25 times, that hit the muscles from different angles, for a fantastic mid-waist workout that will also target your legs.

Hit the pause button if you need it, stick with us if you can….
(Tony Horton, Ab-ripper) 

Since during the program you will be facing the Ab-ripper at the end of other series, it will never be easy, but if you do it barefoot, it’s a little less gruesome. Sorry, Tony…   I still do my best each time, but my best comes easier without shoes!  😉

A ZEN APPROACH TO P90X
It is easy to start the program obsessing about wrapping it up in 90 days, a task that is not easy, both physically and mentally.   The way I see it now, after doing it  for more than 2 years, P90X can be your exercise of choice in the long run.  By following the routines in a more relaxed pace you can get all the benefits from it without inflicting excessive pain to your body.   Take breaks.  Allow your muscles to fully recover, and enjoy the ride.

After completing two series, I now pick and choose the routines more or less according to my mood and what feels “right” that day,  with the goal of training 4 times per week, sometimes I might go for 5, depending on other activities like running. For added variety, I also like the 10 minute-trainer with Tony Horton,  a life-saver in very busy days.

But, I’m saving the best for last:  Beachbody.com will release P90X2  in December, and I HAD  to pre-order it!  I couldn’t resist it, after reading this review.  I intend to follow my own advice and take a Zen approach to it. Take it easy, and enjoy the ride!   Stay tuned…  😉

ONE YEAR AGOProtocol for a 15 minute dinner

TWO YEARS AGO: Cauliflower au Gratin

Add to FacebookAdd to DiggAdd to Del.icio.usAdd to StumbleuponAdd to RedditAdd to BlinklistAdd to TwitterAdd to TechnoratiAdd to Yahoo BuzzAdd to Newsvine

GIADA’S CHICKEN ADOBO

Football season is just starting in this country, so if you tuned into FoodTV last weekend you’d have noticed that most shows featured “game food,” stuff you can serve for friends who come over to watch that big match.  Giada joined the party too, one of the dishes featured in her show was chicken adobo, a recipe from a Filipino friend of hers, using chicken drumsticks.  I liked the marinade with its strong vinegar component,  but changed the method of cooking a bit. After a slow braising, I moved the dish to the oven, blasted it at high temperature to crisp up the skin.  I also included chicken thighs because they happen to be the best part of the bird. By far.

CHICKEN ADOBO
(adapted from Giada de Laurentiis)

3/4 cup white wine vinegar
3/4 cup soy sauce
1/3 cup light brown sugar
2 cloves garlic, crushed
3/4 teaspoon crushed red pepper flakes
2 dried bay leaves
4  chicken drumsticks
4 chicken thighs
1 + 1/2 cups  chicken broth
2 tablespoons arrowroot
2 tablespoons fresh lime juice (from 2 large limes)
Kosher salt and freshly ground black pepper
chopped fresh parsley or cilantro (optional)

Make the marinade by combining in a medium bowl the vinegar, soy, sugar, garlic, and red pepper flakes. Whisk until the sugar is completely dissolved, add the bay leaves.

Arrange the chicken in a single layer in a glass baking dish. Pour the marinade over the chicken and refrigerate for 2 hours, turning the chicken over halfway through.

Place the chicken and marinade in a Dutch oven and add the chicken broth. Bring the liquid to a boil over medium-high heat. Reduce the heat to a simmer and cook for 1 hour, turning the chicken every 20 minutes, until cooked through.  Transfer the chicken to a baking dish, add some of the cooking liquid over it, and place in a 450F oven.

Meanwhile, reduce the marinade to make a sauce.  Remove and discard the bay leaves and the garlic cloves.  Whisk the arrowroot in  1/8 cup of water, add it together with the lime juice into the Dutch oven. Cook until the mixture thickens, about 5  minutes. Season with salt and pepper, to taste.

When the chicken is well browned, and the skin crisp, transfer to a serving dish, and pour some of the thickened sauce around it.  Sprinkle with fresh herbs, if using.

ENJOY!

to print the recipe, click here

I love the slightly acidic kick given by the vinegar in this dish.  At first I was a bit wary of using a 50/50 proportion of vinegar to soy, but it worked quite well for our taste.  The chicken melts apart, but the final blast in the oven ensures that the skin won’t be mushy.  I served it with sauteed zucchini, but a more traditional approach – which I recommend – would be white rice.  Come to think of it, sweet potatoes would complement it well too.  Any chicken leftover can be shredded into tortillas, a little salsa on the side, another great option while watching the big game.  Or your favorite cooking show… 😉

ONE YEAR AGO:  Shrimp in Moroccan-Style Tomato Sauce

TWO YEARS AGO: Golden Zucchini: A Taste of Yellow

Add to FacebookAdd to DiggAdd to Del.icio.usAdd to StumbleuponAdd to RedditAdd to BlinklistAdd to TwitterAdd to TechnoratiAdd to Yahoo BuzzAdd to Newsvine

CHOCOLATE INTENSITY

Last week we hosted a reception at our home, but the guest of honor had a serious gluten allergy, so I chose a flourless chocolate cake as the dessert.  I’ve made this type of cake several other times, but on this occasion I went with a new recipe whose name I couldn’t resist:  Chocolate Intensity Cake.  Nothing beats that! The cake bakes in a water bath to ensure its fudgy texture, and then it gets smothered in chocolate ganache, as a double dose of goodness.  If you’re a cake-pro,  go for a completely smooth icing and perhaps some decoration with ganache on top. I went with swirls, for reasons that I won’t discuss in public.

CHOCOLATE INTENSITY CAKE
(from The Cake Book, by Tish Boyle)

for the cake                                                                              
8 ounces 62% bittersweet chocolate, finely chopped
1 + ½ cups (3 sticks) unsalted butter
1 cup granulated sugar
½ cup strong brewed coffee
6 large eggs
1 teaspoon vanilla extract
⅛ teaspoon salt

for the glaze
6 ounces  bittersweet chocolate, finely chopped
⅔ cup heavy cream
1 teaspoon vanilla extract

Heat the oven to 350F. Grease the bottom and sides of a 9-inch springform cake pan.

Place chopped chocolate in a large bow and set aside. Place the butter, sugar, and coffee in a medium saucepan and cook over medium high heat, stirring occasionally until the butter is melted and the mixture begins to boil. Pour the hot butter mixture over the chopped chocolate, let it sit undisturbed for one minute, then whisk until the chocolate is fully melted and smooth.

In another bowl, whisk the eggs until completely blended.  Add the vanilla extract and salt, mix again.  Pour a small amount of the hot chocolate mixture into the eggs, whisk gently, and add all the egg mixture into the bowl with the hot chocolate.

Pour the batter into the springform pan.  Wrap the outside with three layers of aluminum foil, place it inside a large roasting pan and pour enough hot water to come halfway up the sides of the cake pan  Bake cake in the water bath for 35 to 45 minutes, until the center is still a bit shiny but almost set  Carefully transfer the cake pan to wire rack and let the cake cool for 20 minutes. Run a thin bladed paring knife around the edge of the pan to loosen the cake, open the springform, and place the cake over a plate still on the bottom of the pan.  Refrigerate for at least  2 hours before adding the glaze.

Make the glaze by adding the chopped chocolate in a bowl. Heat the cream almost to a boil in a small saucepan.  Remove from the heat and pour over the chocolate. Stir until completely smooth, add the vanilla, and stir again.  Let it sit for 5 minutes at room temperature, then slowly pour the glaze over the chocolate cake, starting from the center. Smooth the surface and sides with an offset spatula.   Refrigerate the cake, and bring to room temperature for 1 hour before slicing it.

ENJOY!

to print the recipe, click here

I was nervous about serving this cake at the reception, because I hadn’t yet tested the recipe.  So, I stressed over the baking time, stressed over glazing, stressed over when to remove it from the fridge, and if that wasn’t enough, I  stressed about how to serve it without completely butchering the slices. That last part was easy, I handed the knife to my beloved husband.  😉

To my relief, the compliments kept coming, two guests said it was THE BEST cake they had ever had, and they were using all caps for the statement.  Two commented on the pleasant “smokiness,” wondering where that could be  coming from, and indeed, it was the coffee singing in the background.  Coffee and chocolate, hand in hand, a perfect match.

I must say that this cake was awesome.  The ganache becomes a single entity with the cake, making a velvety, smooth texture.  A tiny slice will be enough because it’s so rich, but the intense chocolate flavor will linger in your mind, and you may find yourself reaching for a second slice, just to make sure you weren’t dreaming!

ONE YEAR AGO:  Semolina Barbecue Buns

TWO YEARS AGO: Lavash Crackers

Add to FacebookAdd to DiggAdd to Del.icio.usAdd to StumbleuponAdd to RedditAdd to BlinklistAdd to TwitterAdd to TechnoratiAdd to Yahoo BuzzAdd to Newsvine

POST-WORKOUT BREAKFAST

Exercising on weekdays is a bit tricky. I find myself cutting some routines a little short, rushing to eat something quickly, take a shower and go to work.  But Saturdays and Sundays are another story: I can indulge, start with a nice run, top it with some weight training, do the full 90-minute P90X yoga.  Once it’s all over, I relax and enjoy a nice breakfast.   Lately, I’ve been hooked on this yogurt concoction because it is refreshing, not too heavy,  a well-deserved reward after working out.


GREEN APPLE &  YOGURT BOWL
(from the Bewitching Kitchen)

1 cup non-fat yogurt
1/2 large Granny Smith apple, grated
sliced almonds
agave nectar

Toast the sliced almonds lightly, either in an oven or a non-stick skillet.  Watch them very carefully, as they go from toasted to burned in seconds.  Let them cool slightly.

In a bowl, mix the grated apple (no need to peel) with the yogurt, add some agave nectar to your taste.  Sprinkle the almonds on top, a little extra drizzle of agave, and…

ENJOY!

to print the recipe, click here

I wish I could give credit to the source for this “recipe” – so simple that it hardly qualifies as such.   I saw a version in the net several months ago, never saved it, just kept it in my memory as something to try.  Maybe the original had honey and a different kind of nuts, but at any rate, start with the green apple and yogurt, add whatever you feel like, including  your favorite cereal, and you can’t go wrong.

I use non-fat yogurt to keep the fat content to a minimum, but you can definitely go for the full fat type, it will be just a tad more decadent, but still good for you.

ONE YEAR AGO: Spices… Did someone say spices?

TWO YEARS AGO: The lighter side of meatloaf

Add to FacebookAdd to DiggAdd to Del.icio.usAdd to StumbleuponAdd to RedditAdd to BlinklistAdd to TwitterAdd to TechnoratiAdd to Yahoo BuzzAdd to Newsvine

SIMPLY SOBA

As the proud owner of too many cookbooks,  I try to give them priority when searching for culinary inspiration, but every once in a while a blogger’s recipe blows away the competition, I won’t rest until I make it.   A beautiful photography is sure nice, but I am primarily taken by the writing along the recipe, especially if it conveys more than just cooking.

The moment I read Rosa’s write up on this post while listening to the beautiful song in the background, I knew I was going to make – and love – those noodles.  The few ingredients come together in what seems like an almost austere preparation, but refrain from the temptation of adding more stuff to it.  Accept its  Zen flow, and keep it simple.

COLD SOBA NOODLES
(adapted from Rosa’s Yummy Yums blog)

2 bundles of buckwheat noodles (approximately 80 g each)
4 Tbs soy sauce (preferably Kikkoman)
1 + 1/2 Tbs dark sesame oil
2 + 1/2 Tbs rice vinegar (unseasoned)
1 + 1/2 Tsp Wasabi paste
3 Tsps fresh ginger, chopped
2  + 1/2 Tbs sesame seeds, roasted
2 medium carrots, cut into thin matchtsicks
1/2 medium cucumber, cut into thin matchsticks

In a large pan, bring salted water to boil, add the noodles, and simmer for about 4 minutes, or according to the package directions.  When the noodles are cooked, drain and immediately run cold water over them. Transfer the noodles to a bowl as you finish preparing the other ingredients.

Make the dressing by whisking together in a small bowl the sesame oil, soy sauce, rice vinegar, wasabi, and ginger.  Add to the noodles, tossing to combine.  Add the toasted sesame seeds, and mix gently. Refrigerate for about 30 minutes.

When ready to serve, add the carrot and cucumber, mix gently, sprinkle with more sesame seeds if you so desire.

ENJOY!

to print the recipe, click here

Comments: To cut the veggies I used one of these small  gadgets that work very well and are simple to wash.  It makes long ribbons that mimic the shape of the noodles, perfect for this dish.

This recipe will be part of our regular rotation from now on.  Leftovers were delicious next day, although the cucumber and the carrots lose their crispness after being in the dressing overnight.  It didn’t bother me at all, but you can always cut a little more of the veggies and add to your plate.   Buckwheat noodles seem to perform a little magic: they satisfy but never make you feel too full.  My favorite type of noodles, hands down.

Rosa, a big thank you for inspiring me with your “Lesson in Zen”    😉

ONE YEAR AGO: Griddle-Fried Filet of Petrale Sole

TWO YEARS AGO: Barm Bread (a must-bake bread!)

Add to FacebookAdd to DiggAdd to Del.icio.usAdd to StumbleuponAdd to RedditAdd to BlinklistAdd to TwitterAdd to TechnoratiAdd to Yahoo BuzzAdd to Newsvine