ROLLED BUTTERCREAM

I am super excited to share this recipe, something I had never tried before and it is great not just for cupcakes, but also for cookie decorating. In fact, I have a post right now in my cookie blog using this exact recipe in several different ways. I would love a visit, so if interested, click here.

ROLLED BUTTERCREAM
(slightly modified from recipe and detailed video tutorial available here)

2 sticks (1 cup), soft butter
3 TBS. cornsyrup
1 tsp vanilla extract
1/4 tsp lemon extract
1 tsp. white gel color
2 lbs. powdered sugar

Beat all ingredients together in a KitchenAid type mixer with a paddle attachment until it comes away clean from the sides of the bowl. It should feel like soft play dough. Turn out and wrap with plastic wrap. Let rest or use right away. Store unused dough wrapped in the fridge(up to 3weeks). Freeze for 3 months. It warms immediately in your hands as you work with it.

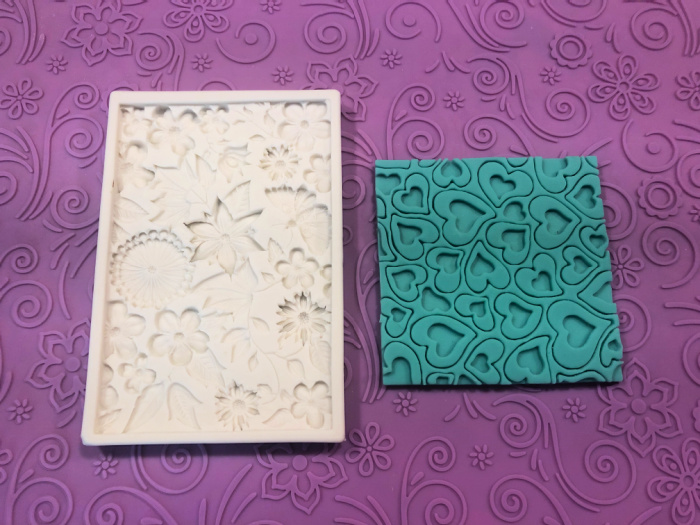
Roll out in the thickness you need, and place a mat with any kind of design over it, rolling gently with a rolling pin to get the impression on the buttercream. You can dust it lightly with cornstarch if needed. Cut to fit the top of your cupcakes. Place o the cupcake with a little bit of buttercream or a light brushing with simple syrup as glue.

ENJOY!

to print the recipe, click here

Comments: This rolled buttercream feels a lot like fondant as you work with it, but it tastes much better, and in some ways I believe it handles better too. Fondant can crack easily if it gets too dry, I felt rolled buttercream to be more forgiving. You can roll it thin and simply cover the cupcake, bringing the edges all the way to the sides, but I liked the look of the layer sitting on top with the edges cut flush with the cake. See which way you prefer.


For these cupcakes, I sprayed the surface of the buttercream with PME luster. You can also paint it or color it as you would a normal buttercream or fondant. In my cookie post, you will be able to see several ways to work with it, and they can all be adapted to cupcakes.

If you visit Pam Kennedy’s youtube channel, you’ll see that she has many video tutorials and recipes for cookies, icings, and cookie decoration techniques. Fantastic source of information, I recommend you start following her. All her videos can be found here at Pam Kennedy Bakes.


ONE YEAR AGO: Miso-Ginger Turkey Meatballs with Cabbage “Noodles”

TWO YEARS AGO: Smoked Shrimp Tacos with Roasted Jalapeño Salsa

THREE YEARS AGO: Corn Fritters

FOUR YEARS AGO: Minnie Macarons

FIVE YEARS AGO: Air-Fried Mexican Meatloaf

SIX YEARS AGO: Mimi’s Sticky Chicken, a Call from my Past

SEVEN YEARS AGO: Perfect Soy-Grilled Steak

EIGHT YEARS AGO: The Devil’s Bread

NINE YEARS AGO: Heart of Palm Salad Skewers

TEN YEARS AGO: Potluck Frittata and Lavoisier

ELEVEN YEARS AGO: Home-made Corn Tortillas

TWELVE YEARS AGO: Whole-Wheat Spaghetti with Peanut Sauce

THIRTEEN YEARS AGO: Brigadeiros: A Brazilian Party!

FOURTEEN YEARS AGO: Lemony Asparagus

BROWNIE CUPCAKES WITH FONDANT TOPPING

Not too long ago I shared a series of brownie cupcakes with a light milk glaze that you can take in many different directions depending on what you use to flavor the milk. In this post the same simple cupcakes were topped with fondant textured with a silicone mat. You will need a very small amount of buttercream spread on the top to serve as a glue for the fondant. I had some leftover from macarons, but you need so little that I would not mind if you grabbed a store-bought version. Perhaps a Wilton cream cheese frosting, which is not too sweet. It won’t be as good as home-made, but you will barely taste it in this case. Recipe for the cupcakes found here.

HEARTS AND GOLD BROWNIE CUPCAKE

Maybe my favorite of the trio, made using this mini-fondant mat. I used Sugarprism red to paint the hearts, and Egyptian gold luster + everclear to highlight the details. A little shower with Champagne glitter dust from TheSugarArt sealed the deal for me.

SPRINGTIME BROWNIE CUPCAKE

For this cupcake, I used one of my favorite little mats, which I bought a couple of years ago. You can find it here. After it dried a little bit, I painted using vodka + luster powder yellow, green, pink and the center of the flower with Egyptian gold. I could not help but finish them with some White Diamond Dust, again from TheSugarArt.

PINK SWIRLS BROWNIE CUPCAKE

For this cupcake I used this large silicone mat, and selected the region I wanted to top the cupcake by placing the round cookie cutter over it. Once the fondant dried for a few minutes, I brushed the surface with a glaze made with TrueColor Air-brush Shine Pink. The small detail in the center of the flower was added with Sugarprism red.

These are the three mats used in this set of brownie cupcakes…

Fondant mats are great little tools to play with, and work equally well with marzipan and even modeling chocolate. Some mats work better than others, and it does take some trial and error to get the impression perfect in the whole extension. With fondant, a bit of cornstarch helps. The advantage of cupcakes is their small area, a lot more forgiving to get it right.

Speaking of marzipan…

In these lemon cupcakes made a couple of years ago and for some reason never blogged (!!!!). The same white mat of the picture was used with rolled marzipan and dusted with dry luster powder in yellow and pink. Amazing what I find in forgotten folders in my computer. Sad thing is that I don’t even remember which recipe I used for them… I might have to re-visit this important issue!

ONE YEAR AGO: Brown Sugar Cookies with Buttercream Icing

TWO YEARS AGO: Mandioca Frita 101 

THREE YEARS AGO: Raspberry Puffs

FOUR YEARS AGO: Vietnamese-ish Chicken

FIVE YEARS AGO: Rutabagas Anna

SIX YEARS AGO: The Ultimate Raspberry Sorbet

SEVEN YEARS AGO: Crispy Cornmeal Sweet Potato Fries

EIGHT YEARS AGO: Pan-grilled Tilapia with Smoked Paprika & Avocado Cream

NINE YEARS AGO: Golden Saffron and Fennel Loaf

TEN YEARS AGO: In My Kitchen, July 2011

ELEVEN YEARS AGO: Heavenly Homemade Fromage Blanc

TWELVE YEARS AGOA Perfect Sunday Dinner