Funny how things work… I’ve been baking sourdough for 17 years, and all of a sudden I stumble on something new to me, something that mesmerizes me and makes me want to drop everything and give it a try. I stumbled by complete accident on the blog of Vincenza, which is written in Italian, but thanks to my Portuguese speaking, I can navigate without too many issues. Vincenza is a fantastic baker, from cakes to bread and macarons. Photography is also one of her hobbies, and her site definitely reveals that right away. This is my first attempt at making one of her recipes (Semolina Bread with Turmeric Lattice). I consider it a work in progress, as some improvement is needed with my handling of the lattice, but isn’t that what life is all about? Setting goals and having fun trying to reach them?

SEMOLINA SOURDOUGH WITH TURMERIC LATTICE
(from La Torte de Cenzy’s blog)
for the main dough:
320 g of double milled semolina flour
80 g bread flour
80 g sourdough starter at 100% hydration
280 g water
8 g salt
for the lattice:
300 g bread flour
150 g water
30 g sourdough starter
5 g salt
Turmeric to taste (I used 1/2 tsp)
In the bowl of a KitchenAid type mixer add the waters flours, and sourdough starter, mix with the dough hook until the flour is incorporated in the water. Let the dough rest for 1 hour, covered.
Sprinkle the salt over the surface and knead until very smooth, about 5 minutes. Transfer the dough to a slightly oiled bowl and make a set of folds. Allow the dough to bulk ferment for a total of 4 hours, folding the dough every 30 minutes for the first two hours. If the dough is too loose, give it another one or set of folds during that period.
Shape the dough as a batard and place it in a banneton with the seam up. Leave it at room temperature for 1 hour. At this point, make the turmeric dough by mixing all ingredients by hand in a bowl. Knead it very well to make it elastic and pliable, then cover the dough and keep it at room temperature overnight.
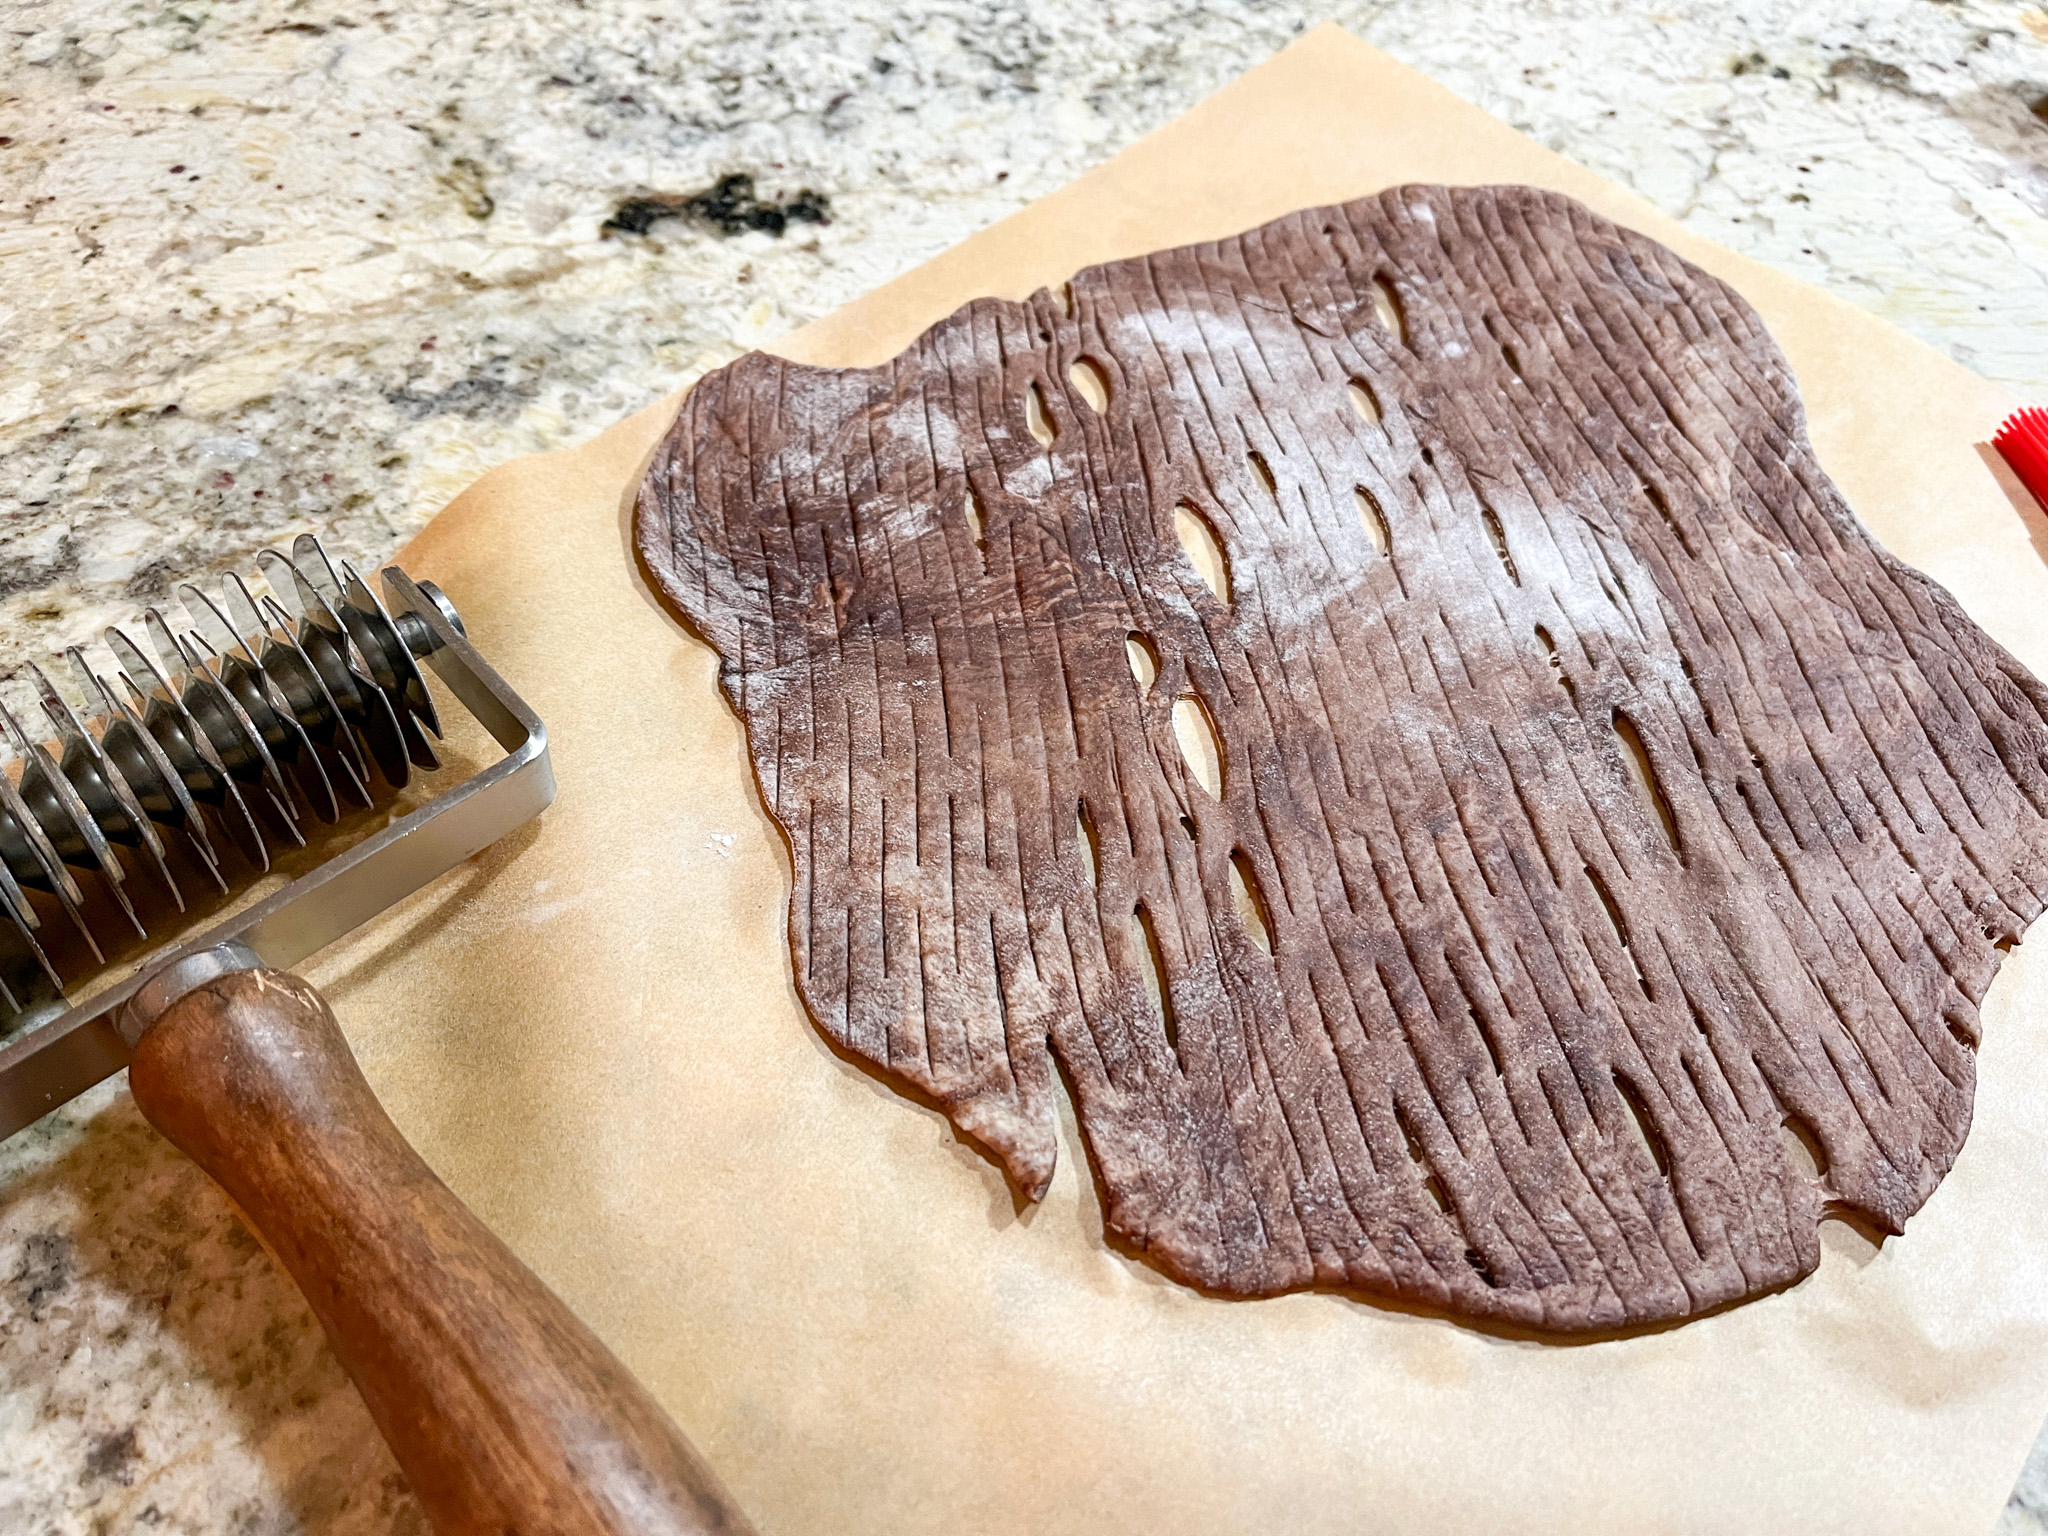
The following morning, roll out the turmeric dough and with a wheel make many strips that will have to be coupled two by two and with them form a basket weaving placed on a sheet of parchment paper. Cut flowers with a cookie cutter, making sure to flour the cutter well.
Turn on the oven to 450F.
Remove the main dough from the fridge, turn it over a sheet of parchment paper, so that the smooth side is up. ake the string from the fridge and turn it over on a sheet of parchment paper, spray it with a little water and cover the bread, turning the prepared lattice over on it and making it adhere well. Glue the flowers with a bit of water on one edge of the bread. Cut a deep incision along the entire side of the bread, off-center and immediately place it in a Dutch oven, cover, bake for 30 minutes, remove the cover and bake for additional 15 to 20 minutes. Cool completely before slicing.
ENJOY!
to print the recipe, click here

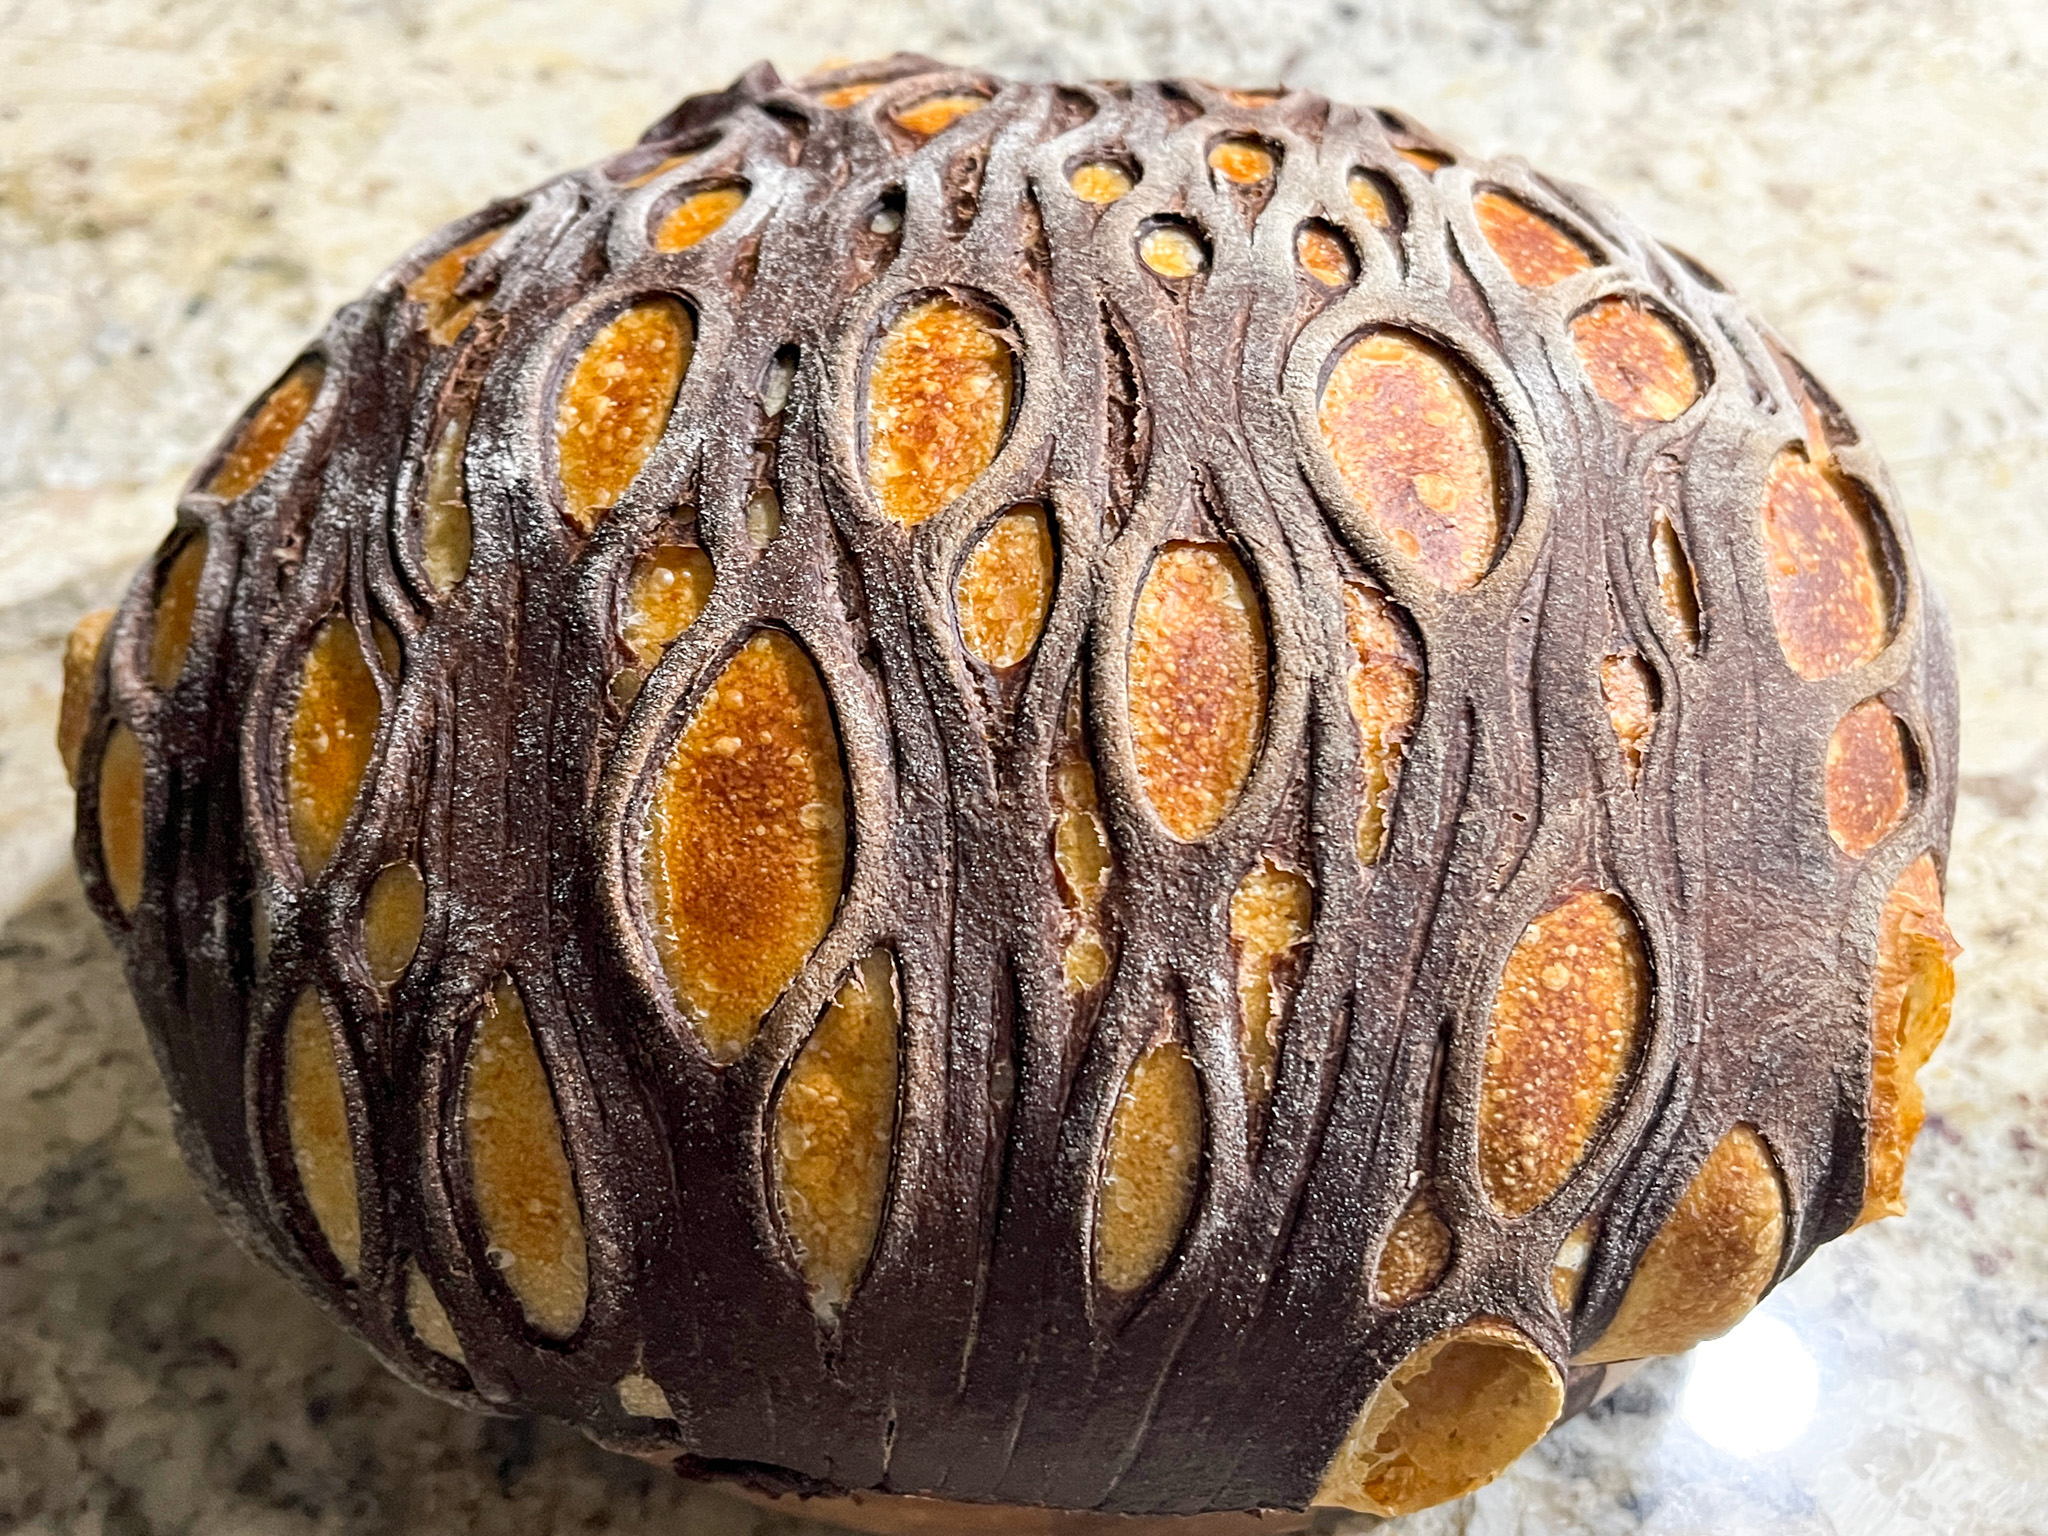
Comments: I was a little scared of making the lattice, but it was not bad at all. I used my roller cutter fully closed, so that the strips would be as narrow as it allows, but you can always use a ruler and cut it with a pizza cutter gadget. Make sure to flour the surface so that the rolling action will separate the strands efficiently. Make the lattice using sets of two strips, and the hard part is done. Well, maybe not quite. The toughest thing to me was adding it to the bread without abusing them (dough and lattice) too much. I did not do a good job on my first attempt, and the bread collapsed quite a bit due to my handling.

You can see it is lopsided and a bit deflated. Still, I am thrilled that somehow the lattice looked ok and the bread turned out delicious!

A few days later I used a similar method with a red dough (I used food gel color, because I was hoping for a real bright red, but feel free to go for natural agents like beet or sweet potato powder). I decided to proof the lattice with the main dough, and the result is totally different, it gets baked flat instead of raised.

I prefer the first look, but I will need to tweak the way I handle the lattice to avoid disturbing the dough too much. Still, the technique has so much potential, I am thinking braids could be fun to try too… So many breads, so little time!

.
Vincenza, thank you so much for your advice and help as I tried to mimic your gorgeous bake!
ONE YEAR AGO: Gruyere Cheese Biscuits
TWO YEARS AGO: Incredibly Simple Korean Chicken Thighs
THREE YEARS AGO: Zucchini with Quick-Pickled Vegetables and Peanut Sauce
FOUR YEARS AGO: Nha Benta (Brazilian candy)
FIVE YEARS AGO: The Best, The Very Best Hummus
SIX YEARS AGO: Chicken Katsu
SEVEN YEARS AGO: Whole-Lemon Marinade: Long Overdue
EIGHT YEARS AGO: Tomato and Cucumber Salad with Almond Vinaigrette
NINE YEARS AGO: Eggplant Tomato Stacks
TEN YEARS AGO: The Couscous that Wasn’t
ELEVEN YEARS AGO: Apple-Cinnamon Bread
TWELVE YEARS AGO: Blueberry Galette
THIRTEEN YEARS AGO: In My Kitchen, August 2011
FOURTEEN YEARS AGO: Journey to a New Home
FIFTEEN YEARS AGO: Friday Night Dinner