HAPPY 4th OF JULY!
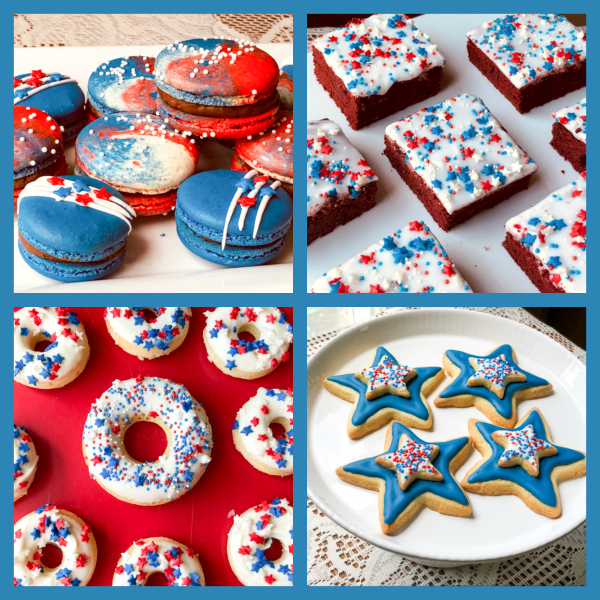
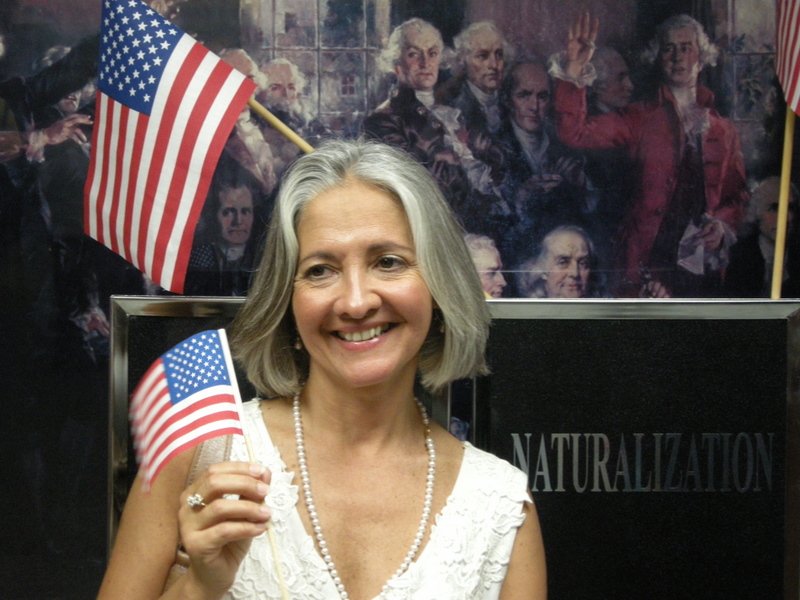
Just a couple of days ago I celebrated 11 years of my naturalization! It always gives me a smile the fact that it fell so close to such an important holiday. Today I share four bakes that celebrate the occasion: macarons, sugar cookies, red velvet brownies, and baked donuts. The common denominator? Sprinkles. I bet you are not surprised.
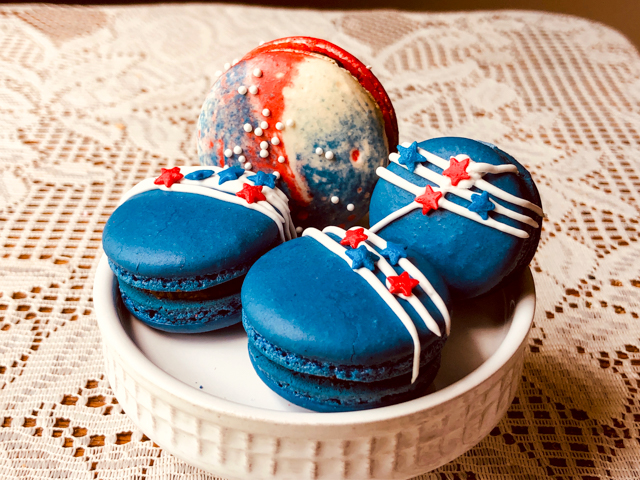
4th OF JULY MACARONS WITH CHOCOLATE COCONUT FILLING
(from the Bewitching Kitchen)
For the shells:
200g powdered sugar
115 g almond flour
115 g egg whites at room temperature (approx. 4 eggs)
1/8 tsp of cream of tartar
100 g granulated sugar
¼ tsp vanilla paste or extract
red, blue, purple and black food gel dye
for the chocolate-coconut ganache:
180g cream of coconut
1/8 tsp salt
200g chocolate, cut in small pieces (II used 70% Lindt)
to decorate:
white non-pareils
Make the shells:
Line 3 heavy baking sheets with parchment/baking paper or Silpat mats. Layer the powdered sugar, and ground almonds in a food processor. Pulse until the mixture looks like fine meal, about 12 pulses. Pass through a sieve and transfer to a small bowl or to a sheet of parchment/baking paper. Set aside.
Place the egg whites and cream of tartar in the bowl of a stand mixer fitted with the whisk attachment. Make sure that the bowl and the whisk are impeccably clean. Starting on medium speed, whip the whites with the cream of tartar until they look like light foam. The whites should not appear liquid. The foam will be light and should not have any structure.
Slowly rain in the granulated sugar in five additions, trying to aim the stream between the whisk and the side of the bowl. Turn the speed up to high. Continue to whip the meringue until it is soft and shiny. It should look like marshmallow creme (marshmallow fluff). Add the vanilla. Whip the egg whites until the mixture begins to dull and the lines of the whisk are visible on the surface of the meringue. Check the peak. It should be firm. Transfer the whites to a medium bowl.
Fold in the ground almond/almond meal mixture in two increments. Paint the mixture halfway up the side of the bowl, using the flat side of a spatula. Scrape the mixture down to the center of the bowl. Repeat two or three times, then check to see if the mixture slides slowly down the side of the bowl. Divide the batter in three parts, dye 1/3 red, dye 1/3 blue (using a mixture of blue, purple and black to get the tone of blue you like). Leave the final third white. Pour the three batters side by side over plastic wrap, enclose them wrapping the plastic around like a sausage. Drop the bag with the three colors inside a piping bag fitted with a round piping tip. If you want to make a set of solid color, divide the batter to get a bigger amount of that color and place some of it in a separate piping bag.
Pipe rounds over Silpat or parchment paper in a half-sheet pan and then slam each sheet hard four to six times on the counter. Add sprinkles, if like. Let the unbaked macarons dry until they look dull but not overly dry. Drying time depends on humidity. In a dry climate, the macarons can dry in 15 to 20 minutes; in a humid climate, it can take 35 to 40 minutes.
While the macarons are drying, heat the oven to 300 F (150 C/130C Fan oven/Gas Mark 2). Bake one sheet at a time on the middle rack. Check in 11 minutes. If the tops slide or move (independently of the ‘feet’ when you gently twist the top), then bake for 2 to 3 more minutes. Check one or two. If they move when gently touched, put them back in the oven for 1 to 2 more minutes until they don’t move when touched. Let the macaroons cool for 10 minutes before removing from the pan. The macarons should release without sticking.
Make the ganache. Bring the coconut puree and salt to the boil in a small pan. Remove from the heat and pour over the chocolate in a bowl. Stir well with a whisk until combined. Cover the ganache with plastic wrap touching the surface and leave at room temperature for at least 1 hour. Do not place in the fridge. Whip with a handheld blender for a minute or so to get a slightly thicker consistency for piping.
Match shells and add the filling (I used a piping bag cut open, no piping tip). Decorations for the small macarons were made with Candy Melts (white) and star-shaped sprinkles. Place the macarons in the fridge overnight to mature before enjoying or freezing them for later.
ENJOY!
to print the recipe, click here
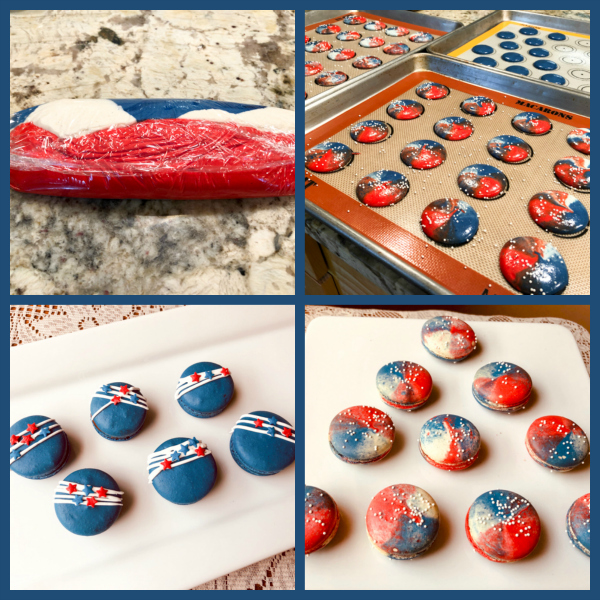
Comments: For the tie-dye color effect, add the three batters to the same bag. The easiest way to do that is to open a large piece of plastic film on your countertop, lay the different colors in three large stripes, side by side. Roll the plastic wrap as a sausage and drop it inside a piping bag fitted with your favorite tip. That will make sure the colors get a random mixing as you pipe the shells. I reserved some blue batter to make smaller macarons, all blue. If you want the colors to be more separated, with clear margins (also a very cool effect), simply place them in three separate piping bags and drop them inside a larger one, after cutting their tips (easy to forget, don’t ask me how I know).
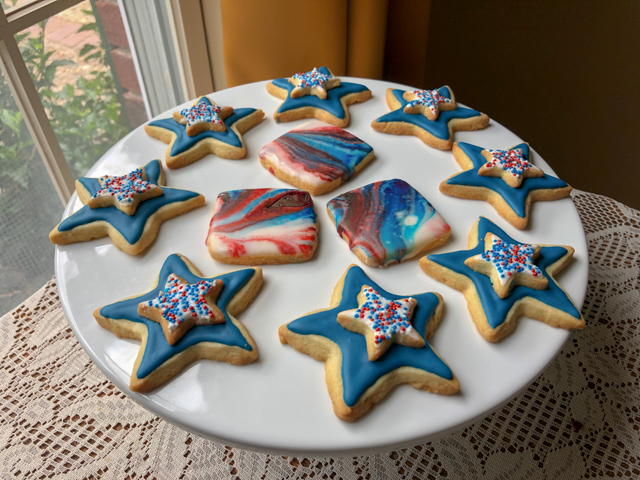
4th OF JULY CARDAMON-ORANGE COOKIES
(from the Bewitching Kitchen)
360 g all-purpose flour
2 teaspoons baking powder
215 g sugar
¼ tsp salt
227 g cup butter, cold and cut in pieces
1 egg
3/4 tsp Fiori di Sicilia extract
zest of 1 large orange
1/2 tsp cardamom
for the Royal Icing:
80 g egg whites
420 g powdered sugar
blue gel food dye
MAKE THE COOKIE DOUGH. Heat oven to 350 F. Combine the flour, baking powder and salt, set aside. Add the orange zest to the sugar and rub it all with your hands to release the fragrant oils. Cream the sugar and butter. Add the egg, Fiori di Sicilia and cardamom, mix well. Scrape the sides of the bowl. Add the flour mixture and beat just until combined.
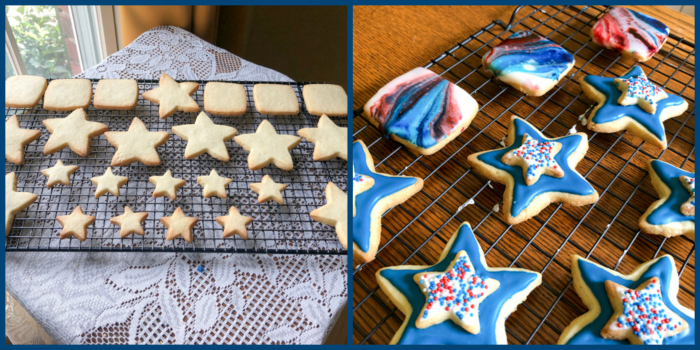
Dough can be rolled right away in between sheets of parchment paper. Roll to about 1/4″ thick, and cut into shapes. I used large stars, small stars, and rectangles. Place on parchment-lined baking sheets, freeze for 5 to 10 minutes. Bake for about 12 minutes. Transfer to cooling rack and cool to room temperature before icing.
MAKE THE ROYAL ICING: whisk the egg whites and powdered sugar using a KitchenAid type mixer until fully smooth. Adjust if needed with sugar or a little milk. Color half of it blue, keep the other half white. Make the small stars first, flooding them with white icing. Add the sprinkles before the icing sets. As they sit on a rack, flood the large stars with blue icing. Keep the very center empty, all you need is a little icing to glue the small star on top. Since it is going to be a bit heavy, if you flood the whole extension of the cookie, it will risk pressing is too much and running down the edges. Place the small star on top and allow them to dry overnight.
For the painted cookie effect, see this post.
ENJOY!
to print the recipe, click here

Comments: This basic recipe for sugar cookies is the one I had planned to use in the Great American Baking Show. I’ve made it so many times now, that I don’t even need to look at the recipe anymore. It always works. My only advice for you is to use regular American butter, like the simple, humble Land-O-Lakes. That butter seems to be the best in terms of less spreading and less fat leaking during baking. And the cookies taste as good as those made with higher fancier brands. Come to think of it, if I had made it in the tent, who knows how they would turn out? I shiver to think. 😉
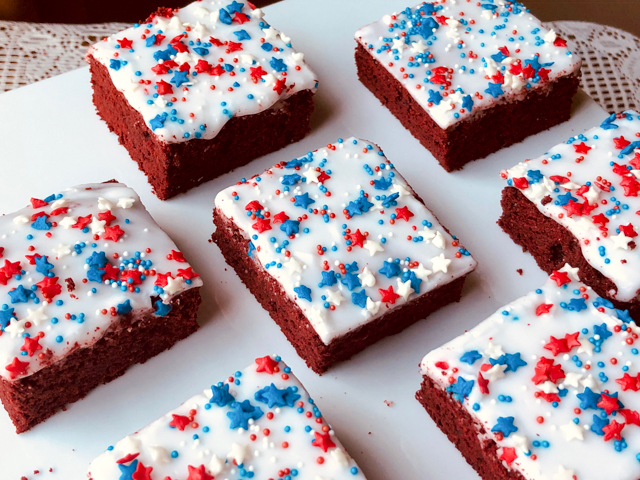
RED VELVET BROWNIE CAKE
(slightly modified from Mary Berry’s Fast Cakes)
300g semi-sweet chocolate, broken into pieces
200g butter
200g sugar
4 large eggs
1 tsp vanilla paste
150g all-purpose flour
1 + 1/2 tsp baking powder
pinch of salt
8 g red gel color (I used Americolor Super Red)
for icing:
300g powdered sugar
3 tbsp very hot water
squeeze of lemon juice
sprinkles
Heat the oven to 325 F. Grease a 12 x 9 in pan tin and line with parchment paper. Sift the flour with the baking powder and the salt. Reserve. Gently melt the chocolate and the butter together. Let it cool slightly and add the sugar, eggs, vanilla and red gel dye. Mix well until smooth and shiny. Add the flour mixture, stir until no dry bits remain.
Pour the mixture into the pan and level the top. Bake for 35–40 minutes, or until risen and a crust has formed on the surface. The middle should feel just firm when pressed with your fingertips. Leave to cool in the pan, then remove it.
Make the icing: Mix the powdered sugar, water and lemon juice together in a bowl to make a smooth paste, adjust consistency as needed. Spread over the cold cake and top with sprinkles. Cut in pieces to serve.
ENJOY!
to print the recipe, click here

Comments: Pretty much everything I bake these days go for Common Table meals, and they need to be wrapped individually. I am always tweaking the recipes so that they bake as flat and uniformly as possible, and if they have some type of icing, it is not too soft. Crusting buttercream and powdered sugar-based icings are the best. I tend to use less baking powder than the recipes call for, so feel free to up a little the amount (up to 2 + 1/2 tsp) if you don’t mind a certain dome effect in the center of your cake. For this recipe a 13 x 9 will give a cake a bit too thin, if that’s the only size you have, perhaps a 10 inch square pan will work better.

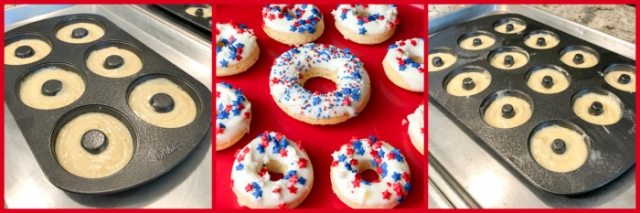
4th OF JULY BAKED ORANGE DONUTS
(from the Bewitching Kitchen)
100g granulated sugar
Zest of 1 large orange
160 g cake flour, sifted
1 + ¼ tsp baking powder
1/4 tsp salt
½ cup buttermilk
1 egg
1 tbsp butter, melted
½ teaspoon vanilla paste
Spray your donut pans with a very light coating of baking spray. I used one mini donut pan and one regular size. Heat oven to 400 F.
In a small bowl combine sugar and orange zest until the sugar is moistened and fragrant. In a large mixing bowl, sift together cake flour, baking powder, and salt. Stir in sugar mixture.
Add buttermilk, egg, butter, and vanilla and stir until just combined. Add batter to a piping bag and fill each donut cup approximately one-half full.
Bake for about 10 minutes or until the top of the donuts spring back when touched.
Let cool in pan for 4–5 minutes before removing. Finish the donuts with melted Candy Melts and add sprinkles before it sets.
ENJOY!
to print the recipe, click here
Comments: I’ve made these donuts about a month ago using orange blossom water instead of vanilla paste, and to me they tasted a bit artificial. So this time I kept the orange theme exclusively in the zest. Maybe it depends on the brand of orange water you have. At any rate, they are very simple to prepare and have a nice texture. Fiori di Sicilia would probably be quite nice also, but I did not want to have two exact same flavors in the weekly bake. All these goodies were included in the same Common Table meal of July 3rd.
I hope you enjoyed this small collection of 4th of July bakes, and that you are having a nice weekend. Please stay vigilant, observe social distance, and wear a mask when outside. It is not a political issue, it is a matter of your health and that of those around you.
A mask is a sign that you care.
For a recent review on staying safe during this pandemic, visit this post.

ONE YEAR AGO: In My Kitchen, July 2019
TWO YEARS AGO: Brigadeiros for the 4th of July
THREE YEARS AGO: Kaleidoscopic Macarons
FOUR YEARS AGO: Zucchini Noodles with Sun-dried Tomato Pesto
FIVE YEARS AGO: In My Kitchen, July 2015
SIX YEARS AGO: Sous-vide Pork Chops with Roasted Poblano Butter
SEVEN YEARS AGO: Roasted Strawberry-Buttermilk Sherbet
EIGHT YEARS AGO: Amazing Ribs for the 4th of July!
NINE YEARS AGO: Baby Back Ribs on the 4th of July
TEN YEARS AGO: Blueberry Muffins
ELEVEN YEARS AGO: A Pie for your 4th of July


