MEMORIES of PASTEIS

When traveling to a country for the first time, it’s a good idea to pay special attention to their “street food.”   In Paris, for example, the tiny shops selling crepes (sometimes slathered with Nutella!) are a delight as one strolls along the avenues.   Many big cities are filled with  such delicacies, and in fact, one of my favorite cookbooks revolves around this topic.

On the streets of Brazil, you might stop to buy a “pastel,” and after sampling it, immediately return to the vendor for a couple more (plural = pasteis).    These fried savory pastries are sold at the entrance of street markets: every week on the same day a few blocks of a neighborhood street close to traffic, while farmers sell their produce from early morning until slightly past noon, with prices dropping as the hours pass.  You’ll smell the pasteis from a distance, and it’s  impossible to resist eating more than just one… The vendors are usually hard working Chinese-Brazilians, with red faces from the intense heat in their huge woks.

Growing up in our house, my memories of pasteis go well beyond the street markets.   Luisa, a cook who worked for my Mom every Saturday, often made them, and always from scratch. She used no machines or special gadgets, but only her strong arms, a rolling pin, and a fantastic disposition.

Luisa routinely prepared two batches, one for the whole family, and another for my Dad, which no one else would touch.  What was so special about his pasteis?  They were filled with minced peppers, and I am not talking jalapenos, poblanos, or serranos.  Those were incendiary Brazilian peppers that can make a grown man cry.  Dad was absolutely addicted to them.

Besides his love for hot peppers, he loved a good laugh.  You might see where this is headed: he’d  sneak into the kitchen to steal a couple of pasteis as Luisa was busy frying them, and then hide one of his “special ones” in the middle of the normal batch.   He later patiently waited for a very unlucky camper to bite into it.  Although everyone was on high alert at the beginning of the meal, we always seemed to forget until someone started howling in pain!   Dad, laughing to the point of tears,  insisted that he didn’t do it,  that Luisa had certainly made a mistake.  😉   The best times were when Mom got the fiery one…  Normally soft-spoken and even-tempered, a mouthful of hot pepper really made her fume, literally.   It’s been almost six years since my Dad left us, but the memories will never fade.

PASTEIS
(recipe adapted from my friend and fantastic cook, Anita)

for the dough
250g all purpose flour
1/2 cup warm water
1 egg
2 Tbs vegetable oil
1 tsp salt
1/2 Tbs pinga (or vodka)
1 tsp baking powder
vegetable oil, for frying (around 2 cups, depending on pan size)

Mix all ingredients together until very smooth. Allow the dough to rest for 30 minutes to 12 hours in the fridge, covered by plastic film.

Using a pasta machine, open small portions of the dough – on a Kitchen Aid, I roll up to number 5, not thinner. Place the dough on a floured surface and cut into squares. Add the filling of your choice to the center of the square and close the dough around it, pressing the edges with the tines of a fork to prevent it from opening as you fry it.  Make absolutely sure there are no holes for the oil to sip in, or they will be soggy.

Fry in extremely hot oil until golden, turning them only once. Remove to a tray with paper towels to absorb excess oil.  Pasteis can be kept in a 200F oven while you fry the full batch.

Ground beef filling
1 pound ground beef
1 Tbs olive oil
1/4 diced onion
1 Tbs tomato paste
1 Tbs pitted, diced green olives
1 Tbs minced parsley
salt and pepper to taste
1/4 cup cold water
1/2 Tbs cornstarch
1 boiled egg, finely diced

Saute the onions in the oil until translucent. Add the ground beef, and saute until cooked through. Add the tomato paste, green olives, salt and pepper and cook in slow-heat for 10 minutes. Add the boiled egg, mix well. Make a slurry with water and cornstarch, add to the ground beef mixture, cooking for a few minutes, until it thickens slightly. Let it cool completely before using. Leftover filling can be frozen.

(makes about 20 pasteis)

ENJOY!

PDF file under preparation……  (it had a mistake when originally published)


Comments:
If you don’t want the trouble of making the dough, won ton skins will work reasonably well, and they are quite easy to find in grocery stores.  But, this recipe will produce an authentic version, with a crust full of blisters and slightly more “substance” than you’ll get from won ton skins.

Pasteis can be filled with many different things.   Pastel de queijo (cheese pastel)  is very popular in Brazil:   just enclose  a piece of mozzarella with a sprinkle of oregano, and remember that it will be very hot once it’s done frying.    Hearts of palm is another popular filling (pastel de palmito) that I’ll definitely post about in the future, because I’m very fond of it.  Your own imagination is the limit: roasted chicken with a little cream cheese, cooked shrimp with tomatoes and herbs, all veggie…..  Have fun with it!

Pasteis can be made in a small size that’s  perfect as an appetizer with a cold caipirinha on the side.  But my favorite pasteis are as part of a full meal, with rice and a fresh salad.  Tropical paradise on a plate!
For more photos, follow the slide show…. And for a quick lesson on Brazilian Portuguese, click on the sound files down below.

This slideshow requires JavaScript.

If you want to pronounce it like a native, listen carefully:
pastel
pasteis

receita em portugues na proxima pagina….
pagina seguinte

BANANA BREAD

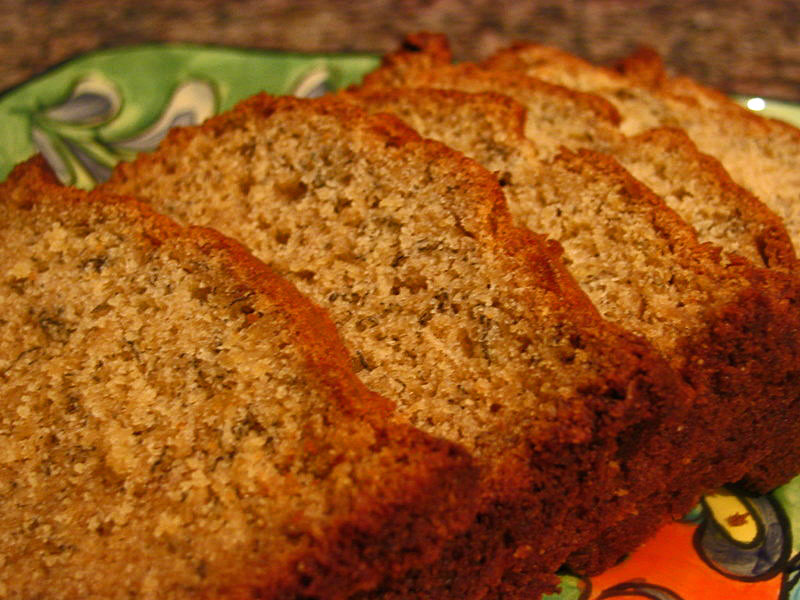
I realize  the world has no shortage of banana bread recipes, as a quick google produces 5,580,000 hits!   You’ll find all shapes and styles: moist, classic, healthy, vegan, gluten-free, low-calorie (!?!?), with nuts, chocolate chips, blueberries, cinnamon, with sour cream or pumpkin…. if you dream it, chances are someone already made it and spread the word about it. Once I hit “publish”, you’ll have at least 5,580,001 options!   I am sure you will sleep better tonigt… 😉

This recipe comes from cookbook author extraordinaire (and very dear net-friend), Glenys Morgan, and makes a moist, very pure, dense but not heavy, banana bread. She doesn’t recommend using this recipe to bake muffins, so stick to a regular loaf pan.

GLENY’S BEST BANANA BREAD
(from Glenys Morgan)

1 cup mashed bananas (2 large or 3 medium, very ripe bananas)
1/3 cup buttermilk
1 teaspoon baking soda
3/4 cup dark brown sugar
1/2 cup unsalted butter
1 egg
1 + 1/3 cups flour
1 teaspoon baking powder
1 teaspoon vanilla or dark rum (optional)

Heat the oven to 375F.

Mash or purée the bananas and buttermilk until smooth. Add the baking soda and mix.
Cream the brown sugar and butter together until smooth. Beat in the egg. Add the banana purée and combine. The mixture will seem curdle.

Add the baking powder to the flour, mix well. Gradually add it to the banana mixture. Stir just enough to combine evenly.   Add the vanilla or rum.

Pour into sprayed or greased 8 1/2 x 4 1/2-inch pan, filling the pan to 2/3 full of its capacity. Bake for 45-50 minutes until a wooden skewer inserted in the center of the cake comes out clean. Leave in the pan for 10-15 minutes before turning out. Do not leave in the pan as the loaves sweat and become soggy.

ENJOY!

to print the recipe, click here

Comments: The most important thing in this recipe is to use very ripe bananas, those that are black, soft, begging to be put out of their misery.  Usually I peel them, mash lightly and stick in a zip-lock bag (writing on the bag how many bananas are inside).   You can also freeze the bananas whole, but sometimes they can be tricky to peel.  Some people like nuts and other bells and whistles in their banana bread, I am more of a purist, and find this recipe absolutely perfect.  Our graduate students seemed to agree, as the loaf was gone in minutes!   😉

Add to FacebookAdd to DiggAdd to Del.icio.usAdd to StumbleuponAdd to RedditAdd to BlinklistAdd to TwitterAdd to TechnoratiAdd to Yahoo BuzzAdd to Newsvine

receita em portugues na pagina seguinte!

Continue reading →

MELLOW BAKERS: LIGHT RYE BREAD

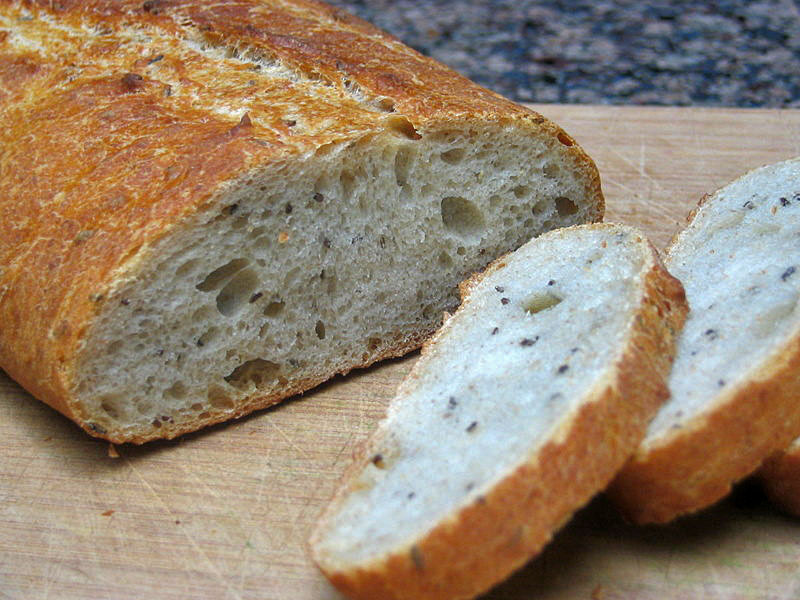
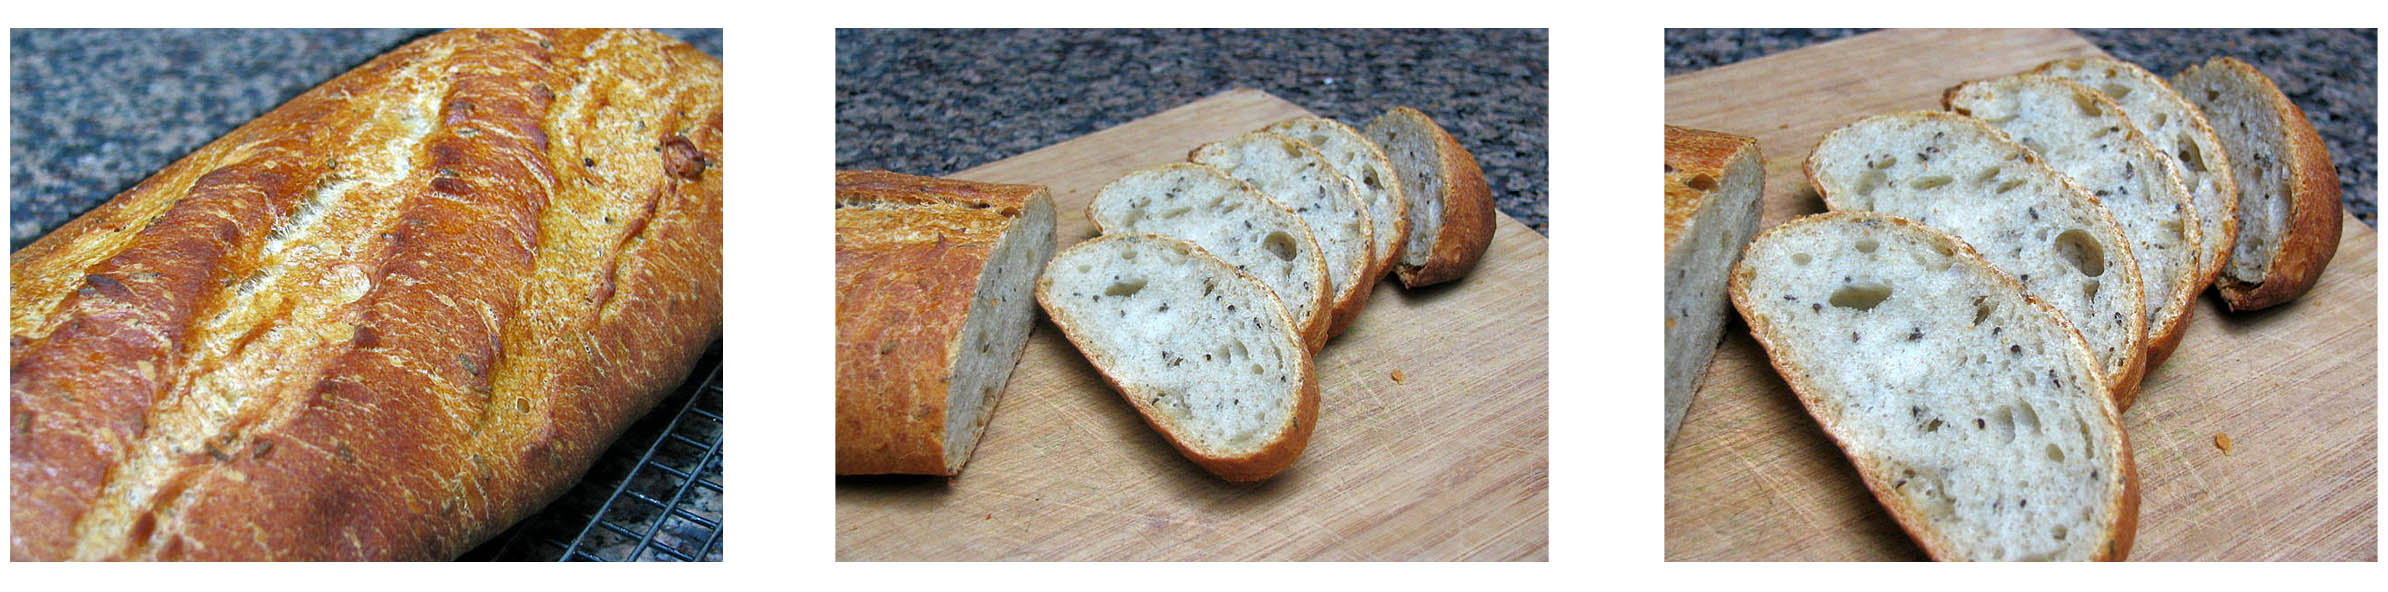
My first bread in this long journey, Hamelman’s light rye bread,  requires a sourdough rye starter.  So if you’re like me, and only have white flour starter, then you’ll need to feed it once or twice with rye flour to convert it into  rye.  Once your sourdough is actively bubbling, this bread will come together in minutes.  The final dough only contains 15% rye, so the flavor is mellow, just like our virtual group… 😉

I was pleased with the lightness of the crumb, which was more open than I expected for a rye bread.  That was from the high proportion of white flour in the formula (85%).  I made a silly mistake in shaping the bread:  I forgot to flour the countertop.  Yes, it’s hard to believe I was so absent-minded, but… it happens. To shorten a long story, I had to re-shape it, and the extra handling resulted in a bread that was a little too long and a little too flat. Still, it didn’t  compromise the internal structure or the taste, and a recipe that withstands  my boo-boos is a recipe worth keeping!

Similarly to what happened in the Bread Baker’s Apprentice Challenge, we will not post the recipes for this group project. The Light Rye Bread can be found on page 197 of Hamelman’s BREAD. It is also available online.

Add to FacebookAdd to DiggAdd to Del.icio.usAdd to StumbleuponAdd to RedditAdd to BlinklistAdd to TwitterAdd to TechnoratiAdd to Yahoo BuzzAdd to Newsvine

COME MELLOW WITH US!

As more and more fellow bakers finished the BBA Challenge, a net-gossip started: what should we do next?   It was so much fun to bake together, cheering each others’ successes and commiserating over the failures, that we all felt a void when the party was over.

The idea of baking another complete bread book, from beginning to end, didn’t appeal to me because of the tight scheduling required.    So when Paul proposed “Mellow Bakers,” it was just what I was looking for:  we’ll bake Hamelman’s “BREAD”  at a leisurely pace, and I’ll even emphasize the “mellowness,”  by skipping some of  breads.   In fact, they already made hot cross buns while I only watched from a safe distance… 😉

So here is an invitation for you:   for a nice bread project  that will expose you to delicious recipes by a great author,  Jeffrey Hamelman,  first jump to Paul’s site to read all about it, and then to the Mellow Bakers forum to introduce yourself and join the party!

I’ll see you in the forum!

SPRING ROLLS on a SPRING DAY

March is a wild month. It’s the beginning of Spring in the Southwest, but Winter still occasionally shows its teeth, bringing low temperatures, freezing rain, snow and nasty winds.   It’s enough to make a tropical creature sob.    This past Saturday I fought back,  ignoring the cloudy skies, the intermittent rain and the 25mph winds…  I went ahead and brought a burst of Spring air into the house.

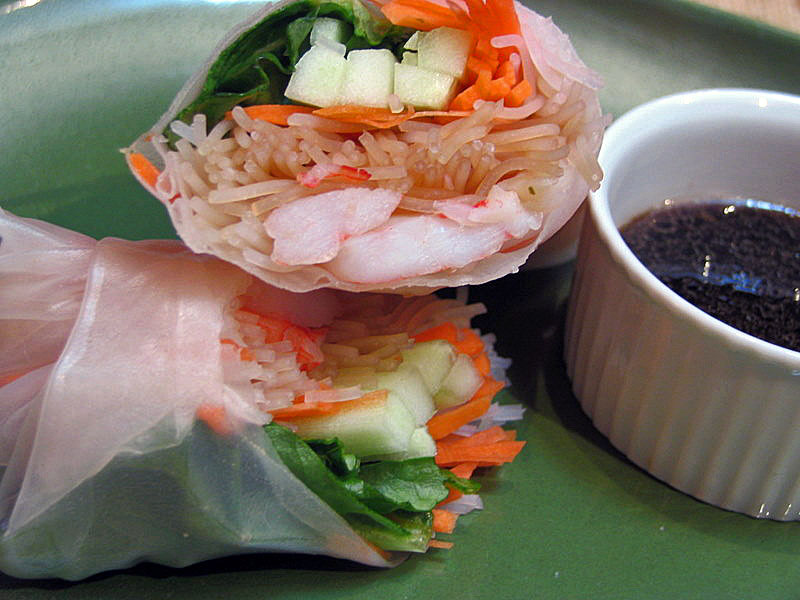
VIETNAMESE-STYLE SPRING ROLLS
(from the Bewitching Kitchen)

4 rice paper rounds
1 oz dry bean threads or rice vermicelli
cooked shrimp, cut in half lengthwise
carrots, cut in long julienne strips
cucumbers, cut in long matchstick pieces
lettuce, cut in strips
cilantro leaves

for dipping sauce
6 Tbs soy sauce
2 Tbs water
2 Tbs rice wine vinegar
2 Tbs brown sugar
1 tsp sesame oil
1 tsp grated fresh ginger

Cut the vegetables, cook the shrimp,  and have everything ready to use on your kitchen counter. Prepare the dipping sauce by mixing well all its ingredients.

Cook the noodles according to the directions on the package (they vary according to type). Rinse them in cold water and set aside (you can add a tiny bit of sesame oil or olive oil to prevent them from sticking, but it’s not absolutely necessary if you rinse them well).

Fill a bowl large enough to hold the rice paper with very warm water. Open a damp cloth over your work surface. Soak the rice paper in the warm water until it is soft and pliable. Carefully lift it and place it over the damp cloth. Line your ingredients, starting with the cut shrimp, then the noodles, veggies, herbs. Add 1/2 tsp of dipping sauce (or just a few sprinkles of soy sauce) to the filling, and roll the paper around them. Repeat with the remaining rice papers. To serve, cut each roll at an angle and serve with a small bowl of dipping sauce.

Think about birds chirping, flowers blooming, and ENJOY!


to print the recipe, click here


Comments: What I love about these rolls is that you can improvise and use lots of different things in the filling.  Granted, this practice might compromise their authenticity, but unless you’re having a Vietnamese guest for lunch, no harm done.   Keep in mind that you can have too much of a good thing: avoid using 6 different veggies, two types of meat, 5 herbs, and a smear of peanut butter inside.  😉 These rolls are supposed to be delicate, fresh, and light.   Perfect for the warm weather that is certainly peeking at us  (fingers crossed).

Click here for a quick tutorial on how to prepare them (plus a cool song in the background!)…

Add to FacebookAdd to DiggAdd to Del.icio.usAdd to StumbleuponAdd to RedditAdd to BlinklistAdd to TwitterAdd to TechnoratiAdd to Yahoo BuzzAdd to Newsvine