A MESSAGE FROM WORDPRESS

The stats helper monkeys at WordPress.com mulled over how this blog did in 2010, and here’s a high level summary of its overall blog health:

Healthy blog!

The Blog-Health-o-Meter™ reads Wow.

Crunchy numbers

Featured image

The Louvre Museum has 8.5 million visitors per year. This blog was viewed about 95,000 times in 2010. If it were an exhibit at The Louvre Museum, it would take 4 days for that many people to see it.

In 2010, there were 150 new posts, growing the total archive of this blog to 252 posts. There were 694 pictures uploaded, taking up a total of 124mb. That’s about 2 pictures per day.

The busiest day of the year was August 12th with 782 views. The most popular post that day was HEAVENLY HOMEMADE FROMAGE BLANC .

Where did they come from?

The top referring sites in 2010 were wildyeastblog.com, thefreshloaf.com, thedeliciouslife.com, simplyrecipes.com, and stumbleupon.com.

Some visitors came searching, mostly for kibbe, bewitching kitchen, endivias, tartine bread, and 4th of july pie.

Attractions in 2010

These are the posts and pages that got the most views in 2010.

1

HEAVENLY HOMEMADE FROMAGE BLANC July 2010
5 comments

2

A CLASSIC ROAST CHICKEN October 2009
14 comments

3

BRAZILIAN PAO DE QUEIJO: Love at first bite! October 2009
14 comments

4

TARTINE BREAD: BASIC COUNTRY LOAF November 2010
12 comments

5

PAIN DE MIE AU LEVAIN February 2010
25 comments

ONE YEAR AGO: Turkish Chicken Kebabs

NATURAL BEAUTY

HAPPY NEW YEAR!

We are taking a tip to Big Sur, a few hours North of Los Angeles, staying in a place without TV or internet connections for a few days.   Sometimes it is nice to be away from everything, especially if we can be rewarded with views such as this…

May the year ahead be everything you hope it to be!

ONE YEAR AGO: Sunflower Seed Rye

LIGHT AND HEALTHY ORZO SALAD

We are sometimes on a mission to cut calories or fat, and this holiday season was one of moderation for us, perhaps because cooking in a tiny kitchen forced us to minimize the excesses. ;-).  With this goal in mind it doesn’t get any better than a light and healthy lunch, and this salad feels like a complete meal that will satisfy you until dinner.  The inspiration is from Tyler Florence’s book,  Tyler’s Ultimate.  It was originally made with rice and served with a lemony, oven-baked chicken curry.  However, my Brazilian genes resisted the idea of serving cold rice as a salad, so instead I used orzo, and I also modified  the seasoning.  Make a large batch and you’ll enjoy it for several days!

MANGO-ORZO SALAD WITH GREEN BEANS
(adapted from Tyler’s Ultimate)

1 cup orzo pasta
1/2 pound green beans
1 mango, diced
2 T fresh cilantro leaves
1/2 cup roasted, lightly salted  cashews
1 T olive oil
zest and juice of 1/2 lemon
salt and pepper to taste

Cook the orzo in plenty of boiling water, drain and place on a baking sheet to cool quickly.  Drizzle a little olive oil and lemon juice to prevent it from sticking.

Trim the green beans and cut in 1 inch pieces.  Cook in boiling salted water for 4 minutes, then drain and plunge in ice water to stop cooking and set the vibrant green color.

Make the dressing by whisking the olive oil with lemon juice, season lightly with salt and pepper, and reserve.  Assemble the salad by mixing in a large bowl the cooled orzo, green beans, cashews, and diced mango.  Add the minced cilantro leaves, drizzle the dressing all over, adjust seasoning, and serve.

ENJOY!

to print the recipe, click here

Comments:  In many regions fresh mango may not be easy to find right now, but if you can locate it then don’t miss the opportunity to try it in a salad like this.  The mango we bought was not as ripe and juicy as the best examples from my childhood in Brazil, but in this recipe it worked just fine.

This salad has it all:  carbs from the orzo,  vitamins and fiber from the green beans and mango,  omega oils from the cashews, that together with the green beans, add a pleasant “crunch.”

Some people even enjoyed it heated in the microwave as a side dish with their steak. 😉  It was also delicious that way.  If you want to serve it hot,  consider adding the diced mango and the cilantro at the very end.

HAPPY NEW YEAR!

ONE YEAR AGO: Beef Wellington (when you have romance in your mind…)

Add to FacebookAdd to DiggAdd to Del.icio.usAdd to StumbleuponAdd to RedditAdd to BlinklistAdd to TwitterAdd to TechnoratiAdd to Yahoo BuzzAdd to Newsvine

GOUGERES

Cover of "Around My French Table: More Th...

Cover via Amazon

The classic amuse-bouche from Burgundy, gougeres, is not very complicated, and even better,  it can be prepared in advance and frozen. When it’s time to entertain just heat the oven and bake them straight from the freezer. This recipe from Dorie Greenspan‘s  masterpiece, “Around my French Table,”  brings fond memories of Paris with every  page. Her love for French food and culture  echoes my own feelings.


GOUGERES

(adapted from Around my French Table)

1/4 cup water (2 oz)
1/4 cup whole milk (2 oz)
1/2 stick butter (4 T / 2 oz)
1/4 tsp salt
black pepper to taste
1/2 cup all purpose flour (2.2 oz)
2 large eggs
3/4 cup grated Gruyere cheese (3 ounces)

Heat the oven to 425 F.

Place the water, milk, butter, salt and pepper to a boil in a heavy saucepan. When boiling and the butter is fully dissolved, add the flour all at once, stirring with a wooden spoon until the whole mass is homogeneous. Keep over medium heat, stirring often, until you notice a light coating forming on the pan as you move the dough around.

Remove from heat, transfer the dough to a bowl and allow it to cool for 5 minutes. Have a hand held mixer ready, and add the first egg to the dough, beating well. Once the egg is incorporated, add the second egg and continue beating until a very smooth dough forms. Add the grated cheese and mix well. Drop tablespoons on a baking sheet lined with parchment paper (or a silicone mat), and bake for 12 minutes, reducing the oven temperature to 375 F as soon as you place them in. After 12 minutes, switch the tray position in case of uneven browning, and bake for 12 to 15 minutes more, until they are well puffed and golden brown. Serve immediately.

(makes 18 gougeres)

ENJOY!

to print the recipe, click here

Comments: The original recipe makes a double batch, with 3 eggs. When I halved the recipe, I tried to use two and a half eggs (admittedly, it is tricky), but the consistency of the dough was too soft.  Instead, 2 large eggs will be perfect, so that’s how I wrote it down.  Since my dough wasn’t dense enough I used a mini-muffin tin and placed 1 tablespoon of dough in each spot. It worked great: the gougeres baked as nice, well formed balls, airy inside and gooey with melted cheese. Pure heaven!

Because I’m cooking in a  small kitchen, I made them early in the morning, froze and baked them right before our Christmas dinner. That’s definitely the way I’ll make them in the future.

Around my French Table goes on my list of all-time favorite cookbooks! Not only do the recipes fit our cooking style, but her presentation, with comments and stories about her time in France, makes this book ultra special. If you’re on the fence about buying it, jump over to the sunny side and GET IT right away!  You won’t  be disappointed.

ONE YEAR AGO: Pumpernickel Bread

Add to FacebookAdd to DiggAdd to Del.icio.usAdd to StumbleuponAdd to RedditAdd to BlinklistAdd to TwitterAdd to TechnoratiAdd to Yahoo BuzzAdd to Newsvine

receita em portugues na pagina seguinte

SOURDOUGH FOCACCIA, WITH A TWIST

(version updated on Dec 28th, to correct a mistake in the recipe)

This past week I got a very special gift: a jar of homemade chili jam, made by my stepson’s girlfriend Carly, a gorgeous actress, who is also smart, witty, and a great cook.  Yeah, some people have it all!   😉 She made the jam by adapting a basic recipe from Nigella Lawson, that you can find here.  It is very flavorful, and looks quite dramatic as you hold the jar against the light revealing red speckles dispersed throughout the jam.  I wanted to make something special with it, and my first “experiment” turned it into topping for a sourdough focaccia.   A successful experiment all the way!

SOURDOUGH FOCACCIA WITH CHILLI JAM
(adapted from Chilli and Chocolate)

for the sourdough sponge:
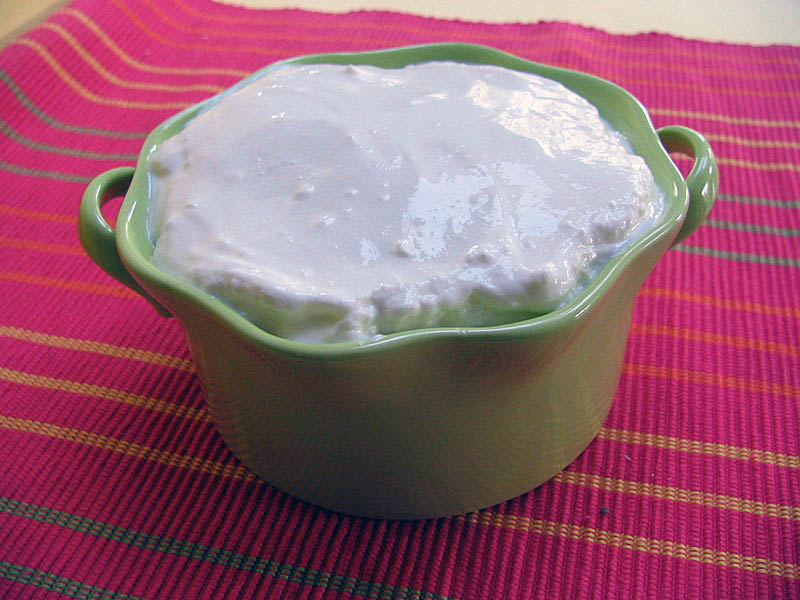
195 g liquid starter (3/4 cup at about 100% hydration)
125 g warm water (1/2 cup)
25 g olive oil (2 T)
10 g honey (1 + 1/2 tsp)
50 g flour (1/2 cup)

for the final dough:
all the sponge made as described
50 g olive oil (1/4 cup)
200 g all purpose flour (2 cups)
1 tsp sea salt

to bake the focaccia:
4 T olive oil
herbs of your choice, minced
2 T chili jam, preferably homemade
coarse or flake salt

Mix all the ingredients for the sponge in a medium size bowl, cover and let it ferment at room temperature for 1-2 hours, until the surface is covered with small bubbles.

Add the ingredients for the final dough and mix until they form a shaggy mass. Let it rest for 15 minutes, then knead quickly folding the dough on itself 10 times (no need to remove from the bowl). Let the dough rest 15 minutes, and repeat this quick kneading process. Repeat for a total of 4 cycles of kneading, each with 15 minutes rest.  Shape the dough into a smooth ball, place in a lightly oiled bowl, and let it rise until almost doubled (1.5 to 2 hours).

Alternatively, place it in the fridge overnight, transferring to room temperature 2 hours before baking.

Cover a 9 x 13 baking sheet with parchment paper, and add 2 T olive oil to the paper, spreading it well.  Put the dough in the pan and press gently until it covers the whole surface.   If the dough is resisting your attempts to stretch it, wait for 5 minutes until the gluten relaxes, and do it again.  Cover lightly and let it rise for 30 minutes, while you heat the oven to 450F.

Using the tip of your fingers, make indentations all over the dough, spread the remaining 2 T of olive oil all over, sprinkle herbs of your choice on half the focaccia.  If your chili jam is too thick, thin it slightly with a little olive oil, and spread on the other half of the focaccia.   Add salt all over the dough, and bake until golden brown on top, about 25 minutes.   If the jam seems to be burning,
reduce the temperature slightly.

Let it cool over a rack before you slice it in squares, and…

ENJOY!

to print the recipe, click here

Comments:  I’ve blogged before about my favorite  focaccia, very quick to put together. This version,  leavened exclusively with wild yeast, takes longer to prepare, but the flavor is exactly what I was hoping for to go along with the chili jam.   I had a few unexpected commitments during the preparation, so the dough went to the fridge overnight,  no harm done.  The focaccia, even baked in our small electric oven, turned out delicious!    The chili jam (thank you, Carly!) is hot, but not overly so, and the contrast of the slight sourness of the bread with the sweet heat of the jam made this simple focaccia quite addictive.  Make sure to add salt on top right before baking, it will intensify all flavors.

By the way,  chili and chilli are both accepted spellings for the word.   Pick your favorite spelling, but whatever you choose, make this focaccia, it’s a winner!

I am submitting this post to Susan’s  Yeastspotting

ONE YEAR AGO: Merry Christmas!


Add to FacebookAdd to DiggAdd to Del.icio.usAdd to StumbleuponAdd to RedditAdd to BlinklistAdd to TwitterAdd to TechnoratiAdd to Yahoo BuzzAdd to Newsvine