REVENGE OF THE TWO DERELICTS

Derolicts1
“Don’t worry, Buck, she’ll get over it.  Remember when I tried to run in the house with that big dead rat in my mouth?  … The  hysterical screaming,     …the door banging in my face?  We had to stay outside forever, until Dad came home and calmed her down.  Unfortunately, he got my rat away from me, but at least Mom stopped acting silly.”

derolicts2 “Anyway, I told you that dropping the dead possum next to the grill when she was cooking the steak was not a good move. You should have listened to me, but now it’s too late.  OK, she could have cooked it, but apparently she doesn’t like possum.   “Now, we’ll be here for a while, I’m afraid.”

“I guess it doesn’t  matter that the damn possum was playin’ possum and then walked away …”

Never a dull moment, folks.  Never a dull moment.  And I wonder why my hair gets a little more gray each day. 😉

EIGHT-BALL ZUCCHINI: THE MISSING FILES

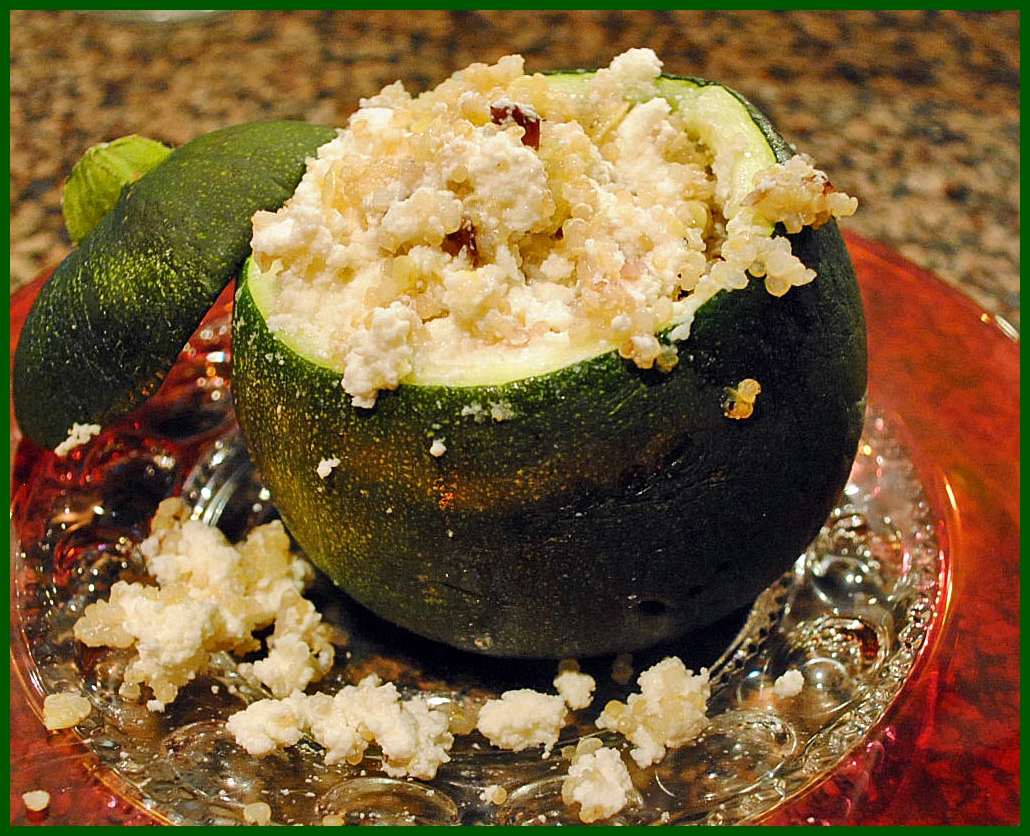
I made this dish several months ago (we were still living in OK) but the photos were temporarily misplaced.  Misplaced as in “downloaded to the wrong folder”.  I stumbled upon them the other day by complete accident, while searching for a figure to include in a power point presentation. Amazing how efficiently I can mess up stuff sometimes.  For those headed into the cooler months, finding eight-ball zucchini could be a stretch, but my readers in the Southern hemisphere will be able to try this recipe sooner… It is delicious!


EIGHT BALL ZUCCHINI FILLED WITH COUSCOUS AND RICOTTA CHEESE
(from the Bewitching Kitchen)

2 eight-ball zucchini
1 medium regular zucchini, cut in small dice
1 Tbs grapeseed oil (or olive oil)
1 shallot, finely diced
salt and pepper
1/2 cup Israeli couscous
1/2 cup ricotta cheese
1/4 cup dried cranberries

Cut the top off of the round zucchini, and carefully coop out the inside, leaving a 1/4 inch wall around to contain the filling later.   Reserve the pulp.  Place the zucchini on a steamer basket and steam for 10 minutes, checking after 5 minutes to make sure it’s not getting too soft.   Remove from the steamer and let it cool briefly.   Meanwhile, prepare the stuffing:  saute the shallots in grapeseed or olive oil until translucent.  Add the reserved pulp of the eight ball zucchini, and the diced regular zucchini.  Saute until soft and fragrant, season with salt and pepper.    Reserve.

Cook the Israeli couscous in plenty of salted, boiling water.  Drain it a couple of minutes before the time stated in the package, as it will cook further during baking. Reserve.

Heat the oven to 375 F.  Mix the sautéed zucchini with the couscous, ricotta cheese, and dried cranberries.   Adjust seasoning with a little more salt and pepper, if needed.   Generously fill the hollowed eight-ball zucchini all the way to the top and rest the cap on.  You may have leftover filling, depending on the size of your zucchini.  Place the zucchini in a baking dish, cover lightly with foil, and bake for 35 to 30 minutes.

ENJOY!

to print the recipe, click here

Comments:  I’ve made stuffed zucchini many times, but most recipes omit the steaming, and ask you to simply fill it and bake it.  When I make it that way, the zucchini never gets tender.  I also tried microwaving to simplify life a little, but steaming works best.  I know, I know, it’s an extra step and a couple more items to wash, but sometimes in the name of a nice dish sacrifices must be made.  So I put on my Braveheart face, and steam it.

I’ve used quinoa in place of couscous, and it results (of course) in a lighter dish, but very tasty too.   You can use rice, orzo, barley, farro, anything stuffed inside an eight-ball zucchini will immediately seem healthy and light.  Stuffing with lasagna might be a stretch, though!  😉

ONE YEAR AGO: Grilling Ribbons

TWO YEARS AGO: Peppery Cashew Crunch

THREE YEARS AGO: Ossobuco Milanese: an Italian Classic

HALF A MILLION PAGE VIEWS! AND IT’S GIVEAWAY TIME…

Can you see me doing a happy dance?  Can you at least imagine me doing a very happy dance?  Today the Bewitching Kitchen hit a special milestone, reaching 500,000 page views, and I’m in heaven!  It seems like only yesterday the site registered the first 100 views, and had the first comment coming from someone other than close friends and family.  😉  Half a million page views!  Great feeling, folks!
Fivehundred

To celebrate, I am giving away a very special book called Jerusalem: A Cookbook, written by Yotam Ottolenghi and Sami Tamimi. The story behind these authors is fascinating! You can read a little bit about it here. Jerusalem is more than a cookbook, it describes the complexities of different cultures co-existing, and the way they influence each other in ways that reach way beyond cooking.  The recipes have that exotic feel that make your mind travel to far away places, imagining each smell and taste.  So, if you would like to get this book as a gift,  leave a comment in this post, and I will draw the lucky winner’s name on December 14th, which happens to be Ottolenghi’s birthday!

Thank you so much for carrying me through the milestone of half a million page views!

SOURDOUGH MINI-ROLLS

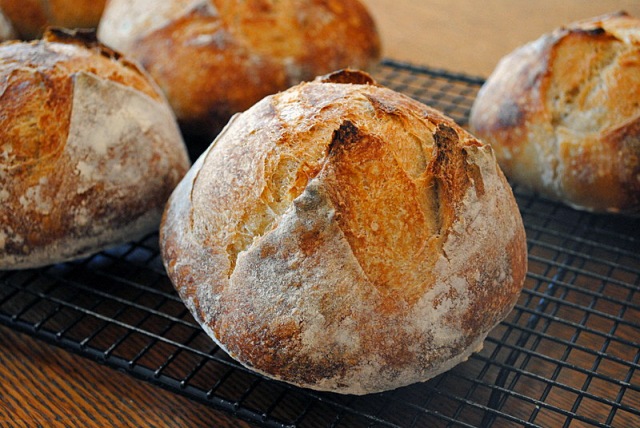
Those who follow my baking adventures know that my favorite type of bread is a sourdough boule, medium to large size.  For some odd reason, when I want to bake small rolls, I always opt for recipes that use  commercial yeast, and result in a softer, more buttery bread.  That is now changed.  I used one of my favorite basic sourdough recipes to bake 6 small rolls, shaped exactly like a large one, and similarly scored.   They turned out so good, I might switch to this type of format for a while. Plus, each roll can be frozen for later, brought to room temperature for a few minutes, then placed in a very low oven (250 F) for 15 minutes or so.  Perfect bread whenever you feel like it!  😉
mini1

SOURDOUGH MINI-ROLLS
(adapted from Hamelman’s Bread)

for starter mixture (make 12 hours in advance)
100 g bread flour
80 g rye flour
110 g water
40 g active sourdough starter (at 100% hydration)

for the bread:
all sourdough made as above
700 g bread flour
20 g rye flour
470 g water
15 g salt

Prepare your sourdough mixture about 12 hours before making the dough.  Heat the water slightly in a microwave until it is lukewarm, and place it in the bowl of a KitchenAid type mixer.  Add the sourdough into the water and mix with your hands to dissolve it. Add both flours, and mix at low-speed until the ingredients form a shaggy mass.

Cover the bowl and let the dough rest for 20 minutes.   Sprinkle the salt over, turn the mixer back on low-speed and knead for about 4 minutes.  Transfer the dough to an oiled bowl and let it rise for about 2 and a half hours, folding the dough every 50 minutes. For a more detailed explanation on folding, click here. You will do a first folding cycle at 50 minutes, another one at 1 hour and 40 minutes, then leave it undisturbed for additional 50 minutes, for a total of 2 and a half hours fermentation.

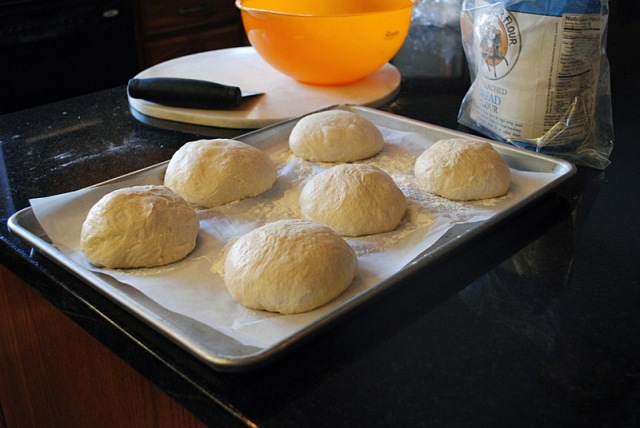
Heat your oven to 450 F. Divide the dough in 6 equal pieces.   Shape each one as a small boule.  Place over floured parchment paper on a baking sheet, flour the surface lightly and cover.  Allow the rolls to proof for 45 minutes.  Score the surface,  and bake for 25 minutes (with initial steam) or until golden brown and the internal temperature over 205 F.   Cool completely on a rack.

ENJOY!

to print the recipe, click here

risingComments:  Depending on the method of steam you use for your oven, these rolls can be a breeze to bake.  I decided to use my usual method of inverting a damp roasting pan over the rolls, and to do that I needed to bake three rolls at a time.  Let’s say it was a bit too convoluted and the second batch was slightly over-proofed.  Next time I might just go for a less complicated method, and use a baking pan with hot water at the bottom of the oven.  Whatever method you choose, the steam provides a nicer crust.

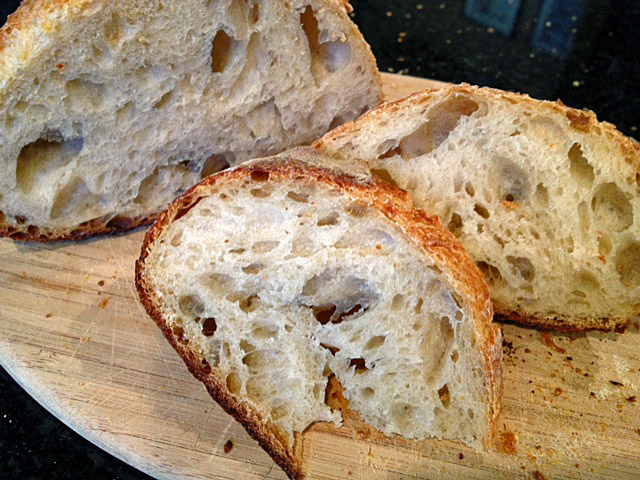
The crumb was moist and creamy, the way we like it, and the crust reminded us of the fantastic baguettes we used to enjoy while living in Paris…  What’s not to like?   😉
crumb

I am submitting this post to Susan’s Yeastspotting…

ONE YEAR AGO: Do you eat your books?

TWO YEARS AGO: Mediterranean Skewers

THREE YEARS AGO Fettuccine with Shrimp, Swiss Chard, and Tomatoes

CHICKEN PARMIGIANA, THE THRILLER

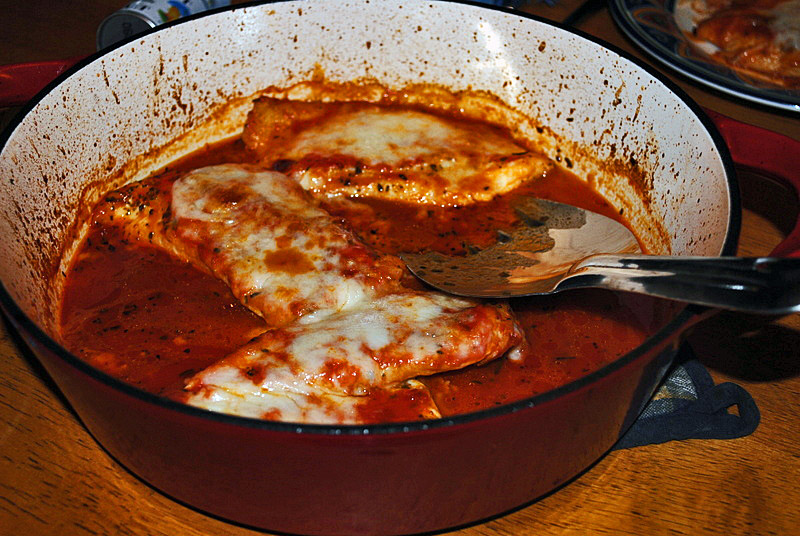
Phil doesn’t like to mess with a classic.  He’s got his favorite pancake recipe,  the oven-fried chicken with buttermilk biscuits and gravy, the Thanksgiving turkey, and the potato dumplings that his Grandma used to make.  And, he is also adamant about my chicken parmigiana, which he professes to be “the best he’s ever had”. That’s why it took me so long to try Giada’s version, a streamlined, lightened up approach to this American-Italian goodie.  I tried to hide my game, but he saw some of the regular actors in the plot: chicken breast filets, mozzarella cheese, and my tomato sauce simmering on top of the stove.  He opened his brightest smile: “We are having chicken Parmigiana! YEAAAAH!”    I  replied with a sheepish smile:  “Well, sort of, it’s a kind of Parmigiana, yes, but not really, maybe almost Parmigiana, but not quite.  We’ll see if we like it.”   Silence.  A slight shudder of the shoulder, which I could not help but notice.  His body language went more or less like “Why would she do this to me?”  Why? For the simple thrill of it, of course! 😉

First, you must make your own tomato sauce, using good quality canned tomatoes.  I saute’ a little shallot in olive oil until fragrant, season with salt and red pepper flakes, add the tomatoes and some dried thyme, and simmer for about 20 minutes. Then I use an immersion blender to turn it into a smooth sauce.
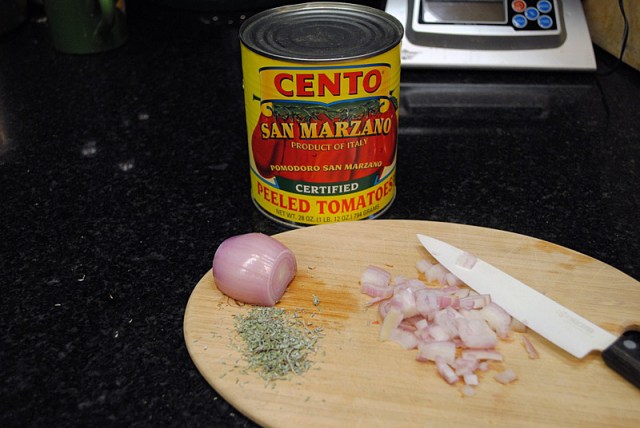
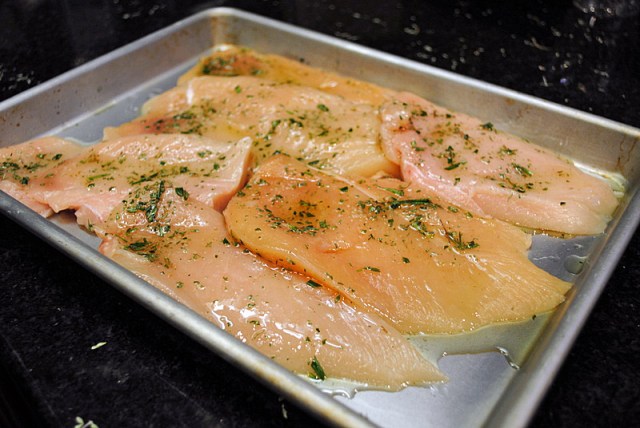
Next, you need to make a little seasoned oil.  I used thyme from my friend Cindy’s garden (yet another gift from my very thoughtful friend), and rosemary from our own plant here in Manhattan. Chop them finely, and add to the oil with a little salt. And freshly ground black pepper.

Brush the chicken cutlets on both sides with the oil, keep in the fridge for half an hour or so, if you have the time. If not, move on to the next step.
Sautee the cutlets in a very hot skillet with just a tiny coating of olive oil.  Once both sides are nicely golden, pour some  tomato sauce around and over the chicken.  Cover the pan and simmer gently for a few minutes.  Uncover, add grated mozzarella cheese on top of the meat, cover the pan again and bake on a 400F oven for 10 minutes.
Open the lid, turn the broiler on for a little while if you like your cheese to get a nice tan. It’s not mandatory, though… at this point, you have already reached the desired level of yumminess.
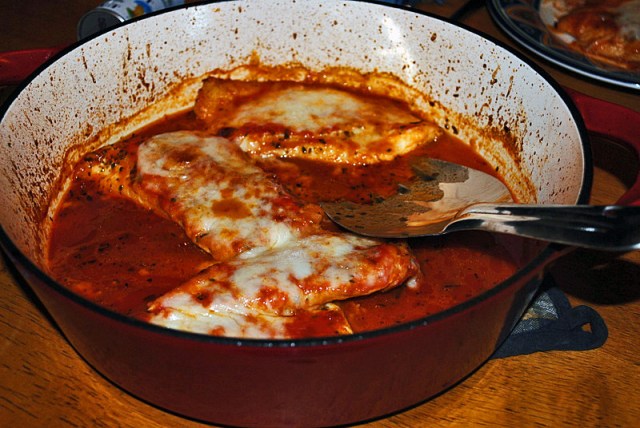
Serve with some spaghetti with your home-made tomato sauce, sprinkle Parmigiano cheese on top, and   ENJOY!

For Giada’s recipe, follow this link…

Comments:  When I make my own version of this dish,  I often omit the cheese in some pieces.  I tried it with this recipe (you might be able to notice one small piece of cheese-less chicken on the first photo), but I advise against it. In this particular preparation, the cheese will act as an important blanket for the cutlets that otherwise will be a bit dry.  What I love the most about this recipe is how easy it was to make it.  No need to have those three trays with breadcrumbs, flour, eggwash, and the result is quite a bit lighter but still delicious.  The herb oil adds a lot of flavor, don’t omit this step, and feel free to experiment with other spices and flavorings. Will it be the default Parmigiana in our home?  I doubt it, but it’s definitely a great option for those evenings that pop up right at the end of a hectic day at work.  😉

One more thing before I forget:  the pan I use is a Giada cast iron dish sold by Target.  I cannot believe I’m saying this, but I like it better than Le Creuset.  It is a lot cheaper, it works just as well, and the cleanup is a breeze!  My Le Creusets got stained from the first use, and never cleaned well, even using diluted bleach.  Giada’s pan still looks brand new, after many  encounters with tomatoes, red wine, and soy based sauces.  No, I don’t work for Target, and have no personal links to Giada.  In fact, I have never accepted  freebies from companies to write a review.  I only endorse stuff I love.  And I love, love, love this pan!  😉

ONE YEAR AGO: Wild Mushroom Risotto

TWO YEARS AGO: Tartine Bread:  Basic Country Loaf
(one of my most popular posts!)

THREE YEARS AGO:  Pugliese Bread