PEARLED FARRO WITH ASPARAGUS COINS

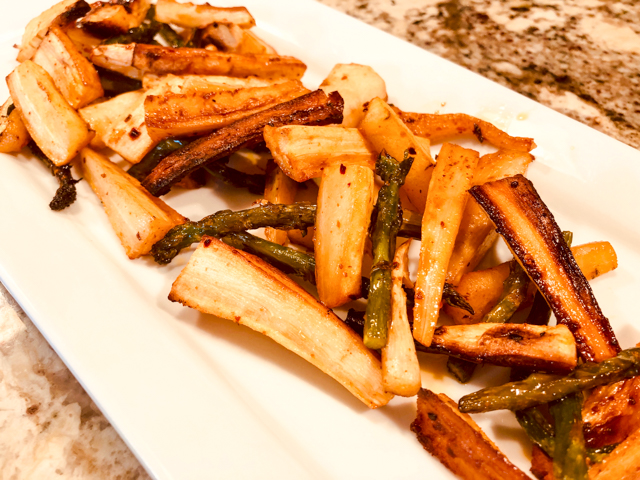
A few years ago I posted a pasta recipe using tiny little asparagus coins as a component of the sauce. The other day I decided to roast them and ended up with a side dish that won me over. Added bonus: it is super fast to prepare. Pearled farro cooks a lot faster than the regular grain, and I did not detect any loss in flavor or texture. If you find it in your grocery store, stock on a few bags.

PEARLED FARRO WITH ROASTED ASPARAGUS COINS
(from the Bewitching Kitchen)

3/4 cup pearled farro
asparagus stalks, cut in very small rounds
2 Tablespoons olive oil
salt and freshly ground black pepper to taste
Herbes de Provence
squirt of lemon juice

Heat oven to 420F.

Bring a large pot of salted water to boil. Add the farro, cook for 15 to 20 minutes. If you like it with a bit more bite, check at 15 minutes and if it’s done to your liking, drain and reserve.

Meanwhile coat the asparagus coins with olive oil, season with salt, pepper, and Herbes de Provence, amounts are flexible, just go with your intuition. For a regular size asparagus bundle I used 1/4 tsp Herbes de Provence.

Place the asparagus in a single layer in a baking dish covered with aluminum foil to facilitate clean-up. Roast for about 15 minutes moving it around the baking sheet.  When they are done, squirt some lemon juice, adjust seasoning and mix with the warm farro.  Serve right away. Leftovers are great also. Even cold as a salad.

ENJOY!

to print the recipe, click here

Comments: Many variations are possible here. If you don’t want to roast the asparagus coins, simply sautee them quickly in olive oil plus all the spices. Because the coins are so tiny, they cook very fast, so doing the top of the stove method, they can be ready in 5 minutes for sure. The roasted version has slightly more intense flavor. The second picture shows a similar approach (top of the stove), but using zucchini. Also very delicious.

I use farro a lot, but was a bit unsure about trying the pearled version, thinking it would not be nearly as good. I was wrong. It is a way to make farro a suitable option for a fast side dish after a busy day in the lab.

I hope you’ll give this simple recipe a try.

ONE YEAR AGO: Pistachio Caramel and Apple Mousse Cake

TWO YEARS AGO: Someone turns 70 today!

THREE YEARS AGO: Carioca Cake, the Final Chapter

FOUR YEARS AGO: Duck Confit for a Special Occasion

FIVE YEARS AGO: Ken Forkish’s Warm Spot Sourdough 

SIX YEARS AGO: Bran Muffins, Rainbows, and a wonderful surprise!

SEVEN YEARS AGO: Salmon Wellington

EIGHT YEARS AGO: The Green Chip Alternative

NINE YEARS AGO: Weekend Pita Project

TEN YEARS AGO: Let it snow, let it snow, eggs in snow


ROAST VEGGIES WITH BLACK BARLEY

Black sesame, black barley…  What can I say? Love them both, although black barley is not always available in our stores. Online I see what seems to be the exact same product described as “purple barley” and pretty expensive by comparison to the product I find here at Hy-Vee. I love the way it looks and it seems to be slightly more chewy and perhaps a bit more bitter than regular barley. In this recipe, I paired it with my current favorite way to roast all kinds of veggies.  It all started with carrots

ROAST BUTTERNUT SQUASH AND CAULIFLOWER WITH BLACK BARLEY
(from the Bewitching Kitchen)

(use enough veggies to cover a baking sheet in a single layer)
Butternut squash, cut in 1 inch pieces
Cauliflower florets sliced to have a flat side
3 tbsp olive oil
2 tbsp rose harissa
1 tbsp pomegranate molasses
1 tsp smoked paprika
1 tsp salt
lemon juice to taste
1 cup barley

Heat oven to 425F.

In a large bowl, mix together the olive oil, harissa, paprika, pomegranate molasses and salt.  Add the veggies to the bowl and toss well to combine. Spread on a baking sheet, add a tablespoon or two of water, cover with foil and roast for 20 minutes. Remove the foil and roast for 10 to 15 minutes longer, until nicely golden brown.

Meanwhile cook the barley. Fill a large saucepan with lightly salted water, when it comes to a boil drop the barley and cook gently until soft. It should take between 30 and 40 minutes. I prefer to retain some texture. Drain it, coat lightly with olive oil and reserve.

Remove the veggies from the oven, add some lemon juice and serve over the cooked barley. Adjust seasoning if needed.

ENJOY!

to print the recipe, click here

Comments: I love this type of recipe, it “almost” makes me feel that becoming a vegetarian would be possible. Almost is the key word, though. I rather embrace my omnivore nature. Leftovers? You know I always cook dinner with leftovers in mind, and more often than not I pair them with another favorite food item of mine.

Lunch is served!

ONE YEAR AGO: Creamy Chicken Thighs with Sun-dried Tomatoes


TEN YEARS AGO:
 Magical Lamb Stew

MOROCCAN CARROT SALAD

I love carrots but have a problem with eating them raw, cannot quite wrap my mind around the harsh texture. In fact, when I see carrot sticks playing as crackers next to a nice bowl of hummus, I feel a bit sad. In this salad, raw carrots are grated and mellowed down by spending some time in a nice dressing with one of my favorite ingredients, pomegranate molasses.  It is absolutely delicious, and even a person with my anti-raw carrot approach will love it. Trust me.

MOROCCAN CARROT SALAD
(adapted from many sources)

2 tablespoons lemon juice
1 tablespoon pomegranate molasses
½ teaspoon ground turmeric
1/8 tsp smoked paprika
Kosher salt
¼ cup extra-virgin olive oil
⅓ cup dried dates, thinly sliced
1 pound carrots, peeled and shredded
3/4 cup slivered almonds, toasted
1/2 cup pitted green olives, chopped
1/2 cup pomegranate seeds

Prepare the dressing by mixing in a bowl the lemon juice, pomegranate molasses, turmeric, paprika and salt.  Pour the olive oil whisking constantly. Add the chopped dates. Reserve while you process the carrots.

Shred the carrots in a food processor or grating by hand.  Add the carrots and olives to the dressing/dates mixture, and mix well. Leave it to stand at room temperature for about 10 minutes. Add the toasted almonds, sprinkle the pomegranate seeds on top, adjust seasoning and serve.

ENJOY!

to print the recipe, click here

Comments: Cannot praise this simple salad enough. One of the things I love most about it is that it is still good next day. How many salads stand an overnight sleep in the fridge? Not that many. Well, maybe if you have more rabbit genes than me, you could find the texture next day a bit too soft, but I doubt it. Still delicious. Pomegranate molasses brings the right amount of sharpness and sweetness, it all goes together beautifully. And don’t skip the pomegranate seeds, they please the eyes and the palate!

Between writing this post and publishing it, I made this salad again. Second time around I used Ras-El-Hanout instead of turmeric, skipped the paprika, and added thinly sliced green apples instead of green olives. Another version, same deliciousness…


ONE YEAR AGO: Pumpkin Sourdough

TWO YEARS AGO: First Monday Favorite

THREE YEARS AGO: Secret Recipe Club: Paalak Paneer, a Farewell Post

FOUR YEARS AGO: In My Kitchen, November 2015

FIVE YEARS AGO: Helen Fletcher’s Oatmeal Cookies

SIX YEARS AGO: Thai-Style Pesto with Brown Rice Pasta

SEVEN YEARS AGO: Shrimp with Spicy Orange Sauce

EIGHT YEARS AGO:  A Simple Appetizer (Baked Ricotta)

NINE YEARS AGO: Sour Cream Sandwich Bread

TEN YEARS AGO: Pasta with Zucchini Strands and Shrimp

TWICE-COOKED EGGPLANT

This recipe was adapted from the cookbook Zahav: A World of Israeli Cooking, by Michael Solomonov. It is very unusual in the sense that you essentially fry the eggplant to the point that it seems ruined. Black. Burned beyond recognition. I made it exactly as described and we enjoyed it quite a bit, however it was a tad oil-heavy, hard to digest.  I wanted to re-visit the method using the air-fryer instead. To compensate for the lack of a “smoky” flavor given by the charred component in the original recipe, I seasoned it with smoked paprika. And for our taste, it was even better!

TWICE-COOKED EGGPLANT
(adapted from Zahav)

2 medium eggplants, cut into thick rounds
2 tablespoons kosher salt
about 3 tablespoons olive oil
1 large red bell pepper, chopped
2 large stalks of celery, chopped
2 medium shallots, minced
2 teaspoons ground coriander
2 teaspoons smoked paprika
1/8 cup sherry vinegar
chopped fresh parsley to taste
1 tablespoon lemon juice

Sprinkle the eggplant slices with the salt, join the slices as if forming the full eggplant again, and tightly wrap each with plastic film. Liquid will collect inside the package. After 20 minutes or so, open the package and rinse lightly. Blot dry with paper towels.  Brush each slice lightly with olive oil and air-fry at 390 F for about 15 minutes, moving the slices around every few minutes.

As the eggplant is air-frying, coat a large non-stick skillet with 2 tablespoons olive oil, and sautee the bell pepper, celery and shallots, seasoning with salt, coriander and smoked paprika.  Cook, stirring occasionally, until the vegetables are very soft but not brown, about 12 minutes.

Add the air-fryed eggplant and vinegar to the pan, breaking up the eggplant and mashing it coarsely until well combined. Cook until the vinegar has evaporated, about 8 minutes. Off the heat, stir in the parsley and lemon juice.

ENJOY!

to print the recipe, click here

Comments: In the picture above you see the extent of frying that must be done before proceeding with the recipe. He includes a photo in the book to make sure everyone knows what he’s talking about when he says black. Charred. It does take a while, especially if you have only one large skillet to prepare two eggplants.

I did not take a picture from the air-fryed version, but it looked like the first photo in the composite picture. But it got there with a lot less oil, I only lightly brushed the slices once and that was it. Overall, a delicious side dish, that is good right after prepared, but also wonderful next day, enjoyed cold or gently re-heated.

Before I leave you, let me tell you that this trick of wrapping the eggplant tightly in plastic to release the bitter liquid was a tip I sent many years ago to Fine Cooking magazine, back when they had a contest for readers, I think it was called tip of the month. I won and got some nice gadgets, including the salad spinner I still own! Anyway, it’s a nice method. Not only you don’t need to spread the eggplant in a large area and find ways to weigh it down, but wrapping it is less messy and somehow makes the liquid come out faster. If you have to work with several eggplants, they can just sit side by side over your countertop. Piece of cake!

ONE YEAR AGO:  Turkey Burger, Japanese-Style

TWO YEARS AGO: Pumpkin Macarons

THREE YEARS AGO: Slow-Cooked Whole Chicken

FOUR YEARS AGO: Chocolate Zucchini Cake with Chocolate Frosting

FIVE YEARS AGO: Pecan-Crusted Chicken with Honey-Mustard Dressing

SIX YEARS AGO: Bewitching Kitchen on Fire!

SEVEN YEARS AGO: Cashew Chicken Lettuce Wraps

EIGHT YEARS AGO: Chiarello’s Chicken Cacciatore

NINE YEARS AGO: Donna Hay’s Thai-Inspired Dinner

TEN YEARS AGO: Panettone


CHICKPEAS AND ZUCCHINI WITH TAHINI SAUCE

This side dish was the marriage of two regular appearances in our kitchen: quickly sauteed zucchini and air-fried chickpeas. The union was celebrated with a nice amount of tahini sauce.  I tell you, this worked very very well. If you don’t have an air-fryer, roast the chickpeas in a 400-420F oven. It takes longer and the texture won’t be quite as crunchy, but it will work just fine.  I intended to sprinkle pomegranate seeds right before serving for a little extra bling, but of course that day the grocery store had ran out of them. Best laid plans.

LEMONY ZUCCHINI AND CHICKPEAS WITH TAHINI-SAUCE
(from the Bewitching Kitchen)

for the tahini-sauce:
1/3 cup plain full-fat yogurt
1/8 cup tahini paste
juice and zest of 1 lemon
2 tsp honey
salt to taste
water if needed
for the veggies:

3 small zucchini, sliced in half lengthwise, then thinly sliced
1 tablespoon olive oil
salt and pepper
juice of 1 lemon
1 can chickpeas, well drained and dried
olive oil to coat chickpeas
1 tsp smoked paprika
1/2 tsp cumin
salt to taste
fresh parsley
(pomegranate seeds if you have them)

Make the tahini sauce: whisk all ingredients in a small bowl. Reserve.

Make the air-fried chickpeas.  Coat them lightly with olive oil, add the spices and place them in the air-frier set at the highest temperature (usually 390F) for about 12 minutes. They should be crunchy and golden brown.  Reserve.

Heat the olive oil in a 12-inch non-stick skillet, add the zucchini covering the whole surface, season with salt and pepper. Let the slices cook undisturbed until the side in contact with the pan is well seared. Move the slices around and cook until done. Sprinkle lemon juice all over, cover the pan for a minute, remove the lid, add the chickpeas and parsley.  Serve immediately with the tahini sauce on top.

ENJOY!

to print the recipe, click here

Comments: When I was a child, teenager or even young adult, you could not bribe me to eat chickpeas, which in Portuguese have the non-appealing name of “grão-de-bico”. It translates – loosely – as “the grain of the beak”. They can also be called “ervilha-de-galinha”, which ends up as “chicken’s green peas”. Yeah, very sexy. How could anyone consider that a delicacy? Anyway, now I crave it. Go figure.

Leftovers were delicious a couple of days later. In fact, I found out that air-fried chickpeas, when microwaved just enough to make them warm, get a nice texture, a bit more creamy inside. My lunch coupled this tasty concoction with a fried egg on top.  I was smiling the whole afternoon.

ONE YEAR AGO: Mokonut’s Rye Cranberry Chocolate Chip Cookies

TWO YEARS AGO: Incredibly Simple Times Four

THREE YEARS AGO: Going naked, and my husband loved it

FOUR YEARS AGO: Cream Cheese Mini-Pancakes with Smoked Salmon

FIVE YEARS AGO:  Star-Shaped Chocolate Brioche Bread

SIX YEARS AGO: Blueberry-Banana Bread 

SEVEN YEARS AGO: Into the Light Again

EIGHT YEARS AGO: Five Grain Sourdough Bread

NINE YEARS AGO: The Nano-Kitchen

TEN YEARS AGO: Kaiser Rolls